Saturday, February 20, 2021

Thick Chocolate Chip Cookies from Kitchen Fun with My 3 Sons

Thick Chocolate Chip Cookies - made October 31, 2020 from Kitchen Fun with My 3 Sons

Although I said last year that I would stop trying out new recipes for chocolate chip cookies because I had found THE ONE, it turns out I lied. It also turns out that, for me, it's not actually about finding THE best recipe because, let's face it, there are plenty of great recipes for chocolate chip cookies out there. Rather, it's about (taste) testing them all and enjoying the journey rather than trying to reach the destination. 
So, even though I probably couldn't distinguish from the plethora of recipes I've made in a blind taste test, it doesn't matter as apparently I just like (taste) testing them all. Not looking for the winner but rounding up all the contestants is my jam. 
Chocolate chip cookies are what I bake most often for military care packages. I don't put nuts in my cookies so they're safe for deployed service members with nut allergies and I figure it's about as ubiquitous a "taste of home" as you can get so it's a safe bet someone will like them. Plus they pack and ship well, vacuum sealed.
This was supposed to be like Levain Bakery cookies but I don't make the cookies as big when I'm planning to ship them. I get more cookies out of a batch by making them smaller and I want to pack the box(es) full so the cookies can be shared with more service members. 
Hence these are smaller than the original blogger intended. Still tasted good though.

2 1/3 cups all-purpose flour
2 teaspoons baking powder
1/2 teaspoon baking soda
1 teaspoon salt
10 tablespoons unsalted butter
2/3 cup brown sugar, packed
1/3 cup granulated sugar
1 egg
2 teaspoons vanilla extract
12-ounce bag of chocolate chips
  1. In a medium mixing bowl, whisk together the flour, baking powder, baking soda and salt; set aside.
  2. In the mixing bowl of a stand mixer fitted with the paddle attachment, cream the butter, brown sugar and granulated sugar on medium speed until light and fluffy, 3-4 minutes. Add egg and vanilla; beat until combined.
  3. Add the flour mixture in two additions and beat at low speed until just combined. Stir in chocolate chips.
  4. Portion dough into balls, cover and chill or freeze for several hours or overnight.
  5. When ready to bake, preheat oven to 400 degrees F. Line baking sheets with parchment paper and evenly space dough balls. Bake cookies for 15-18 minutes for large cookies, 10-12 minutes for smaller cookies or until golden brown at the edges and middles no longer look raw or shiny. Cool on baking sheets for 5 minutes then remove to wire cooling rack to cool completely.

Thursday, February 18, 2021

M&M Cookies from Lil Luna

M&M Cookies - made October 2, 2020 from Lil Luna

As you can tell from the "monster" M&Ms in these cookies. I made these for October care packages. I made them early to allow for shipping time overseas to give them enough time to arrive for Halloween.
This is one of those recipes I could've sworn I've made before from Lil Luna but I couldn't find it on my blog so I made them now or, er, back in October. I always like the look of M&M cookies because it's so easy to make them seasonally relevant by switching out which M&Ms you use. But typically I'm not a big fan of the taste as they always strike me as too sweet. Not so much the cookie itself but because of the M&Ms. 
Regardless of my personal feelings though, these were a good cookie with crispy edges and chewy middles. One pro-tip: reserve some of the M&Ms and gently poke them strategically on top of the cookies immediately after you take them out of the oven. The colors will stay vibrant and not bleed over the cookie and you can "decorate" the cookies with judicious placement of the M&Ms.

1 cup granulated sugar
1 cup brown sugar
1/2 cup butter, softened
1/2 cup vegetable oil
2 eggs
1 teaspoon vanilla
1 teaspoon baking powder
1 teaspoon salt
1 teaspoon baking soda
3 cups all-purpose flour
M&M, plain
  1. Cream together granulated sugar, brown sugar, butter and oil.
  2. Add eggs and vanilla; beat until fluffy.
  3. In a separate bowl, combine baking powder, salt, baking soda and flour. Add to butter mixture in 2 additions, beating until just combined. Fold in M&Ms.
  4. Portion into dough balls and chill or freeze for several hours or overnight.
  5. Preheat oven to 350 degrees F. Line baking sheets with parchment paper and evenly space cookie dough balls. Bake 8-10 minutes or until edges are golden brown and middles are no longer raw or shiny. Remove from oven, let cool on baking sheets for 5 minutes then transfer to wire racks to finish cooling completely.


Monday, February 15, 2021

Starbucks Copycat Espresso Brownies

Starbucks Copycat Espresso Brownies - made January 17, 2021 from Little Spice Jar

I'm not going in order to blog what I've made. Some were from months ago, some from just a few weeks. I decided to keep things simple and just put up what I have and not worry about going in chronological order until I'm caught up.
Another brownie which went into military care packages. I've gotten feedback how popular coffee and caffeine is with our deployed troops so, in addition to sending instant coffee packets and k-pods, I decided to try out this recipe for Starbucks Copycat Espresso Brownies. I don't know how true the copycat version is to the real thing since I don't drink coffee and have never had a Starbucks espresso brownie. But I can tell you this was definitely coffee-flavored and a good choice for people who like that fudgy chocolate and coffee combination.
10 tablespoons butter, cut into tablespoons
6 ounces bittersweet chocolate, chopped
1 1/4 cups granulated sugar
1/4 cup espresso powder
3 large eggs
3 tablespoons cocoa powder
2/3 cup all-purpose flour
1 cup chocolate chips, optional
  1. Preheat oven to 350 degrees F. Line an 8" square baking pan with foil and lightly spray with nonstick cooking spray.
  2. In the top half of a double boiler set over hot water, melt butter and bittersweet chocolate, whisking until smooth and completely melted. Remove from heat. Stir in granulated sugar and espresso powder until combined. Add eggs, one at a time, beating until incorporated.
  3. In a separate bowl, whisk together the cocoa powder and flour. Add to butter-chocolate mixture and mix until just combined. Do not overmix. Fold in chocolate chips, if using.
  4. Pour batter into prepared pan and smooth top. Bake for 30-35 minutes or until a toothpick inserted near the center comes out with moist crumbs, not raw batter. Cool completely.

Saturday, February 13, 2021

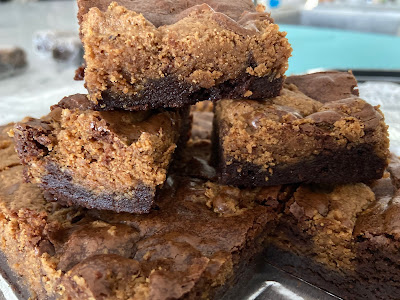
Almond Butter Swirl Brownies

Almond Butter Swirl Brownies - made August 2, 2020, modified from Vintage Kitchen Notes
If you want something different from the traditional peanut butter chocolate combination, try this brownie recipe that uses almond butter as the swirl-in.
Almond butter has a thicker consistency than peanut butter but the oil separates out more easily, especially if your jar of almond butter has been sitting for awhile. Make sure you whisk it to incorporate the almond oil back in if it's separated before measuring out and using.

Almond butter provides a more gritty texture than smooth peanut butter but the almond bits or "grit" are smaller than chunky peanut butter. This makes a fudgy brownie; the almond butter swirl breaks up a bit of the richness of the fudgy chocolate part of the brownie. I liked this one for the texture, the thickness with which the brownie baked into and the durability for mailing. Thumbs up.


Brownies
3/4 cup (4.5 ounces) semisweet chocolate, coarsely chopped
3/4 cup (12 tablespoons) unsalted butter
3/4 cup granulated sugar
3/4 cup dark brown sugar
3 eggs
2 teaspoons vanilla extract
1 cup (140 grams) all-purpose flour
1 1/2 tablespoons unsweetened cocoa powder

Almond Butter Swirl
2/3 cup almond butter
5 tablespoons (40 grams) powdered sugar
1/2 teaspoon vanilla
3 tablespoons heavy cream
  1. Preheat oven to 350 degrees F. Line a 9 x 9-inch baking pan with foil and lightly spray with nonstick cooking spray.
  2. Brownies: Melt the chocolate and butter in the top half of a double boiler set over hot water, whisking until melted, smooth and combined. Cool slightly.
  3. Mix in granulated sugar and brown sugar. Add eggs, vanilla extract and cocoa powder, mixing until combined. Add flour in two additions, mixing after each addition until just combined. Do not overmix. Spread batter evenly into prepared pan.
  4. Almond Butter Swirl: in a medium bowl, mix together almond butter, powdered sugar, vanilla and heavy cream until smooth. If mixture is too thick, warm for 20 seconds in the microwave and stir.
  5. Drop spoonfuls on top of the brownie base and swirl lightly with a knife. Do not overmix or blend.
  6. Bake for 25-30 minutes or until a toothpick inserted in the center comes out with a few moist crumbs. Do not overbake. Cool completely before cutting and serving.

Friday, February 12, 2021

Chocolate Chip Cookie Rollout Recipe

Chocolate Chip Cookie Rollout Recipe - made December 30, 2020 from Semisweet Designs


You'll see a repeat theme as I start posting more regularly again. Namely, cookies that are easy to make and ship well. Because, even though I've gone back to work again, thanks to Covid, I'm working remote (which is a privilege I'm very thankful for) so I can't go into a physical office location and drop off a plate of baked goods to test out on my coworkers.
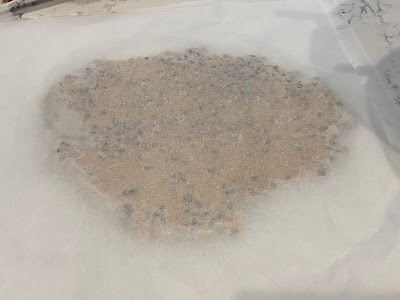
Roll between two sheets of parchment paper to an even thickness

No need for extra flour for rolling if you use parchment

Using mini chips makes cutting out cookies easier


So, as it has been ever since I retired and even now when I went back to (remote) working, 95% of my baking and recipe testing has been for the Angel Baker team for Soldiers Angels. Which means they get mailed out to deployed service members who are overseas and packages can take up to several weeks to arrive. I vacuum seal them so they'll last longer and hopefully still be somewhat fresh by the time they arrive but it also means I need to bake stuff that isn't fragile and will hold up not only to being vacuum sealed but imprisoned in a box that gets tossed about, possibly crushed and who knows what else before it reaches its destination. So yeah, hardy cookies it is.


This is an easy twist on a traditional method of making chocolate chip cookies. For bakers who like uniformity in their cookies, this one's for you. Roll the dough out (I give the tip I learned from Dorie Greenspan's baking books for easy, mess-free rolling in the directions), chill, cut out with cookie cutters. Bake. Easy. Good.

1 cup unsalted butter, softened
1 cup brown sugar, packed
1/2 cup granulated sugar
2 eggs
1 tablespoon vanilla extract
1 teaspoon salt
1 teaspoon baking powder
3 1/2 cups all-purpose flour
1 cup mini chocolate chips
  1. In the bowl of a stand mixer fitted with the paddle attachment, cream together butter, granulated sugar and brown sugar. Mix until fluffy and well combined.
  2. Add eggs, one at a time, salt and vanilla extract, mixing briefly after each addition until just combined.
  3. Combine flour and baking powder in a separate bowl and stir together. Add in 3 additions to the butter-sugar mixture, mixing briefly until just incorporated after each addition. Do not overmix. Fold in chocolate chips.
  4. Cover clean countertop with a large piece of parchment paper. Place half the dough in the center of parchment and cover with another piece of parchment paper. Keeping the dough between the two pieces of parchment, roll out to 1/4" thickness. Chill in refrigerator, sandwiched in the parchment paper, for at least 30 minutes. Repeat with second half of dough.
  5. When ready to bake, preheat oven to 375 degrees F. Line baking sheets with parchment paper.
  6. Remove dough from refrigerator and cut out circles of dough with a round cookie cutter. Evenly space on baking sheets. You can chill again at this step or bake directly in preheated oven for 10-12 minutes, until edges are golden and middles no longer look raw or shiny. Remove to wire cooling racks and cool completely.

Thursday, February 11, 2021

Chocolate Chip Toffee Bars

Chocolate Chip Toffee Bars - made August 3, 2020 from Your Home-Based Mom
I found this in my drafts so apparently I made these long ago, back in August 2020, which, in Covid time was about 10 years ago. 
I can't remember much about it, probably because I only ate a sliver as a taste test before packaging and mailing to military service members for Soldiers Angels. The only note I made was the second bake time was about 40 minutes before the bar cookies were golden brown and done enough to take out of the oven. That's all I got.
But, heck, they look good so I'm going to assume they also tasted good or I wouldn't have mailed them out.

2 1/3 cups all-purpose flour
2/3 cup brown sugar
3/4 cup (12 tablespoons) butter, chilled
1 egg
12 ounces semisweet chocolate chips
1 14-ounce can sweetened condensed milk
1 10-ounce package toffee bits
  1. Preheat oven to 350 degrees F. Line a 9 x 13-inch baking pan with foil and lightly spray with nonstick cooking spray.
  2. Stir together flour and brown sugar. Cut in butter until mixture resembles coarse crumbs.
  3. Add egg and mix well. Reserve 1 1/2 cups of this mixture and press remaining mixture into prepared pan. Bake for 10 minutes.
  4. Pour sweetened condensed milk over hot crust and top with 1 1/2 cups toffee bits. Stir in 1 1/2 cups chocolate chips into reserved crumb mixture.
  5. Sprinkle reserved crumb mixture over top then sprinkle remaining chocolate chips. Bake 25-30 more minutes. Remove from oven and top with remaining toffee bits. Let cool completely before cutting and serving.

Wednesday, February 10, 2021

Pecan Sandies

Pecan Sandies - made dough January 31, 2021 from Everyday Eileen

Yes, it's been ages since I've updated my blog. No, I haven't given it up (yet?). Yes, I'm still working at what was supposed to be a "temporary" job which is partly why I haven't had time or inclination to blog.
I'm going to keep this short since I want to get this post up before work and because, really, who reads the post instead of just skipping to the recipe? 
This was a good cookie, easy to make, dough was easy to handle, and these cookies are sturdy and ship well. One thing I haven't given up when I went back to work is my volunteering with Soldiers Angels to ship care packages to deployed military service members overseas. These ship well and hold up, especially when vacuum sealed. 
Bonus that since you make the dough and chill or freeze beforehand, it's easy to fit into your day with making the dough one day and baking it off at a later date when you have more time. Enjoy. I hope to be back more regularly but I'm playing it by ear.


1 cup unsalted butter
1/2 cup granulated sugar
1/4 cup brown sugar
1 large egg
1 teaspoon vanilla extract
1/4 teaspoon salt
3/4 cup pecans, toasted, cooled and chopped (do not skip toasting the pecans or you won't get the same flavor)
2 cups all-purpose flour
  1. In a large mixing bowl, beat butter until creamy and no lumps remain. Blend in both sugars and beat until combined. Mix in egg and vanilla extract. 
  2. Add flour and mix until just combined. Fold in toasted pecan pieces. Roll dough into logs. Wrap in plastic wrap and refrigerate for 4 hours or overnight.
  3. When ready to bake, preheat oven to 350 degrees F. Line baking sheets with parchment paper. Cut dough logs into thick slices. Evenly space on baking sheets. Bake for 12-15 minutes until edges are lightly browned and tops look dry or have a few small cracks. Do not overbake. Transfer to wire cooling racks.

Friday, August 28, 2020

Brown Sugar Bread

Brown Sugar Bread - made August 3, 2020 from Julie Blanner
I blinked and August is nearly gone. The time warp was helped in part because I went back to work 2 weeks ago and I've been running back on the hamster wheel ever since. I can't complain though as I negotiated to work Monday - Thursday and despite the fact that it just means I squeeze a full work week into 4 days instead of 5, it's really nice to have Fridays off to catch up on the rest of my life again. I wrote this post before I went back to work and now I need to spend the weekend catching up on the other posts I'm behind on.

I was trying to use up some milk so I made a half recipe of this (full recipe is listed as is below). A half recipe made 3 mini loaves and baked for 35 minutes in my oven. This is more accurately called a quick bread, similar to my favorite banana bread recipe, since it doesn't use yeast and relies on chemical leavening (baking powder) for the rise.

How long your quick bread takes to bake will depend on the size(s) of the pan(s) you use and your oven. My oven tends to run cool so I have to preheat to a higher temperature for a longer time before I get to the desired temp according to my $6 oven thermometer. Just use the toothpick test to test for doneness. In the case of quick breads, the toothpick should come out clean or with a few moist crumbs, just not raw batter.
The nice thing about this quick bread is it came easily and intact out of the mini loaf pan, always a good sign. It was good while warm as well. But I have to admit I'm not a big quick bread fan, except for banana bread. This was good while warm but not sure I'd put it in on the regular baking roster. Nothing wrong with it, just a personal (non) preference for quick breads.

2 cups brown sugar
4 cups all-purpose flour
2 tablespoons baking powder
1 teaspoon salt
2 eggs
2 cups milk
2/3 cup vegetable oil
  1. Preheat oven to 350 degrees F. Lightly spray miniature loaf pans with nonstick cooking spray.
  2. In a medium mixing bowl, combine brown sugar, flour, baking powder and salt; set aside.
  3. In a large mixing bowl, beat eggs, milk and oil. 
  4. Gradually add dry ingredients to wet until just moist.
  5. Pour batter into prepared pans, filling to an inch below the rims. Sprinkle coarse sugar on top if desired. Bake 30-40 minutes or until toothpick inserted near the center comes out clean.

Monday, August 17, 2020

Pasta in Lime-Cilantro Alfredo Sauce

Pasta in Lime-Cilantro Alfredo Sauce - made July 31, 2020 from Julia's Album
This is another of those recipes that I had to make some adjustments to since I didn't have all the right ingredients. In these pandemic times, that's now the norm since, let's face it, I'm not enough of a cook to actually plan my "real food" cooking grocery list ahead of time. My style of cooking is to check my pinterest board, see what captures my fancy, evaluate whether I have most of the ingredients and go from there. In other words, unless I want to wait until I do my once-in-awhile grocery shopping, I cook from whatever's already in my pantry and refrigerator.

Case in point, the original recipe for this called for chicken breast, sliced, to make up the protein portion. I didn't have chicken breasts but I did have a couple of packs of ground turkey so I used one to substitute as the protein in this dish. I also was a little short on cilantro as I had used up most of it with the Lime-Cilantro Shrimp but you work with what you have.
One thing I wasn't short on was garlic. The recipe only called for 3 cloves but I had a bulb left that was drying out and I didn't know the next time the cooking muse would hit me with a recipe that required garlic so, yes, I used the whole thing. I'm sure a cooking expert would tell me something reasonable like I can freeze garlic but, oh well, too late now.
And while I'm confessing my cooking sins, I will also say, one squeezed lime didn't quite produce 2 tablespoons of lime juice so I squeezed another lime, ended up with more than 2 tablespoons and added all of it anyway. It's almost freeing to color outside the cooking lines since baking, as opposed to cooking, is much more exact. In retrospect, I support I could've used at least half of the second lime as garnish instead of squeezing it for the excess juice. I didn't think that far ahead.
Despite my cavalier cooking approach, this turned out fairly well. It's not as rich as a traditional Alfredo sauce but that made me like it more. The sauce does seem thin at first but I actually remembered in time (for once) that the sauce does thicken up and the noodles absorb the liquid so there's no need to try and thicken it. In fact, once the dish had cooled a bit, it almost seemed like there wasn't enough sauce. The excess garlic I used so freely took over the flavor profile but I could still taste the lime, if not the cilantro, as well. However, I don't recommend being me and using a whole bulb of garlic because it really is quite a lot of garlic. Oops.
2 tablespoons olive oil
1 pound ground turkey
salt and pepper
3 cloves garlic, minced
2 tablespoons lime juice, freshly squeezed
1/4 cup chicken broth
1 tablespoon fresh cilantro, chopped
2/3 cup heavy cream
2/3 cup milk
1/2 cup mozzarella or parmesan cheese, shredded
8 ounces spaghetti
reserved cooked pasta water
1 tablespoon fresh cilantro, chopped, for garnish
  1. Heat olive oil in a large skillet on medium-high heat. Generously season ground turkey with salt and pepper. Add to hot skillet and cook, stirring and breaking into large pieces, until done. Remove from skillet.
  2. To the same skillet, add minced garlic, lime juice and chicken broth. Deglaze the skillet over high heat, until liquid is reduced and garlic is browned. Mix in chopped cilantro.
  3. Add heavy cream and milk. Bring to a boil then immediately add cheese. Mix until melted while boiling. Remove from heat.
  4. Cook pasta according to package directions. Drain, reserving some cooked pasta water. Add pasta to the sauce, along with half the ground turkey. Mix, coating noodles and turkey completely. If necessary, thin sauce with a little of the cooked pasta water. Top with remaining ground turkey, additional parmesan cheese if desired and garnish with remaining cilantro. Serve warm.