Wednesday, June 26, 2019

Coconut Cream Cheese White Chocolate Chip Cookies

Coconut Cream Cheese White Chocolate Chip Cookies - made dough June 4, 2019 from I'd Rather Bake Than
This was another cookie I made to go into the cookie bags for my coworkers. I've been meaning to make these for awhile but they had the random ingredient of 6 ounces of cream cheese and you know they come in 8-ounce blocks. I hate having leftover ingredients that may or may not be used.
But, in a serendipitous move, the Gluten-free Chocolate Chip cookies (experiment #2) that I made, also for the cookie care packages, needed 2 ounces of cream cheese so I could make both recipes and use up the whole cream cheese block without any waste.
Plus, I had some white chocolate chunks that was just enough to include in this recipe so using up the rest of the bag also meant one less thing to pack up and move.

Baking with white chocolate is always tricky. You have to bake the cookies long enough to actually bake but oftentimes, that also means the white chocolate chunks that are exposed to the heat turn brown. Not very attractive.

And I don't like white chocolate enough to bake with it enough to remember until too late that the best way around this conundrum is to tuck the white chocolate chunks into the dough so they're not exposed, bake the cookies then press more white chocolate chunks over the tops of the cookies right when you take them out of the oven.

The heat from the hot cookies will help the white chocolate chunks melt enough to adhere to the baked cookie but won't be hot enough to burn or brown the white chocolate. I have to remember that next time I make these or other white chocolate cookies.

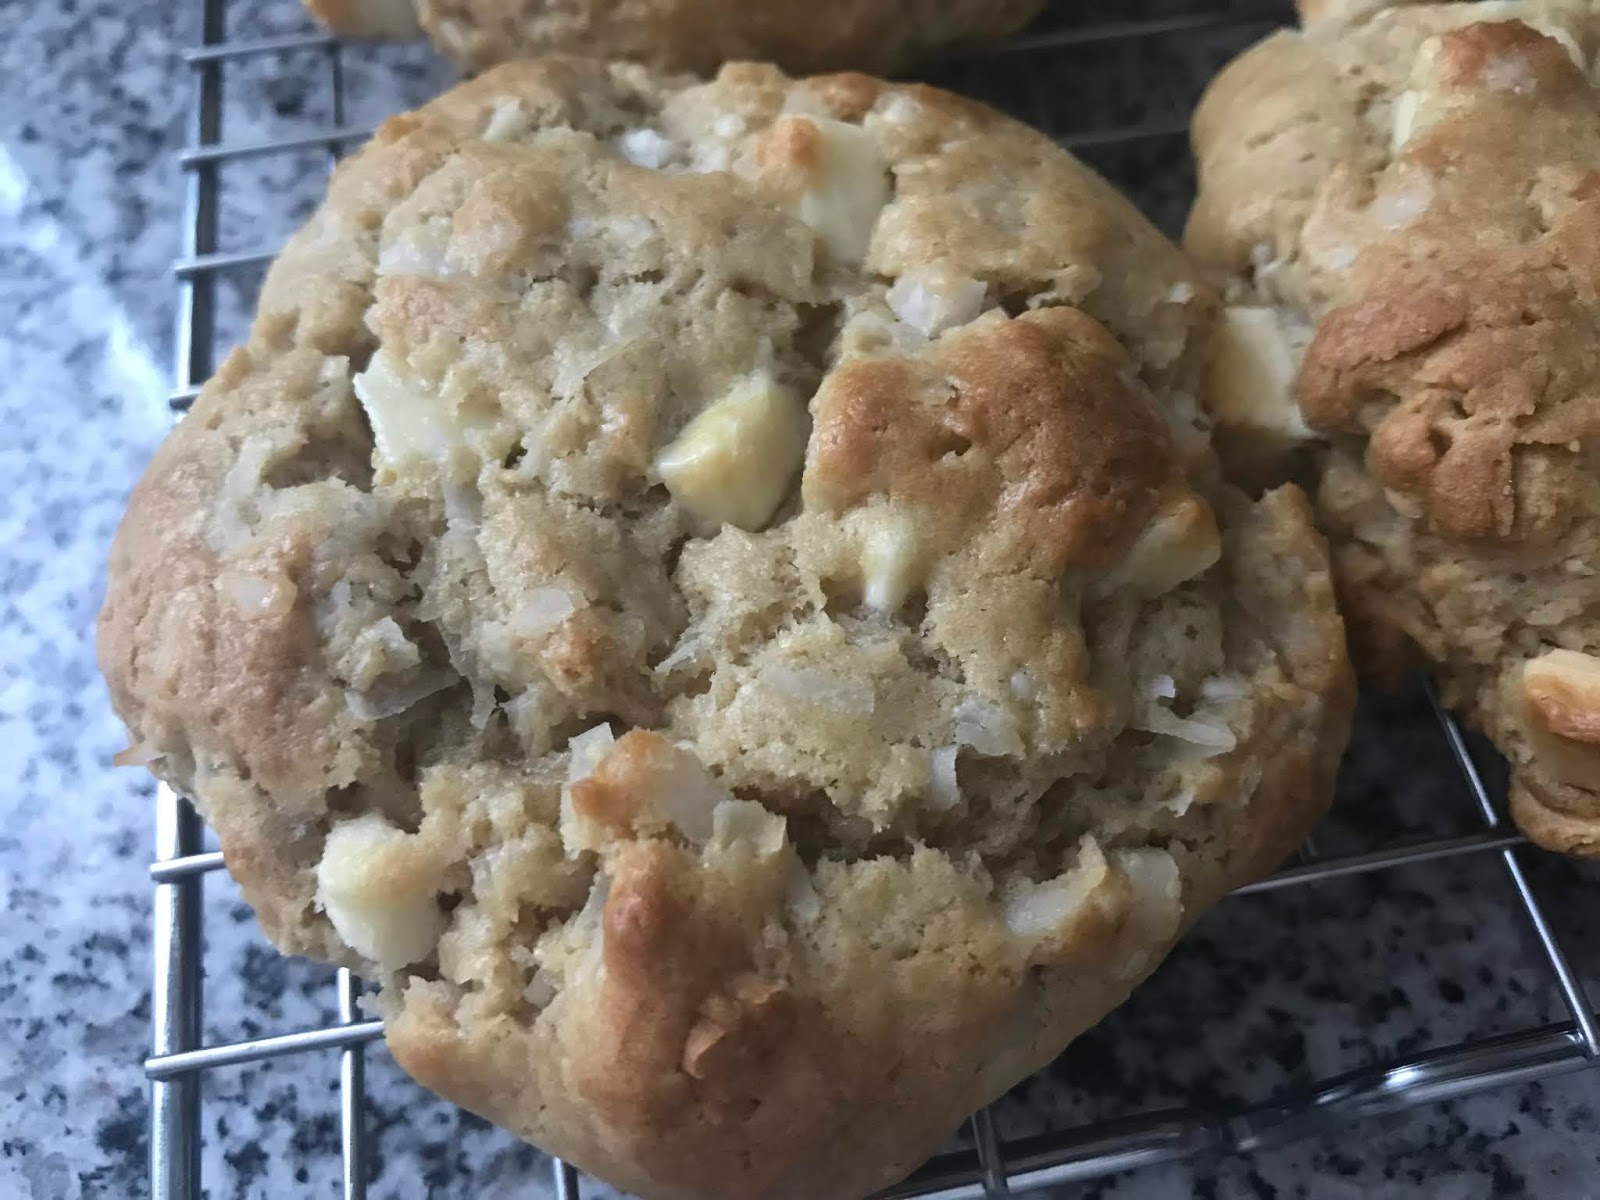
These turned out pretty well. The dough was easy to work with, the cookies didn't spread that much and they were pretty tasty. Not a strong cream cheese flavor but the cream cheese definitely added to the smoothness of the cookie's texture. The coconut added to the chewiness and made for a nice flavor combination with the white chocolate.
If you like macadamia nuts, I'd recommend adding some so you go the full mile with white chocolate, coconut and macadamias.
3/8 cup (6 tablespoons, 85 grams) butter, melted and cooled
6 tablespoons cream cheese, softened, room temperature
1 teaspoon vanilla extract
1 large egg + 1 large egg yolk
3/4 cup (150 grams) brown sugar
1 cup (60 grams) coconut
2 1/3 cups + 2 teaspoons (285 grams) all-purpose flour
1 teaspoon baking powder
3/4 teaspoon baking soda
1 1/4 cups white chocolate chips
  1. Whisk together the melted butter with the cream cheese and vanilla extract. Mix in the egg and egg yolk then add the sugar, mixing until creamy and combined.
  2. Add in the flour, baking powder and baking soda, mixing until just combined. Do not overmix. Fold in coconut and white chocolate chips. Chill dough if soft. Otherwise, portion into golf-ball-size dough balls, cover and chill or freeze for several hours or overnight.
  3. When ready to bake, preheat oven to 350 degrees F. Line baking sheets with parchment paper and evenly space dough balls. Bake 8-10 minutes or until edges are golden and middles no longer look raw. Remove from oven, let cool on baking sheets for several minutes before removing to wire racks to cool completely.

Sunday, June 23, 2019

Gluten-free Chocolate Chip Cookies #2

Gluten-free Chocolate Chip Cookies Experiment #2 - made dough June 4, 2019 from My Gluten-Free Kitchen
This is my second experiment with making gluten-free chocolate chip cookies. The first one turned out "okay" but still had the grit I hadn't yet learned to avoid.
This time around, I followed the tips and tricks to gluten-free baking by letting the dough chill in the refrigerator for at least 4 hours (more like 6 hours) and it probably helped that this had a little cream cheese to make a more smooth dough.


The tricks worked. This definitely had a better texture than the other recipe, no real grittiness in the mouthfeel. It still had a bit of a taste you don't normally get in non-gluten-free chocolate chip cookies but, to be honest, if I had to do a blind taste test, I'm not sure I could've picked these out as gluten free.

Additional plus is they didn't spread too much and remained a nice thickness that I prefer in my cookies. I gave these away in the cookie care packages I gave my friends at the wedding we all went to and I don't think any of them realized the cookies were gluten free.


2 1/4 cups (282 grams) all-purpose gluten-free flour blend with xanthan gum (if your flour blend doesn't have xanthan gum, add 1/2 teaspoon xanthan gum)
1 teaspoon baking soda
1 teaspoon salt
2 ounces cream cheese, softened
3/4 cup (12 tablespoons) unsalted butter, melted
1 cup packed brown sugar
1/2 cup granulated sugar
1 1/2 teaspoons vanilla  extract
2 egg yolks
2 cups chocolate chips
  1. In a medium bowl, whisk together gluten-free flour, xanthan gum if using, baking soda and salt; set aside.
  2. In the bowl of a stand mixer, combine cream cheese and melted butter. Add brown sugar and granulated sugar, mix on medium speed for 2 minutes with the paddle attachment.
  3. Add vanilla extract and egg yolks, one at a time, mixing on medium-low speed until well combined.
  4. Add the flour mixture, beating on low until just combined.
  5. Fold in chocolate chips. Portion into golf-ball-size dough balls, cover and refrigerate a minimum of 4 hours or up to 4 days.
  6. When ready to bake, preheat oven to 375 degrees F. Line baking sheets with parchment paper. Evenly space dough balls on cookie sheet. Bake 11-12 minutes, until edges are set and middles are no longer raw or shiny. Do not overbake. Let cookies sit for 2-3 minutes then remove to a wire cooling rack to cool completely.

Friday, June 21, 2019

Fudgy Brownie Cookies

Fudgy Brownie Cookies - made dough June 1, 2019 from Southern Bite
This is not one of my baking successes. It's one of those cases where I followed the recipe but it still didn't turn out. It happens.
For the first taste test cookie, I baked it as directed (initially) but the cookie still looked pretty raw after 10 minutes in the preheated oven so I left it in there for another 5 minutes, until at least the edges looked done, even though the middle still looked wet. I knew chocolate sets when it cools so I figured it would be okay then.
I was only partially right. The baked outer edges were crisp and tasted bitter. I don't really care for crisp and I'm certainly not a fan of bitter. The middle of the cookie was pretty good though and I thought I understood why the baking directions were as they were. If you take them out at the time you're supposed to, the whole cookie could taste better and you save yourself crispy, bitter edges.


So....the next time I baked them, I took them out at the 10-minute mark, despite all baking instincts that screamed "they're not done! They're still raw!". They were also messy looking as the dough spread and the edges looked messy.
I solved that problem by using a large round cookie shaper and cutting the cookies into neat rounds while they were still hot from the oven. Then I peeled away the cut edges so I was left with fairly tidy, round cookies.

Alas, I really should've left them in for a few minutes longer and then done the cookie cutter trick. At least the middles that were left would've been more baked. As it was, they were just barely baked and were super fragile and mushy. They weren't baked enough to even set properly and I had to eat the second taste test cookie with a spoon.

I never like to admit failure but it's important to; otherwise how am I going to learn? The key learning from this recipe is to bake it long enough for the middles to be able to set but not so long that they fully bake and turn crisp and/or bitter tasting. I do like the cookie cutter trick so I would save that for appearance's sake.
The dough was also rather soft so I don't think increasing the flour by 1/4 to 1/2 cup would hurt either.


1/2 cup unsalted butter
1 12-ounce package semisweet chocolate chips
1 1/4 cups granulated sugar
1 teaspoon vanilla extract
1 teaspoon salt
2 large eggs
3 tablespoons cocoa powder
1 cup all-purpose flour (if dough is too soft, trying increasing flour by 1/4 to 1/2 cup)
  1. Melt butter and 1 cup of chocolate chips in the top half of a double boiler set over hot, not simmering, water. Whisk until smooth and melted.
  2. Add granulated sugar and stir to combine. Cool for 5 minutes.
  3. Add the vanilla, salt and eggs; stir to combine. Add the cocoa powder and flour; mix until just combined. Fold in the remaining chocolate chips. If dough is too soft to scoop, chill for 15 minutes.
  4. Portion dough into golf-ball-size dough balls, cover and chill or freeze for several hours or overnight.
  5. When ready to bake, preheat oven to 350 degrees F. Line baking sheets with parchment paper and evenly space dough balls. Bake 10 to 12 minutes. Cool on baking sheet for several minutes then transfer to wire cooling rack to cool completely.

Monday, June 17, 2019

Gluten-free Pancakes

Gluten-free Pancakes - made June 4, 2019 from The Creative Recycler
Lots of pictures in this post because I made pancakes several different times from the same batch and kept taking pictures.

If you want to cut to the chase and make the best pancakes ever, much less the best gluten-free pancakes ever, just scroll all the way to the bottom and get to it.

Believe me, I didn't expect to type those words, especially when it comes to gluten-free anything. Not because I think there's anything bad or wrong with gluten-free but I haven't been baking or making anything gluten-free and don't have the experience to make the "best" anything gluten-free.

So I'm going to have to give full props to the recipe itself, not anything to do with my pancake making skills. When I made the batter, I was a little skeptical as it was pretty thin batter. So thin that, when I poured the batter into the heated frying pan, I was afraid it would make crepes, rather than pancakes.

I'm happy to be wrong. The pancakes are a little fragile during cooking so make sure you let the first side cook enough to be able to flip the pancake without it falling apart.

These were very tasty; so tasty that I didn't put that much syrup or butter on them. I didn't need to. They tasted great and, perhaps because they were gluten-free and not made with regular wheat flour, I didn't have that bloated, stuffed feeling after eating one. Okay, three. But still....
Happy to say I have a favorite new pancake recipe; bonus that it's gluten free.


1 1/4 cup gluten-free flour (with xanthan gum in the blend)
1/2 cup granulated sugar
1/2 teaspoon salt
1 teaspoon baking soda
1 teaspoon baking powder
1 egg
1 cup buttermilk
3/4 cup milk
2 tablespoons melted butter
nonstick cooking spray
  1. Whisk together flour, sugar, salt, baking soda and baking powder in a mixing bowl.
  2. In a separate bowl, whisk together egg, buttermilk, milk and melted butter.
  3. Combine wet ingredients with dry ingredients and whisk to combine.
  4. Heat a griddle or pan over medium heat. Spray with nonstick cooking spray.
  5. Pour about 1/8 cup pancake batter onto heated griddle or pan. 
  6. When pancake bubbles begin to form and edges start to cook, gently flip over.
  7. Let the pancake cook another minute or two, until golden brown. Repeat with remaining batter Serve hot.