Sunday, January 30, 2022

MJ's Top Secret Chocolate Chip Cookies

MJ's Top Secret Chocolate Chip Cookies - made dough January 16, 2022 from Modern Honey
1 cup butter
1 cup plus 2 tablespoons dark brown sugar
1/2 cup granulated sugar
1 large egg
1 large egg yolk
1 teaspoon pure vanilla extract
2 cups plus 2 tablespoons all-purpose flour
3/4 teaspoon baking soda
1/2 teaspoon salt
3/4 cup semisweet chocolate chunks
3/4 cup milk chocolate chunks
  1. In a medium saucepan over medium-low heat, melt butter. When completely melted, add brown sugar and granulated sugar; remove from heat. Whisk until mixture is glossy and combined. Let cool to room temperature.
  2. Add egg, egg yolk and vanilla; stir well to combine.
  3. Stir in flour, baking soda and salt until just combined. Fold in chocolate chips. Wrap dough in plastic wrap and refrigerate until firm, about 30 minutes. Portion into golf-ball-size dough balls, cover or wrap in plastic and refrigerate an additional 24-36 hours.
  4. If not ready to bake after the additional chilling time, place in freezer bags and freeze.
  5. When ready to bake, preheat oven to 325 degrees F. Line baking sheets with parchment paper and evenly space dough balls. Bake 12-15 minutes or until edges are set and middles are just barely past the raw stage. Remove from oven and let cool on baking sheets for several minutes. Transfer to wire rack to cool completely.
I'm randomly trying out new chocolate chip cookie recipes again. I have a couple of good go-to recipes I use more often than not: this one for chewy and this one for dense-cakey-chewy.
Yet I still enjoy trying out new recipes, especially from a blog I've had good results from before. Like from Modern Honey.
There are many blogs touting they have the "best" recipe for something. And it could be true....for them. Everyone has different preferences though so I always take it all with a grain of salt.
But it doesn't mean they're not good or great. It's just that I have reservations about calling anything the best because they would only be my best, not necessarily anyone else's.
Case in point, this is a really good chocolate chip cookie. Not sure I'd consider it the best, based on my preferences for a chocolate chip cookie but that doesn't mean it wasn't really good. It was. 
This calls for melting the butter rather than creaming it so it has a dense, chewy texture. It also has a very rich brown-sugar-caramel flavor profile, a hallmark of an excellent chocolate chip cookie. The edges were crisp and the middle was chewy, another thing I prefer in my chocolate chip cookies.

I don't know if it was my oven or my baking time but the taste test cookie, pictured below, and a much more generous size than the ones I mailed out in care packages, got baked more evenly overall than I expected. Normally I bake cookies just until the edges are set and the middles are just barely past the raw state. Once the cookie cools, the texture is what I like best of being soft-chewy-dense while the edges are crisp.

This one baked all the way through so the whole thing was a more even texture of crisp-chewy throughout. I also don't know if my sweet tooth was taking a break but this was a little too sweet and a bit too rich for me. Still good but if you want it less rich or to cut the sweetness, I'd scale back on the milk chocolate chips.

If the taste test cookie looks markedly different from the rest of the cookies pictured above, it's because, due to my preference for milk chocolate, I portioned out a chunk of the dough to only mix with milk chocolate chips then I added semisweet chips, mini chocolate chips and caramelized cocoa nibs to the rest of the dough for the cookies I was giving away.
In hindsight, that might not have been the best move as the cookie itself was rich enough without me adding a ton of (large) milk chocolate chips to it. Hence why my sweet tooth might have cried uncle on me.


Thursday, January 27, 2022

Ferrero Rocher Brownies

Ferrero Rocher Brownies - made January 19, 2022 from Sugar Salt Magic 
3/4 cup (95 grams) all-purpose flour
1/4 cup (25 grams) unsweetened cocoa powder
1/4 teaspoon salt
3.5 ounces bittersweet (70% cacao) chocolate
1/2 cup (1 stick) unsalted butter, room temperature
3 large eggs
1 cup granulated sugar
1/4 cup packed dark brown sugar
1 1/2 teaspoons vanilla extract
16 Ferrero Rochers, unwrapped
1/4 cup Nutella
  1. Preheat oven to 350 degrees F. Line an 8 x 8" baking pan with foil and lightly spray with nonstick cooking spray.
  2. In a medium bowl, whisk together flour, cocoa powder and salt; set aside.
  3. In the top half of a double boiler set over hot water, combine bittersweet chocolate and butter, whisking until completely melted and smooth. Remove from heat and cool for several minutes.
  4. In a separate bowl, whisk together eggs, granulated sugar, dark brown sugar and vanilla extract until combined. Add butter-chocolate mixture and stir together until combined,
  5. Add dry ingredients and stir until combined and mixture is glossy.
  6. Pour into prepared pan and press Ferrero Rocher in an evenly spaced 4 x 4 pattern.
  7. Heat Nutella for 30 seconds in the microwave, stir for an even texture and pour over brownie batter.
  8. Bake for 40-45 minutes or until a toothpick inserted in a corner comes out clean and inserted near the center comes out with a few moist crumbs, not raw batter. Cool completely before cutting and serving.
This is an easy "hack" to up your brownie game: add Ferrero Rochers to a fudgy brownie base and drizzle-dollop Nutella over the top before baking.

Mine don't look very pretty but the Nutella blends in nicely once you bake it so it isn't a big deal. And the flavor is on point with a fudgy brownie base, the Nutella adding sweetness and richness and the Ferrero Rochers adding a bit of crunch.

For a prettier look, I recommend swirling the Nutella on top of the brownie batter then pressing in the Ferrero Rochers. No need to cover the Ferrero Rochers completely in the brownie batter; leave them 1/3 to 1/2 showing. They'll sink a little further but the batter is stiff enough to hold them pretty easily.

The versatile part of this brownie is if you don't have Ferrero Rochers, you can substitute other candies like Rolos, peanut butter cups or pretty much any chopped up candies like Snickers, Milky Ways, etc.


Monday, January 24, 2022

Bakery Review - Duff Goldman Red Velvet Heart Cake

Bakery Review: Duff Goldman Red Velvet Heart Cake - received December 10, 2021 via Gold Belly
I'm back with another review of a product from Gold Belly, this time from Duff Goldman. Technically I didn't buy this for myself. It was given to me as a Christmas present from my old college roommate. But it was the red velvet heart cake and in the lead up to Valentine's Day, it seems like a good time to blog about it.
As with every single thing I've ever gotten from Gold Belly, this one arrived well packaged and in great condition. It came packed in dry ice, still chilled and well wrapped. I don't know if that's a condition for all sellers in order to sell through Gold Belly but I haven't ever received anything that wasn't well packaged or didn't arrive in the condition it was supposed to. The minor flaw was a bottom piece of the large red fondant heart broke off but that wasn't a big deal to me.

As for the cake itself, it's quite pretty and also perfect aesthetically as a Valentine's Day gift. As you can see, it's four layers of red velvet cake filled with buttercream then covered with a pink-tinted buttercream and adorned with red fondant hearts. Pretty, right? 

The flavor was also quite good, as I would expect from Duff Goldman. It was fluffy and moist. There was a little too much frosting for me and I don't eat fondant but I merely pushed the excess frosting and red fondant hearts aside and just ate the cake. Was this the best red velvet cake I've ever had? Well, no, but bear in mind I've eaten a LOT of red velvet cakes in my lifetime and I have very picky taste buds. For "the best", I still give the nod to Smith Island Baking Company. But this one from Duff was good and I'm grateful for my old roommate's thoughtfulness in giving me an opportunity to try a Duff Goldman cake (foodie bucket list item checked off).


Saturday, January 22, 2022

Oatmeal Cookies from Dorie Greenspan

Oatmeal Cookies - made dough January 11, 2022, modified from Baking with Dorie by Dorie Greenspan
2 cups (272 grams) all-purpose flour
1 1/2 teaspoons cinnamon
1 teaspoon baking soda
2 1/2 cups (300 grams) old-fashioned oats (not instant)
2 sticks (8 ounces, 226 grams) unsalted butter, room temperature
3/4 cup (300 grams) packed brown sugar
1/3 cup (67 grams) granulated sugar
1 teaspoon fine sea salt
2 large eggs, room temperature
2 teaspoons pure vanilla extract
1/4 cup (60 ml) honey
1 cup semisweet chocolate chips
1 cup milk chocolate chips
1/2 cup caramelized cocoa nibs
  1. In a medium bowl, whisk together flour, cinnamon, baking soda and oats; set aside.
  2. In the bowl of a stand mixer fitted with the paddle attachment on medium to medium high speed, beat together butter, brown sugar, granulated sugar and salt until well combined and creamy.
  3. On low speed, add eggs, one at a time, beating until just combined. Add honey and vanilla; beat until combined.
  4. Add flour mixture in 3 additions, mixing on low speed after each addition, until just combined. Fold in chocolate chips and cocoa nibs.
  5. Cover with plastic wrap and chill in refrigerator for at least 30 minutes. Once chilled, portion into dough balls and flatten slightly into thick discs. Cover and refrigerate or freeze for several hours or overnight.
  6. When ready to bake, preheat oven to 350 degrees. Line baking sheets with parchment paper and evenly space dough balls. Bake for 11 to 13 minutes or until edges have set and middles are barely past the raw stage. Remove from oven and let rest on baking sheets for several minutes before transferring to wire rack to cool completely. 
I've always had good experiences with recipes from Dorie Greenspan. They're straightforward, easy to make (or at least I just choose the easy recipes, ha) and they turn out amazingly delicious.
This oatmeal cookie is no exception. I don't make oatmeal cookies as often as I do other types of cookies (chocolate chip, snickerdoodle, red velvet, chocolate chocolate and so on) so I'm certainly no connoisseur of them. But I can tell you these smelled so good coming out of the oven and their taste didn't disappoint.

Lots of goodness, the edges were crisp and, by dint of being an oatmeal cookie, was satisfyingly chewy. I added a combination of regular semisweet chocolate chips, mini semisweet chocolate chips and caramelized cocoa nibs. No lie, those added to the goodness of these cookies as well.

I like sending oatmeal chocolate chip cookies in military care packages for Soldiers Angels because they're typically sturdy and ship well. Thanks to another angel baker volunteer, I also got the idea to pack them in these individual "thank you" cellophane cookie bags. 
I wrapped each cookie in plastic wrap, put one in each cookie cellophane bag, vacuum-sealed 6 individual cookie bags in a sealer package and placed each vacuum-sealed package in a ziploc freezer bag. Which then all got packed into a priority mail shipping box lined with another plastic bag. I was doing everything possible to keep these cookies from sand, dirt, dust and air so that they'd arrive in good shape. Hopefully they will as (again), these were really good oatmeal chocolate chip cookies. Another winner from Dorie Greenspan,


Thursday, January 20, 2022

Heart-Stamped Shortbread Cookies (Stamped Cookies #19)

Heart-Stamped Shortbread Cookies (Stamped Cookies #19) - made dough January 6, 2022, modified from Kelly's Kitchen Creation 
1 1/2 cups butter, room temperature
1 cup granulated sugar
1 teaspoon vanilla
3 1/2 cups all-purpose flour
1/4 teaspoon salt

Fillings: optional and can use jam, jelly, Nutella, cookie butter, ganache
  1. In the bowl of a stand mixer fitted with the paddle attachment, cream butter and sugar together until well combined and no butter lumps remain, 2-3 minutes. Add vanilla and mix to combine. Add flour and salt in two additions, beating on low speed after each addition until fully combined and dough forms.
  2. Divide dough in half, wrap each half in plastic wrap and chill for 20-30 minutes. Working with one half at a time, lightly flour a clean work surface and roll out dough to 3/8" thickness. Press with cookie stamp. Arrange stamped cookies on a cookie sheet, cover and chill or freeze for 20 minutes.
  3. When ready to bake, preheat oven to 350 degrees F. Line baking sheets with parchment paper. Space cookies evenly on prepared sheets. Bake for 12-15 minutes or until edges are light golden brown. Remove from oven and pipe with filling. Warm filling slightly in a sealed ziploc bag in the microwave (15-20 seconds should do it, depending on your filling), cut a corner of the bag with the warm filling and pipe into the center of the cookies.
You're going to see (and have been seeing) some schmaltzy heart-themed posts on my blog in an early lead up to Valentine's Day. I had to bake and ship them early enough to arrive by or before Valentine's Day. I don't usually do schmaltz but I made these for Valentine's-themed care packages for Soldiers Angels/deployed military service members. Which in itself felt a little weird as technically I don't personally know any of the service members yet I'm sending them packages of heart-shaped cookies in Valentine's Day boxes. No cupids or schmaltzy romance going on here; I was just going along with the Hallmark holiday for the troops, spreading some love for their service.
Plus, let's be honest, I love using these thumbprint cookie stamps from Williams Sonoma. (I am not affiliated with Williams Sonoma and don't get anything if you click on the link and buy/don't buy.) Besides the hearts, there's the rectangular one and the circular one. I love all three. I didn't fill the centers for the ones I sent in the care packages but I did include individual packets of peanut butter in case they wanted to fill on their own.


The dough handled beautifully in terms of making the thumbprint impressions. Unfortunately, they didn't bake quite as well as they handled. You can see they browned unevenly and, if you look closely, parts of the dough puffed up, noticeably in the indents from the thumbprint molds. 
That means a little too much air was beaten into the dough and the puffiness came from the release of that air during baking. In hindsight, I should've let the butter come closer to room temperature so I wouldn't have had to beat it as much to get the (cold) lumps out.
As with all stamped/molded/embossed cookies, I also baked at a higher temperature to set the impressions quickly at higher heat and prevent spread. Unfortunately that means the cookies will brown faster as well. It's not the end of the world but does take away from the visual appeal.


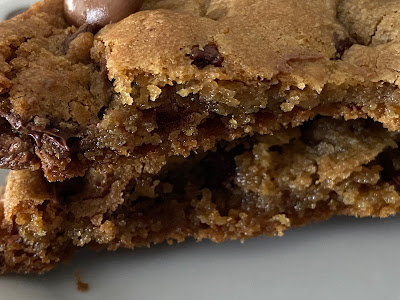
Fortunately, none of those visual issues affected the taste. These cookies tasted really good, nice and buttery. I filled them with cookie butter and that hid the uneven browning and puffing with the indents.

Overall, these were good and well worth making again. Next time I'm going to try baking at a lower temperature and turning the pans around halfway through baking, something I don't normally do, but think it'd be worth it to get a more even baking appearance.