Friday, May 31, 2019

Homemade Taco Seasoning

Homemade Taco Seasoning - made May 21, 2019 from Whole New Mom
Before I discovered Penzey's, I'm not sure it would've ever occurred to me that you can make your own taco seasoning. Matter of fact, I've even bought ready-made Taco seasoning from Penzey's whenever I wanted tacos. But - hello - taco seasoning is made up of individual seasonings so it follows that you can make it "from scratch". Talk about your duh moment.
I didn't have any Penzey's Taco Seasoning but had a hankering for tacos after I'd bought some low-carb tortillas and ground beef. It's a point of stubbornness that I only want to buy my spices from Penzey's (no, I'm not affiliated with them, I just love their spices and believe in supporting the company) so it was unthinkable for me to run to the grocery store and buy taco seasoning that didn't have a Penzey's label on it.

So pinterest to the rescue again when I searched for homemade taco seasoning recipes. This one from Whole New Mom won hands down as I had all but one of the ingredients for it. When does that ever happen? I tend to only buy spices after I have a specific recipe to use it for; otherwise I don't cook enough to be sure I'd actually use it. The only thing I didn't have was the red pepper flakes but I figure that'd be all right since I had everything else.
Obviously, this is the easiest recipe to date since it's literally just measuring spices and mixing them in a small bowl. Then - results - homemade taco seasoning. This turned out a bit spicy for my bland taste buds but did have good flavor. For me, next time, I'd probably cut back a little on the pepper and it was still okay to skip the red pepper flakes. Otherwise, hey, I can now "make" taco seasoning.
2 tablespoons chili powder
1/2 teaspoon garlic powder
1/2 teaspoon onion powder
1/2 teaspoon red pepper flakes
1/2 teaspoon oregano
1 teaspoon paprika
1 tablespoon cumin
2 1/2 teaspoons salt
2 teaspoons pepper

Combine all ingredients in a small bowl. Mix well. Store in a tightly closed container.

Tuesday, May 28, 2019

Lumpia in the air fryer

Lumpia - air fried on May 26, 2019
Most people I know who try lumpia end up eating them like French fries. I am no exception. Which wouldn't be so bad except traditional lumpia is deep fried. That's what makes them so good. I normally don't eat lumpia when it's just me. Too much hassle with deep frying them and, once I do fry them, you know I won't stop at just one, right?

But my mom gave me a few pieces of lumpia and, still being enamoured of said air fryer, I decided to forego the option of loosening my waistband with deep-fried foods by testing how they'd turn out if I put them in my air fryer instead.

I tried out the 6 pieces she gave me in the air fryer, at 370 degrees for 20 minutes, turning them over halfway through. I didn't coat the first 3 with nonstick cooking spray but put them in as is. Although they didn't brown evenly like they would if they'd been deep fried, they came out crunchy and nearly as good as deep fried. I say "nearly" because, realistically, nothing really beats deep frying. However, this came pretty close. The second 3 pieces I did lightly coat with nonstick cooking spray and that came even closer to deep frying.


As in close enough that, according to several of my friends who saw these pictures when I posted them on Instagram, this could be a game changer in the deep frying game. If you love lumpia but restrain yourself because of the deep frying aspect, this alone could be worth investing in an air fryer. Try Costco for a good one at a decent price. No, I'm not affiliated with Costco but that's where I got my air fryer and it's been serving me well so far.
Apparently you can also buy lumpia ready-made, either at an Asian grocery store or, if you're lucky enough to know a Filipino caterer who'll sell you a party pack, from them or a Filipino restaurant that does catering. But if you want to try making your own, here's a pictorial guide to making lumpia. There's also a link to an actual lumpia recipe in the blog post. Enjoy. And get more mileage out of your air fryer.

Saturday, May 25, 2019

Apple Hand Pies

Apple Hand Pies - made May 17, 2019
Thanks to some idle pinterest strolling, I got the idea to make these apple hand pies. I'm still trolling around for new dessert bar ideas and, having recently tried a full-size handpie when I visited Neighbor Bakehouse in San Francisco (it was delicious, btw), I decided to try a mini version.

My favorite pie is the quintessensial apple pie. Sometimes I go wild and branch out to coconut cream pie (hold the whipped cream topping, just sprinkle the top of the custard with toasted coconut). Pecan pie is also acceptable as long as it doesn't have too much of that gelatinous gluey stuff and the pecans are toasted. But apple always wins out so of course I had to try apple hand pies.
Filling before cooking

After cooking
I don't like pie enough to make it very often. Hence one reason I haven't mastered pie dough. I can make a decent one but nothing special. I cheated for this trial and got those pre-made pie dough. Past experience says it isn't as good as homemade pie dough but I was just in experimenting mode so I wasn't going to be that fussy about it. Plus, there's something to be said for easily rolling out the pre-made dough to a slightly thinner thickness and equally easily cutting the dough into the rounds I wanted to make the pies.
I only used one of the two pie doughs in the package as I have other plans for the 2nd dough. Subsequently, the recipe below makes too much filling. Not a problem with apple pie filling though as I just put the overage into ramekins and covered it with some apple crumble topping I made.
If you want to super cheat, not only can you buy the premade pie dough but you can also buy a can of apple pie filling. I've tried that canned filling once though and honestly, you're better off making your own. It's easy enough to peel and chop the apples and cooking it for a few minutes over a stove top with some sugar, cinnamon and nutmeg couldn't be simpler. Season to taste. I tend to have a light hand with nutmeg (don't really care for the taste) and a heavy one with the cinnamon (Penzey's all the way).

How much filling you use is up to you but careful not to overstuff it or you'll have a problem sealing the dough rounds together. You don't want filling leaking through the cracks if it's bursting out the seams before you even get the pies into the oven.

I sealed a few of the hand pies with the tines of a fork and a couple of others with the round end of a 1/4 teaspoon measuring spoon, just to try for different looks. The measuring spoon produced something that looked like a big ravioli but the edges got too thin and browned faster than the rest of the mini pie. The fork tines didn't look as pretty but were fine and baked better.
Before baking, make sure you brush the tops, including round edges, with egg wash. They''ll brown better. Also make sure you cut small slits on top of each pie to allow steam to escape.
Overall, I liked how these turned out. I might add a bit more cinnamon and butter to the filling for a little more flavor or, to be completely decadent, some salted caramel sauce, for a more juicy filling. The pie dough actually tasted decent and browned nicely.
The baked versions still weren't as pretty as some of the ones I've seen on pinterest. I still haven't conquered the knack of how to make my desserts come out "pretty". But, hey, they still tasted good and qualify for the future dessert bar I'm planning on. I just need a little more practice on how to spiff them up for a more "professional" presentation.
1 package refrigerated pie dough (or make your own)
3 large Granny Smith apples, peeled and cut into small chunks
4 tablespoons dark brown sugar
1 teaspoon cinnamon
1/4 teaspoon nutmeg
1 tablespoon butter
1 tablespoon cornstarch mixed with 1 tablespoon water to make a slurry
  1. Roll out pie dough circles to flatten slightly. Cut out rounds of dough, using a round cookie cutter/shaper. Cover and keep chilled in the refrigerator while you make the filling.
  2. Filling: Combine dark brown sugar, cinnamon and nutmeg until evenly mixed in a large mixing bowl. Add apple chunks and toss to coat.
  3. In a large saucepan over medium-high heat, add apple mixture and stir, cooking until apple chunks are tender but not mushy, 5-6 minutes. Add butter and stir. When butter is melted, add cornstarch slurry until sauce is thickened. Remove from heat and let cool.
  4. Preheat oven to 375 degrees F and line a baking sheet with parchment paper.
  5. Wet the outer edges of each dough round with a little water. Place a small scoop of the cooled apple mixture in the center of one round and cover with another. Seal the moistened edges with a fork or the round side of a 1/4 teaspoon measure. Repeat with remaining dough rounds. 
  6. Beat 1 egg with a tablespoon of water to make an egg wash. Brush apple hand pies lightly with egg wash. Cut small slits on top of each pie to let steam escape. Bake in preheated oven for 15-20 minutes or until pies are golden brown.

Wednesday, May 22, 2019

Easy Oven Baked Pork Chops

Easy Oven Baked Pork Chops - made May 16, 2019 from Lemon Blossoms
This turned out pretty tasty. My biggest problem is I inadvertently baked it for too long. The original blog post from Lemon Blossoms warned against that and I took it to heart but apparently not well enough. I checked it after 20 minutes but my pork chops were so thick and looked raw on top so I left them in for - wait for it - another 40 minutes. Oops.

I probably should've realized what I thought was "raw" looks was really the color of the rub melting into liquid. Sigh. I'm not kidding when I say I'm not much of a cook. However, this was so easy to make and next time I buy thick cut boneless pork chops, I'm trying it again as the rub melted into a tasty sauce and there was a slight "crust" that was crisp on parts of the pork chops.

Dry Rub
2 tablespoons brown sugar
1/2 teaspoon garlic powder
1 teaspoon paprika
1/2 teaspoon oregano
1/2 teaspoon salt
1/4 teaspoon ground black pepper

4 boneless pork chops (1-inch thick)
2 tablespoons olive oil

  1. Preheat the oven to 375 degrees F. Line a baking sheet with aluminum foil.
  2. In a small bowl, mix the dry rub ingredients.
  3. Rub the pork chops with olive oil and season them all over with the dry rub. Place on prepared baking sheet.
  4. Bake for 30-35 minutes or until the pork reaches an internal temperature of 140 to 145 degrees. Remove from oven and let rest for 5 minutes before serving.

Monday, May 20, 2019

Nutella-Stuffed Chocolate Chip Cookie Pies...er, mini muffins

Nutella Stuffed Chocolate Chip Cookie Pies - made May 16, 2019, inspired by Marsha's Baking Addiction
I didn't actually follow the recipe from Marsha's Baking Addiction in making these but hers was the inspiration for it so full credit goes to her blog. Plus, when you look at her pictures vs mine, you may want to try her recipe instead of mine so you get better looking "pies". Mine were more like "mini muffins gone mutant".
Left is how they should have turned out (from Marsha's Baking Addiction), right is how mine turned out
I had a package of ready made sugar cookie dough from when I was making the Motherlode Bars (also another baking fail, *long-suffering sigh*) and I wanted to use that up so that was the "pie crust" for these. I also wanted to make them smaller than the size of a regular muffin so I put one ready-made cookie dough portion into each mini muffin tin. If you're psychic and haven't read ahead, this is where I made a mistake. Read on, Macduff.

For the Nutella, I used the Costco Kirkland brand hazelnut spread. I've switched to this instead of the real Nutella as it doesn't use palm oil and, to me, tastes just as good. But you can use Nutella if you wish.

For the chocolate chip cookie part, I used my new favorite standby of Basic, Great Chocolate Chip Cookies. Since these were going to be mini desserts, I opted to use mini chocolate chips instead of chunks. Otherwise, I made the recipe as is.

After mixing the chocolate chip cookie dough, the rest of the recipe is just assembly. Lightly grease the mini muffin tins with nonstick cooking spray, drop a sugar cookie ball in the mini muffin cavity, and if you're lucky enough to own a Pampered Chef (or some other brand) mini tart shaper, you can easily make the cookie cups within each muffin tin.
Add a dollop of hazelnut spread in each cookie cup then cover snugly with a bit of chocolate chip cookie dough. So easy, right? Going to come out beautifully, right? Hey, why are you laughing??
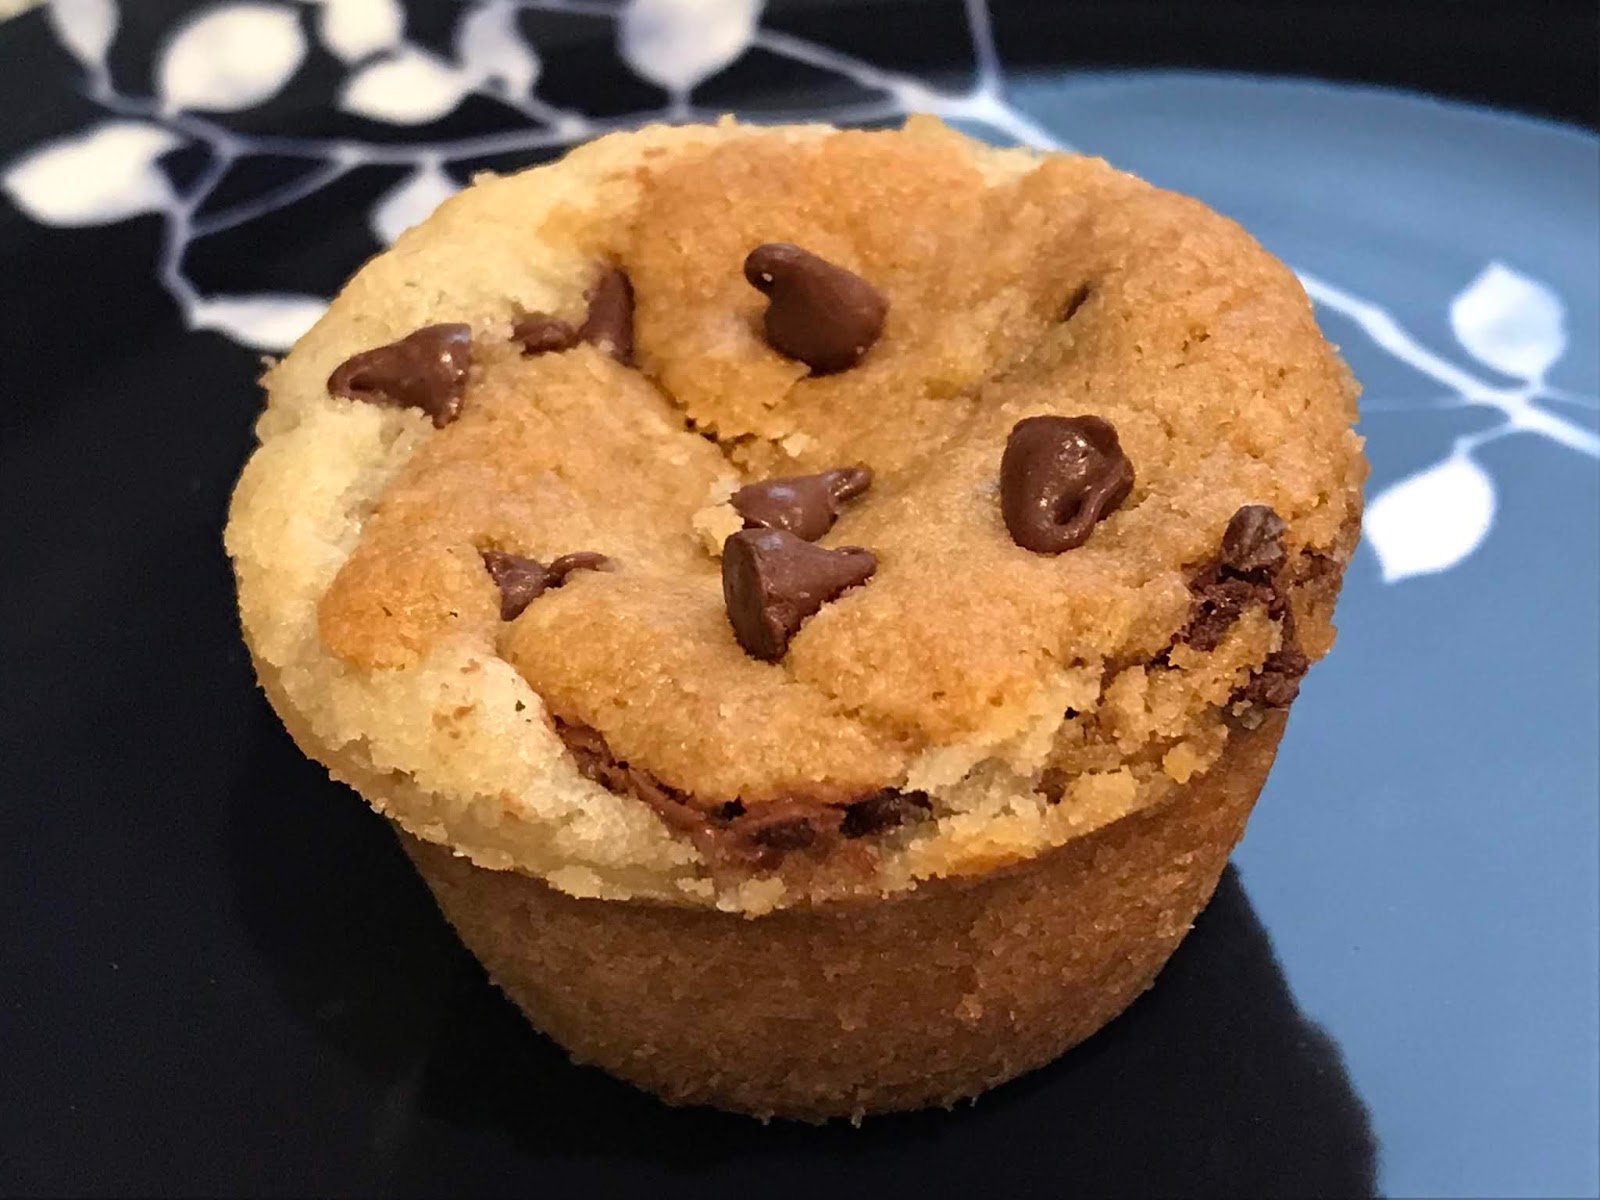
Okay, fine, go ahead and laugh. As you can tell from the pictures, once again, how I viewed something and how it actually turned out seemed to be in different stratospheres of my baking universe and reality.

Turns out, each sugar cookie portion in those prepackaged cookie dough things were simply too big for mini muffin tins. And if they don't have enough room, they overflow their respective cavities and mock you. Talk about (mini) muffin tops! Insubordinate little bastards.
Unfazed, and after a self-deprecating mocking laugh (because if you can't laugh at your own baking failures, hang up your oven mitts), I did a little cosmetic surgery: I took out a round cookie cutter almost the same size as the top opening of each mini muffin cavity and cut through those overflowing muffin tops. They still looked nowhere like Marsha's Baking Addiction way-more-professional cookie pies but at least now they looked plausibly like mini muffins with a sugar cookie crust, hazelnut spread filling and a topper of chocolate chip cookie.
Thankfully, they tasted good. They would probably taste better with a homemade crust that didn't have the temerity to bake beyond the confines I put them in but that'll be a future experiment. For now, laugh at my baking fail and go try Marsha's recipe as written.

Friday, May 17, 2019

Air Fryer Sweet Potato Fries

Air Fryer Sweet Potato Fries - made May 5, 2019 from OOLA
I have a new gadget obsession. Move over Instant Pot and make room for the air fryer. I'd heard of air fryers before and been intrigued but managed to ignore the craze. Then I visited my niece and her fiance in Denver during my time off and they had an air fryer. One whirl of the sweet potato fries from Trader Joe's in their air fryer and I was hooked. It tasted better than the sweet potato fries from Elephant Bar, which had been my previous gold standard  for sweet potato fries. Crisp on the outside but mealy inside. They were amazing and much faster than baking in the oven.
Trader Joe's sweet potato fries from the air fryer
So, when I got back home, despite my inner urgings not to buy anything because I'm moving shortly and would just have to move it, I lasted a whole three days before I broke down and bought an air fryer from Costco. Then the package of sweet potato fries from Trader Joe's. They turned out as well as when my niece and her fiance made them except this time I didn't have to share with either of them, ha.
I've long been on a quest of making my own crispy sweet potato fries "from scratch", aka an actual sweet potato, sold "as is", i.e. dug up out of the ground, rather than from the plastic package from the TJ's freezer section. With the air fryer, I optimistically thought I had a chance. I mean, really, how hard could it be now that I had this swanky gadget?

That would be the foreboding and premonition section of this post for those of you who have seen my prior efforts at this Don Quixote quest. Yes, you guessed it, I was tilting at windmills again. But honestly, it all seemed so easy. I followed the recipe, I read the blog tips, I did it.

Except someone forgot to tell the sweet potato fries to crisp up. They turned out pretty good, taste-wise, as I liked the spice mixture that covered them. Even if said spices burned in my (over)enthusiastic quest to make them crispy so I let them keep on chugging in the air fryer until they were threatening to turn into carbon.

So I tried a second time and this time did the other tricks I've tried before: soak the sweet potato strips in cold water then drain, pay dry and toss in the spice mixture with some cornstarch to add that outer coating for the crispness. Um, yeah. As you can see from the pictures, this time, I had a heavy hand with the cornstarch and it still didn't work. *hands thrown up in despair" #fail
Never mind. I'll always have Trader Joe's....and their packaged sweet potato fries.

2 large sweet potatoes
2 tablespoons olive oil
kosher salt to taste
pepper to taste
2 teaspoons paprika
2 teaspoons onion powder
2 teaspoons garlic powder
cooking spray
  1. Slice the sweet potatoes into half-inch slabs and then into strips of equal size. Place the strips in a medium bowl and add the olive oil, kosher salt, pepper, paprika, onion powder and garlic powder. Toss to coat the strips.
  2. Lightly coat the basket of air fryer with cooking spray. Preheat your oven to 380 degrees. 
  3. Place half of the sweet potato strips into the air fryer basket and cook them for 5 minutes. Flip the fries in the basket with a pair of tongs to brown all the sides evenly. Continue to cook the fries for an additional 5 minutes or until the fries are crispy and slightly brown. Transfer the fries to a cooling rack. Repeat steps above for the remaining strips. Serve immediately.