Saturday, September 24, 2016

Levain Bakery-inspired White Chocolate Macadamia Cookies

Levain-Bakery-Inspired White Chocolate Macadamia Cookies - made dough August 27, 2016 from No Spoon Necessary
I’m not sure what Levain Bakery (my obsession with a New York City bakery I’ve never been to continues) has to do with this cookie recipe and it’s not really explained in the original blog post I got it from but I’m going to assume that Levain Bakery inspired this cookie because it’s meant to be oversized, chubby and freaking delicious.

In that case, inspiration hit a home run because that’s exactly what this was. I feel like I’ve been lucking out on some all-time great recipes for certain cookies. I found a new chocolate chip cookie recipe that’s become a favorite, I have new go-to favorite recipes for peanut butter cookies, double chocolate cookies and snickerdoodles. And now I add this white chocolate macadamia to the all-star list.

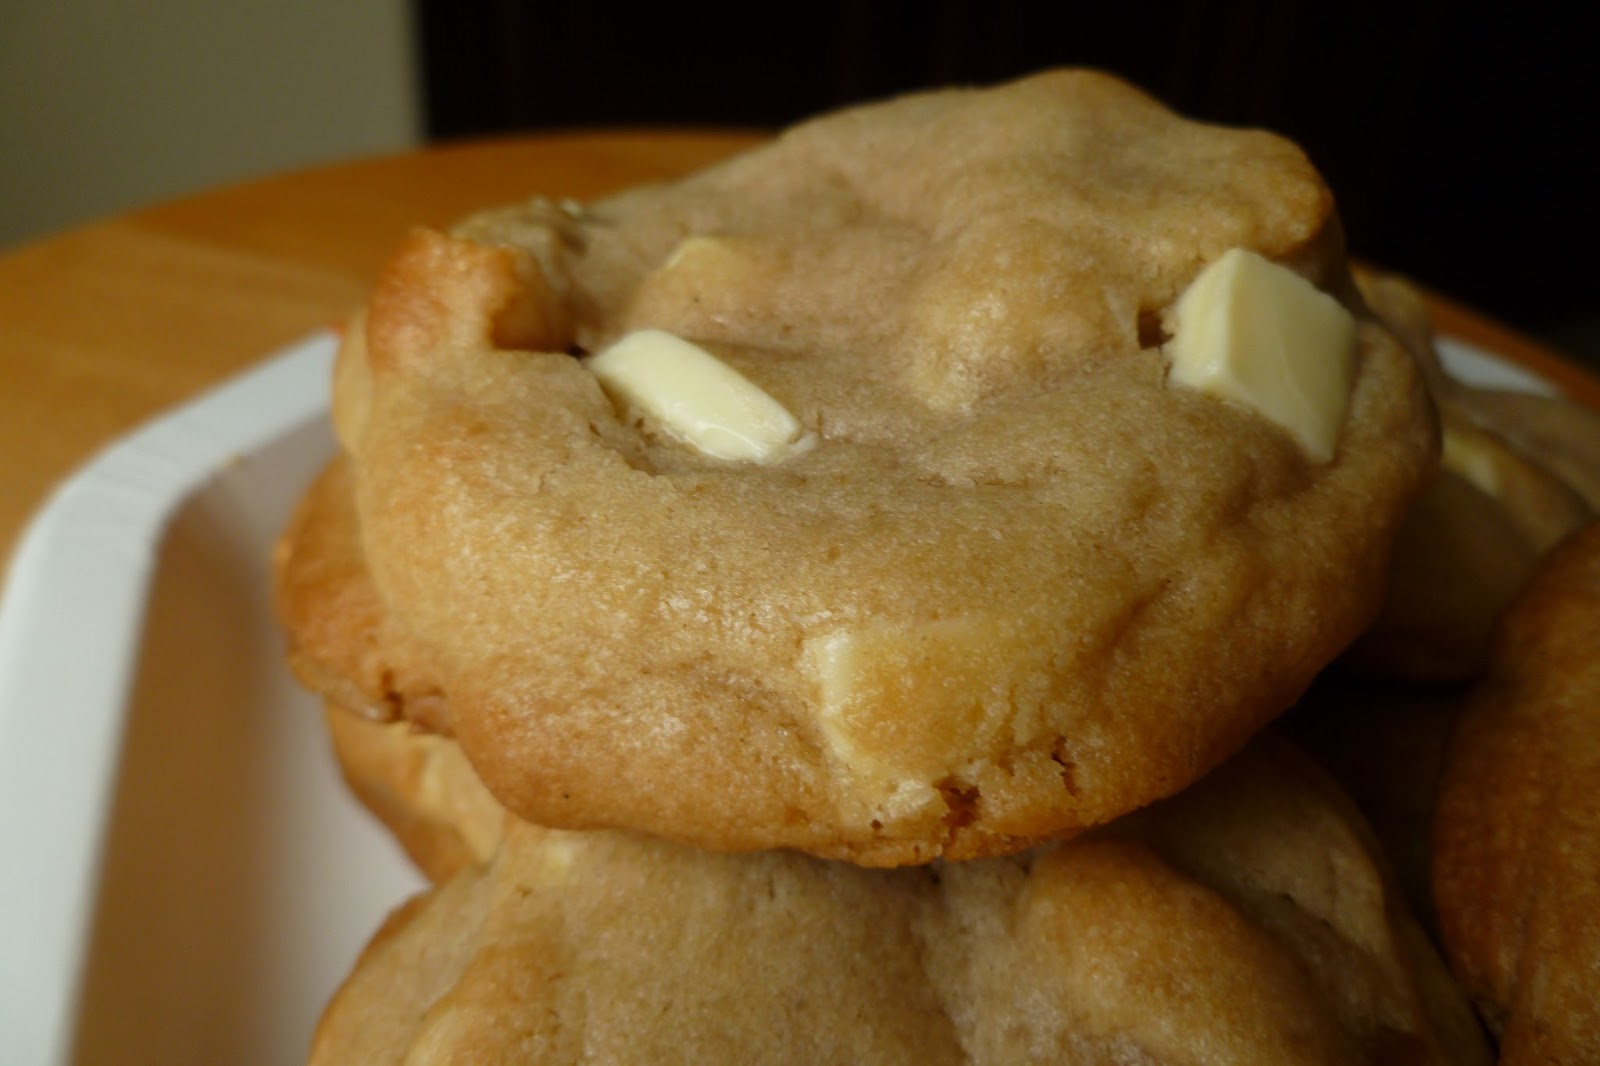
This was good from beginning to end. Not only is it easy to mix up but the dough is great to handle and portion into big cookie dough balls, not dry and crumbly or sticky but just right. Which makes portioning it out effortless. I like my cookies big (you knew that already, right) so I make generous scoops of dough and pat into thick discs. Then I freeze them overnight at least and bake them off from frozen dough. These do take a little longer to bake than the average cookie because of their size but 14-16 minutes ought to do it. I watched for the browning around the edges and took them out just when the middles were barely not raw.

You do want to let these set and cool completely or they’ll be too mushy. When completely cool, they’re be moist and chewy. If they had been “real” chocolate instead of being a vanilla-based dough, I would call the texture almost fudgelike. As it is, this is my new favorite white chocolate macadamia cookie.

3 cups (13.5 ounces) bread flour (do not substitute all-purpose flour)
1 teaspoon baking powder
1/4 teaspoon baking soda
3/4 teaspoon salt
1 cup unsalted butter, cold
3/4 cup + 4 teaspoons (5.5 ounces) dark brown sugar
1/2 cup granulated sugar
2 large eggs
1 teaspoon vanilla extract
1 1/2 cups white chocolate chips
1 cup macadamia nuts, roughly chopped
  1. In a medium bowl, stir together flour, baking powder, baking soda, and salt. Whisk to combine; set aside.
  2. Beat butter in the bowl of a stand mixer on medium speed for 1 minute or until creamy. Add both sugars and continue to beat at medium speed, scraping down sides of bowl as necessary, for 1-2 minutes, until well combined.
  3. Add eggs, one at a time, and vanilla, beating until just combined. 
  4. On low speed, add dry ingredients in 3 additions, beating until just combined each time. Do not overmix.
  5. Add white chocolate and macadamia nuts, stirring in with a wooden spoon. Using a large ice cream scoop, portion dough into golf-ball-size dough balls and pat into very thick discs. Cover and chill or freeze for several hours or overnight.
  6. When ready to bake, preheat oven to 350 degrees F. Line baking sheets with parchment paper and evenly space frozen dough balls, 2 inches apart.
  7. Bake cookies for 16-20 minutes or until edges are golden brown and middles no longer look shiny or raw. Remove from oven, let cool for several minutes then transfer cookies to wire racks to cool completely.

Thursday, September 22, 2016

Lemon Buttermilk Sheet Cake

Lemon Buttermilk Sheet Cake - made August 20, 2016 from Jay's Baking Me Crazy
Got buttermilk? Got lemons? Then you’ll find it really easy to make this lemon buttermilk sheet cake. I still had lemons from my sporadic lemon harvest and I also had buttermilk from when I made banana bread to bring to my relatives in Winnipeg. And you can’t go wrong with a sheet cake if you want to put together something quick and easy.

What “dresses up” this simple sheet cake is the lemon sugar on top. Which is basically lemon zest rubbed into granulated sugar. You reserve ¼ cup to sprinkle on top and put the rest into the batter itself. I recommend increasing the amount of zest (if you like lemon, you can rarely have too much zest) and capturing a good portion of that zest into the reserved ¼ cup for sprinkling on top. Otherwise you’re just going to have sugar on top of icing when you really want lemony sugar and sugared lemon zest instead.

This has a really nice crumb, light and cakey. It wasn’t as lemony as I would’ve liked though. Most of the lemon flavor came from the icing since I used lemon juice to whisk into the powdered sugar. That argues again for using more lemon zest in the batter. But otherwise, this is a nice summer picnic cake to help feed a crowd. When I have a lot of people to cover in dessert, while chocolate is typically the most requested flavor, lemon often comes in a very close second.
2 1/2 cups cake flour
1 teaspoon baking powder
1/2 teaspoon baking soda
1/2 teaspoon salt
zest of 3 lemons
1 3/4 cups granulated sugar
3/4 cup buttermilk
1/4 cup lemon juice
1 teaspoon vanilla
12 tablespoons (1 1/2 sticks) butter
3 eggs plus 1 egg yolk

Glaze
3 cups powdered sugar
3 tablespoons lemon juice
2 tablespoons buttermilk
  1. Preheat oven to 325 degrees F. Line a 9 x 13 pan with foil and lightly spray with nonstick cooking spray,
  2. In a large bowl, combine cake flour, baking soda, baking powder and salt; set aside.
  3. In a separate bowl, mix lemon zest and sugar together until moist and fragrant, about 1 minute. Transfer 1/4 cup of mixture to a small bowl and set aside,
  4. In a liquid measuring cup, combine buttermilk, lemon juice and vanilla.
  5. Add butter to remaining sugar mixture and beat until light and fluffy, about 2 minutes.
  6. Beat in eggs and yolk, one at a time, until combined.
  7. Add flour mixture in 3 additions, alternating with buttermilk in 2 additions, mixing until just combined after each addition. Do not overmix.
  8. Pour batter into prepared pan and bake for 35-40 minutes or until a toothpick inserted near the center comes out clean or with a few moist crumbs. Do not overbake. Let cake cool for 10 minutes.
  9. Meanwhile, prepare glaze by combining ingredients together and whisking until smooth. Pour over warm cake and sprinkle with reserved lemon sugar.

Monday, September 19, 2016

"Best Ever" Peanut Butter Cookies

"Best Ever" Peanut Butter Cookies - made dough August 19, 2016 from Like to Cook It
If you ever wonder why I seem to make the same type of thing in relatively quick succession, chances are I was in the mood to make something, trolled pinterest and my baking books for recipes of that something and ended up with several that I couldn’t decide between. Such is the case with another peanut butter cookie.

It started when I was going to see my nieces one weekend and I asked them what they wanted me to make. They decided on peanut butter cookies. So off I go on my recipe trolling and came across at least 5-6 different recipes I wanted to try. Then come to find out the Costco-sized half jar of peanut butter sitting in my pantry has been sitting there long enough to have just expired a month before I meant to use it. I didn’t know if the “best before” date was more of a suggestion or a mandate but I never take those kinds of chances, especially since I’m not going to be the only one eating them. It was another week before I got to Costco to buy another 2-pack, ever optimistic that this time I’ll use both jars well before their sell-by date and I ended up making my nieces something else.

But I still had these recipes for good-looking peanut butter cookies on my pinterest board! I made one already and they were gobbled up at work before I could blink and that recipe became my favorite peanut butter cookie. But I’m afraid it’s going to have to move over and make room for this one. I normally don’t buy into someone else’s hyperbole about “best ever” but I may have to remove the quotes on this one. Or at least qualify it as “one of the best ever” peanut butter cookie recipes I’ve tried. Because it is.

Similar to the other recipe, this also didn’t spread much and had a wonderfully moist and chewy texture. It was also soft, almost fragile, especially if you underbake cookies like I do. For the chocolate, I chopped up a big slab of Cadbury milk chocolate whole hazelnut that I’d bought last time I was in Europe. I know, I don’t like nuts in my cookies, right? The hazelnuts actually worked in this cookie. They didn’t steam and soften but remained crunchy and paired well with the peanut butter. Go figure. So now I have two awesome peanut butter cookie recipes for you. Be creative with the add-ins. You can add chopped, toasted peanuts or plain chocolate chips or chunks, semisweet or milk. Just don’t overbake them.

Oh, and for anyone keeping score, these too disappeared rather quickly at work.

1 cup creamy peanut butter
1/2 cup unsalted butter
1 cup brown sugar
1 egg
3 tablespoons milk
1 teaspoon vanilla extract
1 1/2 cups all-purpose flour
3/4 teaspoon baking powder
1/4 teaspoon salt
1 cup mini chocolate chips
  1. In a large bowl of a stand mixer or using a hand mixer, cream the peanut butter, butter and sugar, until blended. Beat in the egg, milk and vanilla.
  2. In a medium bowl, whisk together the flour, baking powder and salt.
  3. Add the dry ingredients to the wet, gradually, and mix to combine. Form into golf ball-size dough balls, flatten slightly into thick discs, cover, and chill or freeze for several hours or overnight.
  4. When ready to bake, preheat oven to 375 degrees F. Line cookie sheets with parchment paper. Roll dough discs in granulated sugar and evenly space on cookie sheets.
  5. Bake for 8-10 minutes. Do not overbake, even if they look undercooked. Cool completely on wire racks.

Friday, September 16, 2016

Frosted Lemon Cookies

Frosted Lemon Cookies - made August 19, 2016 from Chocolate Chocolate and More
My dwarf lemon tree forgot about the “dwarf” part of its name and shot up to over 12 feet. It’s my fault it got that high because I wasn’t paying attention and hadn’t realized it had grown so tall. I didn’t know it could get that tall. If that was the dwarf version, what’s the regular tree like? Fortunately, a sharp pair of pruning shears and my lemon tree is back to a modest 7-foot height. Okay, that’s still not very dwarfy but at least it doesn’t look in danger of toppling over into my neighbor’s yard anymore. Did I mention it’s growing crooked too? Yeah, my green thumb isn’t so green.
But my lemon tree is producing lemons. It’s more prolific in the winter time but it does ripen the occasional yellow lemon while there are a (frightening) number of green ones growing larger and larger with every passing day. Expect more lemon-based recipes in the future.
For now, I thought it was a good time to try this recipe for frosted lemon cookies since I had to use up lemons and buttermilk. Normally I don’t do rolled cookies because, let’s face it, they’re a pain. Make the dough, chill it, roll it out to even thickness, cut with cookie shapers, pry off the counter while still trying to keep its shape if you didn’t flour the counter enough, get on the cookie sheet, again without distorting the shape and bake.
I did a fairly decent job with most of that and even was able to remember to time the cookies and take them out at 8 minutes exactly. They even looked done at that point, which is not a long time to bake cookies. But these were thin enough that 8 minutes was sufficient. I let them cool then frosted them. The only thing I changed from both the cookie dough and the frosting is I didn’t use lemon extract. I don’t like the metallic tang of lemon extract so instead I used freshly squeezed lemon juice. It doesn’t impact as much lemon flavor in the cookie as it does in the frosting though.

Hmm, not sure what to say about these cookies. I tried the thickest one as the taste test cookie but maybe I should have tried a thinner cookie. It was a little cakey to me and that cakey texture made it seem dry. It wasn’t overbaked but I didn’t love the texture. The taste was fine and I liked the icing I ended up with but I’m not a fan of (most) cakey cookies. It might also have been a mistake not to use lemon extract in the cookie dough because it really wasn’t that lemony. If it wasn’t for the lemon icing, it wouldn’t have really been a lemon cookie. I think I’m just not a fan of cookies made with buttermilk because they will almost always be cakey cookies.
1/2 cup butter, softened
1 cup sugar
1 egg
1 teaspoon lemon extract
1/2 cup buttermilk
2 1/4 cups all-purpose flour
1 teaspoon baking powder
1/2 teaspoon baking soda
dash of salt

Frosting
1/4 cup butter, softened
2 cups confectioners' sugar
1/2 teaspoon lemon extract
2-3 tablespoons heavy whipping cream

  1. In a large mixing bowl, cream butter and sugar until fluffy and light in color. Add egg and lemon extract; beat until combined,
  2. Combine flour, baking powder, baking soda and salt. Alternately add flour mixture and buttermilk until combined. Dough will be soft.
  3. Divide dough into two, wrap each half in plastic wrap and refrigerate for 4 hours or overnight.
  4. When ready to bake, preheat oven to 350 degrees and line baking sheets with parchment paper.
  5. Place chilled dough on well-floured surface. Using a flour-dusted rolling pin, roll out dough to 1/4" thickness. Cut into rounds with cookie cutter. Arrange evenly on baking sheets, Bake for 8 minutes, just until cookies are firm. Remove from oven and let cool on baking sheet for 5 minutes before removing to racks to cool completely.
  6. Make frosting: cream butter in a mixing bowl; slowly add sugar until combined. Add in lemon extract. Beat until combined. Add in cream, one tablespoon at a time, until desired consistency. Frost cooled cookies and let set.

Thursday, September 15, 2016

Photos, Recipes and Credit

I had another cookie post ready to go up tonight on the blogging schedule but something happened today that made me decide to write a different post instead. Something in the nature of a PSA (public service announcement) and something partly as a catharsis to get off my mind what was bothering me.

If you've been following my blog or have even skimmed a few posts, you know how much I like showing pics of what I've made, especially of something I think turned out well. I'm no professional photographer, as I'm sure anyone can tell, and I don't have fancy equipment. Every picture you see on my blog is taken with my cell phone and/or my pocket digital camera. Every picture on a recipe post is also something I've personally made or, in the rare instances where it isn't, I make it clear where it is from, similar to all the recipes I try from other blogs, baking books and everywhere else. If it's from another blog, I always link back to the recipe on the original blog in the post title as well as the blog itself, also in the post title, where I give credit to where I found the recipe.

Because that's what I do in the name of proper etiquette and simple courtesy, I assume that's what everyone else does. So I was taken aback when a reader commented on my post for Chocolate Peanut Butter Cheesecake Brownies that someone had the picture of my brownies on their Facebook page and, without any reference as to coming from my blog, it looked like it was theirs. I looked into it and sure enough, although it had been cropped closely to leave out the easily identifiable dessert plate I used, it was the exact same brownie picture from my blog and, without any photo credit, it looked like it was the business owner's picture. Bummer.

On a good day, it may not seem like a big deal and I can take most things in stride. My blog is public, I share recipes and pictures freely and I don't mind when other people make what I post; that's the point of my blog, right? But today wasn't a good day. I don't mind my recipes, posts or pictures being shared. I don't mind if someone uses the pictures I post anymore than I mind if they make the recipes I post. But if it's going to be used, especially in the capacity or implication that it's something they made, I expect some kind of acknowledgment of where they got it from and not an implication, unintentional or otherwise, that what's pictured is what they made when it isn't. Especially when it looks like a business selling the brownie. So I would assume they've made it themselves already and have something to take a picture of so using my picture should be unnecessary. Once I found out today, two weeks after the picture looks like it was posted, I did ask the business owner to give my blog the proper credit and even linked my blog post to their picture to prove it came from my blog. Fortunately, she did as I requested.

Still a bummer that it happened and that I had to ask for the proper credit in the first place but I thank the person who let me know what they saw. I never thought I had to ask this and I don't want to be one of those people who superimpose their name over every picture so I'll just simply say: you're free to use the recipes I post, you're free to use my pictures but if you're going to re-post the recipes and pictures and/or sell the baked goods using my pictures, I do ask that you give proper credit as to where you got them from. Thank you.

Tuesday, September 13, 2016

Ooey Gooey Fudge Brownies - add the Nutella

Ooey Gooey Fudge Brownies - made August 13, 2016 from Brownie Bites
This was one of the things I baked for my Canadian relatives while I was in Winnipeg for my cousin’s wedding. My aunt and one of my cousins wanted brownies and that’s so easy to make on the fly. Although I did have to find one that uses only cocoa as I forgot to get unsweetened chocolate at the grocery store when we did our run for baking ingredients.
Normally I don’t like cocoa brownies. Why? Brownies made exclusively with cocoa, even without any leavening agents like baking soda or baking powder, tend to end up being more cakey even if the brownie is meant to be fudgy. They have a softer mouthfeel with soft being like a cake rather than dense and chewy like baked fudge. Cocoa does add a nice chocolate depth to brownies though so my favorite recipes tend to include both baking chocolate and a small amount of cocoa.

But cocoa was all I had so this is the recipe I went with. On the whole, it turned out fine. The chocolate was good, it was fudgy but yes, it was still a bit lighter in texture than a recipe using only baking chocolate. I upped the decadence factor by using the lazy baker’s frosting, i.e. Nutella spread over the hot brownie 5 minutes after coming out of the oven. I didn’t have any toffee or extra chocolate chips to sprinkle on top so I kept it plain. No one seemed to mind and the full 9 x 13 pan of brownies disappeared before a day went by (I doubled the recipe below). Clearly, I’m in the right family.

1/2 cup (1 stick) unsalted butter, melted and cooled
1 1/2 cups granulated sugar
1/2 teaspoon vanilla extract
2 eggs
3/4 cup all-purpose flour
1/2 cup unsweetened cocoa powder
1/4 teaspoon salt
1/4 teaspoon baking soda
  1. Preheat oven to 350 degrees F. Line an 8 x 8 baking pan with foil and lightly spray with nonstick cooking spray.
  2. In a large bowl, whisk together the flour, cocoa powder, salt and baking soda; set aside.
  3. In another bowl, combine melted butter, granulated sugar and vanilla extract until smooth and fluffy. Beat in eggs, one at a time, into the sugar-butter mixture until combined. Add vanilla extract.
  4. Add flour mixture in 3 additions, mixing after each addition until just combined. Do not overmix.
  5. Pour batter into pan and smooth top with small metal spatula. Bake for 20-25 minutes or until toothpick inserted near the center comes out with moist crumbs, not raw batter. Do not overbake,

Saturday, September 10, 2016

Oatmeal Chocolate Chip Cookies

Oatmeal Chocolate Chip Cookies - made August 12, 2016 from Liv for Cake
I was in Winnipeg last month for my cousin’s wedding. As always, when I visit that side of the family, I bring banana bread with me as it’s one of their favorites. While I was there, I also made apple cobbler as it’s my uncle’s favorite. My cousin, who was the one getting married, asked for oatmeal cookies, “the chewy kind”. At first I was puzzled by the request since, to me, all oatmeal cookies are chewy. Then I realized she was comparing it against the crisp oatmeal cookies you can buy in grocery stores. Yeah, I don’t do crisp.
I’m so used to baking in my own kitchen that it’s actually hard for me to bake anywhere else. For one thing, I take for granted that the staples in my pantry are staples in everyone else’s pantry. Which is not always the case. For this trip, I was staying in my other cousin’s house (the bride’s oldest sister) and I had to do an inventory of her kitchen to determine if she had what I needed to make cookies and I don’t just mean the ingredients: cookie sheets? Measuring cups and spoons? Mixing bowl? Mixer? Spatula, wooden spoon? My cousin was a cook rather than a baker. Thankfully she had most of the equipment so I mainly had to shop for ingredients. Another cousin of ours took me to the grocery store and some of the things I needed, she had in her pantry so between the two kitchens and a trip to the Real Canadian Superstore, I got what I needed to try out this oatmeal cookie recipe.
Normally, when I make cookies, I like to make them big. Partly because I like big, thick cookies and partly because they bake better when they’re bigger since you have time to bake them long enough for the edges to get crisp but the middles will still remain chewy. If you bake small cookies, they tend to not only bake faster but also more uniformly, meaning by the time the edges are baked, so is the rest of the cookie and there’s less underbaking in the middle in the cookie. Which is my favorite part.

In this instance, I did end up making the cookies small. I was only making one batch and there were going to be over a dozen people eating them so instead of getting 12 large cookies out of one batch, I made over 2 dozen small cookies. That did mean they ended up a little more baked than I would have liked. They weren’t dry but they weren’t as gooey-chewy as I normally make my cookies. The other challenge of not baking in my own kitchen is I had to learn my cousin’s oven. Some ovens run hotter than others. Her baking sheets were also a darker finish than mine and even lined with parchment paper, the bottoms baked more quickly than I would’ve liked. I know, a litany of first world problems, right?
In the end, the cookies turned out pretty well. I baked the first batch inadvertently to full bake instead of underbaking but I learned for the last 2 batches when to take them out so that even though they looked underdone, they were actually just right by the time they had cooled and set. I don’t know that I found these memorable compared to other oatmeal cookies that I’ve tried but it’s really hard for me to find THE oatmeal cookie recipe I would prize above all others. Then again, I also don’t know if that’s more because I didn’t bake these like I normally would from my own kitchen and had to adapt to a new place or if I’m just inordinately picky. My relatives loved them and were thrilled with fresh, homemade cookies so you have to take my picky spectrum with a grain of salt.
1 1/2 cups all-purpose flour
1 teaspoon baking soda
1 teaspoon cinnamon, optional
1/2 teaspoon sea salt
1 cup butter
1 cup light brown sugar, packed
1/4 cup granulated sugar
2 large eggs
2 teaspoons vanilla
3 cups rolled oats
2 cups chocolate chips
  1. In a medium bowl, whisk flour, baking soda, cinnamon and salt; set aside.
  2. In the bowl of an electric mixer, cream butter and sugars on medium-high until pale and fluffy, approximately 3 minutes.
  3. Add eggs, one at a time, incorporating after each addition, and beat on high for 1 minute. Add vanilla.
  4. With mixer on low, add flour mixture; mix until combined.
  5. Add oats and chocolate chips by hand, using a wooden spoon. Mix until just combined.
  6. Portion into golf-ball-size dough balls, cover and chill for several hours or overnight.
  7. When ready to bake, preheat oven to 350 degrees F. Line baking sheets with parchment paper.
  8. Bake for 10 minutes or until edges are lightly browned but center is still soft and unset. Cool 5 minutes on baking sheet. Transfer to cooling rack to cool completely.

Wednesday, September 7, 2016

Big Bakery-Style Peanut Butter Chunk Cookies

Big Bakery-Style Peanut Butter Chunk Cookies - made dough August 4, 2016 from Sally's Baking Addiction
This may be the best peanut butter cookie recipe I’ve tried. Or at least the best I can remember in my recent baking past. Which really says something because you know I’m indifferent to peanut butter. But if a peanut butter lover asked me to bake them some cookies, I would go with this one, hands down.

I like it for a few different reasons. First, with 2 cups of peanut butter in it, it isn’t messing around. It’s peanut butter. Even though it has chocolate chips in it, first and foremost, it’s a peanut butter cookie.


Second, and you had to know this was coming, it baked into a thick, chubby cookie! Hardly any spread. In fact, you may want to shape this as thick discs instead of dough balls as it won’t spread out that much if you bake it from frozen dough, which is what I always do. Baking as thick discs will help give you a uniformly thick cookie instead of (very slightly) thinner edges with a domed middle.


Lastly, I loved the texture. I’m still somewhat indifferent to the taste of peanut butter itself but I liked the soft, chewy, moist texture of this cookie. A lot. I put these out at work before 8 am, had meetings most of the morning but the next time I went to our communal kitchen, even the plate was gone. Rumor has it they were gone by 9 am. There weren’t even any telltale crumbs on the counter. So that’s my gauge that other people less indifferent to peanut butter than I am also liked this cookie.

2 1/2 cups all-purpose flour
1 teaspoon baking powder
1 teaspoon baking soda
1/2 teaspoon salt
1 cup (2 sticks) unsalted butter
1 cup granulated sugar
3/4 cup packed light brown sugar
2 large eggs
2 cups creamy peanut butter
1 1/2 teaspoons vanilla extract
 1 1/2 cups semisweet chocolate chips

1/2 cup granulated sugar for rolling, optional
  1. Whisk the flour, baking powder, baking soda and salt together in a medium bowl; set aside.
  2. Using a stand mixer fitted with the paddle attachment, cream the butter and both sugars together on medium speed until smooth, 1-2 minutes. Add the eggs and beat on high until combined, 1 minute. Add the peanut butter and vanilla and mix until combined.
  3. Add the dry ingredients to the wet ingredients and mix on low until combined. Fold in the chocolate chips with a wooden spoon.
  4. Portion into golf-ball-size dough balls, flatten into thick discs if desired (these don't spread much), cover and chill or freeze for several hours or overnight.
  5. When ready to bake, preheat oven to 350 degrees F. Line baking sheets with parchment paper.
  6. Roll dough balls in granulated sugar and evenly space on cookie sheets. Bake each sheet for 14-15 minutes until lightly browned at the edges and middles no longer look raw. Remove from oven and let cool on baking sheets for several minutes before removing to wire cooling racks to cool completely.