Monday, August 29, 2016

Restaurant Review: 1000 Degrees Pizza

1000 Degrees Pizza - lunch on July 16, 2016
I first heard of 1000 Degrees Pizza when it was served as an ad on my Facebook feed. At first I got it mixed up with 10,000 Degrees which is a nonprofit I donate to that helps people get their college degrees. Oops, no, 1000 Degrees had one less zero and churned out pizzas instead of diplomas.
I’m always interested in finding local pizzerias to support. This one is a franchise and they had one close by. Even better, I could place my order online, specify when I could pick it up and plan my errands accordingly. And, best of all, the one closest to me was in the same strip mall where I had to run a couple of errands. When you work a lot during the week, you learn really good time management skills to minimize time spent on the weekends doing grown up things like (endless) errands.
I love ordering online because you can peruse the menu at your leisure, order exactly what you want and pay up front. I did that and went about my errands, timing it so that I arrived at 1000 Degrees a couple of minutes before my scheduled pick up time.
I was there during an off hour so it was rather empty. I let the guy behind the counter know I was there to pick up my order and waited. After a couple of minutes, a man who looked like he was the pizza chef approached me and apologized that my order wasn’t ready yet. There was some kind of snafu or mixup between what I ordered and what he made so they needed a few more minutes. Honestly, I didn’t mind (can’t sweat the small stuff) and he was so nice about it and I could tell he felt bad. I assured him it was okay and sat down to wait. It took another 10 minutes, none of which was wasted since I had my iphone, the kindle app on it and an e-book.
My pizza was boxed and ready to go, piping hot. That was my last errand so I was able to get home and enjoy a late lunch. The pizza was pretty good. It wasn’t deep dish (you know my weakness for deep dish) but as a “normal” crust pizza, I liked it. I had a couple of slices (really, just a couple) and froze the rest to eat later. Can’t beat the convenience, they were genuinely contrite about the mixup and seemed very pleasant. I’d go again. 


Saturday, August 27, 2016

Toffee Fudge Brownies

Toffee Fudge Brownies - made July 17, 2016 from Back for Seconds
Another brownie break instead of cookies. I had several bags of Heath toffee bits to use up so I went on the hunt for recipes that included them. Toffee’s actually a bit tricky to work with. I don’t generally like them in cookies or brownies since I’m somewhat of a purist and don’t like the toffee bits to interfere with the texture inside of a brownie or cookie unless they add to, not detract from, it. What do I mean by that?
It depends on how it’s used. When you add toffee to cookie dough, in baking, the high heat can cause the toffee to melt then harden when it cools but the hardening isn’t a crunch like the unbaked toffee but can be the chewy, hard-to-eat harden. Some people like that texture but I’m not one of them.  So, yeah, I’m choosy about how I use toffee in baking.
In this particular case, no need for my (usual) drama. I ignored the original recipe’s instructions to add toffee to the brownie batter and instead reserved the toffee bits for sprinkling on top of the frosted brownie. Similar to how I don’t like nuts in my brownies, I don’t normally care for toffee bits inside them either. I like the moist, dense, chewy texture of a brownie by itself, not to be interrupted by random toffee bits in them. I often don’t like chocolate chips in my brownies for the same reason. At room temp, the solid chocolate chips interfere with my chewing of a dense, rich brownie.

But the weird part is I like the toffee bits on top of the brownie to provide a texture contrast and a sweet crunch. I know, I can’t explain myself either. It just is and I just am. I’ve had friends try to tell me “it all ends up in the same place”. I try to explain back “it’s not the destination, it’s the journey.” That’s normally the point where we shake our heads at each other and keep on eating.
I also ignored the original recipe’s instructions about making a chocolate frosting and instead went with the lazy baker’s frosting, meaning I spread Nutella over the top of the frosting, sprinkled the toffee bits liberally over it and called it good. After all that drama, I ended up eating only half a piece of this brownie. It was good and I liked it, especially with the toffee bits on top of the Nutella but I think I’d already eaten enough on the day I made these so it was easy to exercise portion control and bring the rest to work to give out.
Brownies
1 cup unsalted butter, melted
1 cup cocoa powder
2 cups granulated sugar
4 eggs
1 teaspoon vanilla extract
1/2 teaspoon salt
1 1/4 cups all-purpose flour
1 bag Heath baking bits or 1 1/2 cups toffee bits

Topping 
12 ounces semisweet chocolate
1/3 cup milk
(Alternatively, you can use Nutella for the topping)
  1. Preheat oven to 350 degrees F. Line a 9 x 13 pan with foil and lightly spray with nonstick cooking spray.
  2. In a mixing bowl, stir melted butter and cocoa until combined. Add sugar and mix well. Stir in eggs, one at a time. Add vanilla and salt, stir until combined. Mix in flour until well combined. Stir in 1 cup toffee bits, if desired (I left them out).
  3. Pour into prepared pan and bake about 20-25 minutes or until toothpick inserted in the center comes out clean or with a few moist crumbs. Let cool.
  4. Prepare topping: Melt chocolate and milk in the top half of a double boiler over low heat, whisking until melted and smooth. Pour over baked, cooled brownies and sprinkle generously with remaining toffee bits.

Thursday, August 25, 2016

Soft & Chewy Snickerdoodles

Soft & Chewy Snickerdoodles - made dough July 2, 2016 from The Pinning Mama

Another snickerdoodle recipe! I hadn’t meant to make another one but when I was expecting guests for dinner, I tried two different recipes as I had planned to send everyone home with a cookie bag and didn’t want to run short. But, thanks to some last-minute cancellations, I had less people over than I expected so the snickerdoodles from the first recipe was all I needed.

But I had already made this recipe and had the dough waiting in my freezer so I baked them off later and brought them to work. I have to say, I like this recipe better than the ones I made for my friends for our potluck. I think it was mostly because I didn’t underbake it too much so the texture was just right, still a little cakey but also chewy and moist like a good snickerdoodle. It didn’t spread much either so that’s always points with me.
Not sure this replaces my favorite snickerdoodle recipe but it comes close and it's still a winner. The main difference between this and a typical snickerdoodle is this one doesn't have cream of tartar. Purists may disagree that this is a "real" snickerdoodle but they're going to miss out on a really excellent cookie if they don't make this.
1 cup butter
1 1/4 cups granulated sugar
1 egg
1 1/2 teaspoons vanilla extract
3 cups flour
1 1/2 teaspoons baking powder
1/4 teaspoon salt

1/4 cup granulated sugar
1 1/2 teaspoons cinnamon
  1. Cream together butter and sugar until light and fluffy.
  2. Add in egg and vanilla until combined.
  3. In a separate bowl, combine flour, baking powder and salt. 
  4. Slow add flour mixture to butter mixture, mixing until just combined.
  5. Measure dough with a 1/4 cup measure and roll into golf-ball-size dough balls. Cover and chill or freeze several hours or overnight.
  6. Combine 1/4 cup sugar and cinnamon in small bowl.
  7. Preheat oven to 350 degrees and line baking sheets with parchment paper. Roll dough balls in cinnamon sugar mixture and evenly space on baking sheets.
  8. Bake for 12-15 minutes or until center is just set. Let cool for 2 minutes on baking sheet then transfer to wire racks to cool completely.

Monday, August 22, 2016

Bakery Review: Wicked Good Cupcakes

Wicked Good Cupcakes - received July 14, 2016
Every year, you can count on me doing a write up of something my old college roommate, Caroline, sent me from an online bakery. Through her, I’ve discovered Crumbs, Cake Monkey, Sweet Melissa’s and Smith Island Baking Company. This year’s discovery was Wicked Good Cupcakes. I’d heard of Wicked Good a couple of years ago but have never tried them. They were one of the places I looked into visiting when I was in Boston but I’d run out of time in the time I had there to hit a 4th bakery.

Fortuitously though, Caroline sent me a pack of 6 cupcake jars from Wicked Good for my birthday so I got to try them after all. That’s Wicked Good Cupcakes’ lure: they sell cupcakes in a jar. Or, I guess more accurately, layers of cake and frosting in a jar that’s meant to be the equivalent of a cupcake size. Just in a jar and you eat it with a spoon.


My birthday pack included Red Velvet, Birthday Chocolate, Birthday Vanilla, Wicked Good (peanut butter chocolate chip), Tiramisu and Carrot Cake, all nicely packaged and even accompanied by 6 silver plated plastic spoons. As packaging goes, it was brilliant and made for a great gift. It was certainly a pleasure to receive.

Chocolate Birthday
I was less enamored with the taste of the cupcakes themselves. The Wicked Good was my least favorite because I’m indifferent to peanut butter and it was one of the last jars I had tried several days after receiving them so it was a bit dry. The instructions say the cupcakes are best eaten within a week of receiving and there’s no need to refrigerate them; refrigerating will only dry out cakes even further. I tried the chocolate first and it was good but something I could easily make so it didn’t stand out to me. Plus the frosting was way too sweet. The red velvet ended up being my favorite. It was the second flavor I tried and it was still moist. The frosting on all of the cupcakes were too sweet for me so it didn’t help that there was the usual generous amount of frosting on them.

Wicked Good sells their cupcake jars in different-sized packs with “free” shipping but each jar works out to be $10 apiece. The cheapskate in me thinks that’s way too expensive for what you get so bear in mind, you’re paying for packaging and shipping more than cupcake. If you’re okay with that, then it’s worth a try (get the red velvet). Regardless though, I’m always grateful my friend remembers my birthday and sends something she knows I will appreciate and I do. Thanks, Caroline!
Red Velvet


Tiramisu


Saturday, August 20, 2016

Creme Brulee by Chef in Training

Creme Brulee - made July 14, 2016 from Chef in Training
Remember that test run of the crème brulee before I hosted some friends over? Although it turned out pretty well, I decided it wasn’t sweet enough so I took a risk and went with another recipe for the actual dinner. Some days you just have to live on the edge and hope it works out. I had snickerdoodles as a backup anyway in case the crème brulee didn’t work out.

Fortunately it did. This version was just as easy to make as the recipe from Cooking Classy. I think I could’ve whisked the custard mixture a little more thoroughly though as when I baked the ramekins, even in the bain marie (water bath), the tops of some of the ramekins formed a crust and had brown spots from where the sugar hadn’t completely dissolved in the cream before baking. That was a little worrisome and, ahem, a rookie mistake. But not to worry. Once I sprinkled sugar on top and bruleed it with my torch, the crust issue went away.

I liked this recipe a bit better than the first one. It appeared to have a little more flavor than just cooked cream and I think I baked the custard better so it was more firm, even after torching the top. My only issue is the same one I had with both crème brulees: I used real vanilla beans scraped from a vanilla bean pod to flavor the custard and the seeds ended up on the bottom of the ramekins instead of being evenly distributed throughout. That’s probably inevitable but a bummer nonetheless.
1 quart heavy cream
2 teaspoons vanilla extract
seed scrapings from one vanilla bean (optional but that's my preference, save vanilla pod)
1/2 cup sugar
6 large egg yolks
2 quarts hot water
1/2 cup sugar
  1. Preheat oven to 325 degrees F.
  2. In a medium saucepan, combine heavy cream, vanilla, vanilla bean seed scrapings and vanilla bead pod after seeds have been scraped out. Stir constantly over medium heat, for about 7-8 minnutes, until mixture starts to bubble, close to a simmer.
  3. Remove saucepan from heat; cover and let set for 15 minutes.
  4. In a medium bowl, whisk together 1/2 cup sugar and the egg yolks until well blended and it just starts to lighten in color. Add the cream a little at a time, stirring constantly until all is combined.
  5. Pour liquid into 6 (7 to 8-ounce) ramekins. Place the ramekins into a large cake pan. Pour enough hot water into the pan to come halfway up the sides of the ramekins.
  6. Bake at 325 degrees F, just until the creme brulee is set, but still jiggles slightly in the center, approximately 40-45 minutes.
  7. Remove the ramekins from pan and refrigerate for at least 2 hours and up to 3 days.
  8. Remove the creme brulee from the refrigerator 10 minutes before serving.
  9. Divide the remaining 1/2 cup sugar equally among the 6 ramekins and spread evenly on top. Using a torch, melt the sugar and form a crispy and browned top. Return to the refrigerator for 5 minutes to let top set. Serve.

Thursday, August 18, 2016

Another Levain Copycat - Chocolate Chip Cookies

Another Levain Copycat - Chocolate Chip Cookies - made dough July 3, 2016, modified from Smells Like Home
If you suspect I have a mild obsession fascination with Levain Bakery cookies, you’re probably correct. I can’t explain it either because I had 2 Levain Bakery cookies (eaten over a 4-day period) more than 5 years ago and while I enjoyed them, I didn’t have this driving interest in recreating them back then like I do now. Truth be told, I can’t even remember what they tasted like, only that they were thick, chubby, hearty cookies that weren’t for the faint of heart.
Since my chocolate chip cookie recipe testing phase when I stumbled on the Levain Bakery copycat recipes, I’ve now been actively seeking out more copycat recipes. I don’t know that I’m really trying to get as genuinely close to a Levain Bakery cookie taste so much as a Levain Bakery behemoth-sized cookie that literally gives you a lot to chew on.  Because, again, I can’t remember what they tasted like. It’s on my bucket list to refresh my memory next time I go to New York City but until then, copycat recipes will have to tide me over.
And this is a good one! I pulled out my bag of tricks and did the things that make me love how the cookies turned out: I used chocolate chunks from Trader Joe’s Pound Plus milk chocolate bar (don’t be stingy with the chocolate), I substituted ¼ raw cane sugar for ¼ of the granulated sugar to give the cookies a bit of sweet crunch, made the dough balls into big, thick discs, froze them, baked them just until the edges were golden brown and the middles were just barely not raw anymore (never fully bake cookies or they can be dry).
While all good chocolate chip cookies are delicious when they’re still lukewarm, the edges have crisped up, the middles are gooey and the chocolate chunks are still melty, I also liked these cookies because I ate one at room temperature and they were still good: chewy and moist with that caramelized brown sugar flavor. It may not be Levain Bakery exactly but it was an amazingly delicious cookie nonetheless and probably the best of the copycat recipes I've tried so far.
3 cups plus 2 tablespoons all-purpose flour
1 teaspoon baking powder
1/4 teaspoon baking soda
1 teaspoon salt
1 cup unsalted butter, cold, cut into tablespoons
3/4 cup + 4 teaspoons (6 ounces) dark brown sugar
1/4 cup granulated sugar
1/4 cup raw cane sugar or Turbinado sugar
2 eggs
1 teaspoon vanilla extract
2 cups chocolate chunks, roughly chopped
  1. Whisk the flour, baking powder, baking soda and salt together in a medium bowl.
  2. In the bowl of a stand mixer fitted with the paddle attachment, beat the butter at medium speed until creamy, about 1 minute. Add the sugars and beat for 2 minutes. Mix in the eggs and vanilla at medium-low speed until incorporated.
  3. Scrape down the sides of the bowl and gradually add the flour mixture, beating until just combined. Do not overmix. Add chocolate chunks.
  4. Portion the dough into golf-ball-size dough balls and flatten slightly into thick discs. Cover and chill or freeze for several hours or overnight.
  5. When ready to bake, preheat oven to 375 degrees F. Line baking sheets with parchment paper and evenly space frozen dough discs about 2 inches apart.
  6. Bake for 15-20 minutes, until edges are golden brown and middles are no longer raw. Do not overbake. Let rest on baking sheets for 2 minutes then remove to wire racks to cool completely.


Monday, August 15, 2016

Eats in Dublin, Ireland - July 25-28, 2016

Eats in Dublin, Ireland – July 25-28, 2016

I traveled to Dublin for work last month and, as is now second nature to me, I took pictures of (almost) every scrap of food I ate on the trip. We had a couple of team dinners so I was fortunate enough to experience two Dublin restaurants, a boat ride to one of them, and an honest-to-goodness musical Irish pub crawl. 
My favorite part was singing Molly Malone, in case you wondered. Maybe because it was one of two Irish songs I was familiar with. "Cockles and Mussels, alive, alive-o!" Reminded me of Arya on Game of Thrones. But I digress....


First restaurant was Aqua, which was in Howth and which entailed us getting on a boat, sailing on the bay for almost an hour (fortified with a seafood appetizer buffet en route which I could not enjoy because while I was fine for the first 20 minutes, the last 30 were not my friends) and pulling up to the pier in front of the restaurant. That’s not your grandmother’s Uber ride..  


Smoked Salmon with crab
Steak with what I called "Jenga potatoes"
Since Aqua was set near the water, a great view was mandatory and that’s what we had. I only remembered to take one picture of the spectacular view because I was too busy talking, eating and taking pictures of the food. I had the steak and ordered it “medium”. The waiter informed us they only did rare, medium and well done. I thought medium was a safe, moderate bet but unfortunately I was wrong. Either I got someone else’s steak by mistake or the Irish version of “medium” was “seared on each side, middle just barely lukewarm. Meaning by my standards, it was really rare. I ate the outside but couldn’t do the middle. The potatoes were terrific though and artistically presented as to what I call a Jenga pattern. I’ve never had a bad potato in Ireland. I don’t think it’s allowed.
Chocolate Tart


Very excellent creme brulee

The next night, we went on a carousing musical pub crawl through 3 pubs, guided by local musicians who sang and taught us some Irish songs at each pub. Definitely a new and fun experience, even or especially if you can't sing. I can't so I kept my "singing" voice low enough not to embarrass myself. I don't drink so I'm never going to be drunk enough to actually sing.


The front of 41 Restaurant
After the musical pub crawl, we had dinner at 41 Restaurant, which from the outside, didn't look like a restaurant at all, more like someone's home.. This one was fancier, reminiscent of Alexander’s back home where they do fancy little one-bite palate cleansers between courses, whether you ordered it or not. One was a single dumpling in a tasty sauce, that was pretty good. Another one was butter foam with random popcorn on it. I don’t know what that was except odd. I didn’t care for it. I got the steak again here but prudently ordered it “well-done” this time. That turns out to be the right choice as it was closer to medium-well than well-done. Whew. Pretty tasty too.


Foie Gras
Steak Medallions
Some weird butter foam thing
Peach Vol au Vent
When I wasn’t having team dinners or working, I did manage to venture out during my lunch hours to do my usual “I’m on a mission, 
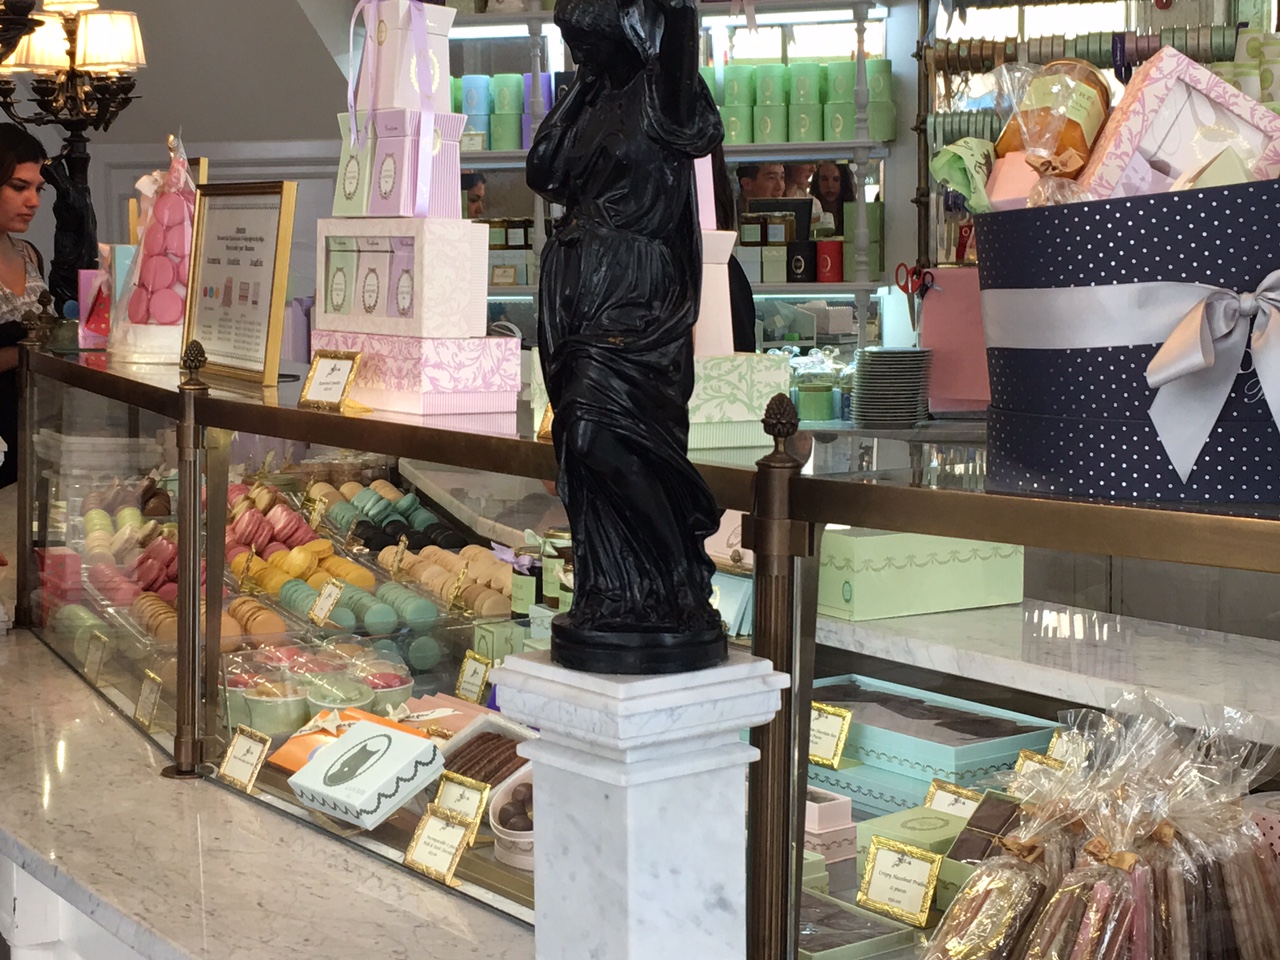
have to find a bakery to try while I’m out here” walk. I found Laduree which was a pleasant surprise as I didn’t know they had one in Dublin. I went in hoping for something like the hazelnut slice I had at the Laduree in Paris but alas, this one was so small, they only did macarons. I “settled” for the salted caramel macaron (2 euros) as memory served that this was the only flavor macaron I like. With like being a strong word for describing me and a macaron.
One of the coworkers also recommended I try Queen of Tarts. It was just over a mile from the office so it was an easy 15-minute walk with the GPS function on my phone. I couldn’t find anything in Dublin without it. Queen of Tarts was a cute little place, half of it filled with small tables and the other half with the kitchen and the counter display cases full of mouth-watering desserts. While my eyes always round out bigger than my stomach (and that’s saying something), past experience says I shouldn’t get more than ONE thing or I’ll regret it, especially since I was leaving the following day and I had already bought the salted caramel macaron.


So although I could’ve hung out in front of the display cases, licking my chops, eating with my eyes all day and risk having the Queen of Tarts people call the garda to throw out the weird American, I did manage to observe propriety and sedately asked for just the apple crumble “for takeaway”. That means “to go” since I wasn’t going to be eating it until after work that night. Apple crumble in Dublin, in case you wanted to know, is like American apple pie with a Dutch crumble or streusel topping. Except it’s less sweet, there’s less of the gelatinous filling and more pure apple. This particular one gets high marks from me because, most importantly, there were no raisins in it. No raisins. So that makes it a near-perfect apple crumble to me.  3.95 euros so it might seem a tad expensive but that’s not too bad and it was definitely worth it.


So that was a slice of my almost-week in Dublin, not counting my pacing of the airports, racing through Heathrow to catch connections, staying up all hours because I can’t sleep on airplanes and waking up at 1 am thanks to jet lag. But I still love to travel and I love trying new places to eat.