Wednesday, December 19, 2012

Orange Butter Cookies

Orange Butter Cookies - made December 8, 2012 from The Fearless Baker by Emily Luchetti

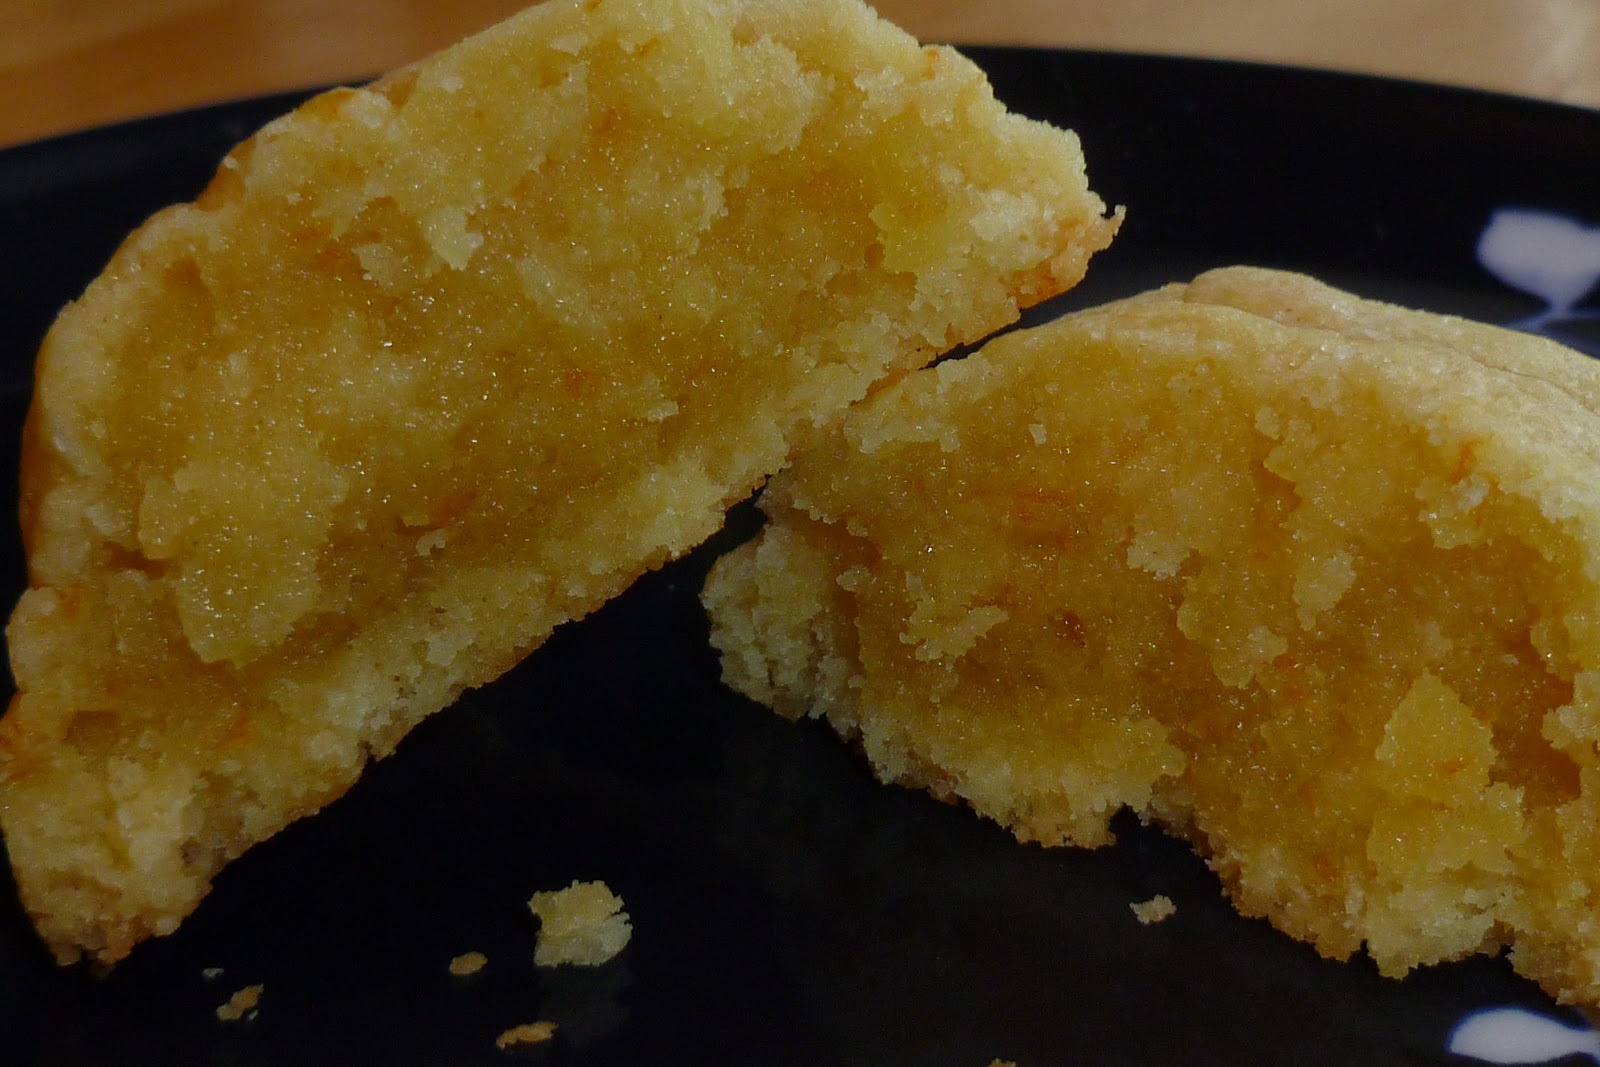
As I bake my holiday gifts this year, I like to provide a variety of different cookies with different flavors.  Sometimes I like to do something fancy and sometimes just something simple but good.  This cookie falls into the latter category.  I'd never made it before so I did a test run and tried it out on my parents.  One recipe only made 9 cookies so if you have more than 2-3 orange lovers, you might want to double or triple the recipe.  Because this is a really good cookie.  It's dense, orange-y and chewy.  It doesn't spread very much (I also froze the dough and baked it on a convection setting) and I loved both the taste and the texture. It's like a chewy butter cookie flavored with oranges. The picture below doesn't do it justice as it looks raw but it really isn't, just dense, moist and chewy. (Hey, even my skinny mom ate two).

1 medium navel orange
8 tablespoons (1 stick) unsalted butter, softened
1/3 cup granulated sugar
1 large egg yolk
½ teaspoon pure vanilla extract
¼ teaspoon kosher salt
1 cup plus 2 tablespoons all-purpose unbleached flour

1.     Zest the rind of the orange, then cut the orange in half and squeeze the juice into a bowl – you’ll need 1 ½ teaspoons of the juice).
2.     In a stand mixer, beat the butter and sugar on medium speed until smooth.  Add the orange zest, 1 ½ teaspoons of the juice, the yolk, vanilla and salt and stir until combined.
3.     Reduce the speed to low, add the flour and mix until everything is combined and comes together into a dough.
4.     Turn the dough out onto a well-floured work surface, gather together with your hands, and divide into 2 pieces.  Sprinkle one of the pieces with flour and roll it with your hands into a 6-inch evenly thick log.  Repeat with the second piece of dough.  Wrap the logs in plastic wrap and refrigerate for at least 1 hour or until firm.  (The dough can be kept in the fridge for 2 days or frozen for 2 months.)
5.     Preheat the oven to 350F.  Line the baking sheets with parchment paper.
6.     Slice the logs into ½”-thick large coins and arrange on the parchment-lined baking sheets about 2 inches apart.
7.     Put 2 racks in the upper and lower thirds of the preheated oven.  Bake until the cookies are golden brown, about 13 minutes.  Rotate pans if necessary to brown evenly.  Let cool completely.
HungryLittleGirl What's cooking, love?

Tuesday, December 18, 2012

Cola Cake - Cracker Barrel Style

Cola Cake: Cracker Barrel Style - made December 8, 2012 from Food.com
Slight underbaking problem again
We don't have a Cracker Barrel in my area (that I know of) so I've never eaten there but I've heard about them from friends and they seem to enjoy a lot of comfort food from there.  I found this recipe on pinterest and it looked fairly simple and what I needed to add to my holiday baking gifts since I like giving a variety of different baked goods in one gift pack.  This is similar in concept to the Root Beer Bundt Cake from Baked with the cocoa powder and the soda.  I think this came out a little sweet for me though.  The  texture was moist and fluffy which I like in my cakes but the addition of the cola frosting put the sweetness factor on the higher end.  I think this would be better with a darker chocolate frosting without the cola.

2 cups all-purpose flour
2 cups granulated sugar
1 teaspoon baking soda
1 cup butter
1 cup cola, beverage
5 tablespoons unsweetened cocoa powder
1/2 cup buttermilk
2 eggs
1 teaspoon vanilla

Frosting
1/2 cup butter
3 tablespoons unsweetened cocoa powder
9 tablespoons cola, this should be the remaining cola left in a 12oz can
1 teaspoon vanilla
4 cups confectioners' sugar
  1. Preheat oven to 350°F.  Line a 9 x 13-inch pan with foil and lightly spray with nonstick cooking spray.
  2. Combine flour, granulated sugar and baking soda in mixing bowl. 
  3. In a small saucepan, heat 1 cup butter, 5 tablespoons cocoa and 1 cup cola beverage to boiling. (whisk together as it melts).   Pour over the flour mixture and whisk thoroughly. 
  4. Add buttermilk, eggs and vanilla. Mix well.  Pour into prepared 9x13 pan. Bake for 40 minutes. 
  5. During last 10 minutes of baking prepare frosting: place 4 cups confectioners' sugar in a mixing bowl.  In a small saucepan, combine 1/2 cup butter, 3 tablespoons cocoa powder and 9 tablespoons cola beverage. Whisk together. Heat to boiling. Remove from heat, stir in 1 teaspoon vanilla.  Pour over 4 cups confectioners' sugar.  Mix well with a whisk. 
  6. Remove cake from oven.
  7. Slowly pour warm coco-cola frosting over cake. Let cake cool for about an hour before cutting into it.
  Cast Party Wednesday

Sunday, December 16, 2012

Mocha Cookies & Cream Brownies

Mocha Cookies & Cream Brownies - made December 8, 2012, recipe adapted from The Brownie Experience by Lisa Tanner


I needed brownies for some care packages so I dug this one out of my "Still Need to Make" file.  It's one of several from The Brownie Experience that I've had for years and I think I've made it long, long ago but I can't remember what it tasted like so it seemed like a good time to try it again.  I changed it slightly by leaving out the almonds the original recipe called for and adding Oreo chunks instead.

This wasn't super chocolaty and the coffee flavor wasn't too pronounced either.  The texture was moist but also not super fudgy.  So I'd consider this "okay" - remember I have very finicky taste buds, especially when it comes to brownies.  The Oreos were a good touch though and I'm glad I added them in.

5 ounces unsweetened chocolate
1 rounded tablespoon powdered instant coffee
1 cup butter, softened
1 ¾ cups brown sugar, packed
5 eggs
1 ½ teaspoons vanilla
1 cup flour
1 generous cup Oreos, chopped into rough chunks

1.     Preheat oven to 350˚F.  Butter a 13 x 9 x 2” pan.
2.     Melt chocolate over low heat; stir in coffee powder and let cool.  In a large bowl, with wire whisk, cream together butter and sugar.  Add eggs, one at a time, beating well after each.  Blend in vanilla, then melted chocolate mixture.  Gradually stir in flour.  Fold in Oreo chunks.  Spread batter in pan.
3.     Bake 20-30 minutes, or until done.  Let cool in pan completely before cutting.

Linked to Crazy Sweet Tuesday
 Inside BruCrew Life


Saturday, December 15, 2012

Samoa Thumbprints

Samoa Thumbprint Cookies - made December 8, 2012, recipe adapted from Great Cookies by Carole Walter

I've been traveling all week for work and stepped off a plane after an 11 1/2 hour flight to the news of what happened in Connecticut.  My thoughts and prayers go out to the adults and children killed in the tragedy and their families.  Hug your loved ones and do something kind for someone.  It's the only coping mechanism I've found against senseless violence.

(Written before my travels): I liked how the Chocolate Turtle Thumbprints turned out so much that I started to obsess a bit on making other thumbprint combinations.  The most common one is probably peanut butter thumbprints filled with jam or jelly but I don't like jam or jelly so I started thinking about other flavor combinations.  I know I wanted to make a non-chocolate cookie and I still like caramel as the filling in the well of the cookie but I wanted something a little "more" than just a vanilla cookie/caramel combo. I also wanted to roll the cookie in something other than almonds or pecans.  Toasted coconut was the obvious choice and from there it was easy to leap to a samoa combination: a brown sugar cookie rolled in toasted coconut, filled with caramel and drizzled with chocolate.
I started out with Carole Walter's thumbprint cookie recipe but modified hers to include brown sugar for a more caramelized flavor.  I brushed the cookie dough balls with egg white then rolled them in toasted coconut.  Half the dough balls I used a 1/2 teaspoon measure to make an indentation and for the other half, I used the end of the handle of a wooden spoon.  The wooden spoon handle makes a narrower deeper indent.  Then I froze the dough at that point. These turned out pretty well.  They didn't spread much which is what I was most concerned about and the toasted coconut coating provided a nice texture contrast to the cookie and the caramel.  When using caramel bits (or caramels) melted with milk, go a little more generous with the milk to make sure the caramel stays soft even after it sets.  The last thing you want is your caramel to be too chewy at room temperature.
2 cups all-purpose flour
¼ teaspoon salt
1 cup unsalted butter, slightly firm
¼ cup granulated sugar
¼ cup dark brown sugar
2 large egg yolks
1 teaspoon vanilla extract
2 large egg whites for coating, beaten until frothy
Toasted coconut, crumbled and in a shallow bowl
Caramel (homemade or caramels melted with a little milk)
Melted milk or dark chocolate for piping

1.    In the large bowl of an electric mixer fitted with the paddle attachment, mix the butter on medium-low speed until smooth.  Pour in the sugars and mix just until incorporated.  Add the egg yolks and vanilla, mixing only until blended.  Using a wooden spoon, stir in the flour and salt in two additions, mixing just to combine after each addition.
2.    Roll the dough into small balls.  Dip into frothy egg whites then roll in toasted coconut.  Using the handle end of a wooden spoon, make an indentation in the center of the dough ball.  Repeat with remaining dough.  Chill until firm, at least an hour, or place in freezer bags and freeze until needed.
3.    When ready to bake, preheat oven to 350°F.  Place cookies evenly apart on baking sheets lined with parchment paper and bake until lightly golden, about 14-15 minutes.  Remove from oven.  If indentations are no longer as pronounced, gently re-impress them with the rounded side of a ½ teaspoon measure.
4.     Let cool completely.  When cookies are cooled, fill indentations with melted caramel.  Pipe thin lines of melted chocolate over cookie.  Sprinkle with additional toasted coconut if desired.

What's cooking, love?

Tuesday, December 11, 2012

Chocolate Waffles

Chocolate Waffles - made December 7, 2012, recipe adapted from Better Homes & Gardens 2012 Chocolate edition


Whenever you see me post a breakfast recipe that I actually ate for breakfast, that's code for I didn't have any real food in the house, just baking ingredients.  So I make pancakes or waffles or something breakfast-y until I can go grocery shopping and stock up on protein ingredients.  It's just as well I didn't have real food on hand at the time I made these though or I might've missed out on a good chocolate waffle.  This isn't too chocolaty but it was good - light, crisp and flavored just chocolaty enough.  I only made a half batch of these and am stocked up for another 3-4 breakfasts.

1 3/4 cups all-purpose flour
1/2 cup sugar
4 teaspoons baking powder
1/2 teaspoon salt
2 egg yolks
1 1/2 cups milk
1/2 cup butter, melted (the original recipe called for shortening but I prefer butter)
2 ounces semisweet chocolate, melted and cooled (I used Guittard chocolate buttons/wafers)
1 teaspoon vanilla
2 egg whites
  1. Melt butter and chocolate together in the top half of a double boiler set over hot, not simmering, water.  Whisk smooth.
  2. In a medium bowl, stir together flour, sugar, baking powder and salt.  Make a well in the center of flour mixture; set aside.
  3. In another medium bowl, combine egg yolks, milk, butter-chocolate mixture and vanilla.  Add to flour mixture all at once.  Stir just until moistened (do not overmix).
  4. In a small mixing bowl, beat egg whites with an electric mixer on medium to high speed until stiff peaks form.  Gently fold into chocolate mixture.  Do not overmix.
  5. Pour 1 cup to 1 1/4 cups of batter onto the grids of a preheated, lightly greased waffle baker.  Close lid quickly; do not open until done.  Bake according to the manufacturer's directions.  When done, use a fork to lift the waffle off the grids.  Repeat with remaining batter.  Serve warm.
Cast Party Wednesday  What's cooking, love?

IHOP Pancakes

IHOP Pancakes - made November 30, 2012 from Cookin' Up North
I had made an IHOP pancakes knock off recipe long ago and I thought I had it on my blog but it seems I don't.  So I tried this one from Cookin' Up North's blog as I think it's the same recipe I tried before.  It's a nice basic pancake recipe, not as fluffy as the Orange Cinnamon Roll Pancakes but still a good option if you need to use up buttermilk and don't have anything but baking ingredients in your house.....again.

1 1/4 c. flour
1 tsp. baking powder
1 tsp. Baking soda
pinch of salt
1 egg, beaten
1 1/4 c. buttermilk
2 Tbsp. melted butter
1/4 c. sugar

Stir together the flour, baking soda, baking powder,and salt. Mix the egg with the buttermilk and add to the flour mixture, stirring only until smooth. Add the melted butter and sugar. Fry on a greased griddle. Serves 4.

Monday, December 10, 2012

Chocolate Chips and Chunks Cookies

Chocolate Chips and Chunk Cookies - made November 29, 2012 from Averie Cooks
I know 'tis the season of fancy or traditional holiday cookies and the iconic chocolate chip cookie might normally take a backseat in holiday baking but not for me.  For one thing, I was still drooling over the pictures on Averie's blog and her chocolate chip cookie pictures with their thick chunky chip-ness sucked me right in.  I've rarely met a chocolate chip cookie recipe I wouldn't try.  Similar to Alton Brown's recipe, she advocates using bread flour for more chewiness.  I actually keep bread flour on hand more for cookies than bread so fortunately I had some available in my pantry for this recipe.  I didn't have a slab of chocolate to cut into chunks though so I had to default to a mixture of milk chocolate chips (Guittard) and mini Hershey kisses.  I was originally going to use the regular Hershey kisses and cut them up but I didn't have that kind of time so I went with ready-made chips.
Look at how beautifully chunky these turned out - yum.  I baked them a few minutes longer than she said to but it was only because the middles still looked raw after 8 minutes.  So I went closer to 11-12.  They still came out pretty well, I think.  Gotta love a good chocolate chip cookie, at any time of the year.

3/4 cup (1 1/2 sticks) unsalted butter, softened
3/4 cup brown sugar, packed
1/4 cup granulated sugar
1 large egg
2 teaspoons vanilla extract
1 cup all-purpose flour
1 cup bread flour (all-purpose flour may be substituted and used exclusively in place of bread flour)
2 teaspoons cornstarch
1 teaspoon baking soda
1/2 teaspoon salt, optional and to taste
6 ounces (3/4 cup) semi-sweet or milk chocolate chips
6 ounces bittersweet or dark baking chocolate, chopped into bite-sized chunks
  1. To the bowl of a stand mixer fitted with the paddle attachment, beat the butter on low speed until smooth, 1 to 2 minutes. 
  2. Add the sugars and beat on medium-high speed until creamed and well combined, about 3 minutes. Stop, scrape down the sides of the bowl, and add the egg, vanilla, and beat on medium-high speed until light and fluffy, about 3 minutes. 
  3. Stop, scrape down the sides of the bowl, and add the flours (solely using all-purpose flour will work, but the cookies will not be as chewy), corn starch, baking soda, salt, and mix until just combined, about 1 minute. Add the chocolate chips and chunks, and either fold in by hand or beat for a few seconds on low speed. Transfer dough to an airtight container and refrigerate for at least 30 minutes, up to 5 days (although chilling the dough is theoretically not necessary; in reality cookies spread less with chilled dough).
  4. Preheat oven to 350F, line a baking sheet with parchment paper. Using a 2-ounce cookie scoop or a 1/4 cup measuring cup, form heaping mounds  and place them on the baking sheet, spaced at least 2 inches apart. Bake for 8 to 10 minutes, until barely golden brown around the edges, even if slightly undercooked in the center, noting the tops will not be browned and will be pale. Do not cook longer than ten minutes as cookies will darken and firm up as they cool. Allow cookies to cool on the baking sheet for 5 minutes before removing and transferring to a rack to finish cooling. Store cookies in an airtight container at room temperature for up to 5 days or in the freezer for up to 3 months.  Alternatively, unbaked cookie dough can be stored in an airtight container in the refrigerator for up to 5 days, so consider baking only as many cookies as desired and save the remaining dough to be baked in the future when desired. 
Linked to Crazy Sweet Tuesday

 Chef In Training