Thursday, July 23, 2020

Easy Oatmeal Cookies

Easy Oatmeal Cookies - made dough July 8, 2020 from Averie Cooks
I have a favorite oatmeal chocolate chip cookie recipe already but I've tried many good recipes from Averie Cooks so I thought I'd try this one as well.
The advantages of this recipe is it's easy to mix by hand in a bowl and doesn't require chilling. So it's a good recipe for a novice or someone who doesn't bake that often. That would not be me so I didn't take advantage of the touted benefits. I mixed it in my kitchen aid and did my usual thing of portioning into dough balls and freezing before baking.

So I can't tell you how these would've turned out otherwise but they did turn out well. It's a standard oatmeal chocolate chip cookie recipe. It didn't topple my current favorite recipe but it was still good. And if you make it the easy way like Averie suggests, I'm sure it would still turn out well.


1 large egg
1/2 cup unsalted butter
1/2 cup brown sugar, packed
1/4 cup granulated sugar
2 teaspoons vanilla extract
1 1/2 cup old-fashioned whole rolled oats
3/4 cup all-purpose flour
1/2 teaspoon baking soda
1/2 teaspoon salt
1 cup chocolate chips
  1. Preheat oven to 350 degrees F. Line baking sheets with parchment paper.
  2. In a medium-size bowl, cream together butter, brown sugar and granulated sugar. Add egg and vanilla extract; mix briefly just to combine. 
  3. Add oats, flour, baking soda and salt, mixing until just combined. Fold in chocolate chips.
  4. Portion into dough balls and evenly space on baking sheets. Bake 10-12 minutes or until edges are set and middles no longer look raw. Remove to wire rack and let cookies cool completely.

Tuesday, July 21, 2020

Peanut Butter Nutella Swirl Cookies

Peanut Butter Nutella Swirl Cookies - made July 7, 2020 from Six Sisters Stuff
One of my favorite cookies (yes, the list is long) is Almond Butter Nutella Swirl Cookies. It's one of the cookies I love so much that I rarely make it or else I would eat the whole batch. No, I'm not kidding. I love the flavor, the texture and the decadent swirls of Nutella in each chubby cookie.

Considering how much I liked them, it's a little surprising that I haven't thought to do the whole swirly Nutella thing in peanut butter cookies before. I've swirled Nutella in chocolate chip cookies and sometimes substitute Nutella swirls for the chocolate chips. But I didn't think to do it in peanut butter cookies. Until now.

Credit for the combination and the recipe go to Six Sisters' Stuff. Credit for the updated look of the "crosshatches" using the pointed end of a meat mallet rather than criss-crossed fork tines goes to my friend Annie the Baker. I've rarely used my meat mallet for meat. But it's very familiar with peanut butter cookie dough.

For the most part, this worked really well. You never want to mix the Nutella into the cookie dough since you want distinct swirls of Nutella in each cookie. Making the crosshatch indentations can be a bit tricky as only the peanut butter cookie dough, not the Nutella, will carry an impression. The Nutella will simply stick. I dip the mallet in granulated sugar before making the indentations to keep the mess to a minimum while still achieving the indentations.

I say "for the most part" because, while this was a good cookie, I think I prefer my favorite peanut butter cookie recipe instead. So I'd probably make that recipe and swirl it with Nutella. Then I would have a peanut butter version along with the almond butter version that I like so much. Regardless, swirling Nutella in any flavor cookie can only be a good thing. Try it.


1/2 cup unsalted butter
3/4 cup smooth peanut butter
1/2 cup granulated sugar
1/2 cup brown sugar, packed
1 egg
1/2 teaspoon vanilla extract
3/4 teaspoon baking soda
1/4 teaspoon salt
1 3/4 cups all-purpose flour
1/4 cup Nutella
  1. In the bowl of a stand mixer fitted with the paddle attachment, cream together the butter, granulated sugar and brown sugar until no butter lumps remain. Add peanut butter and cream until mixed.
  2. Add egg and vanilla extract; beat until just combined.
  3. Add flour, baking soda and salt, mixing until just combined; do not overmix.
  4. Warm up Nutella in a small bowl for 20 seconds in the microwave. Drizzle over cookie dough and swirl until marbled but not absorbed into dough. Portion into dough balls and lightly press with pointed side of a meat mallet or fork tines to make the cross hatches. Cover and chill or freeze for several hours or overnight.
  5. When ready to bake, preheat oven to 350 degrees F and line baking sheets with parchment paper. Evenly space cookies and bake 8-10 minutes or until cookies are set and middles no longer look raw. Transfer to wire racks and cool completely.


Saturday, July 18, 2020

Bakery Style Soft Sugar Cookies

Bakery Style Soft Sugar Cookies - made dough June 28, 2020 from Gluesticks
Although I already have a favorite recipe for Sugar Cookies and an even bigger favorite for Brown Sugar Cookies, I think I had pinned this recipe from Gluesticks around the same time as the other two but had never made it before so it seemed like I should try it out.
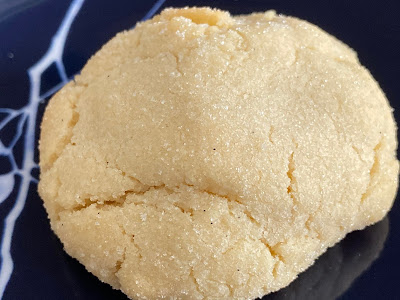
What I like about this recipe is, as you can tell from the pictures, the cookies don't spread much. Or hardly at all. Which makes them a nice thickness.
The reason they don't spread is the recipe calls for more flour than usual, considering the amount of butter and shortening. The dough was a bit dry when I mixed it up so I did end up adding a little extra vanilla extract. It was still a little dry but I didn't want to add too much liquid or it could affect the composition (spread) of the cookie. So I formed the dough balls by hand and the heat from my hands helped the dough stick together a little better.
Because the dough is more dry and less butter (as displaced by the shortening), you definitely don't want to overbake these. Err on the side of underbaking as these can have a dry mouthfeel even if "perfectly" baked. I underbaked like I usually did and, while the cookies weren't dry exactly, they didn't have as much of the "fudgy" texture an underbaked cookie usually has (see pictures from Brown Sugar Cookies to see what I mean).
The flavor was still good though. The original recipe called for almond extract but I don't like almond extract (almonds yes, almond extract no) so I used all vanilla extract and even a little vanilla bean paste. The upside is these were sturdy cookies so I felt fine vacuum sealing them and adding them to the military care packages I was sending out. These should survive the mail just fine and not arrive as crumbs.
1 cup butter
1/2 cup shortening
1 1/2 cups granulated sugar
1 egg
1 1/2 teaspoons vanilla
2 teaspoons almond extract (I substituted vanilla extract and vanilla bean paste)
4 cups all-purpose flour
1/2 cup cornstarch
2 teaspoons baking powder
  1. In a large mixing bowl, cream together butter, shortening and sugar until fluffy and well combined. Add egg, vanilla and almond extract. Mix to combine. 
  2. Whisk together flour, cornstarch and baking powder in a separate bowl. Add in thirds to butter mixture, mixing after each addition until just combined. Do not overmix.
  3. Flour a clean work surface and roll dough into a large ball. Roll out to desired thickness and cut into desired shapes. Line up on a baking sheet, cover and chill for 30-60 minutes, optional but recommended.
  4. Preheat oven to 325 degrees F. Line baking sheets with parchment paper and evenly space chilled cookies. Bake 10-12 minutes. Remove to wire rack and let cool completely. 

Thursday, July 16, 2020

Coconut Blondies

Coconut Blondies - made June 25, 2020 from Shutterbean
Still going through my blondie bar phase. All these bar cookies were going in care packages as fast as I could bake, cool, cut and vacuum seal them. I and the rest of the Soldiers Angels Angel Baker team were trying to get baked goods out to every service member who had signed up and had a mail stop date coming up in the very near future. The window was closing to mail out to ensure the packages would arrive in time so I put on the turbo boost of bar cookie baking.

This was one of them. I'm not fond of nuts in baked goods but, as I have to remind myself, I'm not the one eating these and not everyone has the same prejudice I do about it. This recipe made a 9 x 13 pan so I knew I could get enough bar cookies out of them to supply 2-3 care packages.
Whenever you bake with nuts, toast them first to bring out their flavor. In culinary school, our chef instructors always said if the nuts are going inside the dessert, toast first before adding. If they're going on the outside, no need to toast as they will toast during baking. As with many other things in life, I chose to ignore that instruction and I toast the nuts regardless of whether they're baked on the inside or outside. I prefer the taste and texture of toasted pecans (and almonds) in particular to feel just fine ignoring professional advice about it.
As you'd expect in a blondie, this was sweet with just the right brown sugar overtones. The coconut adds great chewiness but it really is the toasted pecans (ha) that add both an additional crunch but also cuts the sweetness of the bar cookie.
If the top is getting too brown but the blondies aren't done yet, lightly cover with foil when the top has reached the desired color, usually just past the halfway mark.
2 sticks (1 cup) unsalted butter
2 cups brown sugar, packed
1 teaspoon vanilla extract
2 large eggs
1 1/2 cups all-purpose flour
3/4 teaspoon baking soda
3/4 teaspoon salt
1 1/2 cups pecans, toasted and cooled
2 cups sweetened, flaked coconut, divided
  1. Preheat oven to 350 degrees F. Line a 9 x 13-inch baking pan with foil and lightly spray with nonstick cooking spray.
  2. Melt butter in a small saucepan over low heat. Measure brown sugar into mixing bowl and pour melted butter over it. Mix to combine. Add vanilla and mix to combine. Add eggs, one at a time, whisking after each addition to combine.
  3. In a separate bowl, whisk together flour, baking soda and salt. Add to butter mixture in two additions, beating on low speed after each addition until just combined.
  4. Stir in pecans and 1 1/2 cups coconut. Spread batter into prepared pan, smoothing top into an even layer. Sprinkle remaining coconut on top. Bake until toothpick inserted into the center comes out clean, about 35-40 minutes. Let cool completely before cutting and serving.

Tuesday, July 14, 2020

Brownies from The Food Charlatan

Brownies - made June 26, 2020 from The Food Charlatan
You know all the directions in brownie recipes that call for baking the brownies until the toothpick comes out "clean" or "with a few moist crumbs"? I decided to illustrate that in this post so people know what I'm talking about when I blog it and the difference you can expect between "raw" and "underdone" or "done enough". Note: not overbaked.
But first a shout out to a new source for unsweetened chocolate. I normally buy them by the hefty poundage from Scharffenberber, a 10-lb bag that costs enough for me to mortgage a piece of my soul. It lasts a long time though so I usually don't mind once I work it into my budget. But this time around, when I was getting low and it was time to reorder, it wasn't available on the Scharffenberger site. Erk.
But google is my friend so I was able to poke around on the internet and find a 5-lb bag from Cacaoholic. A 5-lb bag of unsweetened chocolate goes for $40 shipped. While it still requires a piece of my budgeting soul, albeit a smaller one, I needed a good bulk source. Chocolate is life and I can talk myself into anything. Plus I've been eating ramen and such to make up for the expense.
Back to the toothpick test. The first picture above is what the toothpick looked like after the brownie had been baking for 25 minutes. Every oven is different so never take the recipe baking guidelines as gospel. They're just that - guidelines. My oven doesn't run as hot as I'm used to. Normally I would check the brownie after 20 minutes but since I knew my oven lagged, I checked at 25 minutes. You don't want to check too soon or too often because every time you open the oven door, you let heat out and the temperature drops, thereby setting your brownie baking time back further. As you can see from the pic above, this is what I mean when I put in the baking instructions that you want a few moist crumbs on the toothpick, "not raw batter". Above is raw batter.
The second toothpick picture (always use a fresh toothpick for each test for doneness) - and sorry for the blurriness, my camera phone wasn't cooperating - is a little closer to doneness but there's still raw batter at the end. Not done yet.
Success at last with the third test, between 6-9 minutes after the last test. No raw batter and a few moist crumbs at the end. I don't like to bake until the brownies yield a completely clean toothpick. By then I always think the brownies will be too dry.
Here's what the texture of the brownies looked like with that third toothpick test, after they had cooled completely. Not dry, still fudgy, not too raw or underdone.
Since chocolate sets when it cools, you do have a little leeway. If you want a more firm brownie, you can bake a few minutes longer. A cakey brownie, potentially even a few minutes more. But I'll stick with my third toothpick test result.
Oh and the chocolate from Cacaoholic worked just fine in these brownies. This was a good brownie with a nice fudgy texture and flavor.
1 1/4 cups butter
4 ounces unsweetened chocolate, chopped
2 1/2 cups granulated sugar
1 tablespoon water
2 teaspoons vanilla extract
4 large eggs
1/2 teaspoon salt
1 cup all-purpose flour
1 1/4 cups chocolate chips
  1. Preheat oven to 350 degrees F. Line a 9 x 13 baking pan with foil and lightly spray with nonstick cooking spray.
  2. In a heavy duty saucepan over medium heat, melt butter, stirring until foamy and browned bits form. Turn off heat and immediately add unsweetened chocolate. Whisk until chocolate is melted and mixture is smooth and combined.
  3. Add granulated sugar and mix until combined. Add water and vanilla extract, whisking until combined. Add eggs, one at a time, mixing until incorporated. Add flour and salt, mixing until no flour streaks remain. Do not overmix. Fold in chocolate chips.
  4. Pour into prepared pan and smooth top with small metal spatula. Bake until a toothpick inserted in the center comes out with a few moist crumbs, about 25 minutes.  Cool completely before cutting and serving.

Sunday, July 12, 2020

Beef and (Ramen) Noodles

Beef and (Ramen) Noodles - made June 20, 2020 from Salt and Lavender
We interrupt the bar cookie posts for a random real-food post.
I went back to a ramen noodle recipe as I consistently seem to prefer noodles over rice. This was easy to make because you just throw the sauce ingredients together, boil the noodles, quick-fry the meat and toss it all together.

I am predisposed to like simple dishes, especially involving meat and noodles so this was a no-brainer for me.
The only cautionary tale is not to overboil the ramen noodles because they'll get too mushy and don't overcook the beef either as it'll get too tough. I'm not a big fan of sriracha so I went skimpy on it but this still tasted fine.
1/2 tablespoon olive oil
1/2 medium onion, sliced
1 pound sirloin steak (I used flank steak), sliced thinly
3 packages ramen noodles, seasoning packets discarded

Sauce
1 tablespoon soy sauce
2 tablespoons hoisin sauce
1 tablespoon sriracha sauce
1 teaspoon toasted sesame oil
juice of 1/2 lime
1 clove garlic
1 tablespoon water
  1. Bring a large pot of water to a boil. Add the noodles and boil for several minutes. Drain.
  2. Whisk together sauce ingredients in a small bowl.
  3. In a separate skillet, add olive oil and, when heated, saute onion until softened and lightly browned.
  4. Add the steak strips and stir fry for several minutes, until desired doneness. Add sauce ingredients and ramen noodles. Toss together until coated. Serve warm.

Friday, July 10, 2020

Butterscotch Toffee Blondies

Butterscotch Toffee Blondies - made June 25, 2020 from Spicy Southern Kitchen
Another toffee blondie recipe. If you're noticing a sameness to my recent posts, it's because all the brownies and bar cookies are still going in care packages for deployed military service members for Soldiers Angels and I'm still doing fewer chocolate desserts because of mailing in hot summer temps, both at their origin and destination.
I made a half recipe of this one (click on the post title for the full original recipe) as I was baking several things and wanted a good variety for each box.
At first the bar cookie raised uniformly and baked evenly. But towards the end, the sides continued to rise while the middle sank. It sank after I did a toothpick test in the center so I wonder if opening the oven door and poking in the toothpick released some air it shouldn't have.
But regardless of how it looked in the end, this was a pretty good blondie, especially if you like that brown sugar/butterscotch and toffee flavor combination. I also threw in the last of my pastel M&Ms to clear them out of my pantry so they added some chocolate and crunch.
1/2 cup unsalted butter, softened
1 1/2 cups packed brown sugar
2 large eggs
1 teaspoon vanilla extract
1 1/2 cups all-purpose flour
1/2 tablespoon (1 1/2 teaspoons) baking powder
1/4 teaspoon salt
1/2 cup toffee bits
1/2 cup butterscotch morsels
  1. Preheat oven to 350 degrees F. Line an 8 x 8-inch baking pan with foil and lightly spray with nonstick cooking spray.
  2. In the bowl of a stand mixer fitted with the paddle attachment, beat together butter and brown sugar until fluffy, about 2 minutes.
  3. Add eggs, one at a time, mixing briefly after each addition. Beat in vanilla extract.
  4. In a separate bowl, whisk together flour, baking powder and salt. Add to butter mixture in 2 additions, mixing briefly on low speed until just combined. Fold in toffee bits and butterscotch morsels.
  5. Spread in an even layer in the prepared pan. Bake until toothpick inserted near the center comes out clean, 35-45 minutes. Cool completely before cutting and serving.