Friday, January 13, 2023

Chocolate Chip Cookies from Urban Apron

Chocolate Chip Cookies - made dough January 1, 2022 from Urban Apron
1/2 cup (1 stick) unsalted butter
1/2 cup shortening
3/4 cup brown sugar, packed
3/4 cup granulated sugar
2 large eggs
1 teaspoon vanilla extract
1 teaspoon salt
1 teaspoon baking soda
2 3/4 cups all-purpose flour
2 cup chocolate chips or chunks
  1. In the bowl of a stand mixer fitted with the paddle attachment, cream together butter and shortening until well combined and creamy with no lumps. Add brown sugar and granulated sugar and beat until well combined.
  2. Add eggs, one at a time, mixing on low speed after each addition. Add vanilla and beat until just combined.
  3. Add salt, baking soda and flour, mixing on low speed, until just combined. Fold in chocolate chips.
  4. Portion dough into golf-ball size dough balls, cover and chill or freeze for several hours or overnight.
  5. When ready to bake, preheat oven to 375 degrees F. Line baking sheets with parchment paper and evenly space dough balls. Bake 9-10 minutes. Remove from oven and let rest on baking sheets for several minutes before transferring to wire rack to cool completely.
You may see me trying out different recipes for chocolate chip cookies more often again. It's partly because I'm trying to clear out my pinterest boards (a never-ending quest) and partly because chocolate chip cookies are the most popular and requested items from deployed military service members.
If I'm going to keep making them for military care packages, I need some variety in what I'm mailing out, even if the service members will neither know nor care what recipe I'm using, lol.
Fortunately, this one did not go the way of thin, flat, spread out with abandon cookies like some of my earlier tried and true recipes have done because of the more-water-in-the-butter issue of the past few months. I don't think it was necessarily the recipe as much as I'm now just adding more flour than the recipe might call for until I'm satisfied with the texture of the cookie dough. You don't want to add too much or it'll affect the final texture and flavor of your cookie but a couple of extra tablespoons doesn't hurt if your dough is too soft and sticky.

These came out fine and are your basic, good chocolate chip cookies with crisp edges, chewy middles and a nice caramelized brown sugar flavor. 


Wednesday, January 11, 2023

Crumbl Copycat Cinnamon Fry Bread from Lifestyle of a Foodie

Crumbl Copycat Cinnamon Fry Bread - made dough December 28, 2022 from Lifestyle of a Foodie 
1 stick unsalted butter, softened
3/4 cup granulated sugar
1/4 cup brown sugar
1 large egg, room temperature
1 teaspoon vanilla extract
2 1/3 cups all-purpose flour
3/4 teaspoon baking soda
1/4 teaspoon cream of tartar
1/4 teaspoon salt
1 teaspoon cinnamon
3 tablespoons sweetened condensed milk

Cinnamon buttercream, optional
4 tablespoons butter
1/2 cup powdered sugar
1/4 teaspoon cinnamon
1/4 teaspoon vanilla extract
  1. Preheat oven to 325 degrees F. Line baking sheets with parchment paper.
  2. In the bowl of a stand mixer fitted with the paddle attachment, cream together butter, granulated sugar and brown sugar until light and fluffy. Add egg and vanilla extract and mix to combine.
  3. In a separate bowl, whisk together flour, baking soda, cream of tartar, salt and cinnamon. Add to butter mixture and mix on low speed until just combined.
  4. Portion into 8 equal-sized dough balls and flatten each ball slightly to thick discs, at least 2/3-inch thick. Evenly space on baking sheets, leaving cookies 2 inches apart.
  5. Drizzle each cookie disc with about 1/2 to 1 teaspoon sweetened condensed milk. Bake for 15 minutes. Remove from oven and let rest on baking sheets until lukewarm. Remove to wire cooling rack to cool completely before frosting.
  6. Make the buttercream: cream butter, sugar, vanilla extract and cinnamon until smooth and fluffy. Top each cooled cookie with about 1/2 to 1 tablespoon of cinnamon buttercream.
I didn't quite make this exactly like a Crumbl copycat as you know I'm not about the frosting and this is supposed to have a dollop of it. But I was intrigued by the idea of drizzling sweetened condensed milk over a cookie and wanted to see what that would add.
As you can tell by the picture above, I didn't drizzle so much as "envelope" the cookie dough balls. That was on purpose as I really did want to see how they'd turn out. During baking, it turns out the baked sweetened condensed milk obligingly did envelope the cookie, even down to the edges of the bottoms.
Which made removing them from the baking sheet a bit sticky-tricky but hence why I always use parchment paper. Don't try this at home without parchment paper. Not unless you want to be scrubbing your baking pans after.
The cookies might look more underdone than they actually are but you can see from the bottom of the cookie below that they're not. It's the sweetened condensed milk baked on top that gives them that appearance.
Taste-wise, I thought this was good. I liked the texture. The baked sweetened condensed milk over the top of the cookie makes it more chewy, not crisp, which isn't surprising. It's like a dense sugar cookie but not as sweet as one. The cinnamon isn't as pronounced but was still present. Not sure this will stand out later to me as more than a dense, chewy cookie but I liked it at the time. Oh, and in fairness, I can't say I've had fry bread before so I can't evaluate this well in terms of having the cookie version of it.


Monday, January 9, 2023

Graham Cracker Cookies from The Kitchn

Graham Cracker Cookies - made dough December 28, 2022 from The Kitchn
2 cups graham cracker crumbs
1/4 cup granulated sugar
2 tablespoons dark brown sugar, packed
1/2 teaspoon baking soda
1/4 teaspoon salt
6 tablespoons unsalted butter, melted and cooled
1 large egg, lightly beaten
1/2 teaspoon vanilla extract
  1. In a large bowl, whisk together graham cracker crumbs, granulated sugar, dark brown sugar, baking soda and salt. 
  2. Add melted butter, beaten egg and vanilla extract, stirring with wooden spoon or rubber spatula to combine into a soft dough. Portion into golf-ball-size or smaller dough balls. Cover and chill for an hour or more.
  3. When ready to bake, preheat oven to 350 degrees F. Line baking sheets with parchment paper. Evenly space chilled dough balls 2 inches apart. Bake 8-10 minutes or until edges are set and middles no longer look raw. Let rest on hot baking sheets for 5 minutes before transferring to wire rack to cool completely.
I have to confess I consider this one another baking fail. If you click on the post title and go to the original blog post from The Kitchn, you'll see immediately what I mean. Mine looks nothing like what they're supposed to. I mean, they do look like they have graham cracker crumbs in them but the similarity ends there.
I had misgivings as soon as I had mixed the dough. I used packaged graham cracker crumbs instead of processing graham cracker sheets into crumbs but other than that, I followed the recipe exactly. But I suspect that was the problem - using the packaged crumbs yielded too much and the resulting dough was dry. Heck, it couldn't even be called dough The texture was similar to what it would look like if you were making the graham cracker base for Magic Cookie Bars. Except even more dry than that.
It was challenging even to form the dough into balls. In hindsight, I should've added more butter to make a more liquid dough. But I (foolishly) hoped that baking would do its magic and transform them into a more cookie-like appearance instead of "I got a rock" cookies.

Flavor-wise, I confess I wasn't that impressed either. They just tasted like....graham cracker crumbs. Or more kindly, like graham crackers without the crunch. Ironically, I did like the texture as it was like a soft doughy cookie. Unfortunately, that was all I liked about it. Ah well, at least I tried something new.


Sunday, January 8, 2023

Instant Pot Indian Butter Chicken from Two Sleevers

Instant Pot Indian Butter Chicken - made December 15, 2022 from Two Sleevers 
1 14-ounce can canned tomatoes
5-6 cloves garlic, minced
1-2 teaspoons minced ginger
1 teaspoon turmeric
1/2 teaspoon cayenne pepper
1 teaspoon smoked paprika
1 teaspoon kosher salt
1 teaspoon garam masala
1 teaspoon ground cumin
1 pound chicken thighs, boneless or bone-in

To finish
4 ounces butter, cut into tablespoons
4 ounces heavy cream
1 teaspoon garam masala
1/4 - 1/2 cup cilantro, chopped
  1. Place all ingredients in instant pot in order listed until the chicken thighs. Mix well then add chicken. Seal lid and set instant pot to cook on high for 10 minutes. Let natural release for 10 minutes.
  2. Remove chicken from instant pot and blend remaining sauce with immersion blender. Let cool for 10 minutes then add butter, heavy cream, garam masala and cilantro, setting on manual. Whisk to combine. Add chicken back in. Serve hot with rice.
There's a restaurant in the Bay Area, CA called Amber India that served the best naan and butter chicken. I don't have a tandoor oven and no plans to stick my hand inside a 500-degree one to slap a piece of naan dough against the side to bake (been there, done that, thanks culinary school) but I can make butter chicken, thanks to this easy Instant Pot recipe.
Traditional Indian cooks might be horrified (or not) at this hack of their dish but my Instant Pot and my air fryer are my codependency partners in my cooking crimes so there you have it. I've had this recipe for awhile but not the spices so I had to wait until I made a big Penzeys buy to get the spices I needed. I don't know how authentic this butter chicken is and it's not quite Amber India standard but I thought it was good. The spices aren't overpowering at all and are quite subtle. One recipe does make a lot of sauce so I had to use twice the chicken for this dish. 

Saturday, January 7, 2023

Banana Blondies from The View from Great Island

Banana Blondies -made December 30, 2022 from The View from Great Island
1/2 cup unsalted butter, melted
1 cup brown sugar, packed
1 large egg
1 1/2 teaspoons vanilla
1/2 cup well-mashed banana, about 1 to 1/2 overripe bananas
1 cup all-purpose flour
1/4 teaspoon salt

Caramel Icing
1/4 cup butter
1/2 cup brown sugar
2 tablespoons cream or whole milk
1 cup powdered sugar
  1. Preheat oven to 350 degrees F. Line 9 x 9-inch baking pan with foil and lightly spray with nonstick cooking spray. (I recommend making in an 8 x 8-inch pan for thicker bars.)
  2. In the bowl of a stand mixer fitted with the paddle attachment, cream together melted butter and brown sugar until well combined. Add egg and vanilla, mixing to combine. Beat in mashed bananas
  3. Add flour and salt, mixing until just combined; do not overmix. Pour into prepared pan and smooth into an even layer. Bake 25-30 minutes or until center is set and toothpick inserted near center comes out clean or with a few moist crumbs.
  4. While cake is cooling, in a small saucepan, melt butter, brown sugar and cream or milk, whisking until well combined. Bring to a boil, whisking constantly, before removing from heat and adding powdered sugar, whisking until smooth and combined. Spread immediately over cake and spread evenly. Let cool before cutting and serving.
This is one of the rare times I made something with bananas and frosting. Since 99% of my baking goes into military care packages going overseas, I don't bake or send anything with frosting and nothing with fruit like bananas. The bake would be too moist to survive potentially long mailing times without molding, even if vacuum sealed.
But we had a family gathering at my sister's with my aunt and uncle in town so I seized the opportunity to try out this recipe that I've been meaning to make for ages. It turned out really well, flavorful and perfect cakey texture.
The only tweaks I would make for next time is to bake in a smaller pan (8 x 8) to make thicker bars and to cut back on the powdered sugar by at least 1/4 to 1/3 cup. The frosting set up quickly and set more like a thin penuche. Plus it was really sweet. Less powdered sugar would keep it as a softer frosting and cut back on the sweetness. But the cake part of the blondies was superb.


Thursday, January 5, 2023

Crumbl copycat Coconut White Chocolate Cookies from Lifestyle of a Foodie

1/2 cup butter, softened
1/2 cup + 2 tablespoons brown sugar
1 egg, room temperature
2 teaspoons butter vanilla emulsion or vanilla extract
1 1/3 cups all-purpose flour
2/3 cup sweetened toasted coconut flakes
1/2 teaspoon baking soda
1/4 teaspoon salt
2/3 cup white chocolate chips
1/2 cup sweetened untoasted coconut flakes for rolling the cookies
  1. In the bowl of a stand mixer fitted with the paddle attachment, cream together butter and brown sugar until light and fluffy. Beat in egg and vanilla butter emulsion.
  2. Add flour, toasted coconut, salt and baking soda; mix until just combined. Fold in white chocolate chips.
  3. Portion evenly into 7 large cookie dough balls. Roll in untoasted coconut flakes, flatten into discs 1" thick. Chill for 30 minutes.
  4. Preheat oven to 350 degrees and line baking sheets with parchment paper. Evenly space dough discs and bake for 11-12 minutes or until edges are set and middles no longer look raw. Let cookies rest on baking sheets for 20 minutes before transferring to wire rack to cool completely.
This is a cookie for coconut lovers. I can't remember if I've ever eaten the original Crumbl version of it (likelihood is high) but even if I have, clearly I can't remember what it tastes like so I don't know how true this is to the original.
But the copycat recipes from Lifestyle of a Foodie are consistently pretty good recipes in their own right and this one is no exception.
Coconut and white chocolate pair well with each other, especially in a brown-sugar-based cookie like this. It's a great combination overall, particularly in this recipe.


Roll the dough balls generously in flaked coconut to add to their appearance, texture and chewiness. This is a straightforward cookie to make for anyone who likes coconut.


Wednesday, January 4, 2023

Monster Cookies from Baking with Blondie

Monster Cookies - made dough December 27, 2022 from Baking with Blondie
1 cup unsalted butter, cold and cubed
1 cup brown sugar, packed
1/4 cup granulated sugar
1/2 cup creamy peanut butter
2 large eggs, cold
1 teaspoon vanilla
1/2 cup uncooked, old-fashioned oats
3 1/2 cups all-purpose flour
1 teaspoon cornstarch
1 teaspoon baking soda
1 teaspoon salt
1 cup semisweet chocolate chips
1 cup M&Ms
  1. Preheat oven to 410 degrees F. Line baking sheets with parchment paper.
  2. In the bowl of a stand mixer fitted with the paddle attachment, beat butter for 1 minute until light and fluffy. Add brown sugar and granulated sugar, beating on high speed for 3 minutes, until mixture is light and fluffy. Scrape down the sides and bottom of bowl to keep mixture even texutred.
  3. Beat in peanut butter, vanilla and eggs, one at a time, beating after each addition until well combined.
  4. Add in oats, flour, cornstarch, baking soda and salt, mixing on low speed until just combined. Do not overmix.
  5. Reserve 1/8 cup chocolate chips and M&Ms then fold in the rest of the chocolate chips and M&Ms.
  6. Portion dough into 8 equal-size dough balls and form into tall round balls. Evenly space 4 dough balls on each sheet and flatten slightly to thick discs. Hand press reserved chocolate chips and M&Ms onto the tops of each disc.
  7. Bake for 9-10 minutes. Remove from oven and let rest on baking sheets for 5 minutes then transfer cookies to wire rack to cool completely.
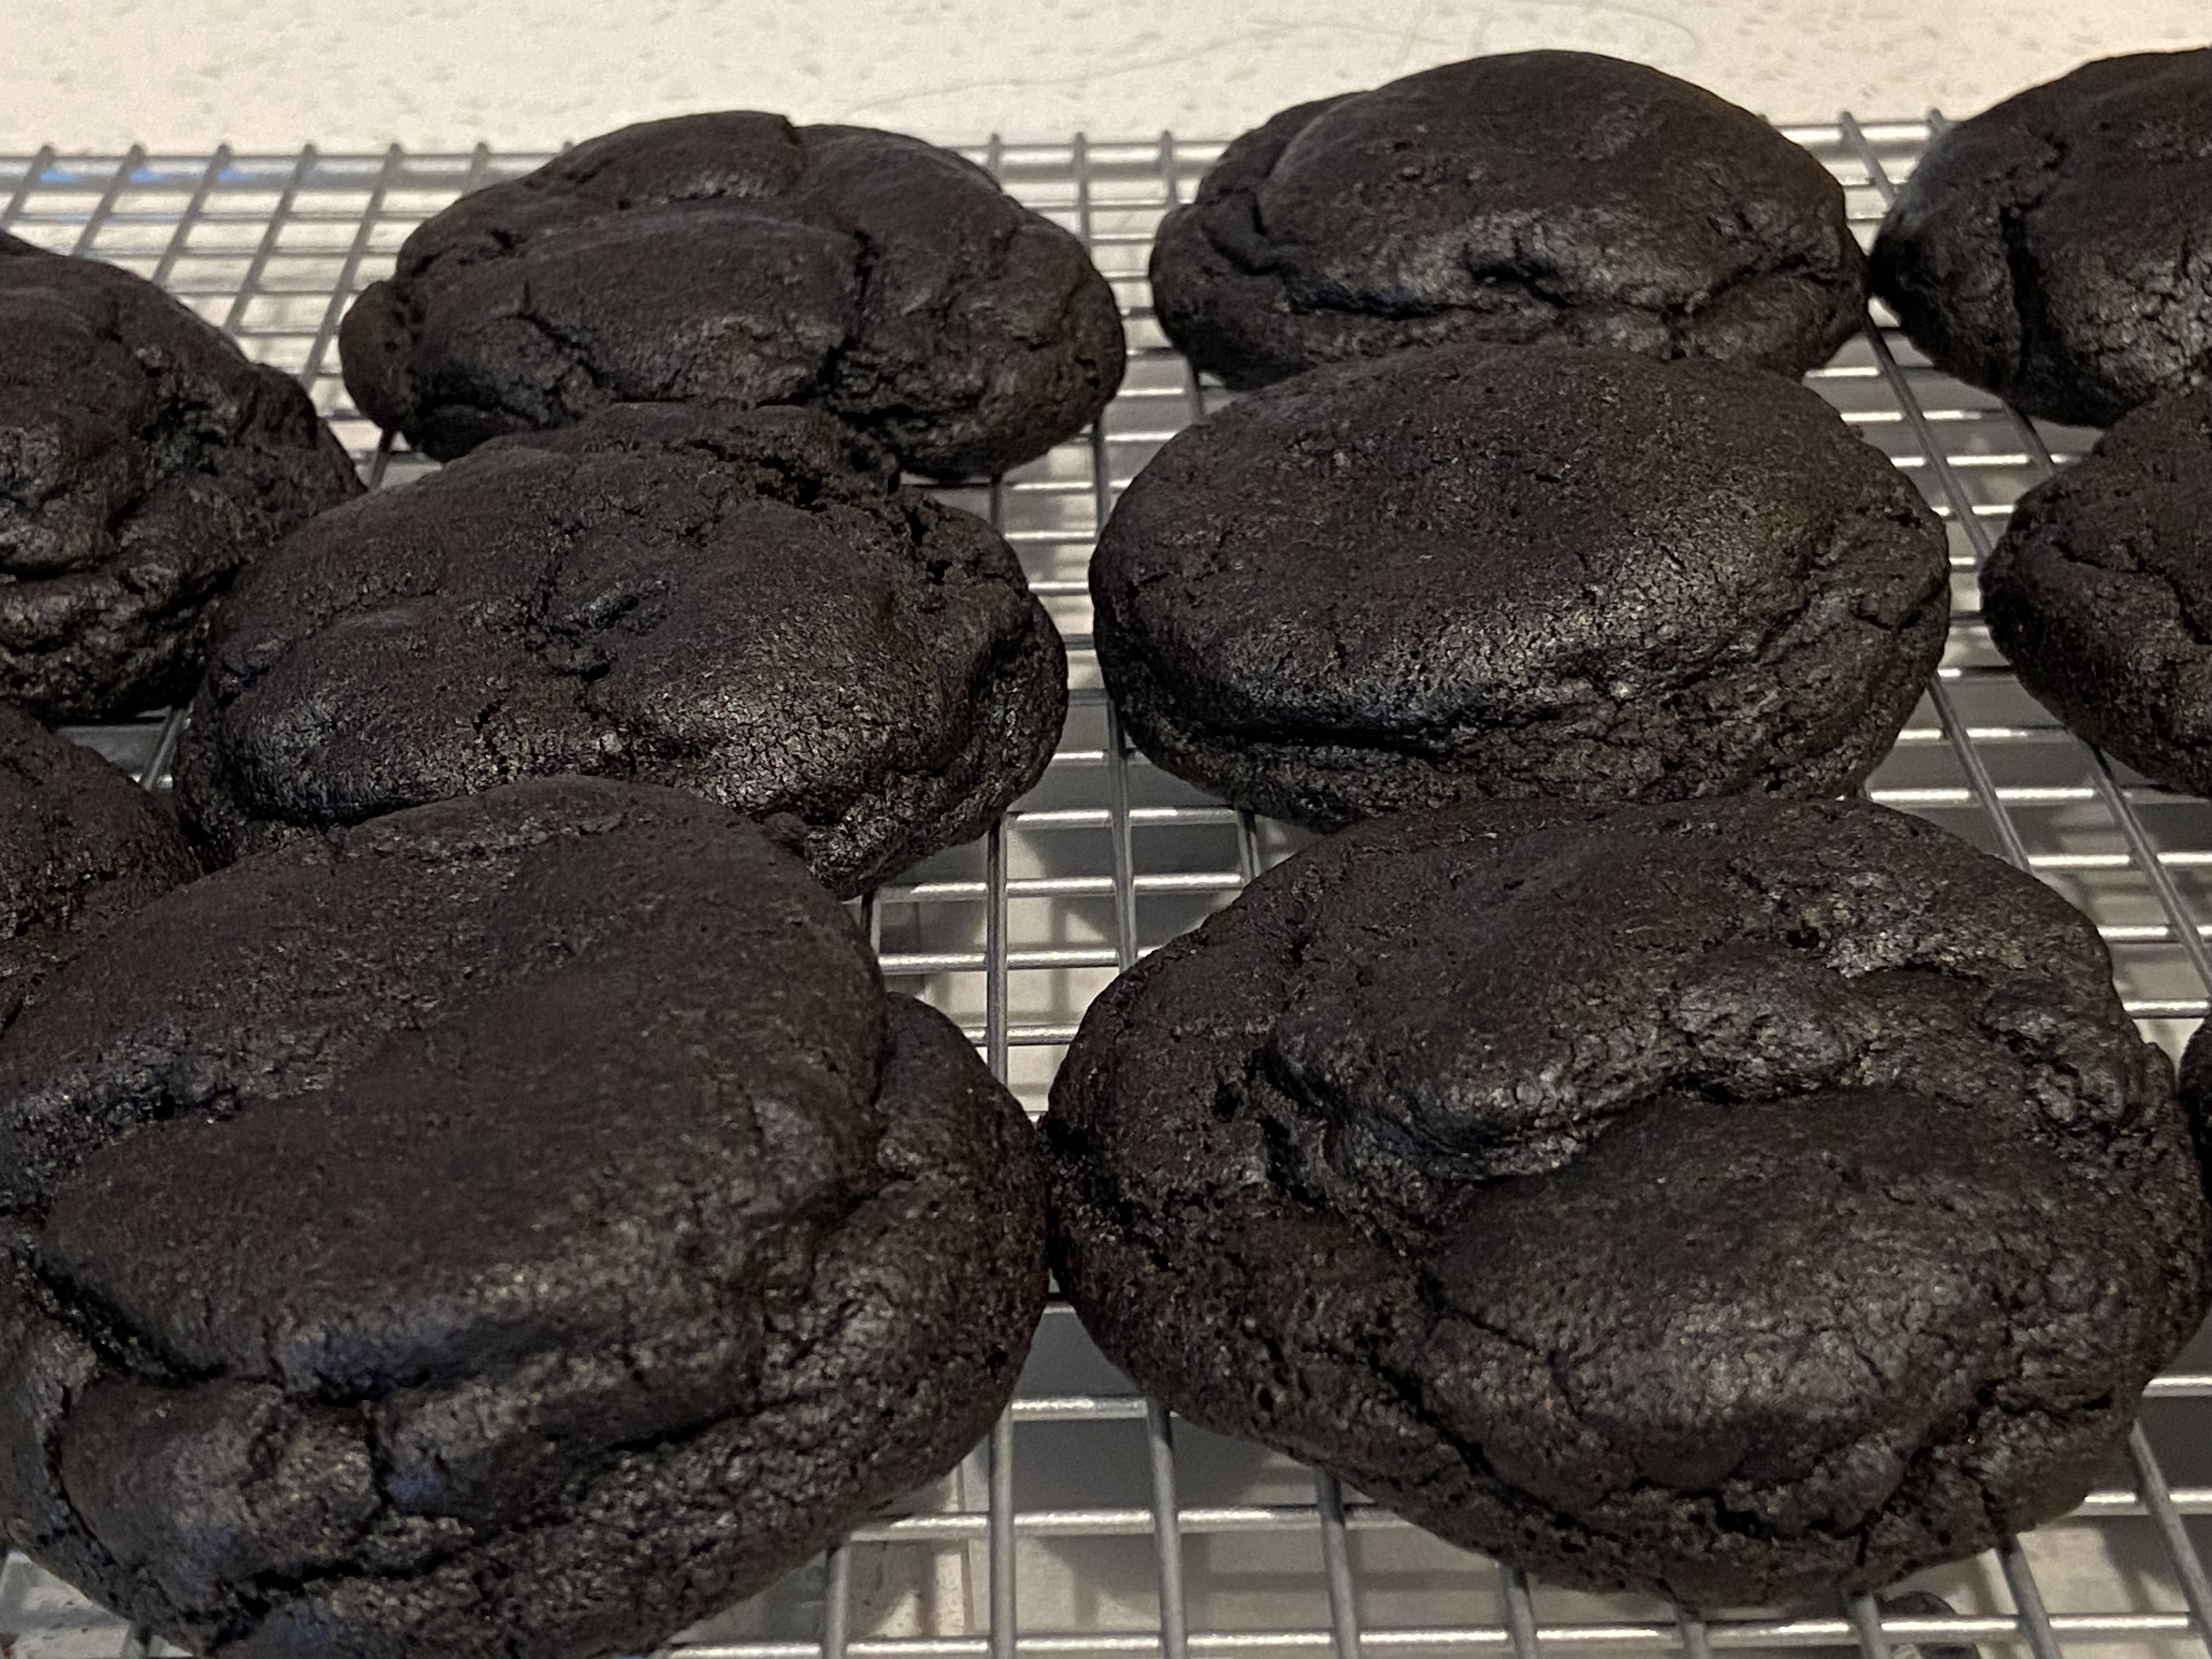
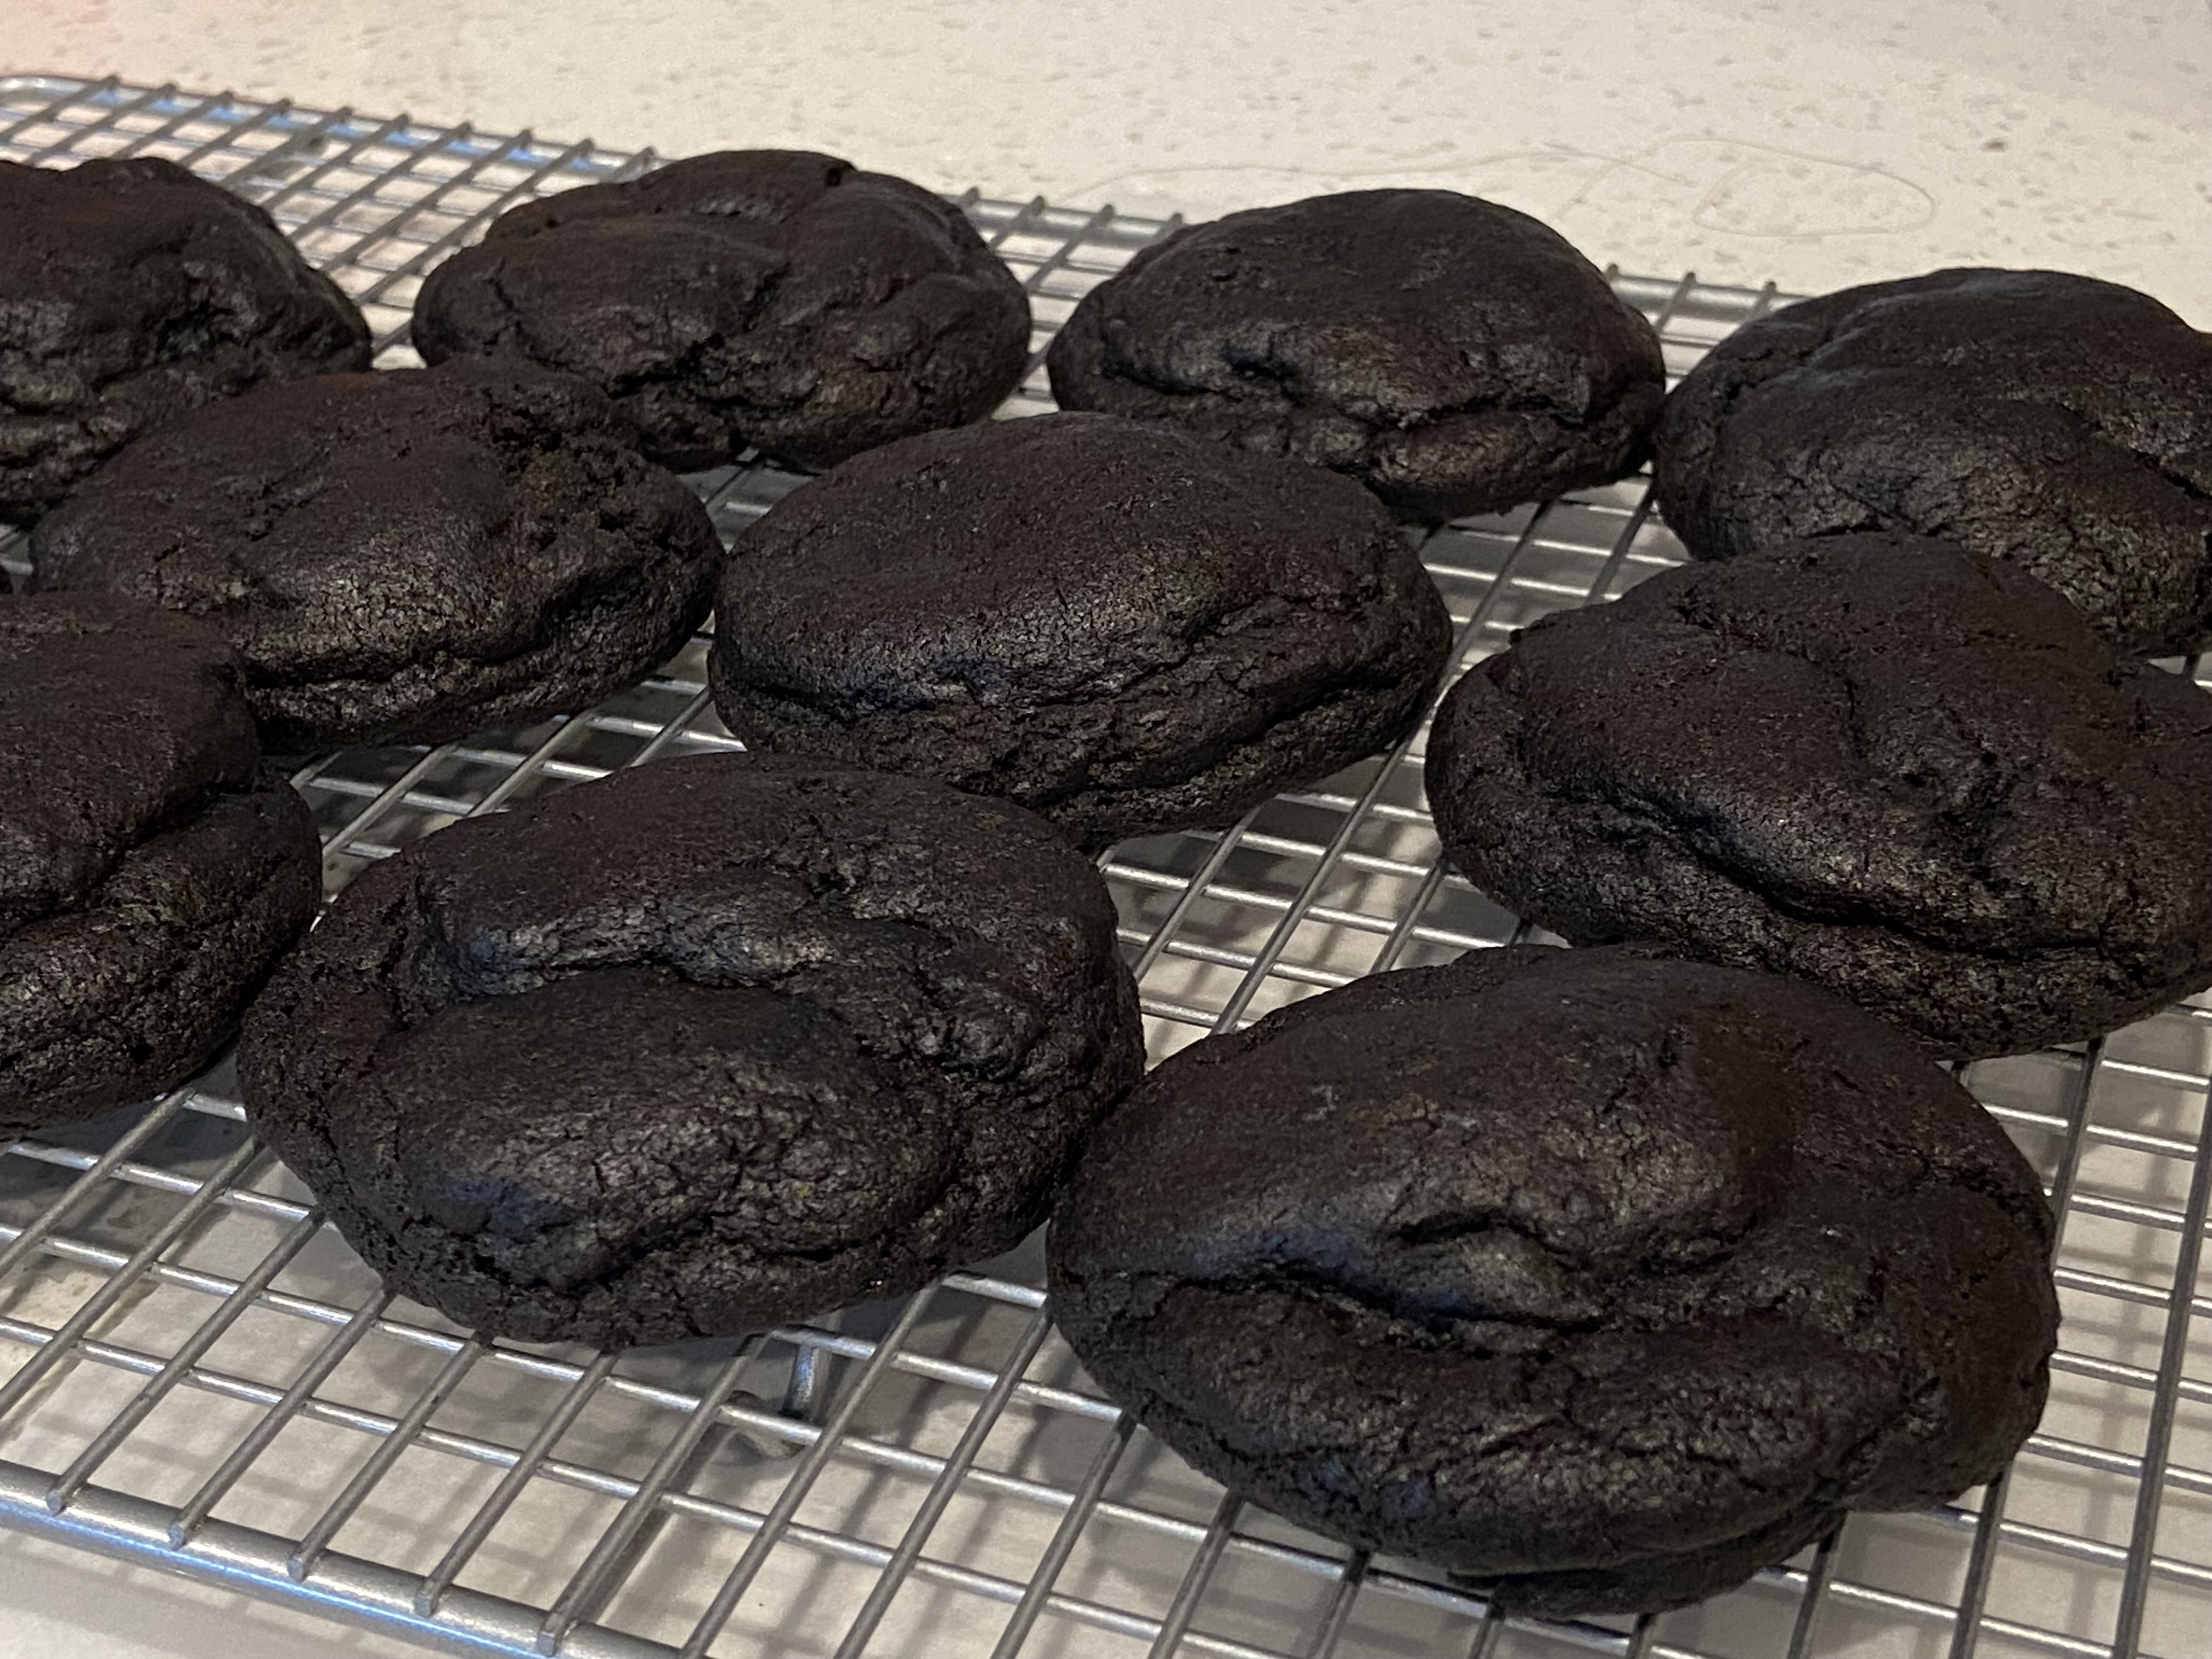
These were meant to be Giant Monster Cookies from Baking with Blondie's blog but I made all but the taste test cookie into smaller ones instead. Sometimes I like to make them all giant-sized for my care packages but for this particular one, I needed quantity so I portioned them into normal sizes. Easier to fit into the shipping boxes.

As with all the cookies from Baking with Blondie, the base recipe is similar (no need to mess with a good thing) and the flavoring (peanut butter) and add-ins are the main changes.

And just like all her other cookie recipes, this turned out well. There isn't a strong peanut butter flavor since it only contains a half cup so if you want to amp up the peanut flavor, add toasted chopped peanuts as one of the add-ins.

This is a soft, chewy texture, not crisp. Don't overbake it. You really only need to leave it in the oven at the 410-degree temperature for about 10 minutes (slightly less if you make them small) and then let them rest on the hot baking sheets for another 10 minutes to continue the bake.
These don't spread much so if you don't want a thick domed middle, press into thick discs for a more uniform bake.


Monday, January 2, 2023

Dark Chocolate Dark Brown Sugar Cookies from Averie Cooks

Dark Chocolate Dark Brown Sugar Cookies - made dough December 24, 2022 from Averie Cooks 
1/2 cup (1 stick) unsalted butter, softened
3/4 cup dark brown sugar, packed
1 large egg
1 tablespoon vanilla extract
1 1/2 cups all-purpose flour
1/2 cup unsweetened natural dark cocoa powder (I used King Arthur's black cocoa powder)
1 teaspoon cornstarch
3/4 teaspoon baking soda
pinch salt, optional and to taste
  1. In the bowl of a stand mixer fitted with the paddle attachment, cream together butter and sugar until light and fluffy, 3-4 minutes. Add egg and vanilla and continue beating until well combined, scraping down sides and bottom of bowl to keep mixture even textured.
  2. In a separate bowl, whisk together flour, cocoa powder, cornstarch, baking soda and salt, if using. Add in two addition to butter mixture and mix on low speed after each addition until combined.
  3. Portion into 2-tablespoon mounds, arrange on a flat plate, cover and chill in the refrigerator for at least 2 hours or overnight.
  4. When ready to bake, preheat oven to 350 degrees and line baking sheet with parchment paper. Evenly space cookies (they don't really spread much) and bake for 8-9 minutes or until edges have set. Do not bake longer than 10 minutes.
Happy New Year! Normally I'd stop baking and try my hand at cooking like I do every January but, also like every January, I'm still catching up from the baking recipes I tried in December so I've got some backlog posts to do. Let's start off the new year with a good one. Remember the Homemade Oreos that I didn't think tasted much like Oreos? Well, it's a little ironic that, without trying, I think I hit upon this recipe that actually does taste like the soft homemade version of Oreos and they weren't even trying to be.
I've had this recipe from Averie Cooks on my pinterest board for awhile and I'm trying to clear out recipes I've held onto for too long without trying them so I went with this one. If you don't use black cocoa, you'll likely get just a nice dark chocolate fudgy cookie. I did have and did use black cocoa and hence why I (accidentally) ended up with something closer to homemade Oreo cookies, sans filling.
Mine didn't look like Averie Cooks' on her blog but these were still good fudgy chocolate cookies. That tasted a little like Oreos, thanks to the black cocoa. I might have to try to make this as a thinner cookie and sandwich them with a vanilla buttercream to come up with a genuine, if accidental, version of homemade Oreos.