Thursday, March 5, 2020

Nutella and Hazelnut Crispy Rice Cereal Treats

Nutella and Hazelnut Crispy Rice Cereal Treats - made February 27, 2020 from America's Test Kitchen Everything's Chocolate
Ever since I made the Cookie Butter Rice Krispie treats, my mind - and palate - have been open to this concept of "dressing" up plain Rice Krispie treats. My simple tastes usually make me prefer the original but I liked the cookie butter one so much that I decided to try this Nutella version from my new cookbook.

Yes, I bought a new cookbook. Three of them, as a matter of fact but I haven't made anything yet from the other two (stay tuned, it won't be long, I bet). After being good for so long and not buying any, I bought 3 within a week. I'm not even sorry about it either so you know it's been awhile since I've indulged.

Anyway, hello Nutella Rice Krispies treats. They're as easy to make as the plain ones. Just make sure you have all your ingredients measured out and ready to go so once the marshmallows are just barely completely melted, you can add everything in. It doesn't do to let your melted marshmallows cook for too long or they'll harden and get even more rubbery (why, yes, that's the voice of experience you're hearing).

Despite the Nutella addition, these aren't super Nutella-y and still stay true to that Rice Krispies treats flavor. It helps to add the chopped toasted hazelnuts though to really bring that nutella and hazelnut flavor home. I liked these. I shared them with some former coworkers when we had a reunion breakfast as well as shipped them out in care packages for deployed service members. I love Rice Krispies treats so I'm glad to add another version to my repertoire.
8 tablespoon unsalted butter
2 (10-ounce) packages marshmallows
1/2 cup Nutella
2 teaspoons vanilla extract
1/4 teaspoon instant espresso powder
1/4 teaspoon salt
10 cups (10 ounces) crisped rice cereal
1/2 cup hazelnuts, toasted, skinned and chopped
3 ounces milk chocolate, chopped (optional)
  1. Line a 9 x 13 baking pan with aluminum foil and lightly spray with nonstick cooking spray.
  2. Melt butter in a large pot. Add marshmallows, Nutella, vanilla, espresso powder and salt. Cook, stirring often, until marshmallows are just melted, about 3 minutes. Off heat, stir in cereal until fully combined.
  3. Transfer cereal mixture to prepared pan. Sprinkle hazelnuts over cereal mixture. Smooth top with rubber spatula. Let cool then cut into squares.
  4. Optional (I left it out): Melt milk chocolate over low heat. Place in ziploc bag, seal and cut a corner to pipe onto rice krispie squares. Let set.

Tuesday, March 3, 2020

Brown Sugar & Cinnamon Cookies

Brown Sugar & Cinnamon Cookies - made dough February 17, 2020 from Hot Eats and Cool Reads
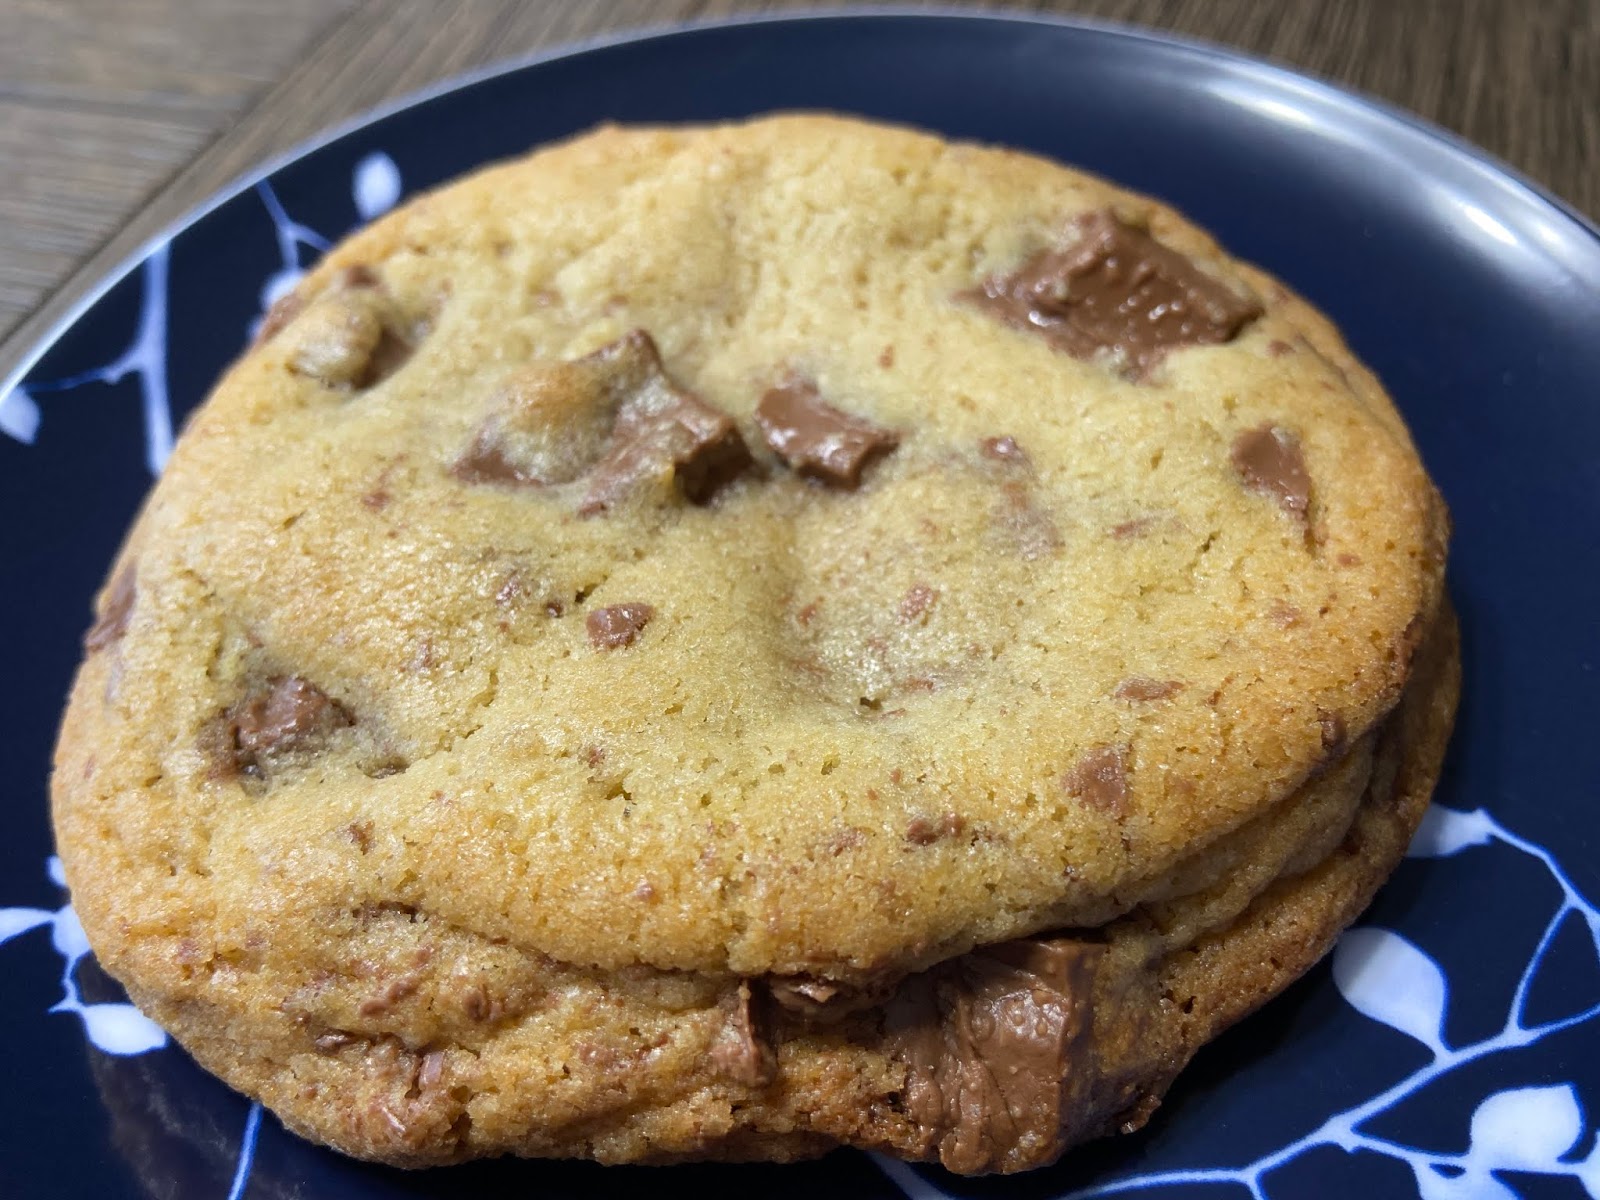
Normally I would look askance at a cookie that had the temerity to spread to thinness. I mean, come on, cookies need to be chubby. Since those delicious (and empty) calories can make you chubby, they should be chubby, right? Yes, that's how my mind works.
However, I might have to make an exception to that (completely logical) stance with these cookies. As you can tell from the pictures, they spread. Not only did they spread but they spread out. They started out as compact, thick discs (frozen), more like chubby round balls with their tops slightly - just slightly, mind you - flattened. 15 minutes in the oven and the middles spread out like a package-laden Christmas shopper settling in on public transportation. The one who decides to sit next to me.
I was a little miffed about that spread. Then I tasted the cookies. And I forgave. The flavor on these is superb. What's a little weird is they almost taste like ginger molasses cookies while not having a lick of ginger or molasses in them. The flavor is all driven by the brown sugar which had the good sense to transform in a deep caramel flavor without the stickiness of caramel.
The weird part? I don't even like ginger molasses cookies all that much but, despite its similar flavor profile, I loved these cookies. They're chewy and packed with great flavor. Now I just have to figure out how to prevent their spread.
I did end up packaging these up for my next care package to a deployed military service member for Soldiers Angels. They vacuum-sealed well enough and hopefully the deployed troops won't be as snobby as I am about thin (thin!) cookies as long as the flavor is there.

Update: I did make these a second time and made the adjustments suggested for high altitude (in parentheses below in the recipe). Unfortunately, while they didn't spread as much, they still spread thin. Fortunately, the flavor wasn't affected. So you can make the recipe as is or adjust accordingly, depending on your location.
2 cups all-purpose flour (for high altitude, add 1 tablespoon)
2 teaspoons baking soda (for high altitude, use 1 3/4 teaspoons)
1/2 teaspoon salt
3/4 teaspoon cinnamon
1 1/2 sticks butter, softened
1 1/4 cups dark brown sugar (for high altitude, decrease by 1 generous tablespoon)
1 large egg
  1. In a medium bowl, whisk together flour, baking soda, salt and cinnamon; set aside.
  2. In the bowl of a stand mixer, cream together butter and sugar until light and fluffy, 2-3 minutes. Add egg and beat until just combined. Add dry ingredients in two additions and beat after each addition, just until combined. Do not overmix.
  3. Portion into balls (the larger the cookie dough ball, the more it'll spread). Cover and chill or freeze for several hours or overnight.
  4. When ready to bake, preheat oven to 375 degrees. Line baking sheets with parchment paper and evenly space dough balls. Bake 8-10 minutes (mine took closer to 15) or until edges are set and middles no longer look raw. Remove from oven, let rest on baking sheets for 3-5 minutes then remove cookies to wire cooling racks to cool completely.

Sunday, March 1, 2020

Instant Pot Korean Beef

Instant Pot Korean Beef - made February 19, 2020, modified from I Heart Eating
After going through such a cooking storm at the end of last year, I completely lost my cooking mojo and have been living off frozen dinners (hello, Lean Cuisine), rotisserie chicken (Costco is my friend) and takeout (Panda Express, less of a friend but still a good acquaintance).

But as I was finally finishing up the leftover ham from Christmas (paced out thanks to storing portions in the freezer), I also decided I should try being a grown up again and adult myself to cooking a dish. Thankfully, with an Instant Pot, adulting is a little less painful.

Mix together ingredients, throw stuff in the Instant Pot and go away for an hour. Works for me. This turned out pretty well. You can increase the Gochujang if you like your meals with more kick but the 2 tablespoons was fine for me. I also thickened up the sauce (which initially had the consistency of thin gruel) with some cornstarch and let it boil for a few minutes. With some steamed rice to sop up the sauce and the beef becoming tender thanks to the pressure cooking, this is a quick, easy to make dish. My kind of cooking.

1/2 cup soy sauce
1/3 cup brown sugar
1/4 cup beef broth
5 cloves garlic, minced
2 tablespoons sesame oil
2 tablespoons rice vinegar
1 teaspoon ground ginger
2 tablespoons Gochujang sauce
1/2 teaspoon onion powder
1/2 teaspoon pepper
3-4 pounds boneless beef chuck roast, cut into 1-inch cubes
  1. In a medium bowl, whisk together ingredients except for chuck roast.
  2. Place cubed roast in Instant Pot. Pour sauce over meat. 
  3. Close the lid, making sure the pressure release valve is turned to "sealing".
  4. Press the Meat program button and set time to 40 minutes. Once it has finished cooking, keep pot closed for 25 minutes for the natural pressure release.
  5. Turn the pressure release valve to venting to allow any pressure to dissipate. Remove lid. If sauce is too thin, remove half a cup to a small bowl and whisk in 1-2 tablespoons of cornstarch to make a slurry. Turn pot to "saute" and add slurry back in. Stir, until sauce is desired thickness. Serve hot with steamed rice.

Friday, February 28, 2020

Chocolate Chip Cookies from Baking is a Science

Chocolate Chip Cookies - made dough February 17, 2020 from Baking is a Science
I'm trying  to space out the chocolate chip cookie recipes but you'll notice I've been making them a lot. Different recipes, sure, but still chocolate chip cookies.
That's mostly because I'm sending them in care packages to deployed military service members and also for my sister (she's a realtor) when she does Open Houses and wants fresh homemade cookies to serve. Who doesn't like chocolate chip cookies? (If you raise your hand, don't bother, I can't see you.)
But being me, I almost always have to try out a new recipe when I need chocolate chip cookies. The good news is I can usually tell if a recipe will turn out so there's little risk. Plus I make my own adjustments to stack the odds for success: freeze the dough, bake from frozen dough, underbake.
The bad news? I make so many recipes that I usually can't distinguish one from another. If they're good, I give them away and move on to the next recipe. A recipe has to be REALLY GOOD for me to remember it a day later. Mostly because I bake chocolate chip cookies so often that even the good recipes blend in my head.
So don't take it as a bad sign if I say these were great but I probably won't remember them a day after I make them. They're good, they're great, they're like many other good/great recipes I've tried. Bonus points that  they didn't spread like some other recipes, even baking in high altitude with my oven.


1/2 cup (1 stick) unsalted butter, softened
1 cup (7 ounces) dark brown sugar
1/4 cup granulated sugar
1 egg, room temperature
1/2 teaspoon vanilla
1 1/2 cups (9 ounces) bread flour
1/2 teaspoon baking soda
1/2 teaspoon salt
1 cup chocolate chips
  1. In the bowl of a stand mixer, cream butter, brown sugar and granulated sugar.
  2. Add egg and vanilla; mix only until just incorporated.
  3. In a separate bowl, whisk together flour, baking soda and salt. 
  4. Gradually add dry ingredients to butter mixture; mix just until combined. If dough is dry, finish mixing by hand. Fold in chocolate chips. 
  5. Form dough into golf-ball size dough balls. Cover and chill for 2 hours. Bake or freeze after chilling.
  6. When ready to bake, preheat oven to 350 degrees. Line baking sheets with parchment paper and evenly space dough balls. Bake for 12-14 minutes or until edges are set and middles no longer look raw.

Thursday, February 27, 2020

Jenny's Sugar Cookies

Jenny's Sugar Cookies - made February 13, 2020 from Jenny's Cookies
This was my (lame) attempt at a Mardi Gras look. I say lame because a fellow angel baker on the Angel Baker team from Soldiers' Angels posted her super-beautiful, royal-icing decorated Mardi Gras cookies and I was floored. I'm not even posting a pic of hers so only I will know how lame mine looks in comparison, lol.
unbaked
It's also kinda lame because all I did was sprinkle colored sugars in the Mardi Gras colors. That's the extent of my decorating prowess.
As for the cookies themselves, positive points that the dough came together well and was easy to work with, even for the rollout and the cookie cutting. Ultimately, this is a cookie that's best served as a base for an icing. It's not that sweet so it would be well served to be frosted or decorated with royal icing.
If you follow the directions to only bake 7-8 minutes, the bottoms will still be pale and the cookies will be a bit fragile. If you bake a few minutes more, long enough for the bottoms to be a pale golden brown, they'll be less fragile and - by definition - a bit more firm and chewy. Bake according to your preference.
These aren't that sweet and don't spread much so I'd recommend them more if you want a sugar cookie who'll keep its shape that you can decorate. But if you want a straightforward sugar cookie with great flavor, I'd still go with either the one from Butternut Bakery or from Easy Family Recipes.
3 cups all-purpose flour
2 teaspoons baking powder
1 cup (2 sticks) butter, room temperature
1 cup granulated sugar
1 large egg
2 teaspoons pure vanilla extract
  1. In a medium bowl, whisk together flour and baking powder; set aside.
  2. In the bowl of a stand mixer fitted with the paddle attachment, cream together butter and sugar until combined and fluffy, about 1-2 minutes.
  3. Beat in the egg and vanilla until combined. Scrape down sides of bowl with rubber spatula.
  4. On low speed, gradually add the dry ingredients. Mix just until combined and flour has been absorbed.
  5. Form dough into a ball and wrap in plastic wrap. Press into a 1-inch thick disc. Refrigerate for at least 10 minutes.
  6. Preheat oven to 375 degrees F. Line baking sheets with parchment paper.
  7. Roll out the dough on a lightly floured flat work surface to about 1/4" thickness, using additional flour as needed to prevent sticking. Cut into desired shapes and evenly space on prepared baking sheets. Bake for 7-8 minutes until puffy. Let rest on baking sheet for 2-3 minutes before transferring cookies to wire rack to cool completely.

Tuesday, February 25, 2020

Bibingka baked in banana leaves

Bibingka - made January 17, 2020 from Pinoy Cooking Recipes
My favorite version of bibingka (Filipino cake) is the sticky kind but occasionally I will go for the more cakey version, mostly because I like eating it warm with melted butter slathered on top, sprinkled with sugar and topped with coconut. It's childhood comfort food.
I tried out this recipe and found it was right in between the sticky and cakey versions in terms of its texture. It wasn't quite cakey like with the Bisquick version I remember my mom making but it wasn't the full-on mochi-like texture of the sticky kind. It was right in between..
The texture is likely due to using rice flour rather than wheat flour so this is gluten-free if your leavening agents are also gluten-free. I think I like this version better than the cakey version with wheat flour (or Bisquick) because it doesn't have the dry mouthfeel you sometimes get with (overbaked or day old) bibingka made with wheat flour.
It wasn't as dense as I was expecting but the flavor was good, especially if you go authentic and bake it in a pan lined with banana leaves. Don't forget slathering it with butter while it's still hot from the oven then sprinkling it with granulated sugar and coconut. This is best eaten warm.

1 cup rice flour
2 teaspoons baking powder
1/4 cup butter, softened
3/4 cup granulated sugar
3 eggs
1 cup coconut milk
1/4 cup whole milk
  1. Preheat oven to 375 degrees F. Line baking molds with banana leaves brushed with melted butter.
  2. Whisk together rice flour and baking powder; set aside.
  3. Cream butter and sugar together. Add eggs, on at a time, beating until combined after each addition.
  4. Add dry ingredients.
  5. Add coconut milk and whole milk, beating until smooth.
  6. Pour batter into prepared cups. Bake for 20 minutes or until a toothpick inserted near the center comes out clean.
  7. Remove from oven and brush tops with melted butter. Sprinkle with granulated sugar and top with grated coconut. Serve warm.

Monday, February 24, 2020

Levain Bakery copycat Chocolate Chip Cookies from 5 Boys Baker

Levain Bakery Copycat Chocolate Chip Cookies - made dough January 14, 2020 from 5 Boys Baker
I should've done the write up for these at the time I made them so I would've remembered them better and had something specific to say about them. Alas, I didn't so I don't.
But that only means this was a good chocolate chip cookie. They flattened too much for me to consider them a Levain Bakery copycat but I'm starting to realize my cookies are coming out flatter, regardless of the recipe, because of the higher altitude I'm baking in and my oven doesn't run as hot as my old oven back in the Bay Area used to.
It's taken me awhile to accept these outside forces so I haven't always remembered to compensate for them. Still, this was a good chocolate chip cookie recipe, even if it didn't stand out in a particular way. But that just means I've tried out a lot of good chocolate chip cookie recipes.

I do remember that I baked these and sent them in a care package for a deployed military service member on behalf of Soldiers Angels. I've been making chocolate chip cookies a lot for those care packages as I figure nothing says "home" like homemade chocolate chip cookies, especially when you're deployed. So that's why you've been seeing so many variations of different recipes for chocolate chip cookies on my blog lately. I've been trying them all plus making some of my favorite ones.

But I do have to stop considering these as Levain Bakery copycats if I'm not making them the behemoth size that Levain's does and I'm not adding walnuts to them so they wouldn't be a real copycat anyway. Just think of them as good chocolate chip cookies.


1 cup cold butter, cut into small chunks
1 cup brown sugar
1/2 cup sugar
1 teaspoon vanilla
2 eggs
1 1/2 cups cake flour
1 1/2 cups all-purpose flour
1 teaspoon cornstarch
3/4 teaspoon baking soda
3/4 teaspoon salt
2 cups chocolate chips
2 cups walnuts, roughly chopped (optional, I left them out)
  1. Preheat oven to 410 degrees F. Line baking sheets with parchment paper.
  2. In the bowl of an electric mixer, cream together the butter, brown sugar and granulated sugar for 3-4 minutes or until creamy. Add vanilla and eggs, one at a time, mixing well after each addition.
  3. Stir in both flours, cornstarch, baking soda and salt. Mix until just combined; do not overmix. Stir in chocolate chips and walnuts, if using.
  4. Portion dough into 8 6-ounce balls and evenly space on prepared baking sheets. Bake for 9-11 minutes or until edges are set and middles no longer look raw (mine took over 15 minutes in my oven). Cool completely.