Sunday, April 23, 2017

Truffled Walnut Brownies

Truffled Walnut Brownies - made April 8, 2017 from Baking by Flavor by Lisa Yockelson
This was one of the first brownie recipes I ever made from Lisa Yockelson’s Baking by Flavor, one of my favorite baking books. It’s funny since I call it my favorite baking book yet I don’t seem to go back to it that often lately. But I’ve made multiple recipes from it over the years, most of which have turned out well so it’s one of the books I won’t part with, no matter how many times I purge my bookshelves.
My niece is holding a fundraiser this month for the mentor program she’s involved in. She’s mentoring a high school junior who goes to school and works part-time. Among her mentor duties, my niece is helping her "mentee" apply for other jobs (her mentee's current job has a tough schedule for her to meet while also going to high school) as well as gearing her up to apply for college next year. My niece is committed to raising $1000 in April to contribute to the program as $1000 funds 1 mentee/mentor relationship. Being the smart young up and comer who knows her audience, she baited her fundraising hook with “hey, if you donate at least $25, my aunt will make you a goodie bag with your choice of brownies, chocolate chip cookies and/or snickerdoodles.” Yes, I’m the aunt to whom she refers.
The first week, she raised $550, more than halfway to her goal, from 11 donors. She was very organized in tracking which donor wants which combination of the three treats on offer which made it easy for me to do my part of the order fulfillment. Snickerdoodles were easy since I was (initially) only going to do my favorite recipe for those. For chocolate chip cookies, I allowed myself the freedom to explore more recipes for Levain Bakery copycats. More posts on those experiments to follow in the coming weeks.
Alas, the brownies, where I normally live in my creative space because you know how I feel about plain brownies, she tied my hands. Whut?? Since we were catering to a varied audience and didn’t know who liked or didn’t like this, that or the other, she asked for me to make plain brownies. Gulp. Plain, did you say? Okay, fine but that kinda kills my baking soul not to do stuff like my Nutella crunch topping or swirl dulce de leche through the brownie or frost it with Nutella and sprinkle toffee bits over it or give it an Oreo cookie crust or – okay, fine, plain it is.
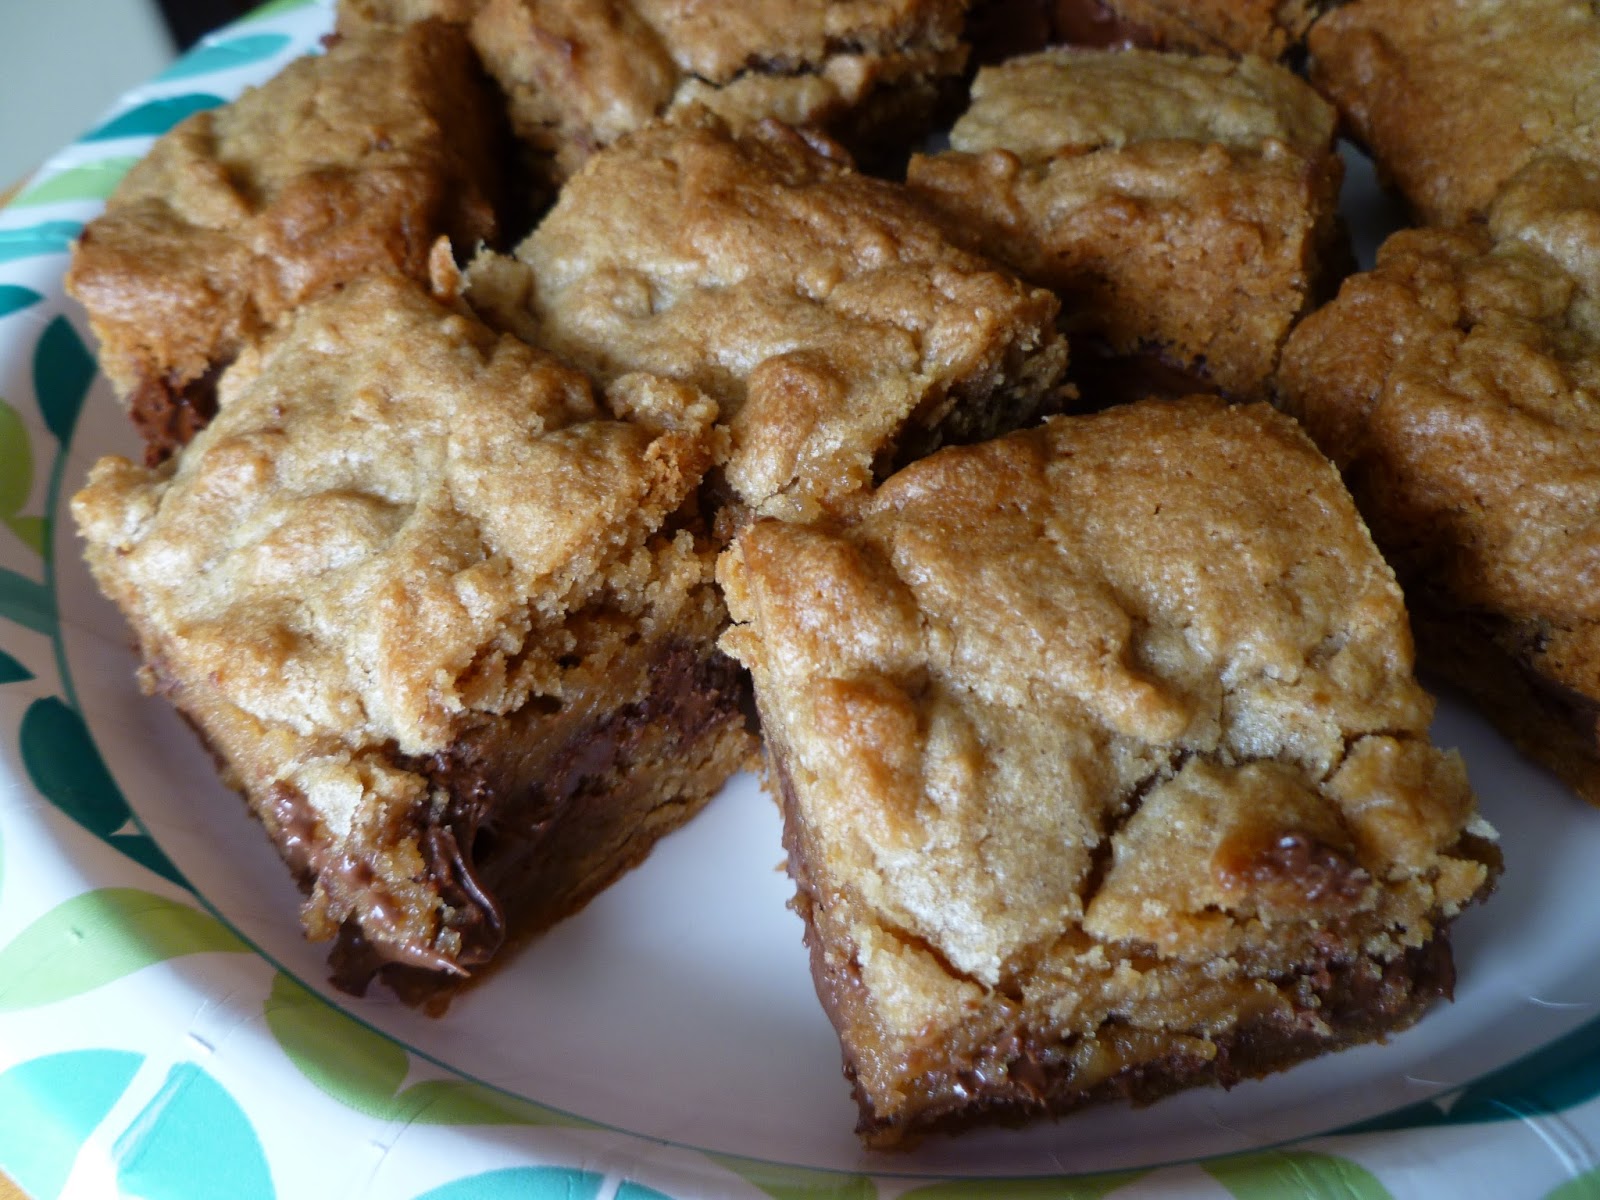
Which is why, although the recipe says “truffled walnut brownies”, there are no truffled walnuts anywhere in here. Even when I had originally made this recipe long, long ago, I hadn’t used walnuts anyway but pecans. This time around, I left out the truffled anything entirely. I still kept them in the recipe in case anyone wants to make these as Lisa Yockelson intended but even without them, these made a good moist, fudgy, rich brownie. They’re not too thick but the normal brownie thickness. I prefer them a little thicker myself but I had to keep reminding myself I’m not the one eating these.
You may be tempted to bake these too long. A crust does form on top as the brownies bake and a toothpick poked at the corners will come out clean while the middle will still have raw batter. Resist the urge to take them out too early. You want to bake them until a few moist crumbs appear on the toothpick test when you stick the toothpick near the center. But don’t wait until the center toothpick poke comes out “clean”. As long as you let the brownies cool to room temperature, they will set properly and give that fudgy texture, as in “baked fudge” fudgy texture. If you underbake them too much, they’ll be too mushy and not have a dense texture so much as a too-squishy one. And of course, don’t overbake them.
1 cup unsifted all-purpose flour
1/3 cup unsifted bleached cake flour
1/3 cup unsweetened, alkalized cocoa powder
¼ teaspoon baking powder
¼ teaspoon salt
½ lb (16 tablespoons or 2 sticks) unsalted butter, melted and cooled to tepid
5 ounces (5 squares) unsweetened chocolate, melted and cooled to tepid
3 ounces bittersweet chocolate, melted and cooled to tepid
5 large eggs
2 cups superfine sugar
2 ¾ teaspoons pure vanilla extract

Truffled walnuts
1 cup walnut halves and pieces, lightly toasted and cooled completely
1 tablespoon unsalted butter, melted, cooled to tepid and blended with ¼ teaspoon pure vanilla extract
½ teaspoon unsweetened, alkalized cocoa sifted with 2 teaspoons unsifted confectioners’ sugar
  1. Preheat the oven to 325°F.  Film the inside of a 10”x10”x2” baking pan with nonstick cooking spray; set aside.
  2. Sift the all-purpose flour, cake flour, cocoa, baking powder and salt onto a sheet of waxed paper.
  3. Whisk the melted butter, unsweetened chocolate and bittersweet chocolate in a medium-size mixing bowl until thoroughly blended.  
  4. Whisk the eggs in a large mixing bowl for 1 minute.  Add the superfine sugar and whisk for 1 minute or until just combined.  Whisk in the tepid melted chocolate-butter mixture.  Blend in the vanilla extract.  Sift over the sifted ingredients.  Whisk slowly until all particles of flour are completely absorbed, taking care to catch any pockets of flour along the bottom and sides of the bowl.  The batter will be thick and heavy.
  5. Make the truffled walnuts: In a medium-size mixing bowl, toss the walnuts with the melted butter-vanilla extract mixture.  Sprinkle over the sifted cocoa-confectioners’ sugar and toss thoroughly.  The nuts will look a bit glossy.
  6. Mix the truffled walnuts into the brownie batter with a rubber spatula.  Scrape the batter into the prepared baking pan, taking care to spread it evenly and into the corners.  Smooth over the top with a rubber spatula.
  7. Bake the brownies for 30 to 33 minutes or until softly set (but not at all liquid).  Cool the brownies in the pan on a rack for at least 4 to 5 hours before cutting into squares with a small, sharp knife.

Saturday, April 22, 2017

Dutch Baby Pancake

Dutch Baby Pancake - made April 2, 2017 from Brown-Eyed Baker
Yes, another skillet recipe. When I first bought the smaller cast iron skillet, I thought I would primarily bake cookies a la pizzookies in them but I’m finding other, creative uses for them. Such as this Dutch Baby pancake.
It isn’t a traditional pancake in that you don’t heat the skillet, pour pancake batter into it and then flip it over when the edges are browned. That would be a regular pancake and you can use any regular frying pan or griddle for that. No, this is a Dutch Baby pancake. It’s a German pancake baked in the oven. Think of it as a cross between a custard and a popover. Made with no sugar (for real) but flour, butter, salt and milk.

It puffs up in the oven during baking and is a perfect candidate for cast iron skillet baking because the cast iron crisps the outside while the inside and middle remain soft. This is so easy to make that I advise you preheat your oven and don’t start mixing the ingredients together until it’s at least at 350 degrees. You bake this at high heat and you want it to go into the oven right after it’s mixed.
I put all the ingredients into the blender, had the melted butter ready to go in the skillet, whipped the batter together in a matter of seconds, poured it into the skillet and popped it into the oven. 15 or so minutes later, it came out beautifully golden and puffy. The edges and bottom were crisp while the middle was soft and almost custard-like. The texture was akin to a really good bread pudding with a soft custard texture but without the bread. Hard to describe but this recipe is so easy that you can make it for yourself without any trouble and see what I mean.

The puffiness does subside so you might want to plan on serving and eating this shortly after you take it out of the oven. I skipped the syrup and went with melted butter. For something without any sugar, it was pretty tasty. And I don’t say that very often.

1 cup all-purpose flour, sifted
4 eggs
1 cup whole milk
1/2 teaspoon salt
4 tablespoons unsalted butter, melted, divided
  1. Preheat oven to 475 degrees F.
  2. In a blender, combine the flour, eggs, milk, salt and 2 tablespoons of the melted butter. Blend until smooth with no lumps, 20 to 30 seconds.
  3. In a 10-inch cast iron skillet, heat the remaining 2 tablespoons melted butter over high heat until foamy. Add the batter and immediately put the skillet in the oven. Bake until the outside of the pancake is puffed and a deep golden color, 17 to 18 minutes.
  4. Remove from the oven, slather with softened butter, and cut into quarters. Pour syrup over the pancake slices and dust with powdered sugar.

Thursday, April 20, 2017

"Triple Layer" Chocolate Cake

Triple Layer Chocolate Cake - made April 1, 2017 from The Stay At Home Chef
The original title of this recipe was Triple Layer Chocolate Cake. Your eyes aren’t deceiving you if you can only see two layers. I actually did make all three layers that the recipe yields except, as usual, I baked them in 8” round cake pans instead of 9” pans. Which made for thicker layers. By the time I was assembling and frosting the cake, I knew early on that a three-layer cake of this much chocolate goodness would probably be daunting for most eaters, even a seasoned veteran such as myself. So I stopped at two layers and froze the third layer, well-wrapped, for a future concoction.
You might scoff that I quaked in my chocolate-loving boots over a three-layer fudge cake but I had used Pernigotti cocoa for this cake and I knew from past experience that that meant no-holds-barred chocolate decadence that would fell even the most stalwart chocoholic. It’s true. I like to tantalize people with baked goods, not slay them flat onto their backs into chocolate-induced oblivion. Most of the time.
I also made up the fudge frosting recipe for this cake and gauged I was going to run short if I tried to make it stretch to 3 layers of towering chocolate goodness. I could have made more frosting, I suppose, but I felt like I had already achieved maximum desired flavor and consistency with what I did make that I felt hesitant to throw my frosting off balance by fiddling with it further. Pernigotti cocoa was also used in the frosting but tempered by whole milk and powdered sugar. Even then, it was powerfully chocolate. And was just enough to cover a two-layer cake.

All that lead in to say….this is an amazing cake. Serious chocoholics should apply, fork in hand, to validate my findings. Soft, moist, richly fudgy chocolate. Your tonsils will hum, your chocolate tooth will sing an aria, your jeans will say “you’re working out later, right?”
One word of advice though – you won’t get that deep dark chocolate look or flavor if you use “grocery store chocolate”. As in, Hershey’s isn’t going to cut it. You really need a high quality cocoa. I favor Pernigotti (I swear I’m not affiliated with them; I just think they have a fantastic product) but you can also use something on the higher end of the cocoa spectrum like Valrhona. If you don’t want as dark a chocolate flavor as I have mine, you can always “cut” the high end cocoa with a Hershey’s-standard cocoa and get something between dark and milk chocolate. I don’t advocate it but it’s an option if you’re not a dark chocolate lover. If funds are tight and you must stick with Hershey’s, it isn’t the end of the world but you may get slightly different results.
Cake
3 cups all-purpose flour
3 cups granulated sugar
1 1/2 cups unsweetened cocoa powder
1 tablespoon baking soda
1 1/2 teaspoons baking powder
1 1/2 teaspoons salt
4 large eggs
1 1/2 cups buttermilk
1 1/2 cups warm water
1/2 cup vegetable oil
2 teaspoons vanilla extract

Frosting
1/2 cup (1 stick) unsalted butter, softened
1/2 cup unsweetened cocoa powder
3-4 cups powdered sugar
2 teaspoons vanilla
3-4 tablespoons whole milk, more if needed for desired consistency
  1. Preheat oven to 350 degrees F. Spray 3 8- or 9-inch round cake pans with nonstick cooking spray and dust with flour, tapping out the excess. Line with round parchment circles.
  2. Mix together flour, sugar, cocoa, baking soda, baking powder and salt in the large bowl of a freestanding electric mixer on low speed until combined.
  3. Add eggs, buttermilk, warm water, oil and vanilla. Beat on medium speed until smooth, 2-3 minutes. Do not overbeat.
  4. Divide batter evenly between the 3 pans. Bake for 30-35 minutes or until toothpick inserted near the center of each pan comes out with a few moist crumbs or clean.
  5. Cool on wire racks for 10 minutes then loosen the sides with a small rubber spatula. Turn out the cakes onto wire racks and cool completely.
  6. Make frosting: cream butter with cocoa and powdered sugar. Add vanilla and milk and beat, adding milk teaspoon by teaspoon until desired consistency,

Wednesday, April 19, 2017

Restaurant Review: Thai Chili Cuisine

Thai Chili Cuisine - dinner on April 3, 2017
I found a small business restaurant that was female co-owned in my neighborhood and talked one of my friends into meeting me there for dinner. It’s closer than my favorite Thai restaurant where I get my favorite pad thai and it’s always good to find another small business to support.

We went on a Monday night and it wasn’t that crowded. Maybe 12-16 tables of varying sizes and a quarter to a third full? We were greeted and seated promptly at a table originally meant for four but the hostess (owner?) separated the two two-toppers slightly in case more customers came in to use the other one. But she kindly invited us to use the chairs from the nearby table to place our purses on which we appreciated.
Roti - $6.95
 As always, when trying a new Thai restaurant, I get – what else – the pad thai, no bean sprouts. I’ve never understood the purpose of bean sprouts. They have no flavor and an annoying crunch. Left to themselves, they camouflage among the noodles then interfere with the dish by inserting their crunchy texture when you just want soft noodles. No, bean sprouts and I are not friends.
Pad Thai with Chicken - $9.95
Fortunately, the restaurant was very accommodating of my aversion to bean sprouts and served me the pad Thai without them. Which made me enjoy my favorite dish just the way I like it. My friend had the drunken noodles which looked good but I was too wrapped up in my pad Thai to try it. We split an appetizer order of roti and OMG, that made the whole dinner worthwhile. The roti was served warm; it was deliciously buttery, flaky and crisp yet chewy. Much as I liked the pad Thai, I’d go back for the roti alone.
Drunken Noodles - medium spicy, $9.95
Thumbs up for Thai Chili Cuisine. It isn’t fancy or large but I like this kind of “neighborhood gem” that isn’t too crowded, has good service, reasonable prices and serves good food. I’m already thinking of who else I can meet for dinner so I can go back.

Monday, April 17, 2017

Sweet Potato Chili

Sweet Potato Chili - made April 1, 2017, adapted from Tastes of Lizzy T
I’ve been trying to cook again. Or at least, I make one thing over the weekend that’ll feed me some random meals during the week and call it a day. Chili has become my fallback meal. It’s easy to make, tastes better the next day and freezes easily. Plus I get to use the spices I ordered from Penzey’s! As with Pernigotti, I’m not affiliated with the company. I just like their products and the company itself so I tout their virtues whenever I can. Plus, their spices are what's encouraging me to cook more. Once I've bought them, I have to use them, right?

When it comes to chili, the hardest thing is chopping up the ingredients and in the case of this recipe, even that isn’t very hard. The only mise en place I had to do was peel and chop the onion and sweet potatoes. I cheated on the minced garlic because I had a (free) jar of minced garlic from Penzey’s that I used instead of fresh garlic. It was pretty good in the Skillet ChickenAlfredo Pizza and I’m not snobby about garlic so using it from the jar was just fine with me.
I modified this recipe, mostly by cutting the amount of chili powder in half. Not out of any culinary skill or preference but simply because I only had a 1/4-cup jar of chili powder from Penzey’s and not half a cup. At first I thought it was going to end up too soupy to be chili but I let it boil and boil (and boil), partially covered, until it had thickened enough to surpass the soupy stage. And once it had cooled, even when heated up the next day, it had thickened up to a satisfyingly chili-like consistency. Fortunately, my sweet potatoes didn’t disintegrate into mush and held up quite well but you might not want to chop them too small in case you have to boil your chili for a bit longer.
This chili had some heat. I wouldn’t say it was spicy-hot (me and my bland taste buds balk at that) but it was flavorful. If I sound surprised, you have to understand I’m a bland eater and a bland cook who never used to really use spices. But I feel like I successfully used spices this time to make something with rich, robust flavor rather than be spicy-hot; that doesn’t happen that often. Go me. Go chili.
1 pound ground beef
1 pound ground turkey
1 onion, chopped
1 teaspoon minced garlic
1 29.5-ounce tomato sauce
2 cups diced tomatoes with juice
3 cups beef stock
5 cups sweet potatoes, peeled and cubed
1 15.5-ounce can kidney beans, drained
2 bay leaves
1/2 teaspoon thyme
2 teaspoons salt
1 1/2 teaspoons black pepper
1/4 cup chili powder
dash of oregano
dash of red pepper flakes
  1. In a large saucepan, brown ground beef, ground turkey, onions and garlic. Drain off the fat.
  2. Add the remaining ingredients to the saucepan. Mix well, bring to a boil and simmer, covered, for about 30 to 40 minutes or until the sweet potatoes are cooked through.
  3. Remove and discard the bay leaves. Serve.

Saturday, April 15, 2017

Skillet Chicken Alfredo Pizza

Skillet Chicken Alfredo Pizza - made March 31, 2017
I’m going to try and space out my cast iron skillet recipes but if you check dates, you’ll know I obsessed about using my new skillet within the same few days as that’s when I tried out recipes using it. For this one, I didn’t really have a set recipe but an idea of “hey, I wonder how pizza would turn out in this thing.”
A cast iron skillet is great for baking anything bread-like. The heat and darkness of the skillet, so anathema when making cakes and cookies (the edges cook faster and get darker before the middle is usually done) is perfect for pizza dough. It crisps the outer edges and forms a nice crust. Because I used a smaller skillet (6”), the outer ring of the pizza didn’t have time to burn before the middle was baked. But did have enough time to crisp to a still-chewy exterior and turn a beautiful golden brown.
This pizza requires no cooking skill to make, which is fortunate. I bought the whole wheat, ready-made pizza dough from Trader Joe’s, used cooked chicken (also from TJ’s) as the topping and made up an alfredo sauce (recipe, such as it is, below) which I poured over the chicken. Bake until golden brown and cheese has melted and voila – Skillet Chicken Alfredo Pizza.

I only wanted a little sauce and the only reason I made it alfredo was I didn’t have any tomato sauce for a tomato-based pizza sauce. This turned out pretty well although I admit, I think I could’ve stretched out the pizza dough to a thinner crust. I like thick crust pizza though so I wasn’t too upset with my impromptu “cooking”.
Alfredo Sauce
2 tablespoons butter
¼ cup half and half
¼ cup whole milk
1 tablespoon chopped fresh garlic (I used Penzey’s minced garlic and it was perfect)
½ cup shredded mozzarella cheese

Melt butter and whisk in half and half and milk. Add garlic and stir in mozzarella cheese. Whisk over medium-low heat until completely melted. If mixture is too thin, add more cheese, a tablespoon at a time. Sauce will thicken after being baked and once it sets.

Thursday, April 13, 2017

Peanut Butter Nutella Blondies

Peanut Butter Nutella Blondies - made March 26, 2017 from Relish
If you know any peanut butter and/or Nutella lovers, this is the easiest thing you could make for them and get raves. You make the peanut butter blondie batter, spread half in the bottom of the pan, pour a layer of warm Nutella over it and then drop the rest of the blondie batter on top, covering the Nutella completely.

The trickiest part is telling when it’s done. You can’t do the traditional toothpick test without running into the Nutella middle and that’ll mask whether the blondie has baked enough or not. Instead, angle the toothpick so that you’re able to spear the top half of the blondie without encountering the Nutella. If it comes out with moist crumbs and not raw batter, it’s done.

While I’m not a big peanut butter lover, I liked this combination. It’s straightforward, simple and the flavors marry well. It’s also easy to make ahead of time and freeze for when you need it. I used creamy peanut butter but you can use either creamy or crunchy. Just don’t use natural peanut butter or you won’t get the same texture or results. I also admit I was a bit generous with the Nutella because, hello, Nutella. You can use as much or as little as you like although I wouldn’t go much more than 1 cup or the Nutella layer will overwhelm the peanut butter (I know, I know, I say that like it’s a bad thing). I wouldn’t go too skimpy with the Nutella either; otherwise, why bother?

1/2 cup unsalted butter, softened
2/3 cup creamy peanut butter
1 1/2 cups packed brown sugar
2 large eggs
2 teaspoons vanilla extract
1 3/4 cups all-purpose flour
1 teaspoon baking powder
1/2 to 1 cup Nutella
  1. Preheat oven to 350 degrees F. Line an 8 x 8 baking pan with foil and lightly spray with nonstick cooking spray.
  2. In the bowl of a stand mixer fitted with the paddle attachment, beat the butter, peanut butter and brown sugar together until smooth, about 30 seconds.
  3. Add the eggs, one at a time, beating well after each addition. Mix in the vanilla. Add the flour and baking powder; stir until just combined. Do not overmix.
  4. Pour half the batter into the prepared pan, smoothing the top. Measure out Nutella in a glass measuring cup and microwave for 15 to 20 seconds. Spread evenly over the batter. Top with remaining batter by dropping spoonfuls evenly over the Nutella and gently smoothing out the top.
  5. Bake for 23 to 25 minutes or until the top is no longer glossy and the edges are golden brown. Cool completely before slicing.

Tuesday, April 11, 2017

Restaurant Review: La Fontaine

La Fontaine - dinner on March 30, 2017
I haven’t done a restaurant review in awhile. I’ve still been trying new local restaurants but just haven’t been good about blogging about them. So I thought I’d get back in the swing with this review for La Fontaine, which I took to be an Italian restaurant based on the cuisine but they bill themselves as French-Italian. Okay.

The menu offers a pretty good selection of different dishes. Price range is in the $20-$30+ per entrée with desserts (you know I look at the dessert menu first) under $10.
This is one of those menus where I had a hard time making a selection because there were several options that looked mouth-wateringly viable. I waffled between a couple of the pasta dishes, the short ribs, the steak frites and the Salmon Wellington. Pasta is usually my go-to at an Italian place, it’s hard to go wrong with steak and the short ribs sounded amazing. But I ultimately went with the Salmon Wellington because that’s not something you see on a menu every day.
Salmon Wellington - $25
The description was knee-weakening in and of itself. Salmon “wrapped” in puff pastry, stuffed with leeks and rock shrimp and served atop a bed of saffron risotto. Yum, right? Unfortunately, it wasn’t quite as good as it sounded. Don’t get me wrong, it was pretty tasty. But it wasn’t actually “wrapped” in puff pastry like you would picture a traditional Beef Wellington is wrapped, as in encased completely so that you had to cut through the pastry to see what was inside. No, this was a salmon fillet which had a strip of puff pastry wrapped around its horizontal edge (like where its skin would have been) so you can still see the salmon, exposed. The middle had a spoonful of stuffing but I was hard pressed to find more than a few bits of shrimp. It was more leek than shrimp. I almost forgot it was supposed to have shrimp in the stuffing. The puff pastry was soggy because of the sauce poured over the salmon. The risotto was quite tasty but there wasn’t much of it. I sound more negative about the dish than I actually was. It was a modest portion that didn’t leave me feeling stuffed, which was good. What there was of the dish was delicious. But I think the reality didn’t live up to the advertising.
Meatballs

Seafood Pappardelle
One of my friends ordered the short ribs, which had been on my short – haha – list of entrees to get and let me have a taste. It was amazing. As in, “I’m coming back here again and ordering that instead” amazing. My other friends ordered pasta dishes and those looked good too so I might have to come back a couple more times.
Braised Shortribs - $26
The good news about the modest piece of salmon is I had room for dessert. Which, of course, I had to get. The lava cake called out my name and I paid heed. It too was modest in portion size but that wasn’t a bad thing. The chocolate lava cake was rich so a little went a long way. It was also delicious as was the caramel gelato that accompanied it.  
Lava Cake - $9
Overall, I liked La Fontaine. The servers were nice and it wasn’t too crowded. The menu items were a little pricey but I don’t mind that if it’s for good food with good service. Looking forward to going back and trying out some of the other entrees.