Tuesday, February 11, 2014

Valentine M&M Sugar Cookies

Valentine M&M Sugar Cookies - made dough February 7, 2014 from So We Think We Can Cook
As I look at my repertoire for Valentine-themed treats, I realize so many of them are red velvet in some shape or form. I like a good red velvet but I also believe in all things in moderation, including food dyes. So here's one way to forego the food color but still stay on theme - add Valentine M&Ms to it. All the pink, red, fuschia and white M&Ms you like. At first I was going to make a chocolate chip M&M cookie or a Monster cookie but I decided to go with a sugar cookie so the girly colors would show up better against a more pale cookie. Plain M&Ms work better for this type of cookie than peanut M&Ms, simply because they're not only flatter and won't stick out as much in a sugar cookie but also because I don't like peanuts in a non-peanut butter cookie.
The only thing I don't like about baking with M&Ms, plain or peanut, is the ones on the outside will inevitably crack during baking so they're just not as pretty when baked. The colors also bleed into the cookie so they're just not as pretty. I tried to circumvent that with these cookies by withholding a handful of M&Ms and pushing them into the cookies as soon as I took them out of the oven. It sort of worked. They look better in the pictures but because of the candy shell, didn't melt and adhere to the baked cookies as much as I would've liked. Despite how it sometimes looks, this is a good cookie option for kiddie Valentine parties. Kids like M&Ms, you don't have to worry about peanut allergies with the plain M&Ms and the only food coloring is in the M&Ms instead of the teaspoons or tablespoons of red food dye that goes into red velvet baked goods (that'll be tomorrow's recipe, ha).
1 cup butter, softened
1 1/2 C sugar
2 eggs
1 1/2 t vanilla
3 C flour
2 t baking powder
1 t baking soda
1 t cream of tartar
dash of salt
1 medium bag (12 oz) Plain M&M's, Valentine edition
  1. Cream the butter and sugar for about 3 minutes, or until fluffy.&nbsp
  2. Add the eggs and vanilla and mix for 2 more minutes.&nbsp
  3. In a separate small mixing bowl combine all dry ingredients. Add to the butter mixture and mix until well combined. 
  4. Pour in your M&M's and mix just until combined. Form into round balls (about 2 inches in size) and lay onto a cookie sheet (or chill or freeze for several hours). Press the tops down slightly. 
  5. When ready to bake, preheat oven to 350. Bake for 8-10 minutes or until you see the cookies start to crack. If desired, press remaining M&Ms over the tops of baked cookies as soon as you remove from the oven.

Monday, February 10, 2014

Red Velvet Peanut Butter Blossoms

Red Velvet Peanut Butter Blossoms - made dough February 1, 2014 from I Am Baker
Did you know Valentine's Day is one of the easiest occasions to decorate baked goods for? I don't like to decorate my food and I'm not good at it but V-day is the one "holiday" I find easy to bake sweets apropos for the occasion. All you need is a heart-shaped cookie cutter, red food color, Valentine-colored candies and sprinkles, and chocolate hearts. Seriously. To prove it to you, I'm going to devote the next few baking posts leading up to Hallmark's Cupid's holiday to Valentine-themed treats. And by Valentine, I mean heart shapes and red and pink up the wazoo, fit to take to your child's school party, your company Valentine potluck (does anyone actually have those?) and, by Friday, even something for a romantic dinner for two.
An easy start is red velvet so get that bottle of red food color ready. How many versions of red velvet baked goods can I make over the years? I don't know; I'm still in discovery mode. Which continues with this red velvet twist on peanut butter blossoms or, as initially called on my blog with my favorite recipe for them, Peanut Butter and Chocolate Kisses. You can trot out the Valentine's Day theme with the red velvet version and literally top it off with hearts - Dove's milk chocolate hearts, that is. Remember, it's February. You can't get too schmaltzy with too many hearts.
I enjoyed the taste and texture of this version. It wasn't as peanut buttery as the original version which was okay by me as I like the added chocolate punch. I like eating this cookie best when it's just barely lukewarm as by then the cookie has cooled enough for the texture and flavor to be optimal but the chocolate heart is still soft and melt-y when you bite into it. If you're serving this for any type of Valentine's Day-related occasion, this is a fun cookie to make....and eat.
1 bag Hershey's Kisses (substitute chocolate hearts if you wish)
1/2 cup (1 stick) butter, room temperature
3/4 cup creamy peanut butter
1 1/3 cups sugar
1 egg
2 tablespoons milk
2 teaspoons vanilla
1 teaspoon red gel food coloring (I used Schilling red food coloring)
3 tablespoons unsweetened cocoa
1 1/2 cups all purpose flour
1 teaspoon baking soda
pinch salt
1/4 cup red sanding sugar
  1. Preheat oven to 375 degrees F (only if baking immediately).
  2. Beat butter, peanut butter, and sugar in stand mixer for about 2 minutes on medium speed. Reduce speed to low and add egg, milk, vanilla and red food coloring. Mix for about 30 seconds to incorporate, then increase speed to medium high and blend until light and fluffy.
  3. In a separate bowl, sift cocoa, flour, baking soda and salt. With mixer on low speed, add flour mixture to sugar mixture and beat until just combined.
  4. Shape dough into 1" balls. If desired, chill for at least 1 hour. When ready to bake, preheat oven to 375 F. 
  5. Pour red sanding sugar into shallow bowl. Roll dough balls in sanding sugar and place on cookie sheet lined with parchment paper about 2 inches apart.
  6. Bake for 8 to 10 minutes. While cookies are baking, unwrap Hershey Kisses or heart-shaped Dove chocolates. When cookies are done, remove from oven and immediately place Hershey Kiss or Dove heart in the center of each cookie. Cool to room temperature.

Sunday, February 9, 2014

Restaurant Review: Pick Up Stix

Pick Up Stix - lunch on January 25, 2014, Valencia, CA
A few weeks ago, I drove my parents down to Southern California to visit one of my cousins in the hospital. It was just a short weekend trip since I had work but we wanted to see my cousin in person so we decided to make the 5-hour drive over the weekend and come back the next day. I had another cousin in the area and my sister was flying in the same morning; we were going to meet at my other cousin's place so we could all go to the hospital together. We left early Saturday morning and got there around noon. Now, in Filipino culture, unless you're arriving with food for your host, it's typically bad form to come at mealtime, hungry and expecting to be fed. Which is why we stopped off at a strip mall on our way to get lunch first.
Pick Up Stix appears to be a chain but they seem to be primarily in Southern CA as their website locator doesn't show any in the Bay Area, only in So Cal. I'd never heard of them before but when we walked in, it seemed like a fancier Panda Express with similar price points and open seating. But instead of pointing to your order behind glass displays that hold trays of food, you actually order it at the register and they bring it to your table.
House Special Chicken with rice and potstickers
They offer lunch combos with rice or noodles, an entree and either potstickers, cheese wontons or an egg roll. I have to say I was pleasantly surprised. It's not haute cuisine but for under $10 a combo, it was good enough. I got the house special chicken combination with potstickers and I thought it was decent. The chicken was in bitsy pieces and I would've preferred larger chunks but at least it wasn't breaded and the sauce was tasty, albeit a trifle sweet.
Shrimp and Vegetables with rice and egg roll
They do offer a good selection of entrees so there's something for everyone. Not sure how authentic it is for Chinese food but for a fast, cheap place, this is a good option. The people behind the counter were very friendly and polite which was nice. All in all, it served its purpose well.
Mongolian Beef with cheese won tons

Frosted Lemon Sugar Cookies

Frosted Lemon Sugar Cookies - made dough January 24, 2014, baked on February 2, 2014 from Lulu the Baker
Sometimes it's annoying when I have a carton of milk to use up and I keep finding recipes that only use a tablespoon of it. On the flip side it's also annoying to find recipes that only use 1 tablespoon of milk and I have none in the house and don't want to buy a carton just to use 1 tablespoon (First World problem). I decided I'd rather be annoyed by the first instance than the second one because the first scenario means I already have the milk on hand and I can keep searching for more recipes that use it. Don't worry if you didn't follow that logic, I'm just thinking out loud.
This recipe used lemons, milk and cream cheese, all ingredients I had in abundance. It had the added advantage that I could make the dough when I had a spare 15 minutes, freeze it then bake it off and make the frosting when I had more time. Like during this year's very lopsided, uninteresting Super Bowl game where I had only the commercials to entertain me.
These make good "tea" cookies, i.e. if you want something cute and small to serve at an afternoon tea. The texture of the cookie was a cross between a butter cookie and a sugar cookie, halfway between cakey and chewy at the same time. The frosting dresses these cookies up a bit. They weren't as lemony as I expected and I think that was because the cream cheese in the frosting competed with the tang of the lemon. If you want it more lemony, I recommended increasing the amount of zest in the cookie dough and possibly not doing a cream cheese frosting but a pure lemon royal icing instead.
Cookies
1/2 cup butter, softened
1/2 cup crisco
1 cup sugar
1 teaspoon vanilla
1 egg
1 tablespoon lemon zest
2 1/2 cups flour
3/4 teaspoon salt
1/2 teaspoon baking soda
1 Tablespoon milk
1 Tablespoon fresh lemon juice

Frosting
1/4 cup butter, softened
4 oz cream cheese, softened
1/2 teaspoon vanilla
1/2 pound powdered sugar
pinch of salt
fresh lemon juice

  1. Preheat oven to 350°F. In the bowl of an electric mixer, cream butter, crisco, and sugar until fluffy. Add vanilla, egg, and lemon zest; mix. 
  2. In a separate bowl, sift together flour, salt, and baking soda. Add dry ingredients to mixer and combine. Add milk and lemon juice, and stir until completely incorporated. 
  3. Roll dough into tablespoon-sized balls and place on a greased baking sheet. Bake for 10-12 minutes, until cookies are just beginning to turn golden on the edges. Remove from oven and cool completely before frosting.
  4. To make the frosting, beat butter and cream cheese until smooth and well mixed. Add vanilla. Add powdered sugar and salt. Stir. Mix in fresh lemon juice until the frosting reaches a spreadable consistency.

Saturday, February 8, 2014

Smitten Ice Cream

Smitten Ice Cream - January 24, 2014
You'd think that as much as I love desserts and sweets, I would be more up to date on the latest foodie scene. But it took two friends telling me (coincidentally on the same day) about Smitten ice cream before I was even aware it existed. If you click on the link above in the post title, it'll take you to the Smitten's website and you'll see Smitten's started off when Smitten founder Robyn Sue Fisher decided ice cream was better made using liquid nitrogen for fast, small-batch freezing and achieving a creamy texture. She could make it to order and provide instant gratification with freshly churned ice cream.
There's a Smitten's attached to Whole Foods that just opened up and it was serendipitously located within walking distance from Paul Martin's of the "you have to be out by 6:30" fame so we decided to forego the $9 desserts at Paul Martin's and go check out Smitten Ice Cream instead.
This location had a select number of flavors with the flavor of the month being the Meyer Lemon Gingersnap. I was tempted to try out the chocolate but the salted caramel caught my eye and wouldn't let go so that's what I got. You can order a small, regular or pint. None of us had any intention of ordering as much as a pint since we planned to eat it there but the small looked tiny to me and my friend Karen, like it could barely hold half a scoop of ice cream so we opted for the regular. I mean, c'mon, it's ice cream - why skimp? My cousin Ellen was more prudent and got the small.
The "Brrr" machine - with the help of liquid nitro, churns out ice cream very quickly
The finished product
We ordered separately and didn't know what each was getting but it turns out all three of us ended up getting the salted caramel so, in hindsight, we might've been able to split a pint after all. You can also pair your ice cream with add ins or sauces but I went for the plain version to get the full, unadorned flavor of the salted caramel.
The texture was creamy as advertised and I enjoyed the salted caramel flavor. I definitely want to try the chocolate and vanilla flavors next. Overall, this was good ice cream. I don't know that it was worth $6 for the regular as I'm not enough of an ice cream gourmand to be able to distinguish between a liquid-nitro frozen ice cream versus a pint of premium Ben & Jerry's (sorry, Robyn Sue Fisher) but it was a good novelty experience to try out.
I will say Ellen got the last laugh on me and Karen because the small turned out to be 2 scoops of ice cream and for something that rich and creamy, 2 scoops is plenty. The regular size Karen and I each got was 3 scoops of ice cream and that was a trifle too much, especially since we'd already eaten dinner. Of course, both Karen and I finished our 3 scoops anyway because we paid all that money for ice cream and we didn't want it to go to waste (just to our waists). And this is why we've been friends since college - we think alike.

Dark Chocolate Brownies

Dark Chocolate Brownies - made February 1, 2014 from The Pioneer Woman
Although I have a plethora of tried and tested brownie recipes, there are so many great-looking ones out there that I almost always try out a new recipe when I need to make brownies rather than using the ones I already know are good. It's not like I'm searching for the ultimate brownie recipe or anything because I have a stableful of great ones already. I just like any excuse to try a new recipe and any excuse to make brownies. Like I need one, ha.
The Pioneer Woman is always a fun show for me to watch. I'm hardly ever home when it's on but I did stumble upon when it regularly airs and started DVR'ing the show. Then I watch the recorded shows in the morning while I work out. Yes, I do recognize the irony of that. I didn't actually get this recipe from watching her show but I did see it on pinterest (where else?) so I trailed the pin back to her blog and went from there. The directions say you can bake it in an 8 x 8 pan or a 9 x 13. I had no intention of making thin brownies so I went with the smaller pan. I like the thickness that resulted and probably would only have made this in a larger pan if I was making brownie ice cream sandwiches and needed thinner brownies. I didn't bake mine as long as the directions suggested and you can see it came out pretty fudgy. With the high chocolate content, that's okay because I'd rather have the chocolate set into a fudgy texture than to overbake the brownies and have them be dry. As the recipe title says, these are pretty dark chocolate brownies. The dark cocoa (I used Dutch processed unsweetened cocoa that I bought from Penzey's) added more chocolate depth and the unsweetened chocolate provided the base. Even the relatively high amount of sugar didn't mute the dark chocolate flavor.
1 cup butter
5 ounces unsweetened chocolate
1/4 cup unsweetened cocoa powder
2 cups sugar
1 tablespoon vanilla
3 large eggs
1 1/4 cups flour
3/4 cup semisweet chocolate chips
  1. Preheat oven to 350 degrees.
  2. In a medium-large saucepan, melt the butter with the unsweetened chocolate over low heat, whisking occasionally until smooth and melted. Sprinkle in cocoa powder and whisk to combine. Remove the pan from heat and allow to cool for about 5 minutes.
  3. Stir in sugar and vanilla until just combined.
  4. One at a time, stir in the eggs.
  5. Gently stir in the flour until halfway incorporated. Add the chocolate chips and stir just until combined.
  6. Pour batter into a greased 8 x 8 or 9 x 13 baking pan. Spread to even out the top and place in the oven.
  7. Bake for 40 minutes, then check the brownies with a toothpick. If it is overly gooey/messy, return to the oven for 5 to 10 more minutes. (I only baked mine for less than 30 minutes.)
  8. Allow to cool completely before cutting and serving.

Friday, February 7, 2014

Restaurant Review: Paul Martin's American Grill

Paul Martin's American Grill - dinner on January 24, 2014
I had never heard of Paul Martin's American Grill before but one of my coworkers mentioned it and when I looked up their website and saw how they sourced responsibly for their menu (sustainable fisheries, free-range meats, artisan cheeses), I wanted to try it. I like to support small businesses and I'm also trying to support the ones who source locally and responsibly whenever I can. It may not seem like much but if I'm going to eat out and spend money anyway, I want to support what I believe in as much as possible.
In a nutshell, I would call Paul Martin's a steakhouse but they offer more than just steaks. You can get seafood, chicken, salads, burgers and ribs as well as steaks. Like a traditional steakhouse, the lighting inside is pretty dim. I think every steakhouse I've ever been in has had low lighting. It's pretty spacious, er, at least what you can see of it in the dim light. Their Mountain View location offers valet service but honestly, save yourself a few bucks and just park in the nearby garage. That's where the valets park your car anyway and there was plenty of parking when I went on a Friday night.
I tried to book a reservation on Open Table but they didn't have any spots available so my friend Karen and my cousin Ellen and I took a chance and just arrived early. The hostess said she could seat us but that we'd have to be done by 6:30. We had gotten there around 5:15 so while it was a little off-putting to be put on a timer, it wasn't a big deal to plan on getting out in less than 75 minutes.

They brought out a bread basket which the waiter, when asked, said they truck down since they don't have a bakery onsite. The inside part was good but the crust was a little chewy, leading me to believe the bread was probably delivered freshly made that morning but as the day wears on and the crust softens, it's not as fresh as it could be.
Marinated Skirt Steak with sweet potatoes and arugula - $24
I ordered the marinated skirt steak with sweet potatoes and arugula. I have to say, it was fabulous. The skirt steak, cooked medium, wasn't super tender but it wasn't tough either, just the right amount of chewy for a steak. The marinade was delicious and the fresh arugula, unadorned with dressing (thank you) made me feel virtuous since I actually ate it. But the best part of the dish? The sweet potatoes. I think they were actually Japanese sweet potatoes because they were white-fleshed yet still tasted like sweet potatoes but with a slightly more firm texture. Delicious.
Fish Tacos - $17
Karen got the fish tacos with the homemade flour tortillas. Unfortunately I don't think she enjoyed her order as much as I enjoyed mine. The "homemade" description had led her to believe the tortillas would be thinner but they were thick. Ellen also wasn't overly impressed with her salmon, finding it a little dry. I think they found their entrees okay but nothing to write about. Whereas I could probably wax on a little longer about my skirt steak and sweet potatoes. But I won't.
Cedar Plank Salmon - $25
Paul Martin's is a little on the pricier side but I expected that given their focus on sourcing sustainably and using fresh, seasonal ingredients. For once, we didn't get dessert. They had 4 offerings for $9 each but nothing appealed to us and, aware of our time limit, we decided not to bother since it was approaching 6:30 and our table was going to turn into a pumpkin for us and into a coach for the next patrons. Instead, we decided to head to Smitten's for ice cream (stay tuned).

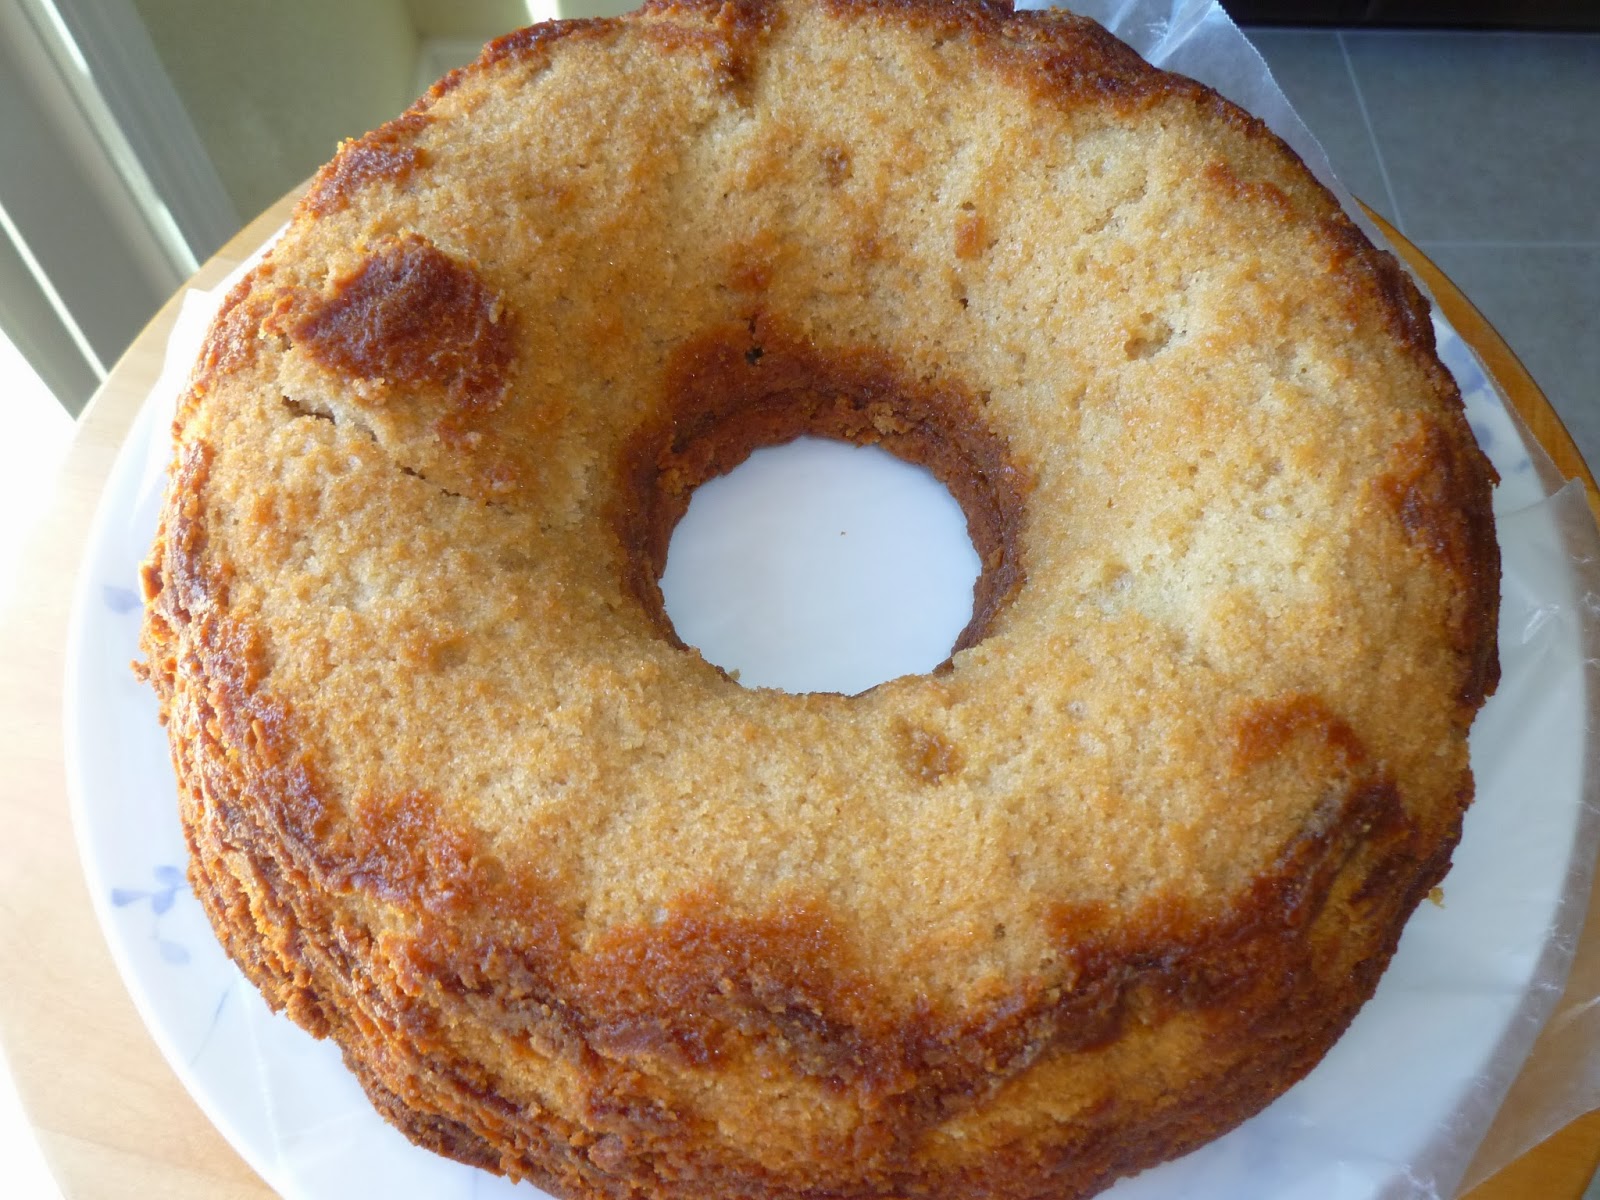
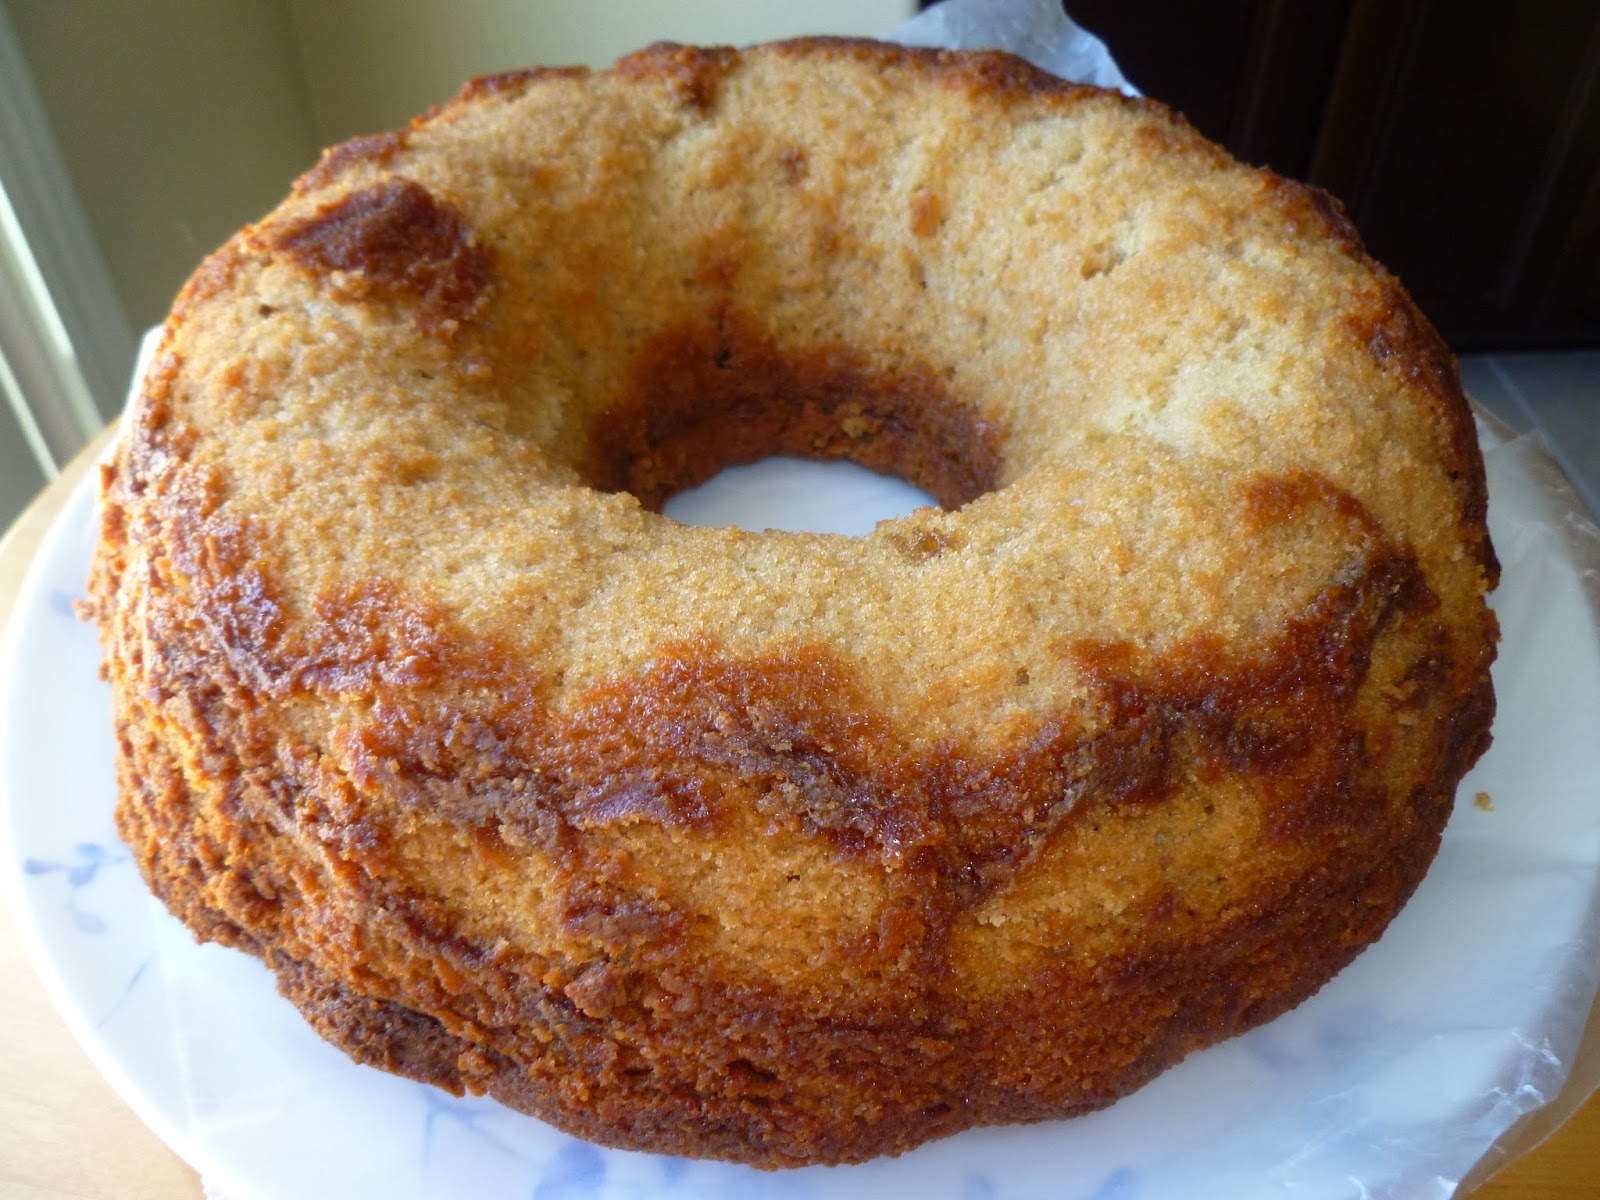
Brown Sugar Pound Cake

Brown Sugar Pound Cake - made January 31, 2014 from Cricket's Cafe
This is another recipe I've had so long on my pin board that I either had to make it or delete it. As always, click on the recipe title to take you to the original recipe page and blog I got the recipe from. It'll probably be better for you to see the original picture that sucked me in and got me to make this cake because it looked so moist and appetizing.
Mine didn't turn out quite the same way so I'm scratching my head wondering if I baked it too much or not enough because my cake doesn't look like that when sliced. When not sliced, as you can see from the pictures, it looks really homemade. As in, it didn't come out of the Bundt pan very cleanly and I was lucky it didn't break completely apart. Taste-wise, it was good although when I first tasted it, I thought it was too sweet. Not surprising with that much sugar in it but I was surprised that it didn't have more of a caramel or butterscotch flavor from all that brown sugar. Instead, it was just sweet. I liked it better when it had completely cooled because, although I could still taste the sweetness, the texture was soft and had a good mouthfeel.

1 1-lb box light brown sugar
1 cup granulated sugar
1 cup shortening
1/2 cup (1 stick) butter
5 eggs, room temperature
1 cup milk
3 cups all-purpose flour
1/2 teaspoon baking powder
1 teaspoon vanilla
1/2 teaspoon maple flavoring
1 cup walnuts, optional
  1. Preheat oven to 300 degrees F.
  2. Grease and flour bundt pan or loaf pans.
  3. Cream butter and shortening. Add brown sugar and granulated sugar and mix well. Add eggs, one at a time, mixing well after each addition.
  4. Combine flour and baking powder in a separate bowl. Alternate adding flour mixture and milk to the creamed mixture.
  5. Add vanilla and maple flavoring; mix well. Add nuts, if using. 
  6. Pour into prepared pans and bake 1 1/2 - 2 hours for bundt pan, less time for loaf pans. Cake is done when toothpick inserted near the center comes out clean.

Thursday, February 6, 2014

Red Velvet Chocolate Chip Cookies

Red Velvet Chocolate Chip Cookies - made dough January 29, 2014 from Sally's Baking Addiction
It's February, the month of schmaltzy hearts, the Hallmark holiday known as Valentine's Day, and pink and red everywhere. It's also the month of not needing an excuse to make anything red velvet because tis the season for edible red food. I saw these cookies from Sally's Baking Addiction and like a moth to a flame, I was irresistibly drawn to making them. Chocolate chip cookies and red velvet? Let me reach for the butter.
Cookies before baking
And speaking of schmaltzy hearts, that's what I tried to make out of these cookies. The picture above is how I shaped them with the help of a heart-shaped cookie cutter as I partitioned out the cookie dough. I froze them that way in the hopes that when baked, they wouldn't spread and would retain their shape. As you can see from the picture below, those hopes were dashed 5 minutes into the oven. Instead of heart-shaped cookies, I ended up with oddly shaped cookies that no one would mistake for hearts. Oh well, the best-laid plans...
Cookies after baking
Total upside though is regardless of how they looked, these cookies were delicious. They were like regular chocolate chip cookies but better because they were red velvet that actually had chocolate flavor to them. I added the white chocolate chips on my own since I like the color contrast in the cookie but you can also stick to just semisweet (or milk) chocolate chips. Oh and I discovered Sally's Baking Addiction, a blog which I've gotten several good recipes from, is publishing a cookbook to be released on March 1. Although I've forsworn buying new books, especially new baking books for awhile, don't think I didn't put this on my wish list for those days when I weaken my resolve and am jonesing for a new book.
1 1/2 cups + 1 tablespoon (198 grams) all-purpose flour
1/4 cup (32 grams) unsweetened cocoa powder
1 teaspoon baking soda
1/4 teaspoon salt
1/2 cup (115 grams) unsalted butter, softened
3/4 cup (150 grams) light or dark brown sugar
1/4 cup (50 grams) granulated sugar
1 egg, room temperature
1 tablespoon milk
2 teaspoons vanilla
2 1/2 teaspoons red food coloring
1 cup (180 grams) semisweet chocolate chips plus extra for after baking

  1. Whisk the flour, cocoa powder, baking soda and salt together in a large bowl. Set aside.
  2. Using a stand mixer with the paddle attachment, beat the butter on high speed until creamy, about 1 minute. Scrape down the sides and the bottom of the bowl as needed. Switch the mixer to medium speed and beat in the brown sugar and granulated sugar until combined. 
  3. Beat in the egg, milk and vanilla extract, scraping down the sides and bottom of the bowl as needed. Once mixed, add the food coloring and beat until combined. Turn the mixer off and pour the dry ingredients into the wet ingredients. Turn the mixer on low and slowly beat until a very soft dough is formed. Beat in more food coloring if you'd like the dough to be more red. On low speed, beat in the chocolate chips. The dough will be sticky.
  4. Cover the dough and chill for at least 1 hour (I recommend making them into 1.5 tablespoon-sized dough balls first then chilling).
  5. Preheat oven to 350 degrees F. Line two large baking sheets with parchment paper. Space dough balls evenly on baking sheet and bake for 10-11 minutes. If desired, press a few chocolate chips on top of each warm cookie.
  6. Cool cookies for 5 minutes before transferring to a wire rack to cool completely.

Wednesday, February 5, 2014

Restaurant Review: Bierhaus

Bierhaus - dinner on January 23, 2014
Although I often meet friends for dinner at one of the restaurants on Castro St in Mountain View (perfect central meeting point for those of us scattered up and down the peninsula), we'd never gone to Bierhaus before. It's fairly new, having opened within the past year. I found them through yelp, as usual, and a rave review for their sweet potato fries sucked me right in.
Truffled Shroom Burger with sweet potato fries
Bierhaus is a casual establishment with both indoor and outdoor seating which is viable in winter when you don't live in the polar vortex, experience record high temps for January and have no rainfall during the rainy season. You place your order at the counter, get a number, find a table and the staff delivers your order to your table, finding you by number. Just like Athena Grill, it's a good casual place to go with friends and not have to worry about splitting the check since you pay separately when you order. (For the record, I don't have a problem splitting the check with my friends but this just takes the calculation out of adding up the bill, tacking on the tip, dividing it by however many of us were there and strategizing what to tell the waiter to charge when some people pay with cash and others by credit card.)
Commando burger with sweet potato fries
Burger prices range from $8.50 - $14 or so, depending on whether you want a 5-ounce burger or an 8-ounce one. Cheese is extra as are bacon and avocado, depending on the burger. I went with a 5-ounce Commando burger because, as the name implies, it comes "commando" (which sounds so much nicer than "I'd like my burger plain") with just the burger and bun. I did add the cheese and didn't bother adding the greenery that came with it. Having been taught by The Counter that anything over 5 ounces would be way too much, I was happy with the 5-ounce patty. It was a good burger and the brioche bun was perfect. I also liked that Bierhaus sources locally and the grass-fed beef comes from nearby Marin Sun Farms. Their greens are also local. Locally-sourced food has been another criteria of mine when seeking out new, small business restaurants to try.
Chicken Cobb Salad
I took pictures of the other entrees my friends got but I often forget to ask them how their orders were so I never have that to include in my blog write ups. Could've been great or just okay but I have no idea since we were too busy talking about other stuff for me to quiz them on the food. I'm just glad they're used to my quirks enough by now that they'll let me photograph their food before they eat it. Yes, I know that's probably annoying but I come with baked goods for them so they humor me :).
Giant pretzel, heavy on the salt
Overall, I liked Bierhaus and it's a good place to go for a casual dinner, even if you're like me and don't drink beer. The burgers were good and I'll applaud any place that has sweet potato fries. I think I still prefer The Counter for burgers but this place is a good option as well.