Tuesday, January 28, 2025

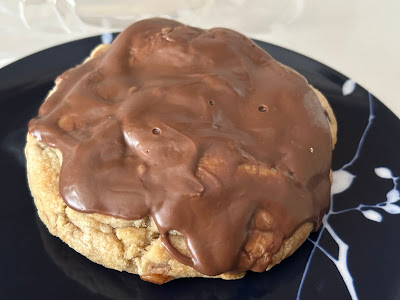
Crumbl Cookies review #86 - Cookies & Cream Cake ft Oreo

Crumbl Cookies review #86: Cookies & Cream Cake ft Oreo - visited January 27, 2025
From this week's menu, these are the ones I've already tried and reviewed: Macadamia NutBanana Bread and Lemon Poppyseed. The only one that interested me that I hadn't tried before, possibly because it was new on the menu, was the Cookies & Cream ft Oreo. Going in, I expected this would be a nice chocolate cake (I prefer Crumbl's mini chocolate cakes to their chocolate cookies) with the added bonus of Oreos.

And....turns out I was right. It is a nice chocolate cake, sandwiched and topped with chocolate ganache and Oreo cream cheese frosting. Not sure I could rave about it other than it's a nice chocolate cake. It didn't send me into orbit or anything. It's just a good cake, cakey in texture and not that overwhelmingly chocolate like their chocolate cookies tend to be. 
The chocolate ganache seemed more like a thin milk chocolate frosting than the rich creaminess of a dark chocolate ganache. Which I actually preferred as I'm more of a milk chocolate fan than a dark chocolate one. I also didn't mind the Oreo cream cheese frosting. Despite that, this didn't strike me as a cookies and cream cake so much as a chocolate cake with ganache and cream cheese frosting. If they wanted this to be more cookies and cream-ish, I'd add some chopped up Oreos to the cake batter and make them more chunky bits in the frosting.
It's got a $1.49 surcharge on top of the regular single cookie price. There are some cakes that Crumbl makes that I think would be worth the surcharge. Not sure this was special enough to warrant the extra $1.49 but this goes into the category of "glad I tried it, don't need to get again". Not because it was bad but there are other things to try that might be more than just "okay" and I'd rather spend my calories on finding those.

Sunday, January 26, 2025

Buttermilk Texas Sheet Cake from Margin Making Mom

Buttermilk Texas Sheet Cake - made January 5, 2025 from Margin Making Mom 
1 cup unsalted butter
1 cup water
2 cups all-purpose flour
2 cups granulated sugar
1/2 teaspoon salt
1 teaspoon ground cinnamon
1 1/2 teaspoons baking soda
2 large eggs
2 teaspoons vanilla extract
1/2 cup buttermilk

Brown Sugar Frosting
1/2 cup butter
1 cup brown sugar, packed
1/2 cup milk
4-5 cups powdered sugar
  1. Preheat oven to 350 degrees F. Line a 9 x 13 pan with foil and lightly spray with nonstick cooking spray.
  2. In a small saucepan over medium-high heat, combine butter and water. Bring to a boil then remove from heat.
  3. In the bowl of a stand mixer fitted with the paddle attachment, whisk together flour, sugar, salt, cinnamon and baking soda. Add the melted butter mixture and mix just until combined.
  4. In a separate mixing bowl, whisk together eggs, vanilla extract and buttermilk. Add to flour mixture, mixing on low speed until batter is smooth.
  5. Pour batter into prepared pan and bake 25-30 minutes or until toothpick inserted near the center comes out clean or with a few moist crumbs.
  6. Once the cake has cooled for at least 30 minutes, prepare the frosting: combine butter and brown sugar in a saucepan over medium-high heat. Bring to a boil, stirring frequently, until the sugar dissolves. Remove from heat.
  7. Gradually stir in milk, a little at a time, until incorporated. 
  8. Add 4 cups of powdered sugar to the bowl of a stand mixer fitted with the whisk attachment. On low speed, gradually add in the hot mixture of butter, sugar and milk.
  9. Increase speed to medium, mixing until frosting is smooth. If needed, add powdered sugar, 1/4 cup at a time, until desired consistency.
  10. Pour over cake and let frosting set for a few minutes before cutting and serving.
I could have sworn I took more pictures of this cake but it turns out I didn't. Probably because I made this at night and the lighting was bad. Then I packaged them all up to freeze so I didn't get any daylight shots the next day. Which was a shame as this was an excellent cake. Perfect cakey texture and great vanilla butter flavor. As with every time I make Texas sheet cake, there was too much frosting so I didn't use up all the frosting and saved it for the next recipe.
But otherwise I really liked this cake. Not just as a good way to use up buttermilk (it was) but also just a great way to make a delicious cake easily, especially if you're short on time. No waiting for the butter to soften since you melt it, no sifting the dry ingredients, nothing except putting everything in the pan to melt and in the mixing bowl to mix. It also makes enough to share with a crowd which is what I did. I froze these after I baked and frosted them then brought them with me when I traveled to the Bay Area to see friends and passed them around to said friends. Or make them for your next potluck for people to enjoy.

Thursday, January 23, 2025

Buttermilk Rolls from Amanda Cooks and Styles

Buttermilk Rolls - made January 4, 2025 from Amanda Cooks and Styles
1 cup buttermilk, heated to 105-115 degrees F
1/2 cup whole milk, heated to 105-115 degrees F
2 teaspoons active dry yeast
1/4 cup granulated sugar
1 teaspoon salt
1/2 teaspoon baking powder
3 1/2 cups all-purpose flour

Egg wash
1 egg
1 tablespoon milk
  1. In the bowl of a stand mixer fitted with the dough hook, add warm milk and yeast. Let sit for 10 minutes to allow yeast activation.
  2. Add buttermilk, sugar and salt. Beat with dough hook on medium speed to mix. Add 2 cups of flour and baking powder and knead for a few minutes. Add remaining flour and knead until a smooth and soft ball forms.
  3. Place ball of dough in a lightly oiled bowl and cover with a towel. Let rise in a warm place for 1-2 hours or until dough doubles in size.
  4. Roll the dough into a long log about 12 inches long. Cut into 12 equal pieces and roll each piece into a smooth ball. Transfer to a parchment lined baking sheet. Cover with a towel and let rise another hour or so until double in size.
  5. Preheat oven to 375 degrees F. In a small bowl, whisk 1 egg and 1 tablespoon milk. Baste tops of rolls with egg wash.
  6. Bake rolls for 13-15 minutes until tops are golden. Remove from oven and let cool to lukewarm. Enjoy with fresh butter.
It's been a long time since I've made a yeasted bread without using my breadmaker and you can tell by my rather amateurish shaping of these rolls. I'd be embarrassed if I was actually a bread baker but I'm really not. I love bread. I love it so much that I don't make it. If that sounds counterintuitive, I can also tell you I love chips but I rarely buy them because I would eat the whole bag, likely in one sitting. There are just some things you have to protect yourself from; overeating your best comfort foods is one of them.
So I rarely make bread and therefore am considerably rusty at it. Truth be told, I didn't try that hard to make these that pretty either since I knew I would be the one eating most of them. And I care more about taste than appearance. Good thing, right?
Although many ovens have a proof setting (mine doesn't) and people have countertop proofers (I don't), nothing beats the old-fashioned method my mom always used when she made bread in my formative years. Namely, she put the bowl of bread for the first rise and later the shaped rolls for the second rise on the center rack of an oven that was turned off, had a shallow baking pan on the bottom rack beneath the bread and she would pour boiling hot water into the shallow pan. Steam and warmth would fill the oven. She would close the oven door and let the bread rise in the warm, damp oven space, sometimes replenishing the hot water with another pour later on if the dough hadn't risen as much as she wanted.
That's how I did both the first and second rise for these rolls. Then I took the risen, unbaked rolls out, removed the shallow pan of water, wiped down the oven and turned it on to preheat. Then baked.
Although I egg-washed these as the recipe directed, the tops didn't brown as much as the bottoms. I was afraid of underbaking them, mostly because I've been binge-watching the Great British Bake Off and had nightmare visions of Paul Hollywood poking at my bread rolls, telling me they were underproved and underbaked. So I ended up baking these a little longer than I normally would, going (erroneously?) more on how much the tops had browned rather than the bottoms.
Still, they weren't burned or overbaked. They didn't quite have the taste of buttermilk but these were still pretty good, soft rolls. They would've been softer if I hadn't baked them for so long but still, it's hard to beat soft, fluffy rolls smothered in melty butter.  If I make these again, I would make the rolls smaller and more uniform, be more generous with the egg wash and not bake them as long. You want the bottoms to be a lighter brown than what I had above.

Monday, January 20, 2025

Crave Cookies review #6 - Biscoff Explosion

Crave Cookies review #6 - Biscoff Explosion, visited January 5, 2025
Biscoff Explosion

I've pretty much given up being able to taste test and post about Crave Cookies in the same week they're available at Crave. Their new weekly flavors drop on Fridays and they're located farther from me so I'm not able to get to that part of town until later the following week. By the time I do the taste test and the write up, it's too late.
Still, there aren't as many Crave locations as there are Crumbl locations so I'm speaking to a smaller audience for Crave Cookies and I haven't heard of anyone rushing to get a particular cookie based on my reviews, lol.

So I'll just write these for me, to remember for next time a particular flavor comes on the rotation, to remind myself whether I liked it or not. In the case of the Biscoff Explosion which was "cookie butter dough + Biscoff cookie butter stuffed + white chocolate chips", um, heck yeah, I liked it.

I'm really enjoying the Crave cookies I've tried so far, mostly because I don't pick the offerings that have a ton of frosting smothering the cookie and because I like the flavors they offer. The Biscoff Explosion was just as good as it sounded. I liked everything about it, from the thickness of the cookie to the crispness of the edges, the chewiness of the cookie itself and, of course, the cookie butter flavor complemented perfectly with the white chocolate. I particularly enjoyed the cookie butter stuffing inside this cookie that was melty if you ate this warm. Crave just does these cookies so well. Worth the farther driving distance than Crumbl, even though I do try to combine it with when I'm already close to that part of town from my volunteer work for my local food bank. Also worth the extra miles I log on my treadmill to eat even part of the cookie.
If you have a Crave Cookies in your area or get one in the future, they're definitely worth a visit.

Friday, January 17, 2025

Banana Bread Coffee Cake from Daily Appetite

Banana Bread Coffee Cake - made January 3, 2025 from Daily Appetite
1/2 cup brown sugar
1/2 teaspoon vanilla
3/4 cup mik
2 large eggs
2 medium bananas, mashed (about 1 cup)
1 1/2 cups all-purpose flour
2 teaspoons baking powder
1 teaspoon cinnamon
1/4 teaspoon baking soda
pinch of salt

Streusel
1/3 cup granulated sugar
1/3 cup brown sugar
1/2 teaspoon cinnamon
1/4 teaspoon salt
1/2 cup butter, softened
1 1/4 cups all-purpose flour

Icing
1 tablespoon milk
1/4 cup confectioners' sugar
  1. Preheat oven to 375 degrees F. Line a 9 x 9-inch baking pan with foil and lightly spray with nonstick cooking spray.
  2. Make streusel topping: in a mixing bowl, use a fork to combine granulated sugar, brown sugar, cinnamon, salt and butter. Slowly add in flour and combine, using the fork in a cutting action. Squeeze handfuls of streusel by hand to create large clumps.
  3. In the bowl of a stand mixer fitted with the paddle attachment, cream together butter and brown sugar until light and fluffy. Mix in vanilla, milk, eggs and bananas.
  4. In a separate bowl, whisk together flour, baking powder, cinnamon, baking soda and salt. Add to butter mixture and mix to combine.
  5. Pour batter into prepared pan and top with streusel, spreading evenly to cover top. Bake for 35-40 minutes or until toothpick inserted near the center comes out clean. Remove from oven and let cool on a wire rack.
  6. While the cake is cooling, make the icing: in a small saucepan over low heat, combine milk and sugar with a whisk. Whisk until sugar is dissolved and mixture is smooth. Add more milk if needed to achieve desired consistency. Drizzle over warm cake.
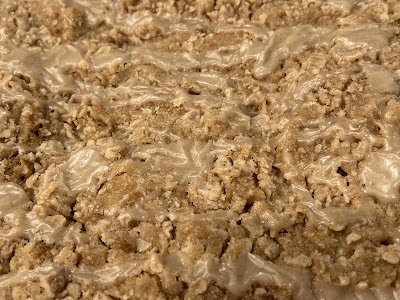
This recipe didn't fail me but rather, I failed it. I've become so used to baking "my way" that I violated the first rule of baking and didn't read the recipe very closely. My biggest mistake is I only baked this at 350 degrees F instead of 375. Consequently, although the toothpick came out clean after 30 minutes, it turns out the cake was still underbaked. I discovered my mistake too late as I'd already glazed it. But the initial taste test piece was too dense and soggy, not just from the bananas but because it was underbaked. I did pop it back into the oven to bake some more but that made the glaze crystallize and harden once it came out of the oven a second time and cooled.
Which was too bad as this cake was pretty good in terms of flavor, even underbaked and later, twice baked. So I'll have to try it again and pay more attention next time. Even though I failed with it, I’m still posting about it as it’s worth logging for a second try and it’s a good way to use up milk before it expires. Not to mention overripe bananas.

Tuesday, January 14, 2025

Crumbl Cookies review #85 - S'mores Cake

Crumbl Cookies review #85: S'mores Cake - visited January 13, 2025
A quick write up so I can get this review posted while the S'mores Cake is still available at Crumbl this week (through Saturday, they're closed on Sundays).

I usually enjoy the new cakes Crumbl has been releasing and always want to try them. I typically stay away from anything s'mores though since I don't care for marshmallows; they're often too sweet and too sticky/rubbery for me.
But I decided to try this one and see. I wanted to like this cake, I really did. But it was just okay, at best. At worst, I didn't like that top layer of frosting at all. It was solid, probably due to the marshmallow in it setting to a solid state. After a couple of bites, I removed the frosting. Only instead of scraping it off like with a cream cheese frosting or a buttercream, the whole top came off in one piece. That's how solid it was. Yeah, not for me.

It's served at room temperature but I liked it much better after I took the top off and popped it in the microwave for 15 seconds. The cakes were softer as was the frosting and ganache in the middle. Much more enjoyable. So overall: glad I tried it for myself, was good enough to taste test but not something I'd get again. Flavor wise, it didn't stand out either other than as a nice chocolate cake and a nice vanilla cake.

Thursday, January 2, 2025

Crumbl Cookies review #84 - Cookies & Cream Tres Leches Cake

Crumbl Cookies review #84 - Cookies & Cream Tres Leches Cake, visited December 31, 2024
Remember when I talked about Crumbl's product extensions on their bestsellers? They started with the original Tres Leches Cake, added Cookie Butter Tres Leches and then Eggnog Tres Leches over the holidays. This week, they extended to Cookies & Cream Tres Leches.
Of this week's offerings, I had already tried Vanilla Crumb Cake ft Golden Oreo, French Toast, Pink Sugar, and the Churro (one of my favorites).
Out of the others, the Cookies & Cream Tres Leches Cake is the only one I wanted to try. I had some reservations as I don't like whipped cream and only like it on the original Tres Leches because of the cinnamon sprinkled on top. Plus, although I love Oreos, I'm not a big cookies and cream fan.
However, I'm glad I tried this one as I liked Crumbl's version. It's really more of a moist chocolate cake and I'm not sure it's really a "true" Tres Leches as opposed to a really good, moist chocolate cake. I did end up scraping off most of the whipped cream after the first taste test bite as I didn't like it enough to consume the calories from it.
It doesn't necessarily photograph that well on the inside, at least not with my photography skills, but don't let that put you off. This is a good cake and captured that dark chocolate, Oreo-ish flavor. Although it was more dark chocolate than Oreo to me. Still, I'm not that picky with a good chocolate cake. This does have a $1.49 surcharge so it was $5.98 at my local store. Crumbl (or at least my store) has perfected the soaking of the milks. My cake was perfectly moist but not soggy or dry. It was just right. I still prefer the original Tres Leches Cake overall but this is a pretty delicious product extension. 

Tuesday, December 24, 2024

"Best" Brown Butter Chocolate Chip Cookies from Modern Honey

Best Brown Butter Chocolate Chip Cookies - made dough December15, 2024 , modified slightly from Modern Honey
1 cup butter, melted and browned
1 cup brown sugar
1/2 cup granulated sugar
2 large eggs
1 large egg yolk
2 teaspoons vanilla extract
2 1/4 cups flour
1 teaspoon baking soda
1 teaspoon salt
2 cups chocolate chips
1 cup Heath toffee bits, optional
  1. Place butter in a large, deep, heavy pot or skillet. Melt over medium-low heat, stirring constantly, until completely melted, foaming and browned bits appear on the bottom, 5-7 minutes. Pour butter into your mixing bowl and let cool to room temperature. Cover and place in refrigerator until solidified, at least an hour. Remove from refrigerator and let come to room temperature, 5-10 minutes.
  2. Beat butter for 30 seconds and scrape the browned bits at the bottom to incorporate with rest of butter. Add brown sugar and granulated sugar; cream for 4-5 minutes, scraping bottom and sides of bowl to keep mixture even textured.
  3. Add eggs and egg yolk, one at a time, beating for 30 seconds after each addition. Stir in vanilla.
  4. Add flour, baking soda and salt, mixing on low speed just until incorporated. Stir in chocolate chips and toffee bits, if using, mixing until evenly disbursed.
  5. Portion dough into golf-ball-size dough balls; cover and chill for 24 hours. Freeze or bake after 24 hours.
  6. When ready to bake, preheat oven to 385 degrees. Line baking sheets with parchment paper. Evenly space chilled dough balls. Bake 9-10 minutes or until edges are light golden brown and middles no longer look raw. Remove from heat and let rest on baking sheets for 2-3 minutes before transferring to wire rack to cool completely.
Although I haven't been trying many new recipes lately, I did sneak this one in from Modern Honey. Beyond holiday-themed cookies for my holiday baking gifts, I almost always include chocolate chip cookies as well since they're a universal favorite among my gift recipients. 

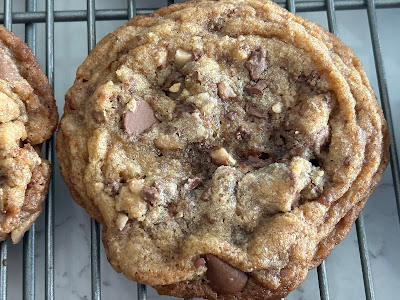
Browned butter provides an extra richness to cookies and this calls for browning the butter, letting it cool to solid state then mixing it into the dough. The result is cookies with crisp edges, an extra richness to the caramelized flavor and chewy moistness in the middle. In other words: damn good.

They puffed up during baking then they did flatten out more than I wanted once they came out of the oven. I did the swirling trick to neaten up the edges and make them more uniformly round. That also led to the crinkles at the edges which I didn't mind. But I would've like them to be thicker. But in any case, they did well on flavor and texture. I also added a cup of toffee bits for some crunch and sweetness but you can leave them out if you prefer.

Wednesday, December 18, 2024

Crave Cookies Review #5 - Caramel Turtle

Crave Cookies Review #5: Caramel Turtle - visited December 11, 2024
Caramel Turtle

I think I've given up trying to get my Crave reviews up the same week the cookies I've tried are still available. The new flavors drop every Friday but I usually can't get to Crave until either a few days after that or a day or two before another new set of flavors drop. So I'm going to be perpetually behind. 

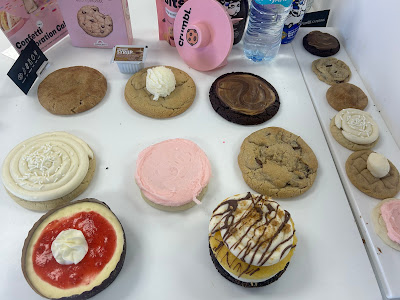
I didn't have time to capture what last week's particular flavors were but here's a picture of them. The only one I was really interested in was the Caramel Turtle so that's what I got.
As you can see, it's pretty straightforward: brown sugar cookie stuffed with caramel, studded with candied pecans and covered in melty milk chocolate.

If your blood sugar spiked just reading that description, imagine actually biting into this. It's like a superior and nutty Twix in cookie form. But infinitely better than a Twix.

I like Crave's base vanilla or brown sugar cookies anyway. Then you stuff it with excellent chewy, flowy caramel and cover it in milk chocolate? Um, yeah. I'm not generally a fan of nuts in my cookies but since this was such a sturdy, thick cookie, it worked fairly well, especially since the pecans were candied and added that sweet crunch. This cookie was worth the calories and double workouts, I assure you.