Sunday, July 27, 2014

Bakery Review - Ici Ice Cream

Ici Ice Cream - visited July 20, 2014
After lunch at Bowl'd, we headed back to Berkeley for dessert from Ici Ice Cream. Resist the urge to pronounce "Ici" as "icy". I know, it's hard if you're not French because you see ice cream and instinctively want to pronounce it wrong but "ici" means "here" in French and is therefore pronounced like "easy" but with a soft "s" sound instead of a "z" sound. Or think of pronouncing it as "Eeee Ceee" Ice Cream - close enough.
When we got to Ici, the shop was pretty crowded but it appeared we came at a good time because when we drove by later on our way home, there was a line out the door and along the sidewalk. If you don't mind spending $4-5 on a scoop of ice cream (and let's be clear, I don't mind - research once again), I can understand why.
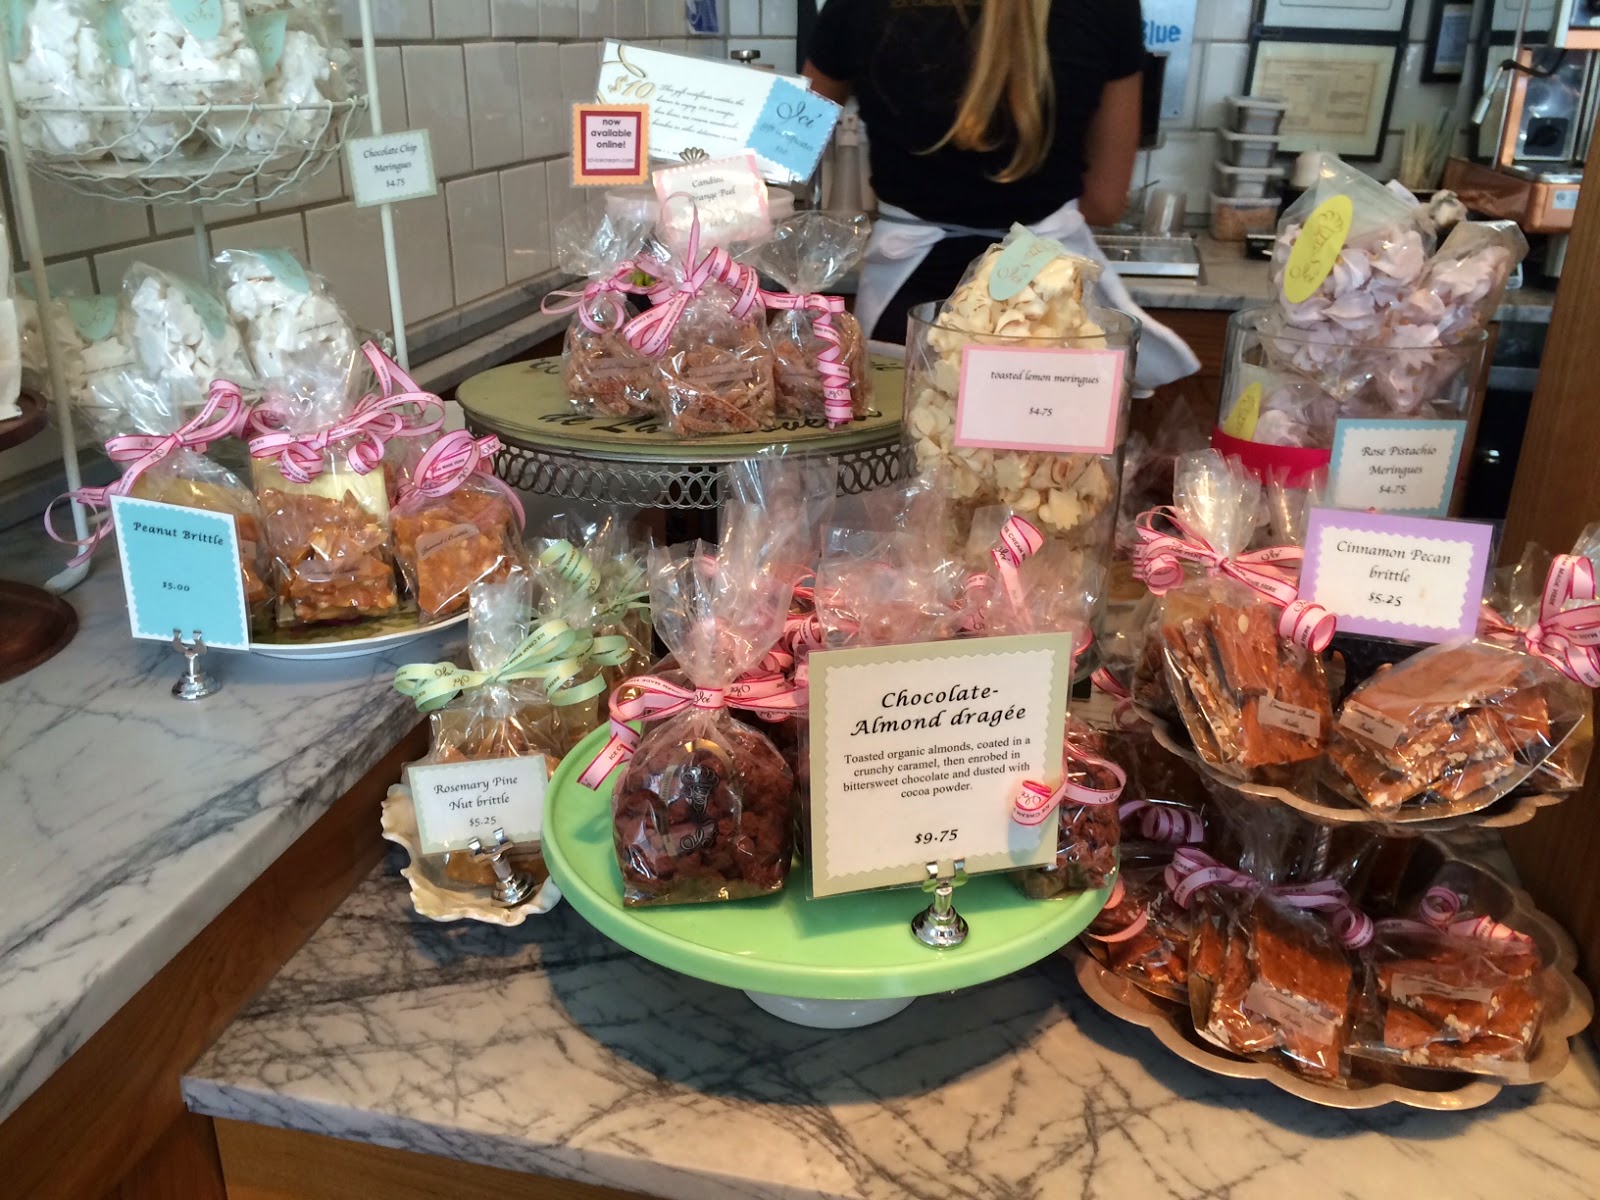
Before I get to the ice cream, I was distracted by the offerings of baked goods in the display cases. Those were a nice surprise since I thought Ici was "just" an ice cream shop. Ah, how wrong I was.
They had a surprisingly wide variety and very nice selection of different baked goods, from whole Baked Alaskas to bite-size individual desserts and little cookies. All super cute. I treated everyone for the ice cream and my niece bought me an assortment of bite-size desserts for me to try later. She knows all about my research for this blog and she wanted me to try out different options. Awww.
Now let's talk about the ice cream. According to my niece, Ici makes different flavors daily and you're allowed to ask for taste tests of up to 3 different ice creams. The helpful counter staff will ask which ones you want to try, go behind the counter, dig around the frozen ice cream vats and come back with little spoons cradling mini scoops of the taste tests you requested.
My niece asked for 3 taste tests and settled on the lavender honey. On her advice and experience, we both opted to get our scoops in the homemade waffle cones. They fill the bottom point with chocolate so no ice cream will melt out into your palm. Brilliant.
Lavender Honey
I confess that once I saw a flavor labeled "Vanilla Fudge Salted Almond", I had pretty much made up my mind, even without a taste test. One of my favorite ice cream flavors is mocha almond fudge and this looked like an upscale riff on that. I tried the sample taste test but since I had already decided that was "my" flavor, I didn't feel the need to try 2 other flavors. Oh, and yeah, that's two scoops you see in that picture and I downed all of it. I may be indifferent to ice cream 90% of the time but that leaves 10% for when I happen to be in an ice cream parlor. I'm a two-scoop minimum kind of girl. Good thing too since the ice cream was delicious, smooth and creamy while the salted almond made a nice contrast to the sweetness of the vanilla ice cream. Do I even need to mention the fudge ribboning throughout was also perfect?
Vanilla Fudge Salted Almond
My parents opted for the Cinnamon Pecan in a cup - waffle cones held no interest for them. No, I'm not adopted; that's just how they roll.
Cinnamon Pecan
With my double scoop of ice cream on a waffle cone, you can imagine I didn't have room for the little box of baked goods my niece got for me. I wasn't there when she was choosing from the bakery displays so when I got home, it was a nice surprise to open the box and see what she picked.
The bottom layer at the left of the picture below is a ginger molasses cookie that she said she'd had before and thought was "bomb" (millienial slang for "yummy-delicious"). She also chose (left to right) shortbread, coconut macaroons and Mexican wedding cakes.

I had to pace myself (freaking portion control and all that) so I consumed the treats over the next several days. They were all good. The ginger cookie had bold ginger molasses flavor like a good cookie of that kind should have. The coconut macaroons had great coconut flavor and the Mexican wedding cakes were just like the ones I make (that probably sounds vain, oh well).
Shortbread
But my absolute favorite of the whole box was the shortbread. I'm predisposed to like shortbread anyway but theirs is better than any I've made. It wasn't too buttery but it still had great flavor. But what I loved about it was the texture - it was soft but not crumbly. "Melt in your mouth" is such an overused cliche but an apropos one in this instance. Honestly, if I could make shortbread like that, I'd have my Christmas cookie of the year.
Mexican Wedding Cakes
Coconut Macaroons
Ginger Molasses Cookies
All in all, Ici Ice Cream was a fun place to visit and try out. If you go, I advise going on the early side. We were there right after lunch so maybe sometime between 2 and 3? Just an hour later is when the line was spilling outside of the shop.

Saturday, July 26, 2014

Restaurant Review: Bowl'd Korean Rice Bar

Bowl'd - lunch on July 20, 2014
Last weekend, my parents and I went to visit one of my nieces and we ended up going to Bowl'd Korean Rice Bar for lunch. It's a cute little restaurant in Albany, about a 10-minute drive from Berkeley. Typical college students probably don't venture this far from campus given the plethora of eating establishments just surrounding Telegraph Ave alone but since we had wheels, my niece recommended we try out Bowl'd.
If you like Korean food, this is a good place to go. If you like Korean food served by a friendly, attentive staff who smile whenever they come up to your table, this is a great place to go.
We never had one dedicated server but we had about 4-5. They all worked together to take our order for appetizers, to fill water glasses, to bring tea, to bring out entrees and to clear the table. Needless to say, we received very good service.
And the food was good too. We started out with appetizers: shrimp dumplings (potstickers), seafood pancake, and caramelized potatoes. Our first server took our appetizer order first then said she'd put the order in while we decided on our entrees so that the appetizers could come out faster. Nice. The shrimp dumplings were delicious. For me, the mark of a good potsticker is the wrapper, how thick or thin it is and how well it was cooked. This one hit it on all counts - the wrapper was just the right thickness and they cooked it perfectly, slightly crisp on the outside but soft and chewy on the inside.
Likewise, the seafood pancake held its own as being crisp on the outside but still soft and chewy inside. It wasn't greasy either which was also a plus. The seafood pancake from Jang Su Jang was just a tad bit better but the one at Bowl'd is on par.
My favorite appetizer, however, and one I probably ate a tad too much of were the caramelized potatoes. Let me repeat: caramelized. Need I say more? Nope. The coating was lightly crisp and lightly sweet. For the most part, the inside was cooked just right, although a few of the larger pieces were a trifle too firm for me. I guess they wanted to make sure they didn't overcook the potatoes or else they might fall apart. Still, if you come to Bowl'd, get the caramelized potatoes - you won't be sorry.
The Works ("cold" bowl)
As for the entrees, each of us got some kind of bowl. When in Rome, right? They offer two types of bowls: a "cold" bowl and a hot bowl. The cold bowl wasn't really cold in the sense that the food wasn't chilled or anything. The helpful waiter explained to us that the bowl itself would be room temperature just like any other plate or bowl on the table. It just wouldn't be a hot bowl. The hot bowl is served in a clay pot and really is served hot, thereby cooking the contents a bit more so the rice may end up getting a little crispy. I'm not a fan of crispy rice so I went for the cold bowl.
The Hot Bowl
If you're trying to eat healthy or healthier, Korean food is a pretty good choice. You can select items that aren't fried or deep fried and the "stuff" that comes in a bowl are mostly veggies and protein. At Bowl'd, you choose whether you want the hot or cold bowl, which protein and which type of rice (white or mixed grain). I opted for the cold bowl with Bul Go Gi or marinated beef, my favorite Korean dish. I was less enthused about the stuff that all came with it and I admit I ate mostly the rice, the egg and the beef. If I had known it came with all those veggies, I might've chosen something else. Still, what I did eat was good and I'm glad we tried it. Plus, really, the nice service couldn't be beat.

Wednesday, July 23, 2014

Death by Chocolate Chocolate Chip Cookies

Death by Chocolate Chocolate Chip Cookies - made dough July 12, 2014 from Imperial Sugar
You'd think by the chubbiness of these cookies, this is another recipe from Averie Cooks, my go-to source for fat, chubby, thick, sink-your-teeth-into-them cookies. But nope, I actually found this one on Imperial Sugar via pinterest.
When you pair the word "death" with "chocolate", you know there's something there worth looking into, right? I added the second "chocolate" in the title because that seemed appropriate. One "chocolate" simply wasn't enough.
I was pleased by how these turned out since they didn't spread much and, thanks to freezing the dough before baking and then underbaking, they came out nice and fudgy. There's no point in baking with chocolate if it's not going to turn out fudgy. So say the Baking Gods.
When I first made the dough, I did find it a bit soft so it was hard to get the dough balls to keep their round shape. They had a tendency to flatten before they chilled properly. If that happens to you, chill the dough in the mixing bowl briefly (5-10 minutes ought to do it) then shape into golf-ball-size dough balls. You don't want to chill it for too long before portioning out or it'll be that much harder to shape properly. You want it chilled just long enough to hold its shape but not so long as the dough becomes difficult to scoop out.
Time these in the oven but if you forget (ahem, yup I forgot), then the safest way to go by appearance is if the middle no longer looks so shiny. Shiny means the dough is still raw and glistening from the melted butter. You want just the barest look of "crust" on top that appears dry but you don't want to bake long enough that cracks form in the crust or the cookie really will be dry. Let cool completely or cookie will be too mushy. The best way to appreciate the fudgy interior is if the cookie is completely cooled. That's my preference anyway.
8 ounces semisweet chocolate, melted
2 1/4 cups all-purpose flour
1/2 cup cocoa powder
1 teaspoon baking powder
1/2 teaspoon salt
1 cup butter, room temperature
1 1/4 cups granulated sugar
2 eggs
1 teaspoon vanilla extract
1 cup milk chocolate chips
1 cup semisweet chocolate chips
1/2 cup white chocolate chips
  1. In a large bowl, whisk together flour, cocoa powder, baking powder and salt. Set aside.
  2. In the bowl of a stand mixer fitted with the paddle attachment, cream butter and sugar together for 2 minutes until light and fluffy.
  3. Add melted chocolate and stir until combined.
  4. Beat in eggs and vanilla until smooth and incorporated.
  5. Stir in dry ingredients into chocolate mixture until dough forms. Do not overmix. Fold in chocolate chips.
  6. Chill dough briefly until firm enough to mold into golf-sized dough balls. Portion into dough balls and freeze until firm or overnight.
  7. Preheat oven to 350 degrees F. Line a baking sheet with parchment paper. Space dough balls evenly on the baking sheet and bake for 12-13 minutes until edges are set.
  8. Cool on baking sheet for 3 minutes then transfer to wire rack to finish cooling. Repeat with remaining cookie dough.

Monday, July 21, 2014

Averie's Soft and Chewy Chocolate Chip Cookies

Soft and Chewy Chocolate Chip Cookies - made dough July 12, 2014 from Averie Cooks
Although I can never resist trying out new recipes for chocolate chip cookies, you know I have standards of almost Herculean-heights in order for me to consider a new recipe good enough to join the ranks of the ones I already hold in high esteem, namely Alton Brown's and Crazy for Crust's recipes for chocolate chip cookies. They don't spread much, stay thick, have the perfect consistency in terms of chewiness and, perhaps, the real standard, tastes good even at room temperature.

That might sound funny but I have many chocolate chip cookies that are fantastic when you taste the cookie 10 minutes out of the oven yet I'm less enthused about them an hour or two later or, "heaven forbid" says my snobby taste buds, a whole day later. Cookies stale quickly and I lose all interest in consumption if they're more than a few hours old. When you've been spoiled eating warm chocolate chip cookies when the mood strikes, you tend to have high standards for said cookies.

So it should come as no surprise that the recipe that joins my Top 3 list for This One's a Keeper chocolate chip cookies comes from Averie Cooks. I expected it to be good because it's from her blog but I admit to a little surprise by how much I liked it. It has vanilla pudding mix which I've baked in chocolate chip cookies before so I expected it would add to a soft texture. Surprisingly, while it did that, this cookie also still had the requisite crisp edges I like in a freshly baked cookie. Good taste, great texture, excellent 10 minutes out of the oven, good even completely cooled. The dough was also a dream to work with, not too soft or sticky (make sure your butter isn't too soft or warm) and held its shape well even when scooped into large dough balls. I've made other chocolate chip cookies from Averie's blog that were also good but this particular one easily joins my Top 3 list.

3/4 cup unsalted butter, softened (1 1/2 sticks)
3/4 cup light brown sugar, packed
1/4 cup granulated sugar
1 large egg
1 teaspoon vanilla extract
2 cups all-purpose flour
one 3.5-ounce packet instant vanilla pudding mix
1 teaspoon baking soda
pinch salt, optional and to taste
one-12 ounce bag (2 cups) milk chocolate chips or chunks (I chopped up a bar of Trader Joe's milk chocolate into good-sized chunks)
  1. To the bowl of a stand mixer fitted with the paddle attachment, combine the butter, sugars, egg, vanilla, and beat on medium-high speed until creamed and well combined, about 4 minutes.
  2. Stop, scrape down the sides of the bowl, and add the flour, pudding mix, baking soda, optional salt, and beat on low speed until just combined, about 1 minute.
  3. Scrape down the sides of the bowl and add the chocolate chips; beat on low speed until just combined, about 30 seconds.
  4. Using a large cookie scoop or 1/4-cup measure, form approximately 14 equal-sized mounds of dough, roll into balls, and flatten slightly. Chill for at least 2 hours or up to 5 days.
  5. Preheat oven to 350 degrees F and line a baking sheet with parchment paper. Place dough mounds on baking sheet, spaced at least 2 inches apart and bake for about 11 minutes, or until edges have set and tops are just set, even if slightly undercooked, pale, and glossy in the center; don't overbake. Cookies firm up as they cool. Allow cookies to cool on baking sheet for about 10 minutes before serving. 

Saturday, July 19, 2014

Chocolate Fudge Brownies

Chocolate Fudge Brownies - made July 7, 2014 from Recipe Girl
Did I mention one of my nieces is in New York City for part of the summer? She's having the time of her life and I enviously track her tumblr blog with all the fantastic experiences she's having, including, but not limited to, all the glorious food NYC offers. My last trip to the Big Apple was solely to go there to eat so you can imagine the nice shade of pea-green envy I turn when I see her food pictures. Yes, she takes pictures of her food too - she's my niece, after all. Those genes run true.
But, despite her ice cream forays at Big Gay Ice Cream, food from Koreatown, and my relentless urging for her to have a burger at the Shake Shack, I still sent her a small care package of brownies. My sister had gone to visit her and thought my niece might be a lil homesick (awwww) and would welcome a care package. Say no more, I was on it.
I hadn't made a nutella crunch version of brownies in awhile so thought I'd trip down memory lane by trying a new brownie recipe from Recipe Girl because I needed something for the nutella crunch mixture to sit on. Plus these mail well.
The original recipe calls for the brownies to be glazed so I've left that down below if you want that version. If you want the version pictured, omit the glaze and use the nutella crunch topping recipe found here. For an 8-inch pan, I only used half the topping recipe. Be generous with the Rice Krispies if you like a lot of crunch (I do). This remains my favorite topping for brownies and a nice way to dress them up.
3/4 cup all-purpose flour
1 teaspoon baking powder
1/2 teaspoon salt
1/2 cup (1 stick) unsalted butter
3 ounces unsweetened chocolate, chopped
1/2 cup packed brown sugar
1/2 cup granulated white sugar
2 large eggs
1 large egg yolk
1 teaspoon vanilla extract
1/2 cup semisweet chocolate chips

Glaze
2/3 cup powdered sugar
2 tablespoons unsweetened cocoa powder
1/4 teaspoon vanilla extract
4 to 5 teaspoons hot water (or more, as needed)
  1. Preheat the oven to 350 degrees F. Line an 8-inch baking pan with foil and spray lightly with nonstick spray.
  2. Prepare the brownies:In a medium bowl, whisk together the flour, baking powder and salt. Melt the butter and chocolate together in a pan set on top of a pot of simmering water. Remove from heat. Whisk the sugars into the mixture. Then whisk in the eggs, yolk and vanilla. Stir in the flour mixture until well incorporated. Fold in the chocolate chips.
  3. Pour the batter into the prepared pan and bake for 25 to 30 minutes. Bake until a skewer inserted into the center of the brownie comes out with moist crumbs. Remove from the oven and cool completely before adding the glaze (or the nutella crunch topping).
  4. Prepare the glaze: In a small bowl, combine the powdered sugar, cocoa and vanilla. Whisk in 4 teaspoons of hot water, then add more water- 1 teaspoon at a time- until you reach a desired glaze consistency. You want to be able to pour it on the brownies.
  5. Use the parchment paper to move the brownies from the pan to a cutting board. Pour the glaze on top of the brownies, and use the bottom of a spoon to gently spread it to the edges. Let the glaze set before cutting.

Thursday, July 17, 2014

Buttery Beer Bread

Buttery Beer Bread - made July 4, 2014 from The Novice Chef
This uses up #4 of the 6-pack of beer I originally bought for the Slow Cooker French Dip. I don't know why I feel compelled to keep trying out recipes that use beer instead of giving the remaining beer bottles away. Maybe it's because out of my friends who drink beer, most, if not all, of them are probably snobby enough about their beer that Heineken isn't going to cut it. They go to micro breweries and talk knowledgeably about - well, I don't know enough about beer to tell you and apparently, I wasn't listening to them when they talked about it. So giving them my leftover Heineken would be like them offering me a cupcake bought at Safeway. Uh, wow, thanks, that's so nice of you. (Really, do I have to eat it?)
Besides, since I already have the beer anyway, it's a rare chance to try recipes that use beer that I had always passed up before. Because I have no intention of buying beer again simply because I find it too confusing and don't know what to get. No need for me to re-live those tortuous moments at Target scratching my head looking at an end cap of beer and being baffled.
I tried this beer bread and it was really easy to make. Pour half the melted butter at the bottom of the loaf pan, dump the beer bread dough into it, pour the rest of the butter over it and bake. Before you can ask what could go wrong, let me tell you. First, the butter didn't incorporate into the dough as fast as I expected. Some of it decided to overflow the loaf pan instead, drip onto the bottom of my newly-cleaned oven and burn to the smokiness which greeted me when I opened the oven door to check on the bread. Awesome.
Second, and worse, it tasted like beer. I know, I know, there's a reason why it's called Beer Bread but I had been counting on the alcohol burning off in the baking and not tasting like beer. That's what happened the 3 other times I had baked or cooked with beer. Not so with Buttery Beer Bread. It lives up to its name, not just the beer part but also the butter part. It really was buttery. I shouldn't be colored surprise since it had a freaking stick of butter in it but it was a tad too buttery for me.  And trust me, I don't say that very often. The shame of it is, if I had liked beer, this would actually be excellent bread. No joke. The texture was crunchy on the outside and soft and well, bready, on the inside. Perfect chewiness. Seriously perfect. Considering it's no-knead dough and how much I love bread, perhaps it's just as well I don't like beer or I might've eaten the whole loaf. As it was, the beer saved me from myself.
3 cups all-purpose flour
1/4 cup sugar
1 tablespoon baking powder
1 teaspoon salt
1 bottle (12 ounces) beer
1 stick unsalted butter, melted
  1. Preheat the oven to 350°F. Grease a 9x5 inch loaf pan. Line with parchment paper for easy removal (optional).
  2. In a large bowl, whisk together the flour, sugar, baking powder and salt. Using a wooden spoon, stir the beer into the dry ingredients until just mixed.
  3. Pour half the melted butter into the bottom of the loaf pan. Then spoon the batter into the pan, and pour the rest of the butter on top of the batter.
  4. Bake for 50 to 60 minutes, until golden brown and a toothpick inserted in the center comes out clean. Serve immediately with a smear of more butter, or reheat in the microwave for 20 seconds.

Tuesday, July 15, 2014

Cinnamon and Spice Sweet Potato Bread

Cinnamon and Spice Sweet Potato Bread - made July 4, 2014 from Averie Cooks
I keep finding all these great looking recipes on pinterest and half the time they lead me back to Averie's blog. Her picture of this sweet potato bread sucked me into this recipe and, because I had several sweet potatoes starting to take root (literally) in my kitchen because I wasn't using them fast enough, this seemed like a good recipe to try so I could use up the sweet potatoes before they started to turn my kitchen into a garden.
Mine didn't come out quite as yummy looking as hers but I still thought this turned out well. The texture was soft and moist like a good quick bread and this was an easy recipe to make. My only issue is there were so many spices that I think I had a hard time tasting the sweet potato.
I've had that issue before with sweet potato baked goods so I don't think it's the recipe but just the nature of the sweet potato; its flavor is easy to overpower. This reminded me more of carrot bread. I don't generally taste a strong carrot flavor in carrot cake for instance but I like it just the same. As with all moist cakes and quick breads, don't slice these until you're ready to serve and eat it or the ends will easily dry out unless they're well wrapped.
about 1 1/2 cups cooked, mashed sweet potatoes (2 medium or 1 very large), cooled
2 large eggs
1/2 cup canola or vegetable oil
1/4 cup buttermilk (or yogurt, Greek yogurt, or sour cream)
1 teaspoon vanilla extract
1 3/4 cups all-purpose flour
1 1/4 cups granulated sugar
1/4 cup light brown sugar, packed
2 teaspoons baking soda
1 tablespoon ground cinnamon
1 teaspoon ground ginger
1 teaspoon ground nutmeg
1/2 teaspoon ground allspice
1/2 teaspoon ground cloves
pinch salt, optional and to taste
  1. Preheat oven to 350 degreesF. Spray one 9-by-5-inch loaf pan with floured cooking spray or grease and flour the pan; set aside.
  2. To the sweet potatoes, add the eggs, oil, buttermilk, vanilla and whisk until combined; set aside. 
  3. In a large mixing bowl, combine the dry ingredients - flour, sugars, baking soda, cinnamon, ginger, nutmeg, allspice, cloves, optional salt, and whisk to combine. Pour the wet sweet potato mixture over the dry ingredients, and stir to incorporate. Stir and fold with a gentle hand as to not over-mix and over-develop the gluten, which results in tougher bread.
  4. Turn batter out into prepared pan, smoothing the top lightly with a spatula. Bake for 60 to 70 minutes for a 9x5 pan, or until top is domed, golden, loaf is springy to the touch, and cake tester inserted in the center comes out clean. Tent pan with foil in the last 15 minutes of cooking if top is browning a bit fast before interior has cooked through. 
  5. Allow bread to cool in pan for 10 minutes before turning out onto a wire rack to cool completely. 

Sunday, July 13, 2014

Lemony Lemonies

Lemony Lemonies - made June 28, 2014 from Bakerella
I did a bunch of baking before I started my new job and I'm still catching up from those posts. This is one of them. I had a family barbecue to go to and (as always), lemons to use up so I went with this version of a lemon brownie. At least that's what they would seem like.
I actually would consider these more of a lemon cake, perhaps a bit more dense than a cake but "dense" is a strong word because they weren't really dense. They don't have much leavening in them either though so cakey also seems like a strong description. Let's just say they were somewhere in the middle.

But whatever you want to call them, I'd call them good. The texture was nicely chewy (yet cakey - and round and round I go on the descriptors) and the lemon flavor was perfect for a summer occasion. Lemons are most abundant in the winter but my lemon tree didn't get that memo and still keeps growing lemons so I keep doing lemon desserts in the summer. What made this cake/brownie particularly good was the lemon glaze. It was both sweet yet also had some tartness from the fresh lemon zest and lemon juice. Don't make the glaze too runny or it won't be thick enough and you want enough powdered sugar to let the icing set when it cools completely. Easy to make, slice and serve - enjoy.
1 cup all-purpose flour
1 cup sugar
1/4 teaspoon salt
1/4 teaspoon baking powder
1 tablespoon lemon zest
3/4 cup unsalted butter, almost completely melted then cooled
2 eggs
3 tablespoons lemon juice
1 teaspoon vanilla

Icing
1 1/2 cups powdered sugar
2 tablespoons lemon juice
1 teaspoon lemon zest
  1. Preheat oven to 350 degrees F. Grease an 8-inch square pan or line pan with foil and lightly coat with cooking spray to easily lift brownies out of pan.
  2. Mix flour, sugar, salt, baking powder and zest together using a wire whisk.
  3. Add melted butter, lemon juice, eggs and vanilla and stir until completely combined.
  4. Pour into pan and bake for 20-25 minutes or until done.
  5. Remove from oven and cool.
  6. For lemon icing, sift powdered sugar in a medium bowl. Add lemon juice and zest and stir until completely combined and smooth. Pour over lemonies and let rest until icing sets. 
  7. Cut into 16 or 25 small bars only right before serving.