Thursday, January 6, 2011

Buttermilk Cake with Butter Sauce

Buttermilk Cake with Butter Sauce - made January 6, 2011 from Cakes to Die For by Bev Shaffer


Earlier this week I discovered my local library which was just a little less than 3 miles from me and therefore was a nice walk (about 5.5 miles roundtrip).  Although I'm quite the book lover, I haven't frequented the library as much as I should, preferring to buy books from amazon or get them from paperbackswap.com.  However, as I enter into a state of preferring to minimize my "stuff", especially the books that threaten to overwhelm me because I've accumulated so many of them, borrowing from the library seemed like the way to go.  I was wandering through the stacks looking for books on my wish list when this one caught my eye, prominently displayed as it was in the New Books section.  I had Brownies to Die For by the same author and I couldn't resist thumbing through the pages for any cake recipes I wanted to try.  Needless to say, this one came home with me for the next couple of weeks.  Technically, since I don't own it, I can't count it in my baking challenge so we'll just consider this a brief detour.

I've hardly ever borrowed cookbooks from the library before and now I'm asking myself why I didn't think to do so before.  Maybe because my acquisitive nature wanted to own the book instead of only borrowing it for brief periods of time.  I should've learned better in kindergarten.  I have so many cookbooks that I'm hardly likely to ever bake through them all.  Yet I still cling to them and sometimes acquire even more.  I need to get over that because in some cases, borrowing makes more sense.  Not only does it minimize the "too much stuff" issue but it's a good way to test drive a cookbook to see if you really like it before you make the commitment of purchasing it.  And if you don't, you still can try it by borrowing it.  Food for thought.

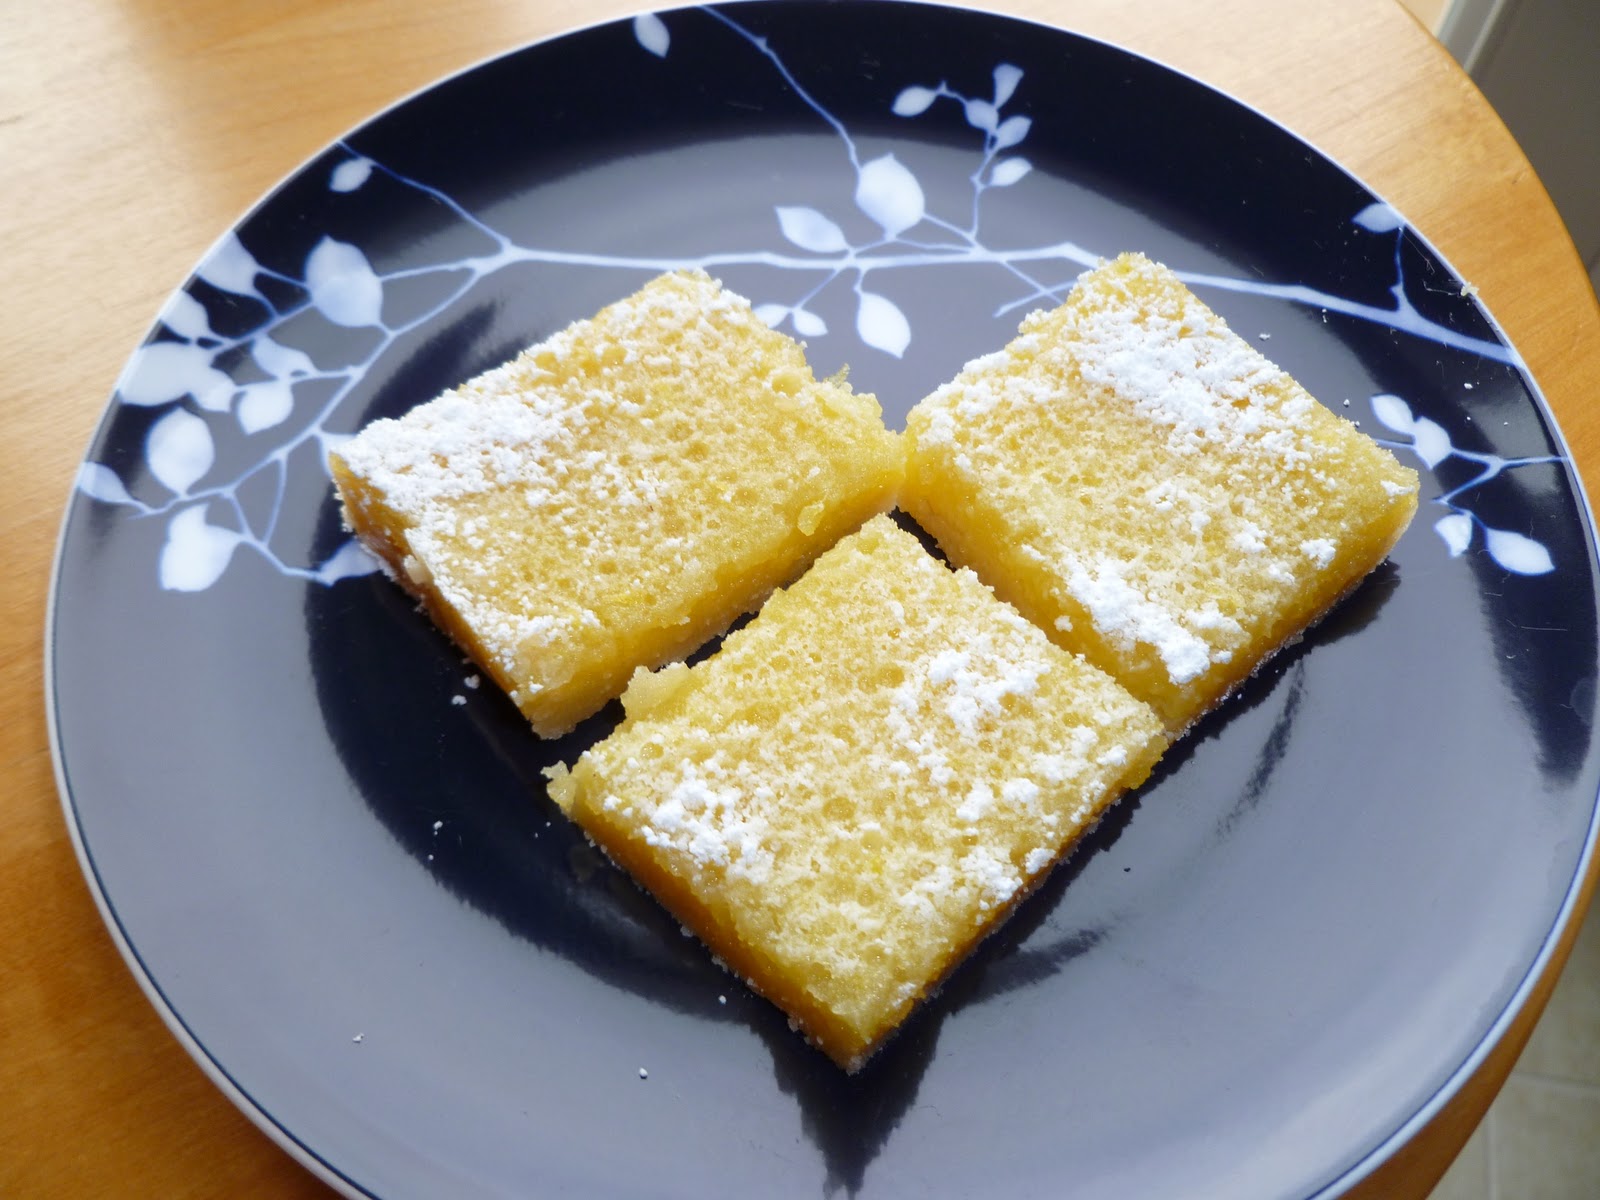
This is the first recipe I've tried from this book and I must say, I really liked it.  If you like pound cakes and butter, this is a good cake.  What sets it apart from the usual pound cake is the butter "sauce" which actually hardens into a glaze, like the sugar glaze on a cake doughnut.  I love the texture contrast of that when you're biting into a slice of moist, soft cake.  My Bundt pan has seen better days and despite my greasing it well, the cake didn't come out of the pan intact.  I still covered it with the butter sauce and let the moistness and sweetness set in.  Yum.

ETA - just had to add, this tasted even better the next day.  Just sayin'....


3 cups unbleached all purpose flour
1 teaspoon salt
1 teaspoon baking powder
½ teaspoon baking soda
2 cups granulated sugar
1 cup unsalted butter, room temperature, cut into pieces
4 large eggs
1 cup buttermilk
2 teaspoons vanilla extract

Butter sauce
¾ cup granulated sugar
1/3 cup unsalted butter, cut into pieces
3 tablespoons water
1 teaspoon vanilla extract

1.     Heat the oven to 325F.  Grease and flour a 10” tube pan or 12-cup Bundt pan, tapping out excess flour.
2.     In a medium bowl, whisk together the flour, salt, baking powder, and baking soda.
3.     In a large bowl of an electric mixer, beat the sugar and butter until light and fluffy.  With mixer on low, blend in the buttermilk and vanilla.  Scrape bowl.
4.     Alternately beat in the eggs, one at a time, with the flour mixture until blended.
5.     Spread batter into prepared pan.  Bake for 52 to 74 minutes or until a toothpick inserted in the center comes out clean.
6.     For the butter sauce: in a small saucepan, combine the sugar, butter and water.  Whisk over medium heat until butter melts; do not boil mixture.  Remove from heat and stir in vanilla. 
7.     Prick warm cake in pan 12 times with a long-tined fork (a skewer would also work).  Slowly pour butter sauce over the cake.  Cool pan completely on a wire rack.
8.     When ready to serve, run a knife around the inside edge of pan and remove the cake.  Serves 10-12.

Wednesday, January 5, 2011

Potato Onion Frittata

Potato Onion (and Ham) Frittata - made January 5, 2011, adapted from Mary Engelbreit's Queen of the Kitchen (book #33)


I've never made a frittata before but once I looked through a few recipes, it looked pretty simple to make and seemed just like a more uppity version of scrambled eggs.  Which I love so I thought I'd try my hand at it, especially since I'm cutting back on the baking temporarily but still have to eat so I might as well cook.

I got the original recipe from the Mary Engelbreit book but I took so many liberties with it that I figure I might as well write up what I did.  It was actually quite liberating not to follow a recipe so closely and just make it up as I go, especially as I was trying to use the ingredients I had on hand.  Now I have a better understanding of cooks on the "hot side" who can make it up as they go and come up with their own creations.  Although I think I will still always prefer baking and the more exact nature of it.

But I did like how this turned out.  The eggs were fluffy and the potatoes were just the right, soft texture.  The original recipe called for parsley but I'm glad I substituted basil for it since I prefer the taste of basil to parsley.  I wasn't as wild about the onions but mainly because I don't care for onions unless I can't taste them.  Next time I might cut back on them and add more ham.  I couldn't really taste the cheese but assume they added to the creamy texture of the frittata.  Check this when it's in the oven as you only want to bake it until the eggs in the middle are just set.  Otherwise the edges will be overdone.


1 large Russet potato, peeled and sliced into rounds
2 tablespoons butter
1/2 large yellow onion (you can use all of the onion if you love onion), chopped
2 garlic cloves, minced
8 slices ham, cut into 1/2" squares
3 tablespoons chopped fresh basil
salt and freshly ground pepper
8 large eggs
1/4 cup half and half
1/4 cup grated cheese (your choice - I used a 6-cheese blend)
  1. Preheat the oven to 350 degrees F.
  2. In a large saucepan, cover the potato with salted water and bring to a boil over high heat.  Cook for 10 minutes or until tender.  Drain and set aside.
  3. In a 10-inch ovenproof skillet, melt the butter over medium heat.  Add the onion and garlic and cook, stirring occasionally, for 10 minutes or until softened.  Add the potato, ham, basil, salt and pepper and cook, stirring, until most of the liquid has evaporated.
  4. In a medium bowl, beat together the eggs, half and half and the cheese.  Pour into the skillet and stir until mixed.  Cook over medium heat, about 3 minutes, until the eggs just begin to set.  Place the skillet in the oven and cook for about 10 minutes or until the eggs are set.  Let stand at room temperature, loosely covered, for 5 minutes.
  5. To serve, with a spatula loosen the frittata from the skillet, invert onto a platter, and cut into 6 wedges.

Saturday, January 1, 2011

New Year's Day 2011

This is traditionally the time of year when the world goes on a diet and makes the famous resolutions to eat better and lose weight.  I applaud any and all efforts along those lines.  Unfortunately this isn't the type of blog to help with that unless you're okay consuming only virtual calories.  You'll notice there's nothing low-fat, low-cal on here and I don't bake with unnatural sweeteners: no splenda or stevia, just good ol' sugar.  And full fat butter and wheat flour with gluten.  The funny part is, the question I'm asked most often is not how to bake a particular item but "how come you don't weigh 300 pounds?"

I usually cut back on baking in January out of respect for people "dieting" as I didn't want to sabotage anyone's healthy eating efforts.  I myself used to be one of those people who would be fired up at the new year to drop the last 10 lbs, eat more veggies (or any), and cut back on rich, fattening foods.  Which always seemed easier to do after holiday feasts.  Then it got less easy as the month of January wore on and the dim memory of Christmas eating got more and more dim. By February I was back to my old ways.

In recent years, I've gotten honest enough with myself to finally break that cycle.  Successful weight loss and maintenance isn't about getting fired up for a short time, dropping a few pounds then going back to old habits that made you gain the weight in the first place.  It's about establishing new habits over the long term.  The only way you can do that is to make small changes, stick to them, make further small changes, keep sticking to them and over the long-term, those small changes actually become big changes that are now second nature.

Case in point - if you're not currently very active, joining a gym and making a resolution to workout 7 days a week is a pretty drastic change from your normal lifestyle.  You might be able to keep it up for a few weeks or longer but the first day you're too tired to exercise or run out of time, are you going to throw the towel in because you missed a day or keep pressing on?  The easier thing to do is focus on being more active all day.  Definitely get a workout in (that'll never hurt) but also go for a walk as often as possible, move around and do activities instead of sitting in front of the TV or a computer.  Move.  One of the things I like about where I live is I can always go for a walk and I can walk some of my errands, primarily to the grocery store, the post office, and, if I have enough time, even the library.  I consciously try not to take my car out at least 1 day a week and just walk instead.  I take the stairs everywhere, I park farther away than necessary, and I look for ways to stay active throughout the day.  Not to say that I'm not a couch potato sometimes but it's not all the time and it's not day after day.

Portion control is another key element.  I've long ago given up the "Snackwell syndrome" - you know, where you eat a lot of low-calorie, low-fat food because you think they're healthier or lower calorie.  Perhaps they are but not if you eat a lot of it.  Even low-calorie foods add up in calories. Personally, I'd rather eat 300 calories of a small portion of something rich and satisfying than 600 calories of something larger but sub-optimal in taste that leaves me unsatisfied and wishing I'd eaten something else.  If I'm going to have empty calories, they're going to be the best empty calories I can have.  I just don't have a lot of it and I don't have it all the time.  Food is meant to be enjoyed and savored, not give you a sick, full feeling or looked at as something that has the power to make you unhappy because it causes your clothes to become tighter.  It doesn't jump into your mouth on its own.  Make a conscious choice about what you're going to enjoy and how much.  Then stop and savor for another day.

Happy New Year!

Friday, December 31, 2010

Pecan Shortbread Cookies

Pecan Shortbread Cookies - made December 25, 2010 from the Sweet Melissa Baking Book by Melissa Murphy (already counted as book #4)


I had liked almost every recipe from this book so the results from this one was a trifle disappointing.  It's your basic Mexican Wedding Cake-type of cookie so it was easy to make and I thought it would turn out okay.  Couple of things that went wrong for me: 1) it called for too many nuts with too little dough.  By the time I had rolled the dough into cookie balls, I still had a small handful of nut bits left but no dough to hold them together.  Not a show stopper but still....

Issue #2) While the taste was pretty good, they came out too fragile to roll well in powdered sugar and even to eat.  They crumbled instead even after they had cooled and you picked them up.  That could partly be my fault since I didn't bake them as long as the recipe said to.  Baking them for that long seemed like they'd be more of a sandy texture than the melt-in-your-mouth texture so I took them out early, when the bottoms were barely golden.  That didn't work out as I had hoped. You can see I couldn't roll them in the powdered sugar like with a more firm cookie by how clumpy the powdered sugar looks over it.  I sprinkled the sugar over the cookies instead of rolling the cookies in the sugar and it still didn't look right. One of my nieces was taking a bite out of one and it literally crumbled through her fingers and dropped to the ground.  While it made for a good laugh, that's not normally how I want my cookies to behave! I guess that'll teach me about risk taking.  I should've stuck to my old recipe for Buttery Tea Balls.

I haven't baked anything new since Christmas Day (just the tried and true stuff) so I close 2010 with my final failure of this holiday baking season.  Live and learn.  Time to explore more new territory (and 170+ more cookbooks) in 2011.


10 tablespoons cold, unsalted butter, cut into pieces
¼ cup sugar
¼ teaspoon salt
1 teaspoon pure vanilla extract
1 cup all-purpose flour
1 ¼ cups shelled pecan pieces, finely chopped
2 cups confectioners’ sugar, for coating

1.     Position a rack in the center of your oven.  Preheat the oven to 325˚F.  Line two cookie sheets with parchment paper or aluminum foil.
2.     In the bowl of a food processor fitted with the metal blade, pulse the butter, sugar and salt to combine.  Add the vanilla, and pulse to combine.  Add the flour and pecans, and pulse to combine.  Remove the dough from the mixer.
3.     Using a small cookie scoop or a tablespoon, form balls and place 1 ½ inches apart onto the prepared cookie sheets.  Bake for 25 to 30 minutes, or until the bottoms of the cookies are lightly golden.  Remove to a wire rack to cool.
4.     Put the confectioners’ sugar in a medium bowl.  When the cookies are almost cool, roll them in sugar.

Monday, December 27, 2010

Peanut Butter Brownies

Peanut Butter Brownies - made December 21, 2010 from The Little Red Barn Baking Book (book #32)


I underbaked these so they almost tasted like peanut butter fudge.  Or I have fudge on the brain since I still haven't made one successfully in my mind.  But these were pretty good and I like the two-layer combination look.  I didn't go exactly halfsies on the batter and made the peanut butter layer a little more than the chocolate layer.  No deliberate reason other than I wasn't that precise is halving the batter.  The chocolate layer looked a little nubbly, maybe because there wasn't enough base batter to go with the melted chocolate.  Still, both layers tasted good.  The only change I would recommend though is to bake in an 8-inch pan instead of a 9-inch one.  The 9-inch pan made the brownies a little thin and, as mentioned, I'm prejudiced against thin brownies.  Making this in a smaller pan would've enhanced the layered look a bit better.  Just remember to adjust for baking time and possibly bake them a little longer.  But not too long as the moist, fudgy texture makes these good. 

4 ounces semisweet chocolate
½ cup (1 stick) unsalted butter
2/3 cup all-purpose flour
½ teaspoon baking powder
½ teaspoon salt
¾ cup granulated sugar
½ cup light brown sugar, tightly packed
2 eggs
1 teaspoon vanilla extract
½ cup crunchy peanut butter
1/2 cup mini chocolate chips (add to the peanut butter layer if you wish) 
 
1.     Preheat the oven to 350F.  Butter and flour a 9-inch square pan. (I recommended using an 8-inch pan.)
2.     Melt the chocolate with half the butter in a double boiler set over hot water.  Stir to combine, then let cool for a few minutes. 
3.     Sift the flour, baking powder, and salt into a large bowl.
4.     In a separate bowl, beat the remaining butter with the granulated and brown sugars until pale and fluffy.  Add the eggs, one by one, beating after each addition.  Add the vanilla.  Gently fold in the flour.
5.     Spoon half of the batter into another bowl.  To one half, had the peanut butter and to the other half, add the melted chocolate.  Spread the peanut butter batter in the prepared pan to form an even layer.  Spread the chocolate batter evenly over the top.  Bake for 20-25 minutes, or until set in the middle.  A toothpick inserted in the center should come out with a few moist crumbs on it.
 
Makes 16-20 brownies

Friday, December 24, 2010

Devil's Food Cake with Chocolate Buttercream

Devil's Food Cake with Chocolate Buttercream - made December 21, 2010 from The Magnolia Bakery by Jennifer Appel and Allysa Torey (book #31)


It's hard for me to make a good chocolate layer cake.  They never come out moist enough for my taste.  The outer ring of the cake is just a trifle dry while the middle is moist.  I want uniform moistness in my cakes.  One answer would be to use the Magi-Cake strips to prevent the outer ring from baking faster than the center but I can't find the velcro version in stores and keep forgetting to order them online until I want to make a layer cake and by then it's too late.

I also have realized I don't make good chocolate frosting and after making this layer cake, I finally figured out why.  My deep dark secret when it comes to frosting?  I never measure how much powdered sugar I put in.  Blasphemy, I know.  Especially since baking is supposed to be such a science.  But when it comes to frostings, I go by taste and spreadable consistency.  Which actually works well for frostings that aren't chocolate like vanilla or cream cheese.  But chocolate?  Remember chocolate sets once it's cool.  So even though I might've liked the consistency of my chocolate frosting when I first mix it and frost with it, it invariably hardens to be more like thin fudge on the cake.  Which makes cutting cleanly somewhat problematic, not to mention eating it.  I solve the problem by microwaving the frosted cake for 20 seconds.  Then the cake is warm (and moist) and the frosting is just melt-y.  Those 20 seconds cover a multitude of baking sins.

For this particular recipe, it calls for making the cake in two 9-inch round cake layers.  When I mixed up the batter, there seemed to be quite a bit of it, too much for only 2 cake pans so I ended up pouring it into three 8-inch round cake pans.  Hence I got quite the towering cake once it was put together and frosted.  The taste was good but the texture could've been a little softer.  That could also have been my error since I didn't read the directions that closely and didn't whip the egg yolks for 2 minutes as instructed.  That would've put more air into the yolks/batter and made it lighter.  I don't mind a dense cake but definitely should've baked these a few minutes less.  Back to the cake drawing board.

3 cups all-purpose flour
1 ½ teaspoons baking powder
1 ½ teaspoons baking soda
¾ teaspoon salt
3 large eggs, separated
¾ cup (1 ½ sticks) unsalted butter, softened
2 cups firmly packed light brown sugar
8 ounces unsweetened chocolate, melted
2 cups milk
1 ½ teaspoons vanilla extract

1.     Preheat the oven to 350˚F.  Grease and lightly flour two 9” round cake pans (or three 8” round cake pans), then line the bottoms with waxed paper or parchment circles.
2.    In a large bowl, sift together the flour, baking powder, baking soda and salt.  Set aside.
3.    Beat the egg yolks until thick and lemon colored, about 2 minutes.
4.    In a large bowl, cream the butter and the sugar until smooth, about 3 minutes.  Add the egg yolks, beating until well combined.  Add the chocolate, mixing until well incorporated.  Add the dry ingredients in thirds, alternating with the milk and vanilla extract, beating after each addition until smooth. 
5.    In a separate bowl, beat the egg whites on the high speed of an electric mixer until soft peaks form.  Gently fold into the batter.  Divide the batter between the prepared pans and bake for 40-45 minutes or until a cake tester inserted into center of cake comes out clean.  Let cakes cool in pans for 10 minutes.  Remove from pans and cool completely on wire racks.  When cake has cooled, ice between the layers, then ice top and sides of cake.

Chocolate Buttercream

1 cup (2 sticks) unsalted butter, very soft
1 tablespoon plus 1 teaspoon milk
6 ounces semisweet chocolate, melted and cooled to lukewarm
1 teaspoon vanilla extract
1 ¼ cups sifted confectioners’ sugar

1.     In a medium-size bowl, beat the butter until creamy, about 3 minutes.  Add the milk and beat until smooth.
2.    Add the melted chocolate and beat well.  Add the vanilla extract and beat for 3 minutes.  Gradually add the sugar and beat until creamy and of desired consistency.

Thursday, December 23, 2010

Super Sugar Sparkles

Super Sugar Sparkles - made December 21, 2010 from Great Cookies by Carole Walter (book #30)


I may just need to rename these "Damn Good Sugar Cookies".  Because they are, especially eaten just slightly lukewarm.  They come out thick with crisp edges and the middle is the perfect combination of cakey and chewy in a sugar cookie.  Almost like Specialty's cookies.  And I adore Specialty's cookies.  Use fresh butter when you make these because so much of the flavor in a vanilla/sugar cookie is the butter.  I normally don't make sugar cookies that often as I don't eat them as often as chocolate chip or even pure chocolate cookies.  But I can see making these regularly.  It's a good gift cookie for people who don't like chocolate (hard as that is for me to fathom but those peeps do exist) and prefer vanilla flavors.

The recipe calls for using sparkling white sugar, which can be obtained from The Baker's Catalog.  I used regular granulated sugar and that was just fine.  If you want to make it less plain and dress it up a little, you can also sprinkle with colored sugars.  I'm a bit of a purist though and think sugar cookies should be equally pure.  I like it sprinkled with plain white sugar.

Oh, and I tried one batch with the egg wash and sugar sprinkled on top and another batch without the egg wash and just the sugar sprinkled on top.  Although the ones with the egg wash browned more nicely, the sugar sprinkles were absorbed too quickly into the egg wash and didn't really stay visible even before baking.  I actually prefer the version without the egg wash.  Bake only until the edges are golden and the top of the middles look only just dry.  Don't overbake them as part of the goodness is the middles being moist and chewy.

3 cups all-purpose flour, spooned in and leveled
½ teaspoon salt
¼ teaspoon baking soda
¼ teaspoon cream of tartar
1 cup (2 sticks) unsalted butter, slightly firm, cut into 1-inch pieces
1 ¼ cups superfine sugar
2 large eggs, separated
2 teaspoons pure vanilla extract
2 tablespoons milk
2 teaspoons water
1/3 cup sparkling white sugar, for garnish

1.    Preheat the oven to 375⁰F.  Line the cookie sheets with parchment paper.
2.    Whisk together the flour, salt, baking soda, and cream of tartar.  Set aside.
3.    In the large bowl of an electric mixer fitted with the paddle attachment, beat the butter on medium speed until smooth and lightened in color, 1 ½ to 2 minutes.  Add the sugar ¼ cup at a time and beat for 2 minutes longer.  Add the egg yolks and vanilla, mixing for 1 minute longer.  Scrape down the bowl as needed.
4.    On low speed, add half of the dry ingredients, then add the milk, and then the remaining dry ingredients, mixing only to combine.
5.    With lightly floured hands, shape about ¼ cup of the dough into a ball.  Place six balls of dough about 3 inches apart on each cookie sheet.  Using the heel of your hand, press each ball into a 3 to 3 ½” disk.  Using a flat-bottomed glass lightly dipped in flour, flatten each disk into a 4” circle.
6.    Combine the egg whites with the water and beat lightly with a fork.  Brush the top of each disk heavily with the egg wash (or omit completely if you prefer).  Sprinkle with ½ to ¾ teaspoon of sparkling white sugar.  Bake the cookies for 13 to 14 minutes, or until the edges are lightly browned.  Let rest on the cookie sheets for 3-5 minutes, or until firm enough to handle.  Transfer the cookies to a wire rack and let cool completely.

Store in an airtight container, layered between strips of wax paper, for up to 3 weeks.  These cookies may be frozen. (My recommendation is freeze the cookie dough and bake the cookies when you need them so they'll always be fresh.)

Wicked Brownie Bites

Wicked Brownie Bites - made December 18, 2010 from Bite-Size Desserts by Carole Bloom (book #29)


Here's the "1/2 failure" I mentioned earlier.  These mini brownie bites tasted great, nice and chocolatey with a slightly crisp outside but fudgy goodness inside.  The failure part was their appearance.  The batter firmed up/cooled off faster than I expected and didn't really smooth out during baking so if they go into the mini muffin pan craggy, they come out craggy.  They also didn't come out easily although I used a nonstick pan and had sprayed it with nonstick cooking spray to boot.  I ran a little spatula around the sides to get them to release more easily but the firm outside meant the spatula met with resistance so sometimes the outside broke and the mini bites came out misshapen.  It didn't affect their taste but this isn't something I'd parade in a magazine either.  To salvage their appearance, I put them in festive little mini cupcake liners.  That probably didn't fool anyone but it hid some of their Quasimodo-ness at first glance.

I kept the worst-looking ones as my taste test by putting a couple of them in a ramekin, warming them up in the microwave for 10-15 seconds and topping with vanilla ice cream.  All was forgiven then.

1 cup (4 ½ ounces) coarsely chopped walnuts (I substituted mini chocolate chips instead)
3 ounces bittersweet chocolate (70 to 72% cacao content), finely chopped
3 ounces unsweetened chocolate, finely chopped
4 ounces (8 tablespoons, 1 stick) unsalted butter, cut into small pieces
2 extra-large eggs, at room temperature
2/3 cup (4 ounces) granulated sugar
2/3 cup (4 ounces) firmly packed light brown sugar
1 teaspoon pure vanilla extract
½ cup (2 ¼ ounces) all-purpose flour
2 tablespoons (½ ounce) unsweetened cocoa powder (natural Dutch-processed)
¼ teaspoon kosher or fine-grained sea salt

1.     Position a rack in the center of the oven and preheat to 350˚F.  Place the mini muffin pans on a baking sheet.
2.     Toast the walnuts if using and cool completely.
3.     Place the bittersweet chocolate, unsweetened chocolate and butter in the top of a double boiler over low heat.  Stir often with a rubber spatula to help the chocolates and butter melt evenly.  When melted, let cool, stirring occasionally to prevent a skin from forming.
4.     Whip the eggs in the bowl of an electric mixer with the wire whip attachment until they are frothy.  Add the granulated sugar and brown sugar and whip until the mixture is very thick and pale colored and holds a slowly dissolving ribbon as the beater is lifted, about 5 minutes.  Mix in the vanilla.  Add the melted chocolate and butter mixture and blend completely on low speed.  Stop and scrape down the sides and bottom of the bowl with the rubber spatula.
5.     In a medium-size bowl, sift together the flour and cocoa powder.  Add the salt and stir to combine.  In 3 stages, add this flour mixture to the chocolate mixture, blending well after each addition.  Stop and scrape down the sides and bottom of the bowl with the rubber spatula.  Add the walnuts, if using, (or chocolate chips) and stir to distribute evenly.
6.     Use a1 ½” round ice cream scoop to divide the batter evenly among the cavities of the mini muffin pans, filling each cavity.
7.     Bake the brownies for 25 minutes, until a cake tester or toothpick inserted in the center comes out slightly moist.  Remove the baking sheet from the oven and transfer the mini muffin pans to racks to cool.  Remove brownies from the mini muffin pans when they’ve cooled slightly.

Wednesday, December 22, 2010

Lemon Bars

Lemon Bars - made December 18, 2010 from Fat Witch Brownies by Patricia Helding (book #28)


I mentioned before that I don't like to try new recipes for my holiday baking because of the risk factor in something not turning out when I need it to.  I've gambled on a few new recipes this holiday baking season and for the most part, they've turned out fine.  However, I have had 2 1/2 failures so far.  In addition to my not-so-creamy-nor-dreamy fudge failure, these lemon bars can be chalked up in the failure column (I'll explain the "1/2" failure in a future post).  I knew I shouldn't have been experimenting, especially since I already have a lemon bar recipe I already like.  But I had extra lemons to use up and this one used more lemon juice than my normal recipe so I thought I would just try it and see.

Where did this go wrong?  Let me count the ways.  First, the crust didn't turn out.  I baked it for 15 minutes like the recipe said but it wasn't golden yet or even "not raw" so I left it in for another 5 minutes.  Still wasn't really done but I took it out anyway, thinking maybe once it baked some more after the topping was put on, it'd be okay.  Second, the topping.  I should know by now that when something calls for 1/2 cup of lemon juice, it's going to be, well, lemony.  As in tart.  As in way too tart and lip-puckering for me to really enjoy.  Once I put the topping on, I baked this another extra 5 minutes more than the recipe said to but it wasn't really browned on top.  I thought maybe it wasn't supposed to be.  I was wrong.  After I let it cool and sprinkled the powdered sugar on top, the moistness in the top kept absorbing the powdered sugar.  Not a good sign.  The crust was almost soggy and was too thin for the tart lemon topping.  Major failure.

It's probably good for me to have a failure once in awhile.  Humility is good for the soul and there's nothing more humbling than having a basic recipe fail on you.  I also tend to learn more from mistakes than failures.  My lessons learned here would've been to follow my instinct and bake the bottom crust longer than the recipe says to until I was satisfied with how "golden brown" it was, bake it in a smaller pan to get a thicker crust, cut back on the lemon juice and bake it longer as a whole so the top layer isn't so soggy and greedily sucking up all the powdered sugar into it.
My only regret is this failure came at a bad time as I was baking it for some goodie bag giveaways for friends at church.  Their bags were a little lighter than usual this year as by the time my baking came to an end, I didn't have time to rectify the mistakes and make another batch of lemon bars.   Oops.

Crust
1 cup unbleached flour
½ cup confectioners’ sugar
½ teaspoon salt
8 tablespoons (1 stick) unsalted butter, not yet to room temperature, cut into pieces

Filling
3 large eggs
1 cup granulated sugar
½ cup fresh lemon juice (2-3 lemons)
1 ½ tablespoons fresh, finely grated lemon zest (1-2 lemons)
3 tablespoons unbleached flour
Big pinch of salt

1.     Line a 9” x 9” baking pan with foil and spray with nonstick cooking spray.  Dust with flour and tap out the excess.  Preheat the oven to 350F.
2.     For the crust: sift the flour, confectioners’ sugar, and salt into a bowl.  Add the butter and mix into the flour, cutting in with 2 knives or a pastry blender.
3.     Pat the mixture evenly in the prepared baking pan and bake for 15 minutes or until golden.  Allow the crust to cool while you make the filling.
4.     Filling: beat the eggs until frothy.  Slowly add the granulated sugar, until just combined.  Beat in the lemon juice and zest and combine well.
5.     Measure the flour and salt and then sift together directly into the filling mixture.  Mix gently until they are incorporated into the lemon mixture.  Pour the filling over the baked crust and bake for 15 minutes or until the top is set.  It should have tiny bubbles on the surface and the edges should be brown and slightly pulling away from the sides.
6.     Remove from the oven and cool on a rack for 1 hour.  Cut just before serving.

Tuesday, December 21, 2010

Chocolate Decadence Cookies

Chocolate Decadence Cookies - made December 17, 2010 from Alice Medrich's Cookies and Brownies (book #27)

ETA: I mistakenly attributed this recipe for Lisa Yockelson's A Country Baking Treasury but I got my recipes mixed up and this is from Alice Medrich's Cookies & Brownies baking book instead.  Sorry, Alice.  Want to know what baked fudge tastes like?  Then make these cookies.  Not only is the flavor pure chocolate but these stayed thick and didn't spread much which is what I look for in a good cookie.

These are super simple to make.  The dough can be made ahead of time, portioned into dough balls and frozen until you're ready to bake them.  Time them in the oven and don't be afraid to underbake them.  Unlike chocolate chip cookies, chocolate cookies actually taste better at room temperature rather than warm from the oven.  That's because you can savor the chocolate taste better.  When it's warm, it's still almost like liquidy dough.  But when cool?  Baked fudge.  And of course, as always, use good chocolate.  It makes a difference.  Once again, I omitted the nuts from this cookie, not just because I don't like nuts in my cookies but also because for a pure chocolate cookie, I didn't want any other flavor getting in the way.  Chocolate is king.


2 large eggs
½ cup sugar
1 teaspoon vanilla extract
¼ cup all-purpose flour
¼ teaspoon baking powder
1/8 teaspoon salt
8 ounces bittersweet or semisweet chocolate, coarsely chopped
2 tablespoons unsalted butter
2 cups walnuts or pecans, coarsely chopped or left in large pieces
6 ounces semisweet chocolate chips

1.     Preheat the oven to 350˚F (unless you’re planning to refrigerate the dough first).  Position racks in the upper and lower thirds of the oven.
2.     Whisk the eggs, sugar, and vanilla in a small bowl to combine thoroughly.  Set the bowl in a larger bowl of hot tap water while preparing the rest of the ingredients.
3.     Combine the flour, baking powder, and salt in another small bowl and mix thoroughly together with a whisk or fork.
4.     Melt the chopped 8 ounces of bittersweet chocolate and the butter in the top half of a double boiler over barely simmering water, stirring frequently.  Remove from heat and let cool until chocolate is warm, not hot.  Add the egg mixture to the chocolate, stirring just until thoroughly combined.  Stir in the flour mixture, then the nuts and chocolate chips.
5.     Scoop slightly rounded tablespoons of batter and place them 1 ½” apart on the cookie sheets.  Bake for 10 to 12 minutes, or until the surface of the cookie looks dry and set and the centers are still gooey.