Thursday, July 17, 2014

Buttery Beer Bread

Buttery Beer Bread - made July 4, 2014 from The Novice Chef
This uses up #4 of the 6-pack of beer I originally bought for the Slow Cooker French Dip. I don't know why I feel compelled to keep trying out recipes that use beer instead of giving the remaining beer bottles away. Maybe it's because out of my friends who drink beer, most, if not all, of them are probably snobby enough about their beer that Heineken isn't going to cut it. They go to micro breweries and talk knowledgeably about - well, I don't know enough about beer to tell you and apparently, I wasn't listening to them when they talked about it. So giving them my leftover Heineken would be like them offering me a cupcake bought at Safeway. Uh, wow, thanks, that's so nice of you. (Really, do I have to eat it?)
Besides, since I already have the beer anyway, it's a rare chance to try recipes that use beer that I had always passed up before. Because I have no intention of buying beer again simply because I find it too confusing and don't know what to get. No need for me to re-live those tortuous moments at Target scratching my head looking at an end cap of beer and being baffled.
I tried this beer bread and it was really easy to make. Pour half the melted butter at the bottom of the loaf pan, dump the beer bread dough into it, pour the rest of the butter over it and bake. Before you can ask what could go wrong, let me tell you. First, the butter didn't incorporate into the dough as fast as I expected. Some of it decided to overflow the loaf pan instead, drip onto the bottom of my newly-cleaned oven and burn to the smokiness which greeted me when I opened the oven door to check on the bread. Awesome.
Second, and worse, it tasted like beer. I know, I know, there's a reason why it's called Beer Bread but I had been counting on the alcohol burning off in the baking and not tasting like beer. That's what happened the 3 other times I had baked or cooked with beer. Not so with Buttery Beer Bread. It lives up to its name, not just the beer part but also the butter part. It really was buttery. I shouldn't be colored surprise since it had a freaking stick of butter in it but it was a tad too buttery for me.  And trust me, I don't say that very often. The shame of it is, if I had liked beer, this would actually be excellent bread. No joke. The texture was crunchy on the outside and soft and well, bready, on the inside. Perfect chewiness. Seriously perfect. Considering it's no-knead dough and how much I love bread, perhaps it's just as well I don't like beer or I might've eaten the whole loaf. As it was, the beer saved me from myself.
3 cups all-purpose flour
1/4 cup sugar
1 tablespoon baking powder
1 teaspoon salt
1 bottle (12 ounces) beer
1 stick unsalted butter, melted
  1. Preheat the oven to 350°F. Grease a 9x5 inch loaf pan. Line with parchment paper for easy removal (optional).
  2. In a large bowl, whisk together the flour, sugar, baking powder and salt. Using a wooden spoon, stir the beer into the dry ingredients until just mixed.
  3. Pour half the melted butter into the bottom of the loaf pan. Then spoon the batter into the pan, and pour the rest of the butter on top of the batter.
  4. Bake for 50 to 60 minutes, until golden brown and a toothpick inserted in the center comes out clean. Serve immediately with a smear of more butter, or reheat in the microwave for 20 seconds.

Tuesday, July 15, 2014

Cinnamon and Spice Sweet Potato Bread

Cinnamon and Spice Sweet Potato Bread - made July 4, 2014 from Averie Cooks
I keep finding all these great looking recipes on pinterest and half the time they lead me back to Averie's blog. Her picture of this sweet potato bread sucked me into this recipe and, because I had several sweet potatoes starting to take root (literally) in my kitchen because I wasn't using them fast enough, this seemed like a good recipe to try so I could use up the sweet potatoes before they started to turn my kitchen into a garden.
Mine didn't come out quite as yummy looking as hers but I still thought this turned out well. The texture was soft and moist like a good quick bread and this was an easy recipe to make. My only issue is there were so many spices that I think I had a hard time tasting the sweet potato.
I've had that issue before with sweet potato baked goods so I don't think it's the recipe but just the nature of the sweet potato; its flavor is easy to overpower. This reminded me more of carrot bread. I don't generally taste a strong carrot flavor in carrot cake for instance but I like it just the same. As with all moist cakes and quick breads, don't slice these until you're ready to serve and eat it or the ends will easily dry out unless they're well wrapped.
about 1 1/2 cups cooked, mashed sweet potatoes (2 medium or 1 very large), cooled
2 large eggs
1/2 cup canola or vegetable oil
1/4 cup buttermilk (or yogurt, Greek yogurt, or sour cream)
1 teaspoon vanilla extract
1 3/4 cups all-purpose flour
1 1/4 cups granulated sugar
1/4 cup light brown sugar, packed
2 teaspoons baking soda
1 tablespoon ground cinnamon
1 teaspoon ground ginger
1 teaspoon ground nutmeg
1/2 teaspoon ground allspice
1/2 teaspoon ground cloves
pinch salt, optional and to taste
  1. Preheat oven to 350 degreesF. Spray one 9-by-5-inch loaf pan with floured cooking spray or grease and flour the pan; set aside.
  2. To the sweet potatoes, add the eggs, oil, buttermilk, vanilla and whisk until combined; set aside. 
  3. In a large mixing bowl, combine the dry ingredients - flour, sugars, baking soda, cinnamon, ginger, nutmeg, allspice, cloves, optional salt, and whisk to combine. Pour the wet sweet potato mixture over the dry ingredients, and stir to incorporate. Stir and fold with a gentle hand as to not over-mix and over-develop the gluten, which results in tougher bread.
  4. Turn batter out into prepared pan, smoothing the top lightly with a spatula. Bake for 60 to 70 minutes for a 9x5 pan, or until top is domed, golden, loaf is springy to the touch, and cake tester inserted in the center comes out clean. Tent pan with foil in the last 15 minutes of cooking if top is browning a bit fast before interior has cooked through. 
  5. Allow bread to cool in pan for 10 minutes before turning out onto a wire rack to cool completely. 

Sunday, July 13, 2014

Lemony Lemonies

Lemony Lemonies - made June 28, 2014 from Bakerella
I did a bunch of baking before I started my new job and I'm still catching up from those posts. This is one of them. I had a family barbecue to go to and (as always), lemons to use up so I went with this version of a lemon brownie. At least that's what they would seem like.
I actually would consider these more of a lemon cake, perhaps a bit more dense than a cake but "dense" is a strong word because they weren't really dense. They don't have much leavening in them either though so cakey also seems like a strong description. Let's just say they were somewhere in the middle.

But whatever you want to call them, I'd call them good. The texture was nicely chewy (yet cakey - and round and round I go on the descriptors) and the lemon flavor was perfect for a summer occasion. Lemons are most abundant in the winter but my lemon tree didn't get that memo and still keeps growing lemons so I keep doing lemon desserts in the summer. What made this cake/brownie particularly good was the lemon glaze. It was both sweet yet also had some tartness from the fresh lemon zest and lemon juice. Don't make the glaze too runny or it won't be thick enough and you want enough powdered sugar to let the icing set when it cools completely. Easy to make, slice and serve - enjoy.
1 cup all-purpose flour
1 cup sugar
1/4 teaspoon salt
1/4 teaspoon baking powder
1 tablespoon lemon zest
3/4 cup unsalted butter, almost completely melted then cooled
2 eggs
3 tablespoons lemon juice
1 teaspoon vanilla

Icing
1 1/2 cups powdered sugar
2 tablespoons lemon juice
1 teaspoon lemon zest
  1. Preheat oven to 350 degrees F. Grease an 8-inch square pan or line pan with foil and lightly coat with cooking spray to easily lift brownies out of pan.
  2. Mix flour, sugar, salt, baking powder and zest together using a wire whisk.
  3. Add melted butter, lemon juice, eggs and vanilla and stir until completely combined.
  4. Pour into pan and bake for 20-25 minutes or until done.
  5. Remove from oven and cool.
  6. For lemon icing, sift powdered sugar in a medium bowl. Add lemon juice and zest and stir until completely combined and smooth. Pour over lemonies and let rest until icing sets. 
  7. Cut into 16 or 25 small bars only right before serving.

Saturday, July 12, 2014

Bakery Review: Three Babes Bakeshop

Three Babes Bakeshop - bought pie on July 3, 2014
At my new job, I discovered an unexpected perk - something called "Pop Up Shop". Pop Up Shop was essentially when local businesses of all kinds set up a temporary shop at a designated, advertised day(s) and time(s) on campus and peddled their wares.
I haven't been there long enough to know all the different types of businesses who show up in the Pop Up Shop. Sp far we've had business offering rentals to apartments nearby, a local CSA (community supported agriculture), and Benefits Cosmetics from San Francisco. During my first week, it was Three Babes Bakeshop. A bakeshop, you say? I think I started just in time.
Buttermilk Pie
They set up on the day before the 4th of July so right before our company holiday and before all those Independence Day barbecues might need some pies. Brilliant timing. According to the announcements posted in our campus Facebook page, you could also preorder a pie and the different flavors were listed of what they would be bringing.
Strawberry Rhubarb Crumble
I had never heard of Three Babes Bakeshop but had to go check out their Pop Up Shop during lunch. I'm not big on pies unless it's apple pie (preferably a la mode) and that wasn't one of the flavors offered. It's not fall yet and they pride themselves on organic, seasonal produce so it's not surprising apple pie wasn't on the menu yet. Still, how often does a bakery come to me instead of me driving to them? I couldn't pass it up.
Peach Pie
They were set up in a little room near the middle of campus with their sandwich board outside to proclaim their presence and the flavors being offered. A woman (one of the Three Babes? No, I found out later) sat at a table with the pies on display. Since I'd never heard of them before, I felt justifiably nosy curious enough to pepper her with questions. Where did they sell? Did they have a commercial store front? How long had they been in business?
Bittersweet Chocolate Pecan Pie
According to her patient answers, they'd been in business for 3 years, worked out of a commercial kitchen, didn't have a storefront but had a stall at the Ferry Building in San Francisco at certain times. And, in checking out their website, I also discovered that technically, there weren't THREE babes but only two. Still, it seems like they're looking for a third babe so there'll be truth in advertising in the future.
I bought the Bittersweet Chocolate Pecan Pie which also touted itself as gluten free. That wasn't a consideration for me since I can embrace, madly hug tolerate gluten just fine. But out of all the pie flavors, that was the one most compatible with my taste buds. If I couldn't have apple, chocolate would do, even though I'm not big on pecans in a pie. It had a graham cracker crust, a creamy chocolate filling and a layer of pecans just underneath the baked chocolate crust. It was pretty good but also pretty rich so eating slowly and taking small bites were key. My niece and I split the first piece and I had to give away and freeze the rest. The pie was $35 which I think is rather steep for a pie. I'm not enough of a pie aficionado to be enthused about spending $35 on a pie, even on a delicious pie, so I chalked it up to both "research" on a bakery and another way to support a local, small business. If Three Babes ever comes back on campus in the fall, I'll be on the lookout for their apple pie and yeah, I'll fork over another $35 to try it. That's just how I roll.

Thursday, July 10, 2014

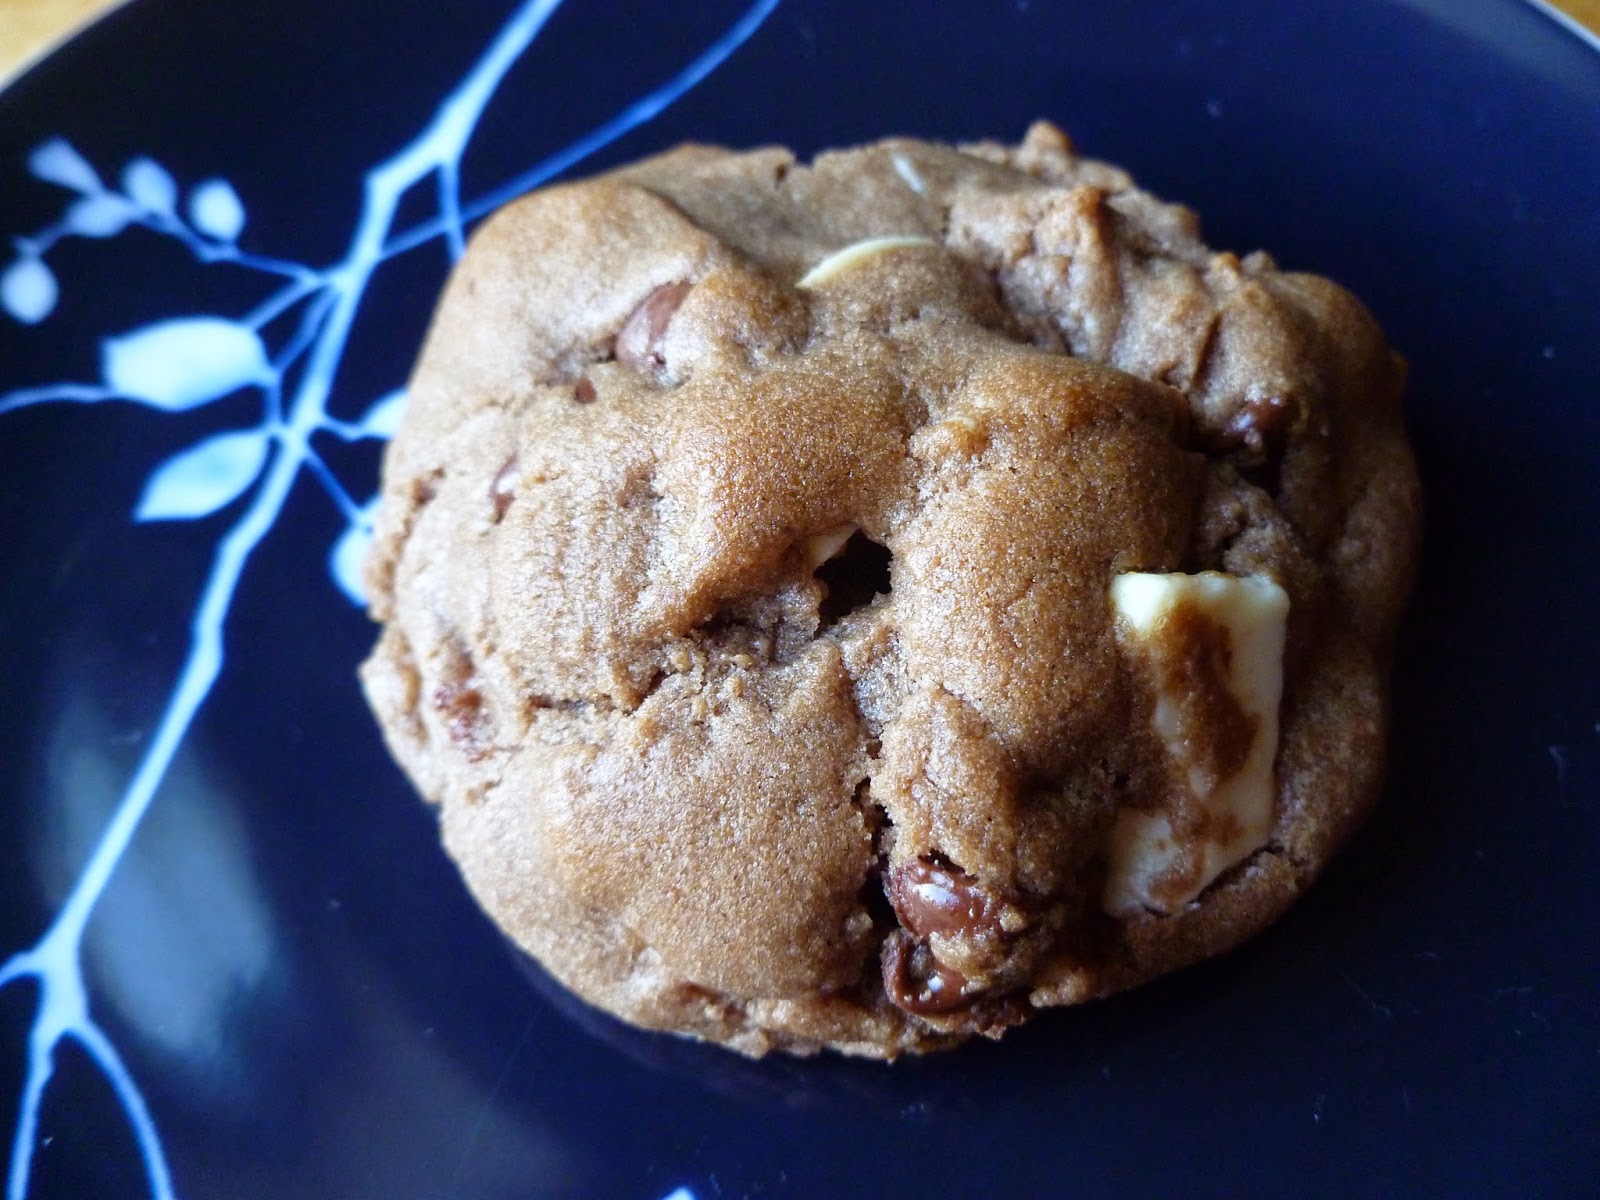
White Chocolate Cream Cheese Cookies

White Chocolate Cream Cheese Cookies - made June 28, 2014 from Averie Cooks
I get a lot of my baking recipes from trolling pinterest and many of the pins I add to my baking pinboards turn out to be from Averie Cooks. Matter of fact, I have so many pins from Averie's blog that I don't know why I don't just go directly to her blog and cut out the pinterest middleman. Probably because that would be too easy. Oftentimes a luscious picture would catch my eye on pinterest and even as my trigger finger clicks on the pin to go to the source recipe, I just know it's from Averie Cooks. Some bloggers have a distinct look and feel to their creations. I've come to associate Averie's look and feel to thick, chubby cookies, moist cakes and just mouthwatering. 


Thick and chubby bursting with white chocolate chunks sucked me into this recipe for White Chocolate Cream Cheese Cookies. I was going to a family barbecue at my cousin's and there were 3 active boys in the family mix so I knew some sort of chocolate chip cookies needed to be in the mix. Plus, really, you can't go wrong with a cookie recipe from Averie's blog.
This one didn't disappoint either. As with all her cookie recipes, make the dough ahead of time, portion it into golf-ball-size dough balls and freeze first. And underbake them. That's how you get them to be thick with the perfect moist, chewy, dense texture. I didn't have white chocolate chips so I chopped up Guittard white chocolate baking wafers. Don't worry if you don't like cream cheese (I don't) because the cream cheese just adds to the texture, not the flavor. I loved these cookies; they're hearty and sturdy but also tender and chewy. If you like white chocolate chip cookies, these are a winner.
1/2 cup (1 stick) unsalted butter, softened
2 ounces (about 1/4 cup) cream cheese, softened 
3/4 cup light brown sugar, packed
1/4 cup granulated sugar
1 large egg
2 teaspoons vanilla extract
2 cups all-purpose flour
one 3.5-ounce packet instant vanilla pudding mix
1 teaspoon baking soda
pinch salt, optional and to taste
10 ounces white chocolate chips
  1. To the bowl of a stand mixer fitted with the paddle attachment, combine the butter, cream cheese, sugars, egg, vanilla, and beat on medium-high speed until creamed and well combined, about 4 minutes
  2. Stop, scrape down the sides of the bowl, and add the flour, dry pudding mix, baking soda, optional salt, and beat on low speed until just combined, about 1 minute.
  3. Hold back a handful of the white chocolate and add the rest.  Beat on low speed until just combined, about 30 seconds.
  4. Using a large cookie scoop, 1/4-cup measure, form approximately 13 to 14 equal-sized mounds of dough, roll into balls, and flatten slightly. Strategically place a few reserved white chocolate chips right on top of each mound of dough.
  5. Place mounds on a large plate or tray, cover with plasticwrap, and refrigerate for at least 3 hours, up to 5 days or place in the freezer in a freezer bag.
  6. Preheat oven to 350F, line a baking sheet with a Silpat liner or parchment paper. Place dough mounds on baking sheet, spaced at least 2 inches apart and bake for about 11-13 minutes, or until edges have set and tops are just set, even if slightly undercooked, pale, and glossy in the center; don't overbake. Cookies firm up as they cool. Allow cookies to cool on baking sheet for about 10 minutes before serving. 

Tuesday, July 8, 2014

Lemon Meltaways

Lemon Meltaways - made dough May 30, 2014 from A Cook's Quest
My lemon tree that can't stop growing lemons
Someone forgot to tell my dwarf lemon tree that dwarves don't grow to 9 feet tall. I've been pruning (ahem, cutting with dull scissors) the branches before they start peeking into the neighbor's yard but given my lack of a green thumb and that I only make myself go out to my backyard when I realize, "hmm, feels like it's been awhile since I watered the trees" it feels like the lemon tree gets inspiration from Jack and the Beanstalk and defies its dwarf designation every time my back is turned. Whatever I prune seems to grow back tenfold. It's mocking me, I just know it.
The orange tree that doesn't like to grow oranges, just leaves
But I have to give it props because, unlike my orange tree which seems to think its sole purpose is to produce leaves and branches rather than actual oranges, my lemon tree keeps popping out lemons. Good-sized lemons too, not sickly little ones. It does seem to take forever for the lemons to actually turn bright sunshiny yellow but there are plenty of them there. I like to think of them as lemon-bars-in-waiting but I do try to mix it up a bit on how I use the lemons.

For summertime cookies, I try not to get too fancy. Actually, year round I try not to get fancy because fancy takes time. Of which I don't have much. So this recipe was perfect because you just mix up the dough, roll into a log, chill then slice and bake. Simple. My only issue with it is the cookie itself wasn't very lemony. It's a good shortbread cookie but simply dredging it in powdered sugar didn't highlight the lemon flavor. Instead, I would recommend making a simple lemon royal icing glaze for it: sifted powdered sugar with a tablespoon or two of fresh lemon juice until it's the consistency you want. For added lemon punch, grate some lemon zest into the icing, spread over the cooled cookies and let it set.
12 tablespoons (1 1/2 sticks) unsalted butter, room temperature
1/3 cup powdered sugar
zest of one lemon
2 tablespoons lemon juice
1 tablespoon vanilla extract
1 3/4 cups + 2 tablespoons flour
2 tablespoons cornstarch
1/4 teaspoon salt
2/3 cup powdered sugar, for dredging
  1. Cream the butter the the 1/3 cup powdered sugar. Beat in the lemon zest, lemon juice and vanilla. 
  2. Whisk the flour, cornstarch and salt into a large bowl. Add to the wet ingredients until just combined. 
  3. Roll the dough into a 1 1/4"-diameter log. Wrap in plastic wrap and chill in the refrigerator for at least 1 hour.
  4. Slice the dough into 1/4" thick slices and place evenly spaced on a baking sheet, 1 inch apart. Bake in preheated 350 degree oven until just lightly golden brown, about 12-15 minutes.
  5. Let cool on a wire rack for 4 minutes. Dredge cookies in powdered sugar to coat.

Monday, July 7, 2014

Restaurant Review: Thaiphoon

Thaiphoon - lunch on June 26, 2014
I met my friend Jenny for lunch here on the last day at my old job. It was my way of ensuring I actually left the building early on my last day. I'd been putting in 11- to 12-hour days in my last two weeks; clearly I failed at short-timers' disease so my last day was my only chance. I kept telling my coworkers I was only staying until the mall opened (at 10 am). I didn't quite make it out that early since I was still working on emails by then but I did make it out in time to meet Jenny for lunch.
I don't know if there's much I can say about Thaiphoon. It was okay. It wasn't bad but it wasn't particularly distinctive either. I think they're slightly hampered by their location. Although located on a busy main street, there's not much in the immediate area except car dealerships so you have to drive here or walk over if you work nearby. I don't know if I would be pulled here for any particular reason. However, Jenny worked nearby and it was in the area where I could run errands so it was a perfect meeting place.
Soup
Other than that, I'd say it was a bit ordinary. I'd recommend it if someone was in the area and wanted Thai food but it doesn't stand out in my head as spectacularly unique. Jenny got the green curry chicken and I got the pad thai (of course). The pad thai was a tad oily but I've had worse. I've had better so this falls into the average category for me. Fortunately, my standards for savory food are lower than my standards for sweets so this was just fine.
Green Curry Chicken
The restaurant was bright from natural lighting, the service was okay and the prices were under $10 for lunch so it was cheap. It's a very typical Thai restaurant for my area.
Pad Thai, no bean sprouts

Saturday, July 5, 2014

Nutella White Chocolate Chunk Cookies

Nutella White Chocolate Chunk Cookies - made dough June 22, 2014 from Averie Cooks
This was one of the cookies I made for my last week at work at my old job. I knew I didn't have a lot of time that week so I needed a cookie dough I could make ahead of time, freeze and just bake off at the last minute. Averie Cooks is a perfect blog for that kind of recipe. Her blog is full of amazing recipes and my favorites are her cookies because they're always thick, chubby and bursting with goodness. I've rarely had something not turn out from her blog so I figured this would be a safe bet since I couldn't afford any baking failures that last week.
My only comment is mine didn't turn out as dark as hers appeared to. I used the same amount of Nutella as recommended in the recipe but the dough still turned out milk chocolate-light. I was afraid of adding more in case it changed the composition of the cookie and I really wanted chubby, puffy cookies.
Which, as you can tell, I got. This is like the perfect size, texture and appearance in cookie to me. It wasn't super chocolaty or super Nutella-y though so if you want a stronger flavor, try substituting a tablespoon or two of dark cocoa and decreasing the flour by the same amount. Because cocoa powder is a drier ingredient and can suck out moisture, that gives you some leeway to add a bit more Nutella. I may try that next time.
The white chocolate chunks and the semisweet chocolate chips paired well together in this cookie as well. You definitely want to freeze this cookie dough and bake the cookies from frozen dough so plan ahead. This isn't the type of cookie you make because you have a craving that has to be satisfied immediately. But it's worth the wait.
1/2 cup unsalted butter, softened (1 stick)
heaping 1/3 cup Nutella (stir well before adding)
1/2 cup light brown sugar, packed
1/4 cup granulated sugar
1 large egg
2 teaspoons vanilla extract
1 3/4 cups all-purpose flour
2 teaspoons cornstarch
1 teaspoon baking soda
pinch salt, optional and to taste
1 cup white chocolate chips
1 cup semi-sweet chocolate chips 
  1. To the bowl of a stand mixer fitted with the paddle attachment, combine the butter, Nutella, sugars, egg, vanilla, and beat on medium-high speed until creamed and well combined, about 4 minutes
  2. Stop, scrape down the sides of the bowl, and add the flour, cornstarch, baking soda, optional salt, and beat on low speed until just combined, about 1 minute.
  3. Stop, scrape down the sides of the bowl, and add the white and chocolate chips, and beat on low speed until just combined, about 30 seconds.
  4. Using a large cookie scoop, 1/4-cup measure, or your hands, form approximately 11 equal-sized mounds of dough, roll into balls, and flatten slightly. Tip - Strategically place a few chocolate chips right on top of each mound of dough by taking chips from the underside and adding them on top.
  5. Place mounds on a large plate or tray, cover with plasticwrap, and refrigerate for at least 2 hours, up to 5 days. Do not bake with unchilled dough because cookies will bake thinner, flatter, and be more prone to spreading.
  6. Preheat oven to 350F, line a baking sheet with a Silpat or parchment paper. Place dough mounds on baking sheet, spaced at least 2 inches apart and bake for about 9 minutes, or until edges have set and tops are just set, even if slightly undercooked and glossy in the center; don't overbake. Cookies firm up as they cool. Allow cookies to cool on baking sheet for about 10 minutes before serving. 

Friday, July 4, 2014

Lofthouse Sugar Cookies

Lofthouse Sugar Cookies - made dough June 21, 2014 from Stella B's Kitchen
I've never heard of Lofthouse but from the prevalence of its recipe for sugar cookies on pinterest, I'm going to guess they have quite a devoted following as many people seem to want to duplicate their baked goods. Particularly their sugar cookies.
These are similar in appearance to the Knockoff Swig Sugar Cookies I've made earlier (I don't know what Swig is either or why people want to copy their sugar cookies). Their similarities are probably helped by the fact that they're both similar is size, color and pink frosting that I used.
But I will have to give the nod to Lofthouse over Swig because I liked these cookies more. They were sweeter but not too sweet, had more vanilla flavor, I liked the texture that was a perfect cross between chewy cookie and slightly dense cake. Plus the vanilla buttercream was much better than the sour cream frosting of the Swig knockoffs.
The dough for these was also easy to make and great to work with, not too soft or sticky but not hard or dry. Make the cookie dough balls into generous sizes, like the size of golf balls. Then flatten slightly into thick discs. They don't spread very much and will remain thick. Baking them as discs instead of as golf balls will ensure you have cookies of uniform thickness instead of mounded in the middle and spread thinner at the sides.
I tinted the frosting pink with a couple of drops of red food coloring (hey, I'm a girl) but you can omit the food coloring and use colored sprinkles instead to dress these up for any occasion. With 4th of July upon us, these lend themselves well to being patriotic cookies just with some red, white and blue sprinkles.
2 1/2 cups plus 2 tablespoons all purpose flour
1/4 cup plus 2 tablespoons cornstarch
3 teaspoons baking powder
1/2 teaspoon salt
1 cup butter, softened 
1 cup granulated sugar
2 large eggs
2 heaping tablespoons sour cream
1 teaspoon vanilla

Frosting
1/2 cup unsalted butter, softened
3 cups powdered sugar
up to 1/4 cup milk (skim is fine)
1 teaspoon vanilla
food coloring of choice
desired sprinkles
  1. Sift dry ingredients and set aside.  
  2. Beat butter and sugar until light and fluffy.  Add eggs one at a time.  Then add sour cream and vanilla.  Add flour mixture and mix until just combined.  Chill dough thoroughly, at least an hour.
  3. Preheat oven to 350 degrees.  On a lined baking sheet, roll balls of 2-3 Tbsp and place 2 inches apart.  Wetting fingers slightly, press balls to about 1/2 inch thick, molding to keep nice round edges.  
  4. Bake for 11-12 minutes until centers are no longer shiny.  Cool on pan for a few minutes.  Remove to cooling rack until completely cool before frosting.
  5. For the frosting, beat butter and vanilla.  Gradually beat in powdered sugar, 1 cup at a time.  Add a couple Tbsp of milk and beat again.  Continue to add milk until the desired spreading or piping consistency is reached.  Add food coloring.
  6. Pipe or frost cookies and top with sprinkles.  Allow to set open to air for several hours before storing in sealed container.  

Wednesday, July 2, 2014

Restaurant Review: King Egg Roll

King Egg Roll - lunch on June 16, 2014
Before I left my last job, I went out to lunch with one of my coworkers. We originally meant to go back to Honey Thai, her favorite place for Thai food, but we went on a Monday and we forgot that many small business restaurants, particularly Asian restaurants, are closed on Mondays. It's like their Sabbath.
Not to be deterred, we decided to try out King Egg Roll, which was nearby and on the way back to the office. Another coworker had mentioned it before and neither one of us had ever been there so it seemed like a good chance to try it out.
I had no idea what to expect but when we walked in, it felt like a Panda Express that served Chinese food entrees as well as dim sum. Like Panda, you could get rice or noodles then your choice of entrees. You could also order dim sum as a side order. The person behind the counter took your order and dished it out then you paid at the cash register at the end of the counter. The price points are also similar to Panda, under $10 for rice or noodles with 2 entrees.


Unlike Panda Express though, each order comes with a cup of egg drop soup which I thought tasted pretty good.
And true to its name, each order also comes with an egg roll. I wouldn't have ordered it otherwise since I knew it would be full of veggies and, even if I ate cooked vegetables, it always seemed contrary to have vegetables deep fried in an egg roll wrapper. Lumpia, I can handle. Deep fried vegetables? Nah.
I got the Orange Chicken to play along with the Panda vibe and the barbecue pork. The Orange Chicken was just okay; Panda's is better. But the barbecue pork was delicious, a little fatty but good flavor.
Steamed Pork Buns
My coworker also got an order of steamed pork buns which we split. That was good too. This is definitely not gourmet Chinese food but for a quick lunch, it's a decent alternative, especially if you don't mind simple and not fancy.