Friday, February 7, 2014

Restaurant Review: Paul Martin's American Grill

Paul Martin's American Grill - dinner on January 24, 2014
I had never heard of Paul Martin's American Grill before but one of my coworkers mentioned it and when I looked up their website and saw how they sourced responsibly for their menu (sustainable fisheries, free-range meats, artisan cheeses), I wanted to try it. I like to support small businesses and I'm also trying to support the ones who source locally and responsibly whenever I can. It may not seem like much but if I'm going to eat out and spend money anyway, I want to support what I believe in as much as possible.
In a nutshell, I would call Paul Martin's a steakhouse but they offer more than just steaks. You can get seafood, chicken, salads, burgers and ribs as well as steaks. Like a traditional steakhouse, the lighting inside is pretty dim. I think every steakhouse I've ever been in has had low lighting. It's pretty spacious, er, at least what you can see of it in the dim light. Their Mountain View location offers valet service but honestly, save yourself a few bucks and just park in the nearby garage. That's where the valets park your car anyway and there was plenty of parking when I went on a Friday night.
I tried to book a reservation on Open Table but they didn't have any spots available so my friend Karen and my cousin Ellen and I took a chance and just arrived early. The hostess said she could seat us but that we'd have to be done by 6:30. We had gotten there around 5:15 so while it was a little off-putting to be put on a timer, it wasn't a big deal to plan on getting out in less than 75 minutes.

They brought out a bread basket which the waiter, when asked, said they truck down since they don't have a bakery onsite. The inside part was good but the crust was a little chewy, leading me to believe the bread was probably delivered freshly made that morning but as the day wears on and the crust softens, it's not as fresh as it could be.
Marinated Skirt Steak with sweet potatoes and arugula - $24
I ordered the marinated skirt steak with sweet potatoes and arugula. I have to say, it was fabulous. The skirt steak, cooked medium, wasn't super tender but it wasn't tough either, just the right amount of chewy for a steak. The marinade was delicious and the fresh arugula, unadorned with dressing (thank you) made me feel virtuous since I actually ate it. But the best part of the dish? The sweet potatoes. I think they were actually Japanese sweet potatoes because they were white-fleshed yet still tasted like sweet potatoes but with a slightly more firm texture. Delicious.
Fish Tacos - $17
Karen got the fish tacos with the homemade flour tortillas. Unfortunately I don't think she enjoyed her order as much as I enjoyed mine. The "homemade" description had led her to believe the tortillas would be thinner but they were thick. Ellen also wasn't overly impressed with her salmon, finding it a little dry. I think they found their entrees okay but nothing to write about. Whereas I could probably wax on a little longer about my skirt steak and sweet potatoes. But I won't.
Cedar Plank Salmon - $25
Paul Martin's is a little on the pricier side but I expected that given their focus on sourcing sustainably and using fresh, seasonal ingredients. For once, we didn't get dessert. They had 4 offerings for $9 each but nothing appealed to us and, aware of our time limit, we decided not to bother since it was approaching 6:30 and our table was going to turn into a pumpkin for us and into a coach for the next patrons. Instead, we decided to head to Smitten's for ice cream (stay tuned).

Brown Sugar Pound Cake

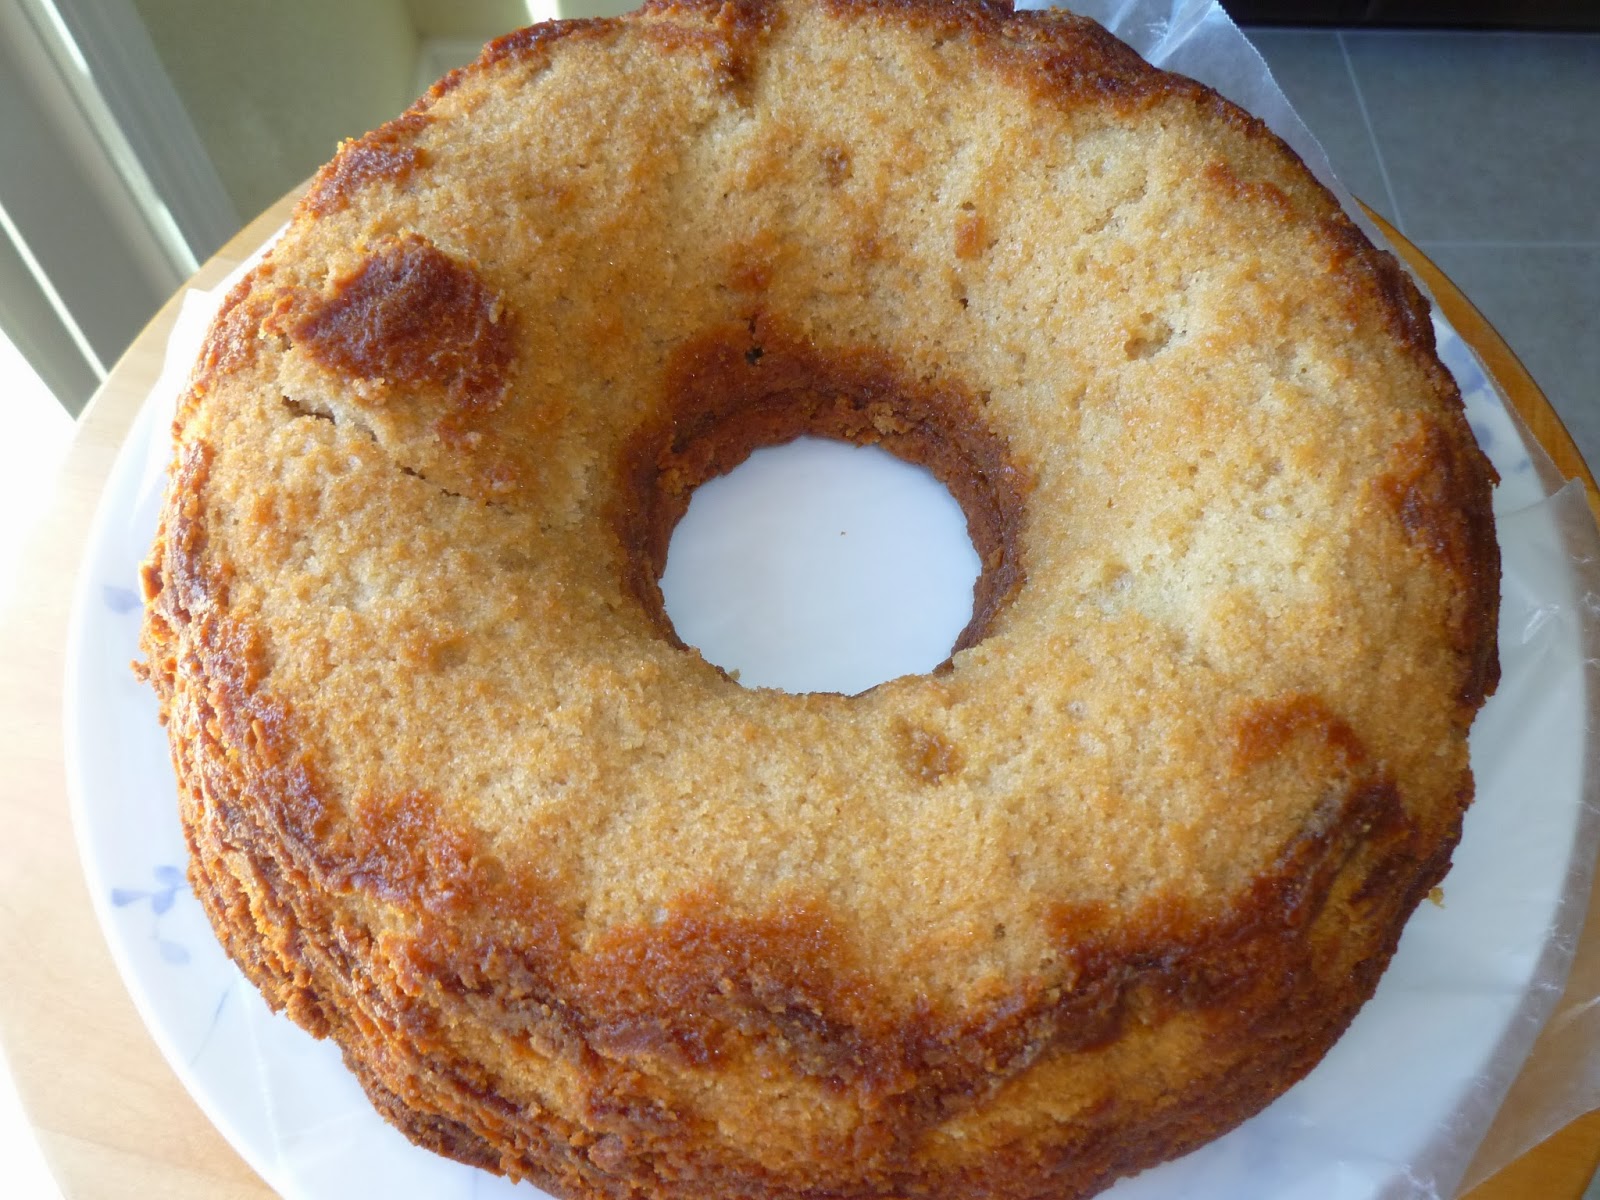
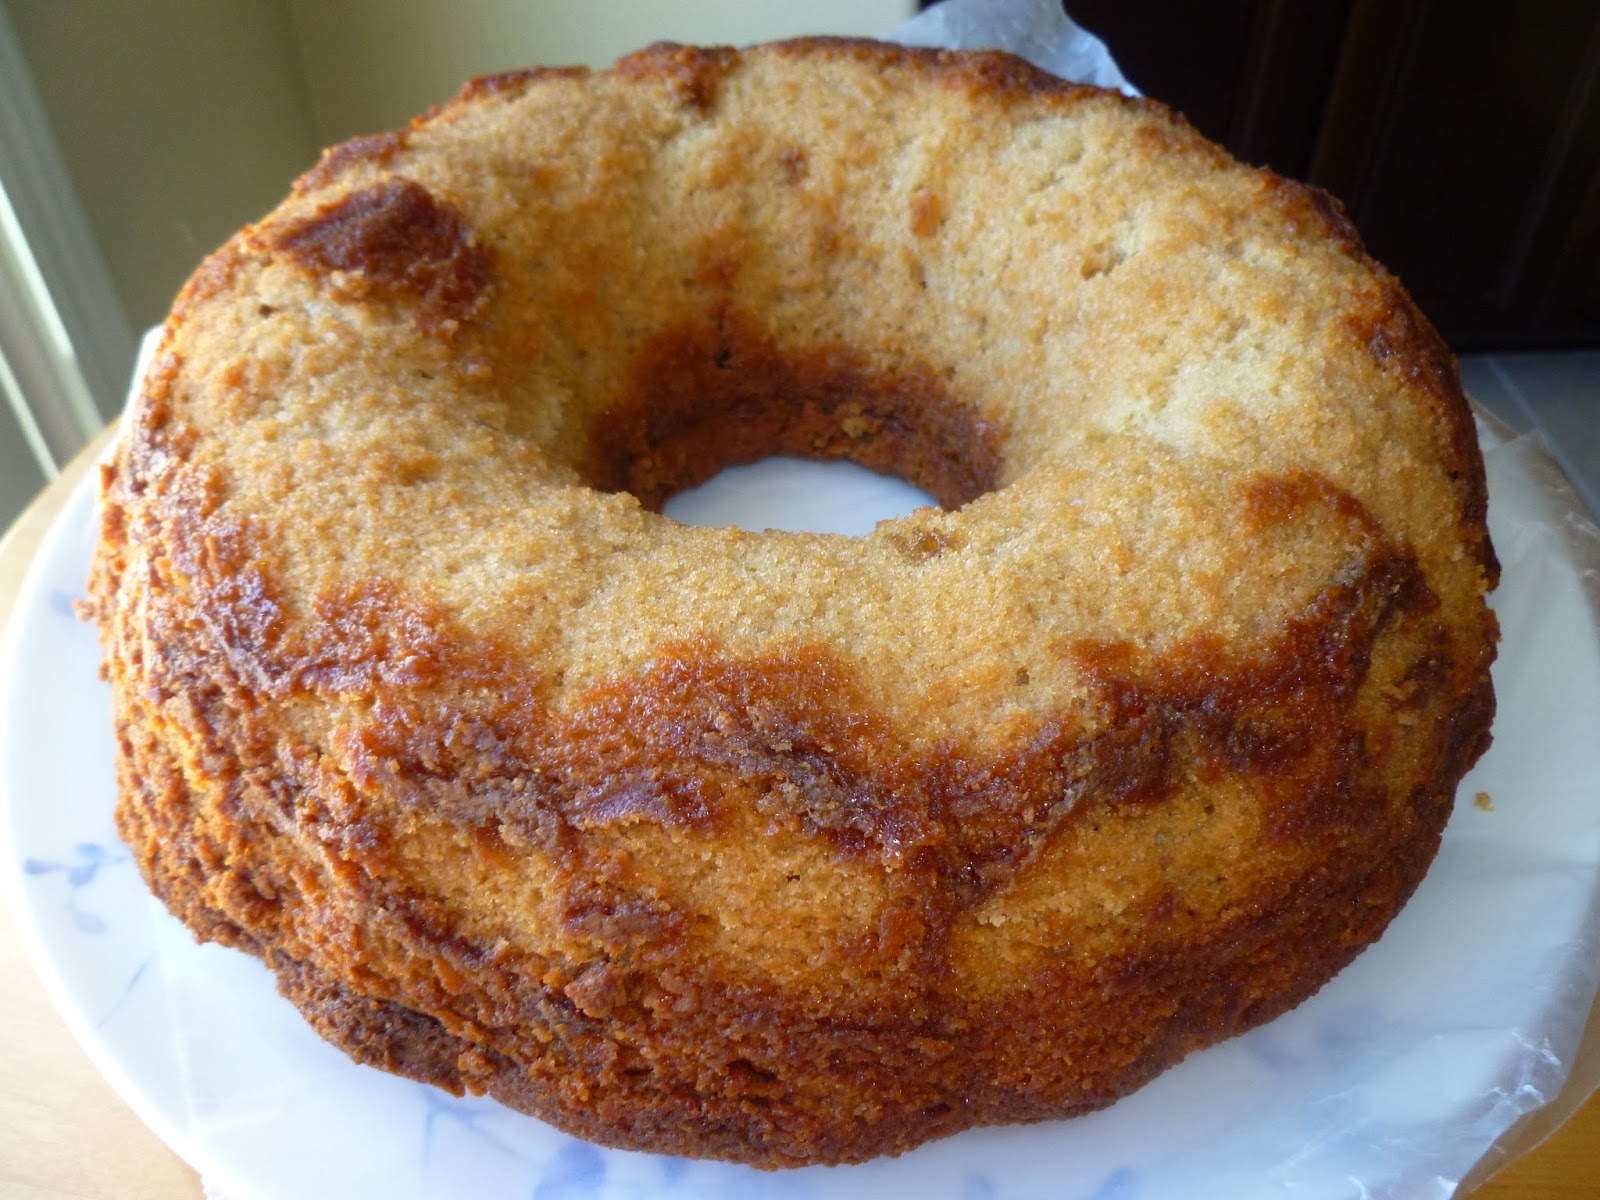
Brown Sugar Pound Cake - made January 31, 2014 from Cricket's Cafe
This is another recipe I've had so long on my pin board that I either had to make it or delete it. As always, click on the recipe title to take you to the original recipe page and blog I got the recipe from. It'll probably be better for you to see the original picture that sucked me in and got me to make this cake because it looked so moist and appetizing.
Mine didn't turn out quite the same way so I'm scratching my head wondering if I baked it too much or not enough because my cake doesn't look like that when sliced. When not sliced, as you can see from the pictures, it looks really homemade. As in, it didn't come out of the Bundt pan very cleanly and I was lucky it didn't break completely apart. Taste-wise, it was good although when I first tasted it, I thought it was too sweet. Not surprising with that much sugar in it but I was surprised that it didn't have more of a caramel or butterscotch flavor from all that brown sugar. Instead, it was just sweet. I liked it better when it had completely cooled because, although I could still taste the sweetness, the texture was soft and had a good mouthfeel.

1 1-lb box light brown sugar
1 cup granulated sugar
1 cup shortening
1/2 cup (1 stick) butter
5 eggs, room temperature
1 cup milk
3 cups all-purpose flour
1/2 teaspoon baking powder
1 teaspoon vanilla
1/2 teaspoon maple flavoring
1 cup walnuts, optional
  1. Preheat oven to 300 degrees F.
  2. Grease and flour bundt pan or loaf pans.
  3. Cream butter and shortening. Add brown sugar and granulated sugar and mix well. Add eggs, one at a time, mixing well after each addition.
  4. Combine flour and baking powder in a separate bowl. Alternate adding flour mixture and milk to the creamed mixture.
  5. Add vanilla and maple flavoring; mix well. Add nuts, if using. 
  6. Pour into prepared pans and bake 1 1/2 - 2 hours for bundt pan, less time for loaf pans. Cake is done when toothpick inserted near the center comes out clean.

Thursday, February 6, 2014

Red Velvet Chocolate Chip Cookies

Red Velvet Chocolate Chip Cookies - made dough January 29, 2014 from Sally's Baking Addiction
It's February, the month of schmaltzy hearts, the Hallmark holiday known as Valentine's Day, and pink and red everywhere. It's also the month of not needing an excuse to make anything red velvet because tis the season for edible red food. I saw these cookies from Sally's Baking Addiction and like a moth to a flame, I was irresistibly drawn to making them. Chocolate chip cookies and red velvet? Let me reach for the butter.
Cookies before baking
And speaking of schmaltzy hearts, that's what I tried to make out of these cookies. The picture above is how I shaped them with the help of a heart-shaped cookie cutter as I partitioned out the cookie dough. I froze them that way in the hopes that when baked, they wouldn't spread and would retain their shape. As you can see from the picture below, those hopes were dashed 5 minutes into the oven. Instead of heart-shaped cookies, I ended up with oddly shaped cookies that no one would mistake for hearts. Oh well, the best-laid plans...
Cookies after baking
Total upside though is regardless of how they looked, these cookies were delicious. They were like regular chocolate chip cookies but better because they were red velvet that actually had chocolate flavor to them. I added the white chocolate chips on my own since I like the color contrast in the cookie but you can also stick to just semisweet (or milk) chocolate chips. Oh and I discovered Sally's Baking Addiction, a blog which I've gotten several good recipes from, is publishing a cookbook to be released on March 1. Although I've forsworn buying new books, especially new baking books for awhile, don't think I didn't put this on my wish list for those days when I weaken my resolve and am jonesing for a new book.
1 1/2 cups + 1 tablespoon (198 grams) all-purpose flour
1/4 cup (32 grams) unsweetened cocoa powder
1 teaspoon baking soda
1/4 teaspoon salt
1/2 cup (115 grams) unsalted butter, softened
3/4 cup (150 grams) light or dark brown sugar
1/4 cup (50 grams) granulated sugar
1 egg, room temperature
1 tablespoon milk
2 teaspoons vanilla
2 1/2 teaspoons red food coloring
1 cup (180 grams) semisweet chocolate chips plus extra for after baking

  1. Whisk the flour, cocoa powder, baking soda and salt together in a large bowl. Set aside.
  2. Using a stand mixer with the paddle attachment, beat the butter on high speed until creamy, about 1 minute. Scrape down the sides and the bottom of the bowl as needed. Switch the mixer to medium speed and beat in the brown sugar and granulated sugar until combined. 
  3. Beat in the egg, milk and vanilla extract, scraping down the sides and bottom of the bowl as needed. Once mixed, add the food coloring and beat until combined. Turn the mixer off and pour the dry ingredients into the wet ingredients. Turn the mixer on low and slowly beat until a very soft dough is formed. Beat in more food coloring if you'd like the dough to be more red. On low speed, beat in the chocolate chips. The dough will be sticky.
  4. Cover the dough and chill for at least 1 hour (I recommend making them into 1.5 tablespoon-sized dough balls first then chilling).
  5. Preheat oven to 350 degrees F. Line two large baking sheets with parchment paper. Space dough balls evenly on baking sheet and bake for 10-11 minutes. If desired, press a few chocolate chips on top of each warm cookie.
  6. Cool cookies for 5 minutes before transferring to a wire rack to cool completely.

Wednesday, February 5, 2014

Restaurant Review: Bierhaus

Bierhaus - dinner on January 23, 2014
Although I often meet friends for dinner at one of the restaurants on Castro St in Mountain View (perfect central meeting point for those of us scattered up and down the peninsula), we'd never gone to Bierhaus before. It's fairly new, having opened within the past year. I found them through yelp, as usual, and a rave review for their sweet potato fries sucked me right in.
Truffled Shroom Burger with sweet potato fries
Bierhaus is a casual establishment with both indoor and outdoor seating which is viable in winter when you don't live in the polar vortex, experience record high temps for January and have no rainfall during the rainy season. You place your order at the counter, get a number, find a table and the staff delivers your order to your table, finding you by number. Just like Athena Grill, it's a good casual place to go with friends and not have to worry about splitting the check since you pay separately when you order. (For the record, I don't have a problem splitting the check with my friends but this just takes the calculation out of adding up the bill, tacking on the tip, dividing it by however many of us were there and strategizing what to tell the waiter to charge when some people pay with cash and others by credit card.)
Commando burger with sweet potato fries
Burger prices range from $8.50 - $14 or so, depending on whether you want a 5-ounce burger or an 8-ounce one. Cheese is extra as are bacon and avocado, depending on the burger. I went with a 5-ounce Commando burger because, as the name implies, it comes "commando" (which sounds so much nicer than "I'd like my burger plain") with just the burger and bun. I did add the cheese and didn't bother adding the greenery that came with it. Having been taught by The Counter that anything over 5 ounces would be way too much, I was happy with the 5-ounce patty. It was a good burger and the brioche bun was perfect. I also liked that Bierhaus sources locally and the grass-fed beef comes from nearby Marin Sun Farms. Their greens are also local. Locally-sourced food has been another criteria of mine when seeking out new, small business restaurants to try.
Chicken Cobb Salad
I took pictures of the other entrees my friends got but I often forget to ask them how their orders were so I never have that to include in my blog write ups. Could've been great or just okay but I have no idea since we were too busy talking about other stuff for me to quiz them on the food. I'm just glad they're used to my quirks enough by now that they'll let me photograph their food before they eat it. Yes, I know that's probably annoying but I come with baked goods for them so they humor me :).
Giant pretzel, heavy on the salt
Overall, I liked Bierhaus and it's a good place to go for a casual dinner, even if you're like me and don't drink beer. The burgers were good and I'll applaud any place that has sweet potato fries. I think I still prefer The Counter for burgers but this place is a good option as well.

Tuesday, February 4, 2014

Another Texas Sheet Cake

Texas Sheet Cake - made January 29, 2014 from A Hint of Honey
(Note: apologies in advance for the somewhat blurry pictures. I was testing out a new camera and still going up a learning curve on how to use it properly.)

I might be a tiny bit obsessed, fanatic, super in love with into Texas Sheet Cake since I just made another one so soon after I had already made one for National Chocolate Cake Day. I had planned on making one anyway since I needed it for care packages and for one of my nieces. Typically I do most of my baking on the weekends when I have more time but I was gone last weekend with no time to bake and I needed it for Thursday when I was going up to Berkeley for a recruiting fair for my company and doing a treat bag handoff to my niece. Texas Sheet Cake is perfect when you need a good amount of cake to give away and you don't have much time. Not to mention, I just like eating it.
I had planned to make it Wednesday night when I got home from work but I woke up irritatingly early on Wednesday morning, more than an hour before my alarm clock was due to wake me up. Usually I try to convince myself to go back to sleep and half the time I can fool myself back into a light doze. But this was the other half of the time when, once I'm awake, my brain decided to do backflips, cartwheels and twirls so the more I tried to go back to sleep, the more awake I became. I typically wake up early anyway since I like to workout before work but this was really early, more than an hour ahead of my schedule for preferred consciousness. So I decided if I was going to be awake, I might as well be baking.
Normally when I do bake before work, I mostly make cookie doughs and don't actually bake anything but just get the cookie dough made, formed and into the freezer ready for baking when I have time. But the best kind of cake to make in under an hour is Texas Sheet Cake so I went hunting on pinterest for another version to try out. The typical Texas sheet cake has the same ingredients, mixed the same way, differentiated mainly by the proportion of ingredients to each other. Some have sour cream, some have buttermilk and some have both. I didn't have any sour cream on hand, just milk and dried buttermilk powder so I culled out an appropriate recipe and got started. True to form, I was able to get this cake mixed, baked, and frosted in less than an hour, including cleanup of my kitchen. Even did my workout and got to work by 8 am as usual. The only difference being the cake was already made and ready to be packaged up by the time I got home. Bonus that my kitchen was already clean and I had no dishes to wash that night.

I would like to say double bonus that this was another great cake. But I can't. It was good but it wasn't as good as the other versions of Texas Fudge Cake I've made. The texture wasn't dry but it wasn't as moist so I don't know if I baked it a trifle too long or if that was just how it's supposed to turn out. The frosting wasn't as smooth either as the other versions. It's odd because when I compare this version to the last version I made, the recipes are very similar but just vary slightly in proportions yet I definitely prefer the last version.
2 cups all-purpose flour
2 cups granulated sugar
1 teaspoon baking soda
1 teaspoon ground cinnamon
1/4 teaspoon salt
3/4 cup water
1/2 cup butter
1/4 cup unsweetened cocoa
1/2 cup buttermilk
1 teaspoon vanilla extract
2 large eggs
Frosting
6 tablespoons butter
1/3 cup milk

1/4 cup unsweetened cocoa powder
3 cups powdered sugar
2 teaspoons vanilla extract

  1. Preheat oven to 375 F. Lightly grease a 9×13 baking pan or sheet pan.
  2. In a large bowl combine flour, sugar, baking soda, cinnamon, salt, and chili powder (optional) and stir together with a whisk. 
  3. In a small saucepan, combine water, butter, and cocoa and bring to a boil, stirring frequently. Pour into flour mixture. Beat with an electric mixer at medium speed until well blended. 
  4. Add buttermilk, vanilla, and eggs. Beat well. Pour batter into prepared pan. Bake in preheated oven for 20-25 minutes (it will bake even faster if you are using a sheet pan) or until a toothpick inserted into the center comes out clean. Remove from the oven and place on a wire rack.
  5. To make the frosting, combine the butter, milk, and cocoa in a saucepan and bring to a boil, stirring constantly. Remove from heat and stir in vanilla and powdered sugar. Spread over warm cake. Cool completely.

Monday, February 3, 2014

Ruth's Chris-style Sweet Potatoes

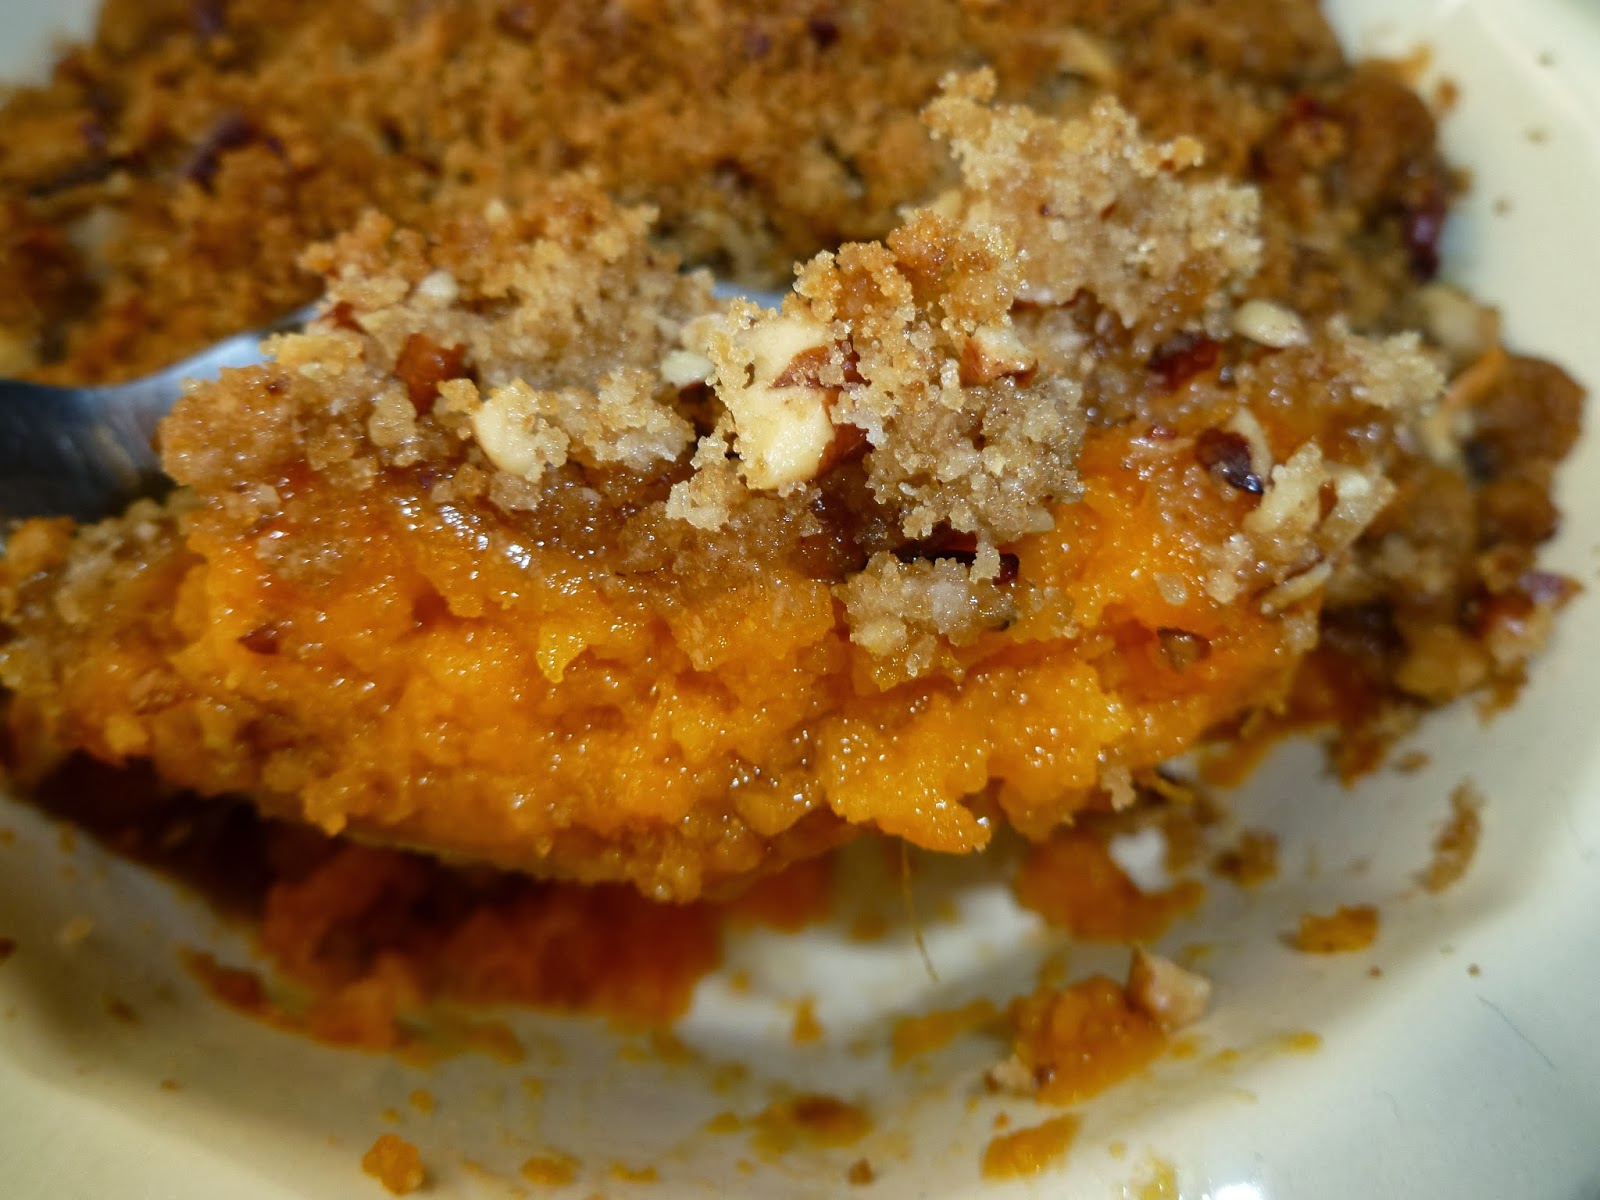
Ruth's Chris-style Sweet Potatoes - made January 24, 2014 from The Girl Who Ate Everything
I have been having a recently discovered love for sweet potatoes. I've tried them baked, boiled and fried and loved them all. I may never eat a white potato again. Even when it comes to fries, I'll go for sweet potato fries instead of their regular white potato counterpart. And sweet potatoes are better for you anyway. Not that I necessarily always, often or even sometimes base my eating choices on nutrition - this is just a happy coincidence.
One version I've always been conceptually against was the sweet potato pie. I think it's because when I first tried sweet potatoes, it was in pie form and it was like over-sugared, heavily spiced mush and my initial reaction was, "ew, who eats this stuff?" It ranked right down there with pumpkin pie and I dislike pumpkin pie intensely. It took me years to try sweet potatoes again and since I have, I've only had them the way I've made them, whether they're just boiled, baked or caramelized or pan fried. It was all good.
But every once in awhile, I pretend I'm open-minded about trying new foods and actually follow through. Such was the case in making this sweet potato pie. I've never been to a Ruth's Chris before since we don't have one near me but I've heard about it and most people seem to love their food so I was curious to try this recipe. I'm not going to lie - when I first looked it through, I couldn't help but wonder why anyone would take something as wholesomely good as a plain sweet potato and add all this "stuff" to it, thereby making it somewhat bad for you and negating all the good nutrition to be found in a sweet potato. But I forged ahead with it as I had three sweet potatoes to use up and I was able to get enough out of them to make half this recipe.

Turns out being open-minded was a good thing as I really enjoyed this pie. Specifically, I loved the topping. It's hard not to like crunchy streusel topping perfectly sweetened with brown sugar and with the added crunch and flavor of toasted pecans to contrast with the smoothness of the sweet potato filling. I'm not convinced plain mashed sweet potatoes wouldn't be better since I really couldn't taste much of a difference in adding the sugar, eggs and butter to the mashed sweet potatoes but I would definitely keep the topping. We're past Thanksgiving so perhaps it's not the season for sweet potato pie anymore but I'd consider making this for Thanksgiving dinner as a side dish or even a dessert - it's really good.
Crust (Topping)
1 cup brown sugar
1/3 cup flour
1 cup pecans, chopped
1/3 cup butter, melted

Sweet Potato mixture
3 cups cooked and mashed sweet potatoes (I peeled, sliced and boiled mine)
1 cup sugar
½ teaspoon salt
1 teaspoon vanilla
2 eggs, well beaten
1/2 cup (1 stick) butter, melted
splash of milk if needed
  1. Preheat oven to 375 degrees. Spray a medium-size casserole dish with nonstick spray.
  2. For the crust: Combine brown sugar, flour, nuts and butter in mixing bowl. Set aside.
  3. Combine sweet potatoes, sugar, salt, vanilla, eggs and butter in a large mixing bowl in the order listed. Beat thoroughly with a hand mixer for about 3-4 minutes to increase the fluffiness of the sweet potato mixture. Add a splash of milk if needed and mix.
  4. Pour mixture into the baking dish. Bake for 25 minutes. At this point, dish can be covered and refrigerated for a couple of days.
  5. Sprinkle the surface of the sweet potato mixture evenly with the crust mixture and return to oven for 10 minutes. Allow to set at least 30 minutes before serving.
  6. The brown sugar and pecan crust should be slightly browned and crunchy. Makes 12 servings.

Restaurant Review: Athena Grill

Athena Grill - lunch on January 23, 2014, 4-star rating on yelp
A coworker and I were trying to figure out where to go for lunch and she mentioned Athena Grill, this Greek place nearby. I'd heard of it before but had never been and of course my first thought was to try it "for blog material". Athena Grill is located in a randomly odd place in an industrial neighborhood of office parks and warehouses. It would either have to be a destination place because there's nothing else out there or the only lunch spot for people who work in the surrounding area or both.
It was actually fairly busy when we arrived just before noon. There's both indoor and outdoor seating. You go inside and place your order with the cashier. Then you're given a block with a number on it, you get your drink of choice from the drink fountain, find a table and one of the wait staff, searching the tables with the other block numbers, comes to find you and delivers your order a few minutes later.
The whole process was pretty efficient. They also come out with a basket of pita bread and French bread with hummus to each table. This is a good place to come to with a group of people if you don't want to worry about splitting the check since each person places and pays for their own order. As an aside, I found the people watching there rather funny as everyone so looked like they worked in high tech. As in, I kept thinking I recognized someone only to discover I didn't know them but I know people who looked like them. It's hard to explain unless you've worked in a certain industry for a number of years and you just know what the people in that industry look like. That's how I felt at Athena Grill and it tickled my odd sense of humor.
Pita and French Bread with hummus
Our orders arrived fairly quickly so this place is a good option for a quick lunch. My coworker got the lamb souvlaki wrap. I'm not well versed on Greek food so I couldn't tell you what it was like but I think she enjoyed it.
Lamb Souvlaki Wrap - $10.95
My own order probably wasn't very authentically Greek since I went with a pasta dish - namely layered ziti in a meat sauce and topped with a bechamel sauce that looks like a block of melted cheese at first glance but really was a thick layer of bechamel. I had thought about ordering a meatier entree to get something more Greek but I already had dinner plans at a burger place with friends that night so I went with pasta for something different.
Pastitsio - $12.95
That might not have been the best call I could've made. The pasta was decent but I did have to peel off some of that thick bechamel layer and the whole dish was rather bland. Now, remember, I have bland taste buds to start with so when I call something bland, it's really got to be bland. Not the yummiest entree I've ever eaten but, in fairness, there are probably other entrees I should've gotten that I would've enjoyed more so I'm not ready to write off Athena Grill just yet. I'll have to go back and try something else before I can really decide if I like the food or not.

Sunday, February 2, 2014

Brown Butter Caramel Mocha Cookies

Brown Butter Caramel Mocha Cookies - made dough January 24, 2014 from Kevin and Amanda
I'm going through a purge on my pinterest boards - either I make something I've pinned or I delete the pin because I've pinned it from so long ago and if I haven't made it by now, I likely never will. Fortunately, this recipe fell into the former category. I needed to put up some cookie dough so I could bake off cookies later on when I needed it and this was one of the recipes I decided to try.
It also had the added advantage of using up some espresso powder I've had for awhile that might lose its flavor if I kept hanging onto it for much longer. Plus I had a nearly-forgotten package of caramel bits that I tend to buy and hoard like I do with most other baking ingredients. But caramel bits aren't something you want to hoard for too long as they do eventually get too hard to use without melting them with milk or cream.
If you like coffee, espresso or mocha-flavored cookies, this is a good cookie to make. They don't spread too much, are chewy and give a different twist to a traditional chocolate chip cookie. The only cautionary note is not to overbake them, not only because overbaking will dry out the cookie but also because the caramel bits will get too hot and become hard and chewy when cooled to room temperature. That's always a factor when baking with caramel but even more so in a cookie. As it is, when you form the dough balls, make sure no caramel bits are exposed at the bottom edges of the cookie They'll leak out of the dough and make misshapen cookies. Plus, the melted then cooled caramel will be too hard to eat. When I had that happen with a few cookies, I simply trimmed off the melted parts while the cookies were still warm.
2 sticks (1 cup) salted butter
1 1/4 cups packed dark brown sugar
1/4 cup granulated sugar
1 large egg plus 1 egg yolk
1 tablespoon vanilla extract
2 1/4 cups all-purpose flour
2 tablespoon instant coffee granules
1 teaspoon baking soda
1/2 teaspoon salt
1 cup caramel bits
3/4 cup semisweet chocolate chunks
Coarse sea salt for sprinkling (optional)
  1. Preheat the oven to 350 degrees F. Melt the butter in a saucepan over medium heat. Once the butter starts to foam, begin whisking constantly. When the butter turns brown, fragrant, and you see little brown bits at the bottom of the pan, immediately remove from heat and and transfer to a large mixing bowl. Set aside to cool.
  2. Meanwhile, whisk together the flour, coffee, baking soda, and salt in a bowl and set aside.
  3. With an electric mixer, beat the butter and sugars until well combined, about 3-5 minutes. Add the egg, yolk, and vanilla until well combined. Add the dry ingredients and mix on low-speed just until combined. Add the caramels and chocolate chunks and stir until just combined.
  4. Use a medium (1.5-tablespoon) cookie scoop to place dough on a cookie sheet lined with parchment paper. Bake at 350 for 10 minutes until edges just start to turn golden brown. Sprinkle with sea salt if desired. Cool on a wire rack.

Saturday, February 1, 2014

Skinny Orange Chicken

Skinny Orange Chicken - made January 18, 2014 from Gimme Some Oven
I'm still on a roll with cooking more at home and since I was giving myself a break from crock pot cooking, I went with what is essentially a stir fry recipe that was equally easy: brown the chunks of chicken, pour the sauce over it and let simmer until thickened. Can't get much easier than that.
This is a skinny version of orange chicken because it isn't breaded or deep fried. Much as I love the breaded, deep-fried version, this is much easier to prepare. The orange sauce delivered the orange chicken flavor although it thickened into something a little more gelatinous than I would've liked. I would cut back on the cornstarch by a teaspoon or two next time. Otherwise, a nice simple dish easy to prepare even on a weeknight when you don't have a lot of time.
Chicken
2 pounds boneless, skinless chicken breasts, cut into bite-sized pieces (I used boneless, skinless chicken thighs)
salt and pepper
2 tablespoons olive oil

Orange Chicken Sauce
3 cloves garlic, minced
1/2 cup orange juice
1/2 cup honey (add more to sweeten, if desired)
1/3 cup soy sauce
1/4 cup rice wine vinegar
3 tablespoons cornstarch
1/2 teaspoon ground ginger
1/2 teaspoon white pepper
zest of one orange
pinch of crushed red pepper flakes

  1. Season chicken generously with salt and pepper.
  2. Heat oil in a large saute pan over medium-high heat. Add chicken and saute for about 4-6 minutes, stirring occasionally, until the chicken is browned and nearly cooked through.
  3. Combine all orange sauce ingredients. 
  4. Pour in the orange chicken sauce, and stir to combine. Let the sauce come to a boil, then boil for an additional minute or two until thickened. Remove from heat and serve immediately over quinoa or rice. Garnish with green onions, sesame seeds and additional orange zest.

Friday, January 31, 2014

Bakery Review: Kara's Cupcakes

Kara's Cupcakes - visited January 18, 2014
After we had lunch at Scott's Seafood, we trekked across the parking lot to get cupcakes from Kara's for dessert. Back in the day, before cupcakeries took off, Sprinkles was the first game in town, followed closely by Kara's Cupcakes. I had a love affair with Sprinkles to the point that my friend, Annie the Baker, asked me if I knew Candace Nelson, Sprinkles' founder. Annie preferred Kara's and she knew Kara as well. If anyone could have a spirited debate over cupcakes, it was me and Annie, lol.
I did my fair share of taste testing between the two and decided that while I liked Sprinkles better overall in terms of taste, texture and size of cupcakes, there were two flavors that I thought Kara did better than Candace: the banana with caramel filling and the chocolate. Sprinkles doesn't even have a banana caramel offering and Kara's chocolate cupcake had more chocolate flavor. Kara's Cupcakes are also smaller than Sprinkles and at $3.25 a cupcake, you can think that's bad for your wallet to get "less" cupcake than Sprinkles' $3.50 price point and good for your waistline that, by sheer size, Kara's Cupcakes are probably not the going rate of 550 calories a cupcakes like Sprinkles.
I haven't been to Kara's in a couple of years; it's one of those places where you know (or think you know) it as a known quantity and I'm usually more interested in trying out new places than going back to ones I'm already familiar with. Nevertheless, since I - ahem - just happened to there already and my cousin was getting cupcakes for her boys, I "had" to get a couple for myself.
Naturally I went with my favorite banana caramel. I could've gotten the chocolate but I was in a red velvet mood so I went for that as my second cupcake choice.
Since it was January, the cupcakes were decorated early in a Valentine's theme so most of the cupcakes were topped with hearts. Not that it mattered since I never eat the topping and usually only manage no more than half of the frosting.
One drawback to me about Kara's Cupcakes is they put too much frosting on top. I know that's the norm with bakery cupcakes and Sprinkles does it too but I don't love frosting so for me, it's always too much. Not a big deal though since I always scrape more than half of it off.
The banana caramel cupcake itself was as good as I remembered it. Love the banana taste of the cupcake itself and the caramel was flow-y and injected in the middle of the cupcake as the filling - all good. But what surprised me and what I didn't like was the frosting tasted a little off. Not "off" as in it had gone bad or anything but like they changed the recipe. It wasn't just the tang of cream cheese but like they added almond extract or some kind of extract that gave it an artificial taste. A bit disappointing even for a non-frosting person like me.
Sadly I was even more disappointed in the red velvet cupcake because that too tasted like there was almond extract in the cupcake itself. There was an artificial taste that I don't recall it ever having. Granted, it's been a couple of years since I've had Kara's Cupcakes but I have a pretty good memory when it comes to sweets and I know I thought much more positively of Kara's Cupcakes than this latest experience.
While the cupcakes aren't dry, they're not as moist as Sprinkles. Good news for people who think Sprinkles is "too greasy" but I love moistness in my cupcakes and cakes so these were just okay in texture. But what really killed me was the artificial tang in both cupcakes. I'm going to have to try a different flavor in the future and see if that holds true again or if I just visited this particular Kara's Cupcakes on an off day. I hope it's the latter because I really want to like her cupcakes again and be able to sing their praises.