Thursday, July 20, 2023

Crumbl Copycats: Pink Sugar Cookies from Lifestyle of a Foodie and Cooking with Karli vs the Crumbl OG

1 stick butter, softened
1/4 cup oil
1/2 cup granulated sugar
2 tablespoons powdered sugar
1 egg, room temperature
1/2 teaspoon vanilla extract
1/4 teaspoon almond extract
2 1/3 cups all-purpose flour
1/4 teaspoon salt
1/4 teaspoon cream of tartar
1 teaspoon baking powder

Pink sugar cookie almond icing
1/4 cup butter, softened
1 cup powdered sugar
2 tablespoons heavy cream, cold
1/4 teaspoon almond extract
pink gel food coloring
  1. In the bowl of a stand mixer fitted with the paddle attachment, cream together butter, granulated sugar and powdered sugar until a consistent texture. Beat in oil until combined.
  2. Add the egg, vanilla extract and almond extract; beat until just combined.
  3. In a separate bowl, stir together flour, salt, cream of tartar and baking powder. Add to butter mixture in 2 additions, mixing until just combined after each addition. Do not overbeat.
  4. Using a large cookie scoop, scoop out 9 equally sized dough balls. Using the bottom of a glass dipped in granulated sugar, flatten each dough ball into a thick disc. Cover and chill or freeze for several hours or overnight.
  5. When ready to bake, preheat oven to 350 degrees F. Line baking sheets with parchment paper and evenly space dough discs. Bake 10-12 minutes or until edges are set and middles no longer look raw. Remove from oven and let cool completely before frosting.
  6. Make the frosting: cream together the butter, powdered sugar and almond extract until well combined. Add in the heavy cream and beat on medium speed until light and fluffy. Add in a tiny bit of pink gel food coloring using a toothpick; mix and check the color. Add more if needed, until desired color is achieved. Generously spread frosting on cookies and chill before serving.
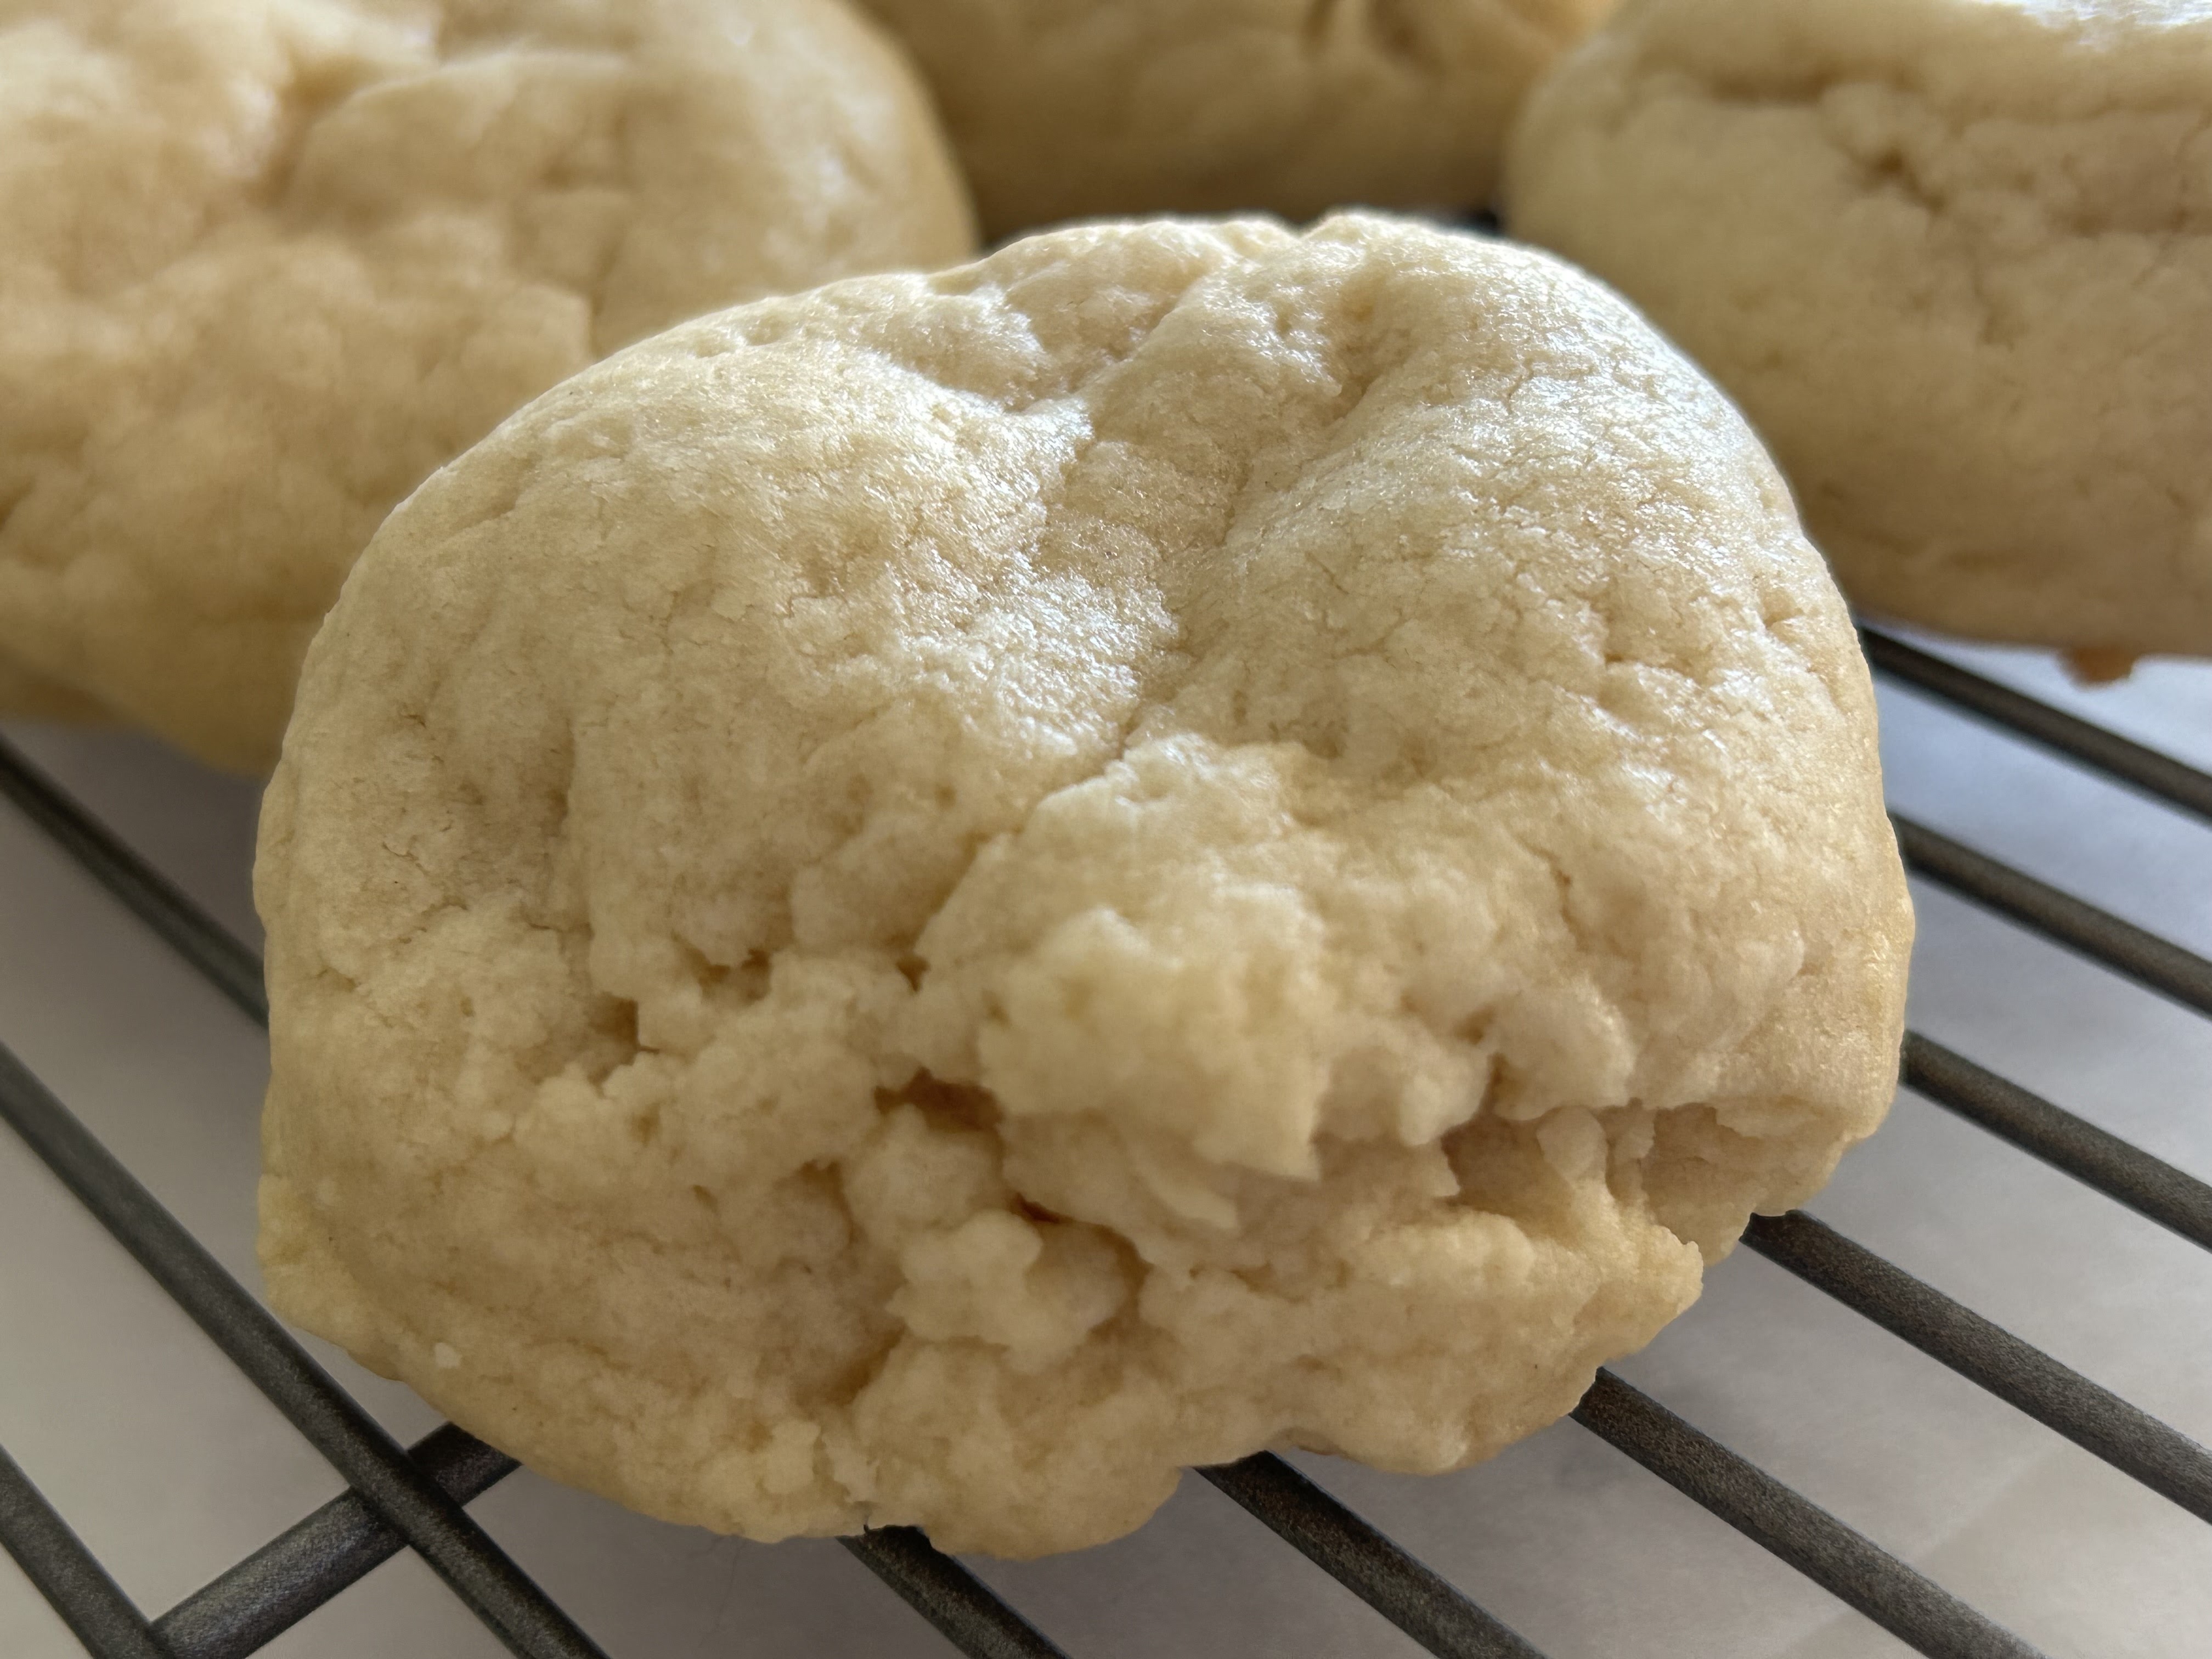
I had some time one day and decided to do a baking experiment with copycat recipes for the Crumbl pink sugar cookie. First off, I'm not a fan of the pink sugar. It's got an almost cult-like following among some of the Crumbl fan base but I'm not one of them. When I had first tried it, I thought the (fake) almond extract flavor was too overpowering and not good at all. I liked the cookie but not the almond extract flavor.
Second, Crumbl said they changed the recipe to include real almond extract, not fake, when they re-released the pink sugar. I didn't try it when the pink sugar came back on the regular menu (it's off again, sorry, pink sugar lovers) as, real or fake, I'm still not a fan of almond extract.
But, in the name of baking experiments, I decided I'd try a couple of copycats for comparison, not just with the Crumbl pink sugar but between themselves. When it comes to Crumbl copycat recipes, the two main sources seem to be Lifestyle of a Foodie and Cooking with Karli so their copycat recipes are the ones I decided to try.


1 cup salted butter (I used unsalted)
1 cup granulated sugar
2 eggs
1 teaspoon vanilla extract
1/2 teaspoon almond extract
3 cups all-purpose flour
2 teaspoons baking powder

Sweet Almond Icing
1/2 cup salted butter, softened
3 cups powdered sugar
1 teaspoon almond extract
1-3 tablespoons milk
neon pink food coloring, optional
  1. In the bowl of a stand mixer fitted with the paddle attachment, cream together butter and granulated sugar until light and fluffy, 2-3 minutes, scraping down the sides to keep the mixture even textured.
  2. Add eggs, vanilla extract and almond extract, beating until just combined.
  3. Add flour and baking powder, mixing until just combined. Portion 1/4-cup balls of dough. Flatten each dough ball with the underside of a glass pressed gently in the center, making thick discs. Cover and chill or freeze (you can skip this step if desired).
  4. When ready to bake, preheat oven to 350 degrees F. Line baking sheets with parchment paper and evenly space dough discs. Bake for 9-11 minutes or until the cookies have puffed up and are no longer glossy. Cool for several minutes on the baking sheets then remove to wire racks to cool completely.
  5. Make the frosting: cream butter until smooth and creamy. Slowly add in powdered sugar, almond extract and milk until smooth and desired consistency. Spread over still slightly warm cookies. Let cookies cool completely then chill, covered, in the refrigerator until ready to serve.
A comparison of the two recipes show the main difference is Lifestyle of a Foodie uses oil and Cooking with Karli is all butter. The differences in the baked cookies is Lifestyle's cookies spread less and had a slightly more crisp-yet-still-chewy texture while Karli's was a softer texture and mouthfeel. 
I only made the frosting recipe from Lifestyle of a Foodie since I didn't need that much frosting for the taste test cookie from each recipe. If you want the Barbie-pink of the Crumbl OG pink sugar, you do need to use pink food coloring, not red. The pink you see on the frosting on made was achieved with ONE drop of pink food coloring. As in, I dipped a toothpick into the pink gel and gently added a tiny bit to the frosting. And even then, you can tell Crumbl's frosting is a slightly lighter pink. 

So the purpose of the baking experiment was 1) which came closest to Crumbl's original and 2) which did I like better?

The original Crumbl pink sugar cookie
On the first question, the results are a little inconclusive. To be honest, I was distracted by the almond extract flavoring in all of them. The new recipe was better than the old one in that the almond extract flavor wasn't as overpowering. But I'm still not a fan of almond extract so I can't say I loved any of them. 
However, between the two copycats, I have to give more of a nod to the one from Cooking with Karli. The flavor is similar on both but Karli's wins on texture. I prefer the all-butter version with the softer chew and more moist mouthfeel than the one with oil that adds a light crispness but also a slightly drier mouthfeel. Both recipes were good but next time I'd sub in vanilla extract for the almond extract as a personal preference.


Tuesday, July 18, 2023

Espresso Toffee Shortbread Cookies from The Monday Box

Espresso Toffee Shortbread - made dough July 2, 2023 from The Monday Box 
1 tablespoon instant espresso powder
1 tablespoon boiling water
1 cup unsalted butter, room temperature
2/3 cup confectioners' sugar plus extra for dusting
1/2 teaspoon vanilla extract
2 cups all-purpose flour
3.5 - 4 ounces chocolate covered toffee bits or 3/4 cup mini chocolate chips
  1. In a small bowl, dissolve the espresso powder in the boiling water.
  2. In the bowl of a stand mixer fitted with the paddle attachment, cream together butter and confectioners' sugar for 3 minutes at medium speed.
  3. Add the vanilla and espresso, beating until combined.
  4. Add the flour and mix on low speed until just combined. Fold in the toffee bits or mini chocolate chips.
  5. Transfer the dough into a gallon-size ziploc plastic bag and leave "unzipped". Roll the dough into a rectangle the width of the bag and 1/4" thick, keeping the dough crease-free inside the bag.
  6. Zip the bag closed, removing as much air as possible. Refrigerate for 2 hours up to 2 days.
  7. When ready to bake, preheat oven to 325 degrees F. Line a baking sheet with parchment paper.
  8. Cut open the ziploc plastic bag and place the dough rectangle on a cutting board. Using a sharp knife, cut the dough into desired shapes and evenly space on baking sheet. Using a fork to poke holes in each cookie.
  9. Bake for 18 to 20 minutes. Remove from oven and dust with confectioners' sugar while cookies are still hot. Let rest on baking sheet for several minutes before transferring to wire rack to cool completely.
Time for a quick and easy recipe that's good for hot summer temps and care packages. This one from The Monday Box fits the bill nicely. For summer picnic-type events, it's always a safe bet to bring something no-fuss that doesn't have frosting. No need to worry about anything melting. For care packages to deployed military personnel, I'm always on the lookout for recipes that have coffee or espresso as our military seems to enjoy their coffee (most of the time).
You can make this with either mini chocolate chips or toffee bits. I went with toffee bits to offer a sweeter contrast to the espresso flavor. This is easy to make in the sense that you put the dough into a gallon-size ziploc freezer bag before you roll it out. The bag keeps the dough within the size of the bag and helps give you an even thickness as you roll it out. If your dough gets too warm, chill it briefly first.
.
The cookies didn't spread much, although they did at the edges so mine weren't as clean cut as The Monday Box's. The espresso flavor comes through quite well so if you're not a coffee lover, you might want to cut back a bit on the espresso powder or amp up the toffee bits for the sweetness. This had a nice crisp texture that shortbread should have. Don't overbake it but don't underbake it either or you won't get the "snap" of the shortbread texture.


Friday, July 14, 2023

Crumbl Copycat Waffle Cookies from Lifestyle of a Foodie

2 sticks (1 cup) butter, softened
1 cup brown sugar, packed
1/4 cup granulated sugar
1 large egg
1 large egg yolk
2 teaspoons vanilla extract
1/4 teaspoon butter flavoring (emulsion)
3/4 teaspoon maple flavoring (I substituted butter flavoring)
3 cups all-purpose flour
1/4 teaspoon cream of tartar
2 tablespoons cornstarch
1 teaspoon baking powder
1/4 teaspoon salt

Buttercream
1/2 stick butter, softened
1 cup powdered sugar
2 teaspoons vanilla extract
1/8 teaspoon butter flavoring (emulsion)
1 tablespoon heavy cream or whole milk
  1. In the bowl of a stand mixer fitted with the paddle attachment, cream butter, brown sugar and granulated sugar until light and creamy.
  2. Add egg, egg yolk, butter flavoring, vanilla extract and maple flavoring; mix until combined.
  3. Add flour, cornstarch, cream of tartar, baking powder and salt; mix until just combined.
  4. Portion dough into 12 equally-sized dough balls and flatten slightly. Using a chopstick, slightly press down on the dough discs to make waffle indentations.
  5. Freeze cookie dough discs for 15 minutes and preheat oven to 350 degrees F. Line a baking sheet with parchment paper.
  6. Evenly space cookie dough discs on baking sheet. Bake for 14 minutes or until edges are set and middles no longer look raw. Let cookies cool on baking sheet for 15-20 minutes. Transfer to wire rack to cool completely.
  7. Make the buttercream: beat the butter, powdered sugar, vanilla extract, butter flavoring and 1 tablespoon heavy cream or milk until light and fluffy. If mixture is too thick, add a few more drops of heavy cream or milk until desired consistency is reached.
  8. Top each cookie with a dollop of buttercream and a drizzle of maple syrup if desired.
Remember when I tried the Crumbl Waffle Cookie and wished I had tasted it without the syrup first because. with syrup, all I could taste was the syrup and not the cookie itself?
So it seemed obvious that the thing to do was to try a copycat recipe, especially from Lifestyle of a Foodie since she has the best copycat recipes, some of whom are even better than Crumbl's OG cookies. Because then I can leave out the syrup and just have the cookie.
I've got to say, that was one of my more brilliant ideas. OMG, this cookie was fabulous. As in, if I were to try the original Crumbl waffle cookie without the syrup, I'm not sure it would be better. I don't think it can be; this cookie was that good. The dough was perfect, not dry or too sticky and, as you can see from the pictures, it kept the waffle indentations very well.
But it was really the flavor that won me over. I didn't have maple extract so I subbed in vanilla extract but even without the maple extract, this still tasted maple-y and waffle-y. That's probably due to the brown sugar but whatever it was, this cookie was fantastic. No syrup needed and I prefer it plain anyway. Look at that thickness and texture. This is definitely going on my "make again" list.


Saturday, July 8, 2023

White Chocolate Lemon Bar Cookies from Baking with Blondie

1 cup unsalted butter, cold
1 cup brown sugar, packed
1/4 cup granulated sugar
2 large eggs, cold
1 teaspoon vanilla extract
2 tablespoons lemon zest
1 tablespoon lemon extract
3 1/2 cups all-purpose flour
1 teaspoon cornstarch
1 teaspoon baking soda
1 teaspoon salt
1 1/2 cups white chocolate chips (reserve a handful to press on top after baking)
1 cup crumbled Lemon Oreos (reserve 1/4 cup to press on top before baking)
  1. Preheat oven to 410 degrees F. Line baking sheets with parchment paper.
  2. In the bowl of a stand mixer fitted with the paddle attachment, beat butter for 1 minute until light and fluffy. Add brown sugar and granulated sugar and beat for 3 minutes on high speed, scraping sides and bottom to keep texture even textured.
  3. Add eggs, vanilla, lemon zest and lemon extract; mix until combined.
  4. Add flour, cornstarch, baking soda and salt on low speed until just combined; do not overmix.
  5. Reserve 1/8 cup white chocolate chips and 1/4 cup crumbled lemon Oreos then mix in the rest on low speed.
  6. Portion dough into 8 equal-sized dough balls. Flatten slightly and handpress crumbled lemon Oreos on top. Evenly space 4 cookies per baking sheet.
  7. Bake for 7-9 minutes. They should be slightly golden on the outside, slightly mounded in the middle and thick/tall and gooey in the center. Remove from oven and gently press reserved white chocolate chips over each cookie. Let rest on baking sheets for several minutes then transfer cookies to wire rack to cool completely.
I've never had Lemon Oreos before, have you? I tend to be a purist so I've always stuck to the original Oreos. No double stuff, no weird filling flavors, no cakey Oreos (cakey Oreos, I mean why??)
But I've had good results from pretty much every recipe from Baking with Blondie so I decided to give this a try. I'm glad I did as these were excellent, as per usual with one of her cookie recipes.
I do advise not pressing the Lemon Oreo pieces or white chocolate chunks on the outside until after you take the cookies out of the oven, not before baking. White chocolate will burn too easily at the 410-degree temp the recipe calls for and won't look as pretty.
But look at the texture of the inside - that's what I'm talking about. Dense, chewy, moist. The lemon flavor came out well, thanks to the lemon extract as well as the Lemon Oreos; the lemon flavor also paired nicely with the white chocolate. I really enjoyed the cookie itself so next time I might cut back on the Lemon Oreos and just enjoy the soft texture of the cookie without too much crunch. 


Wednesday, July 5, 2023

Oatmeal Toffee Cookies from Creations by Kara

Oatmeal Toffee Cookies - made dough June 7, 2023 from Creations by Kara 
1 cup butter, softened
2 cups brown sugar
2 large eggs
2 teaspoons vanilla
1 3/4 cups flour
1 teaspoon baking soda
1/2 teaspoon baking powder
1/2 teaspoon salt
1 teaspoon cinnamon
3 cups old-fashioned oats
1 1/2 cups toffee bits
1 cup coconut, optional
  1. In the bowl of a stand mixer fitted with the paddle attachment, cream together butter and brown sugar until light and creamy. Beat in eggs and vanilla until just combined.
  2. Stir in flour, baking soda, baking powder, salt and cinnamon until just combined. Add oats, toffee bits and coconut.
  3. Portion into golf-ball-size dough balls and flatten slightly to thick discs. Cover and chill for several hours or overnight.
  4. When ready to bake, preheat oven to 350 degrees F. Line baking sheets with parchment paper and evenly space dough discs. Bake 9-11 minutes or until edges are set and middles no longer look raw. Let rest on baking sheets for several minutes before transferring to wire rack to cool completely.
I like toffee itself so you'd think I'd like them a lot in cookies. Normally I don't in "plain" brown sugar cookies or paired with chocolate chip cookies as I find the toffee adds a little too much sweetness for me.
BUT they worked fabulously well in these oatmeal cookies. In fact, I can see that toffee bits work best with oatmeal cookies. Most oatmeal cookies are brown-sugar-based which does complement toffee very well. But it's the oatmeal itself that tempers the sweetness from the toffee and adds both to the chewiness and flavor.

I really liked these cookies and would definitely make them again. They're also a perfect cookie for summer as they're easy to make, package and should survive hotter temperatures without any issues.


Monday, July 3, 2023

Blondies from Handle the Heat

Blondies - made June 17, 2023 from Handle the Heat
1 1/2 sticks (170 grams) unsalted butter
1 1/2 cups (300 grams) light brown sugar
1 large egg
1 large egg yolk
2 teaspoons vanilla extract
1/2 teaspoon salt
1/4 teaspoon baking powder
1 1/2 cups (191 grams) all-purpose flour
1 3/4 cups (281 grams) mix-ins of your choice such as chocolate chips, M&Ms, nuts, etc
  1. Preheat oven to 350 degrees F. Line 8 x 8-inch pan with foil and lightly spray with nonstick cooking spray.
  2. In a heavy duty medium saucepan, melt butter. Add sugar and whisk to combine. Let cool until just warm.
  3. Add egg, egg yolk and vanilla, whisking until smooth. Stir in the salt, baking powder and flour with a rubber spatula. Stir in 1 1/2 cups mix-ins.
  4. Pour batter in an even layer into prepared pan. Top evenly with remaining mix-ins.
  5. Bake until edges are lightly golden but the center still jiggles slightly, about 25-30 minutes. Cool completely before cutting and serving.
Remember I said how I don't usually like blondies? Always just seemed like a too-sweet brown sugar blondie. Well, recipe by recipe, Handle the Heat is starting to change my mind. First were her Chocolate Coconut Blondies which I really enjoyed.
And now, second, are these blondies with chocolate chunks. I probably overdid the chocolate chunks a bit but the blondie part was really good. Just the right "fudgy" texture and great flavor.

I definitely want to make these again, perhaps with a little less chocolate so I could enjoy the blondie part a little more.

When baking these, it's really important not to overbake them. I always say that but it's particularly true for blondies as they dry out more easily and quickly become cakey when fully baked.


Saturday, July 1, 2023

Lemon Sugar Cookie Bars from Five Heart Home

Lemon Sugar Cookie Bars - made June 17, 2023 from  Five Heart Home
2 1/2 cups all-purpose flour
1 1/2 teaspoons baking powder
1/2 teaspoon salt
1 tablespoon lemon zest
1 1/2 cups granulated sugar
1 cup (2 sticks) unsalted butter, room temperature
2 large eggs
1 tablespoon lemon juice
1 teaspoon vanilla extract
1/4 teaspoon lemon extract, optional

Topping
2 tablespoons granulated sugar
1 tablespoon sparkling sugar
  1. Preheat oven to 350 degrees F. Line a 9 x 13 pan with foil and lightly spray with nonstick cooking spray.
  2. In a medium bowl, whisk together flour, baking powder, salt and lemon zest.
  3. In the bowl of a stand mixer fitted with the paddle attachment, beat butter until creamy, 1-2 minutes. Add granulated sugar and beat on medium-high speed for 3 minutes or until light and fluffy. 
  4. Add eggs, one at a time, mixing on low speed until combined then add lemon juice, vanilla extract and lemon extract until just combined.
  5. Add dry ingredients in 2-3 additions, mixing on low speed until just combined. Spread batter in an even layer into prepared pan. Sprinkle evenly with granulated sugar and sparkling sugar.
  6. Bake for 22 to 28 minutes or until a toothpick inserted in the center comes out clean; do not overbake. Cool completely before cutting and serving.
This is a straightforward, easy-to-make sugar cookie in bar form, spiked with lemon flavor. I don't make sugar cookie bars that often as I prefer them in cookie form and bar cookies tend to be more cakey than I like.
But these were pretty good, nicely chewy and not too tart or lemony but still subtly flavored with lemon. If you want to amp up the lemon flavor, grate some extra zest into the batter and/or mix lemon zest with sugar and sprinkle over the top when baking. I didn't have sparkling sugar so I used regular granulated sugar but it would have been a little more extra with the larger sugar crystals. This is a good one for summer picnics since you don't have the worry about frosting melting and they're easy to stack, store and package.