Sunday, February 5, 2023

Toasted Hazelnut Slice and Bake Cookies from Sally's Baking Addiction

3/4 cup (170 grams) unsalted butter, room temperature
2/3 cup (133 grams) brown sugar
1 large egg
1 teaspoon vanilla extract
2 cups (250 grams) all-purpose flour
1/2 teaspoon ground cinnamon
1/4 teaspoon salt
1 cup (120 grams) hazelnuts, toasted, chopped, divided

coarse sugar for rolling, optional
8 ounces milk chocolate, finely chopped
  1. In the bowl of a stand mixer fitted with the paddle attachment, beat butter for 1 minute until creamy. Add brown sugar and beat until light and fluffy, 2 to 3 minutes. Add egg and vanilla extract and beat until just combined.
  2. In a separate bowl, whisk together flour, cinnamon and salt. Add to butter mixture in two additions, beating on low speed after each addition until just combined. Add half the chopped hazelnuts and mix until dispersed throughout the dough. Do not overmix.
  3. Divide dough in half and roll into logs, about 2.5" in diameter. Wrap each log in plastic wrap and chill for at least 4 hours or overnight.
  4. When ready to bake, preheat oven to 350 degrees F. Line baking sheets with parchment paper. Slice chilled dough logs into 12 equally thick slices and evenly space on baking sheets. Bake 12-14 minutes or until golden brown around the edges. Remove from oven and let rest on baking sheets for 5 minutes before transferring to wire rack to cool completely.
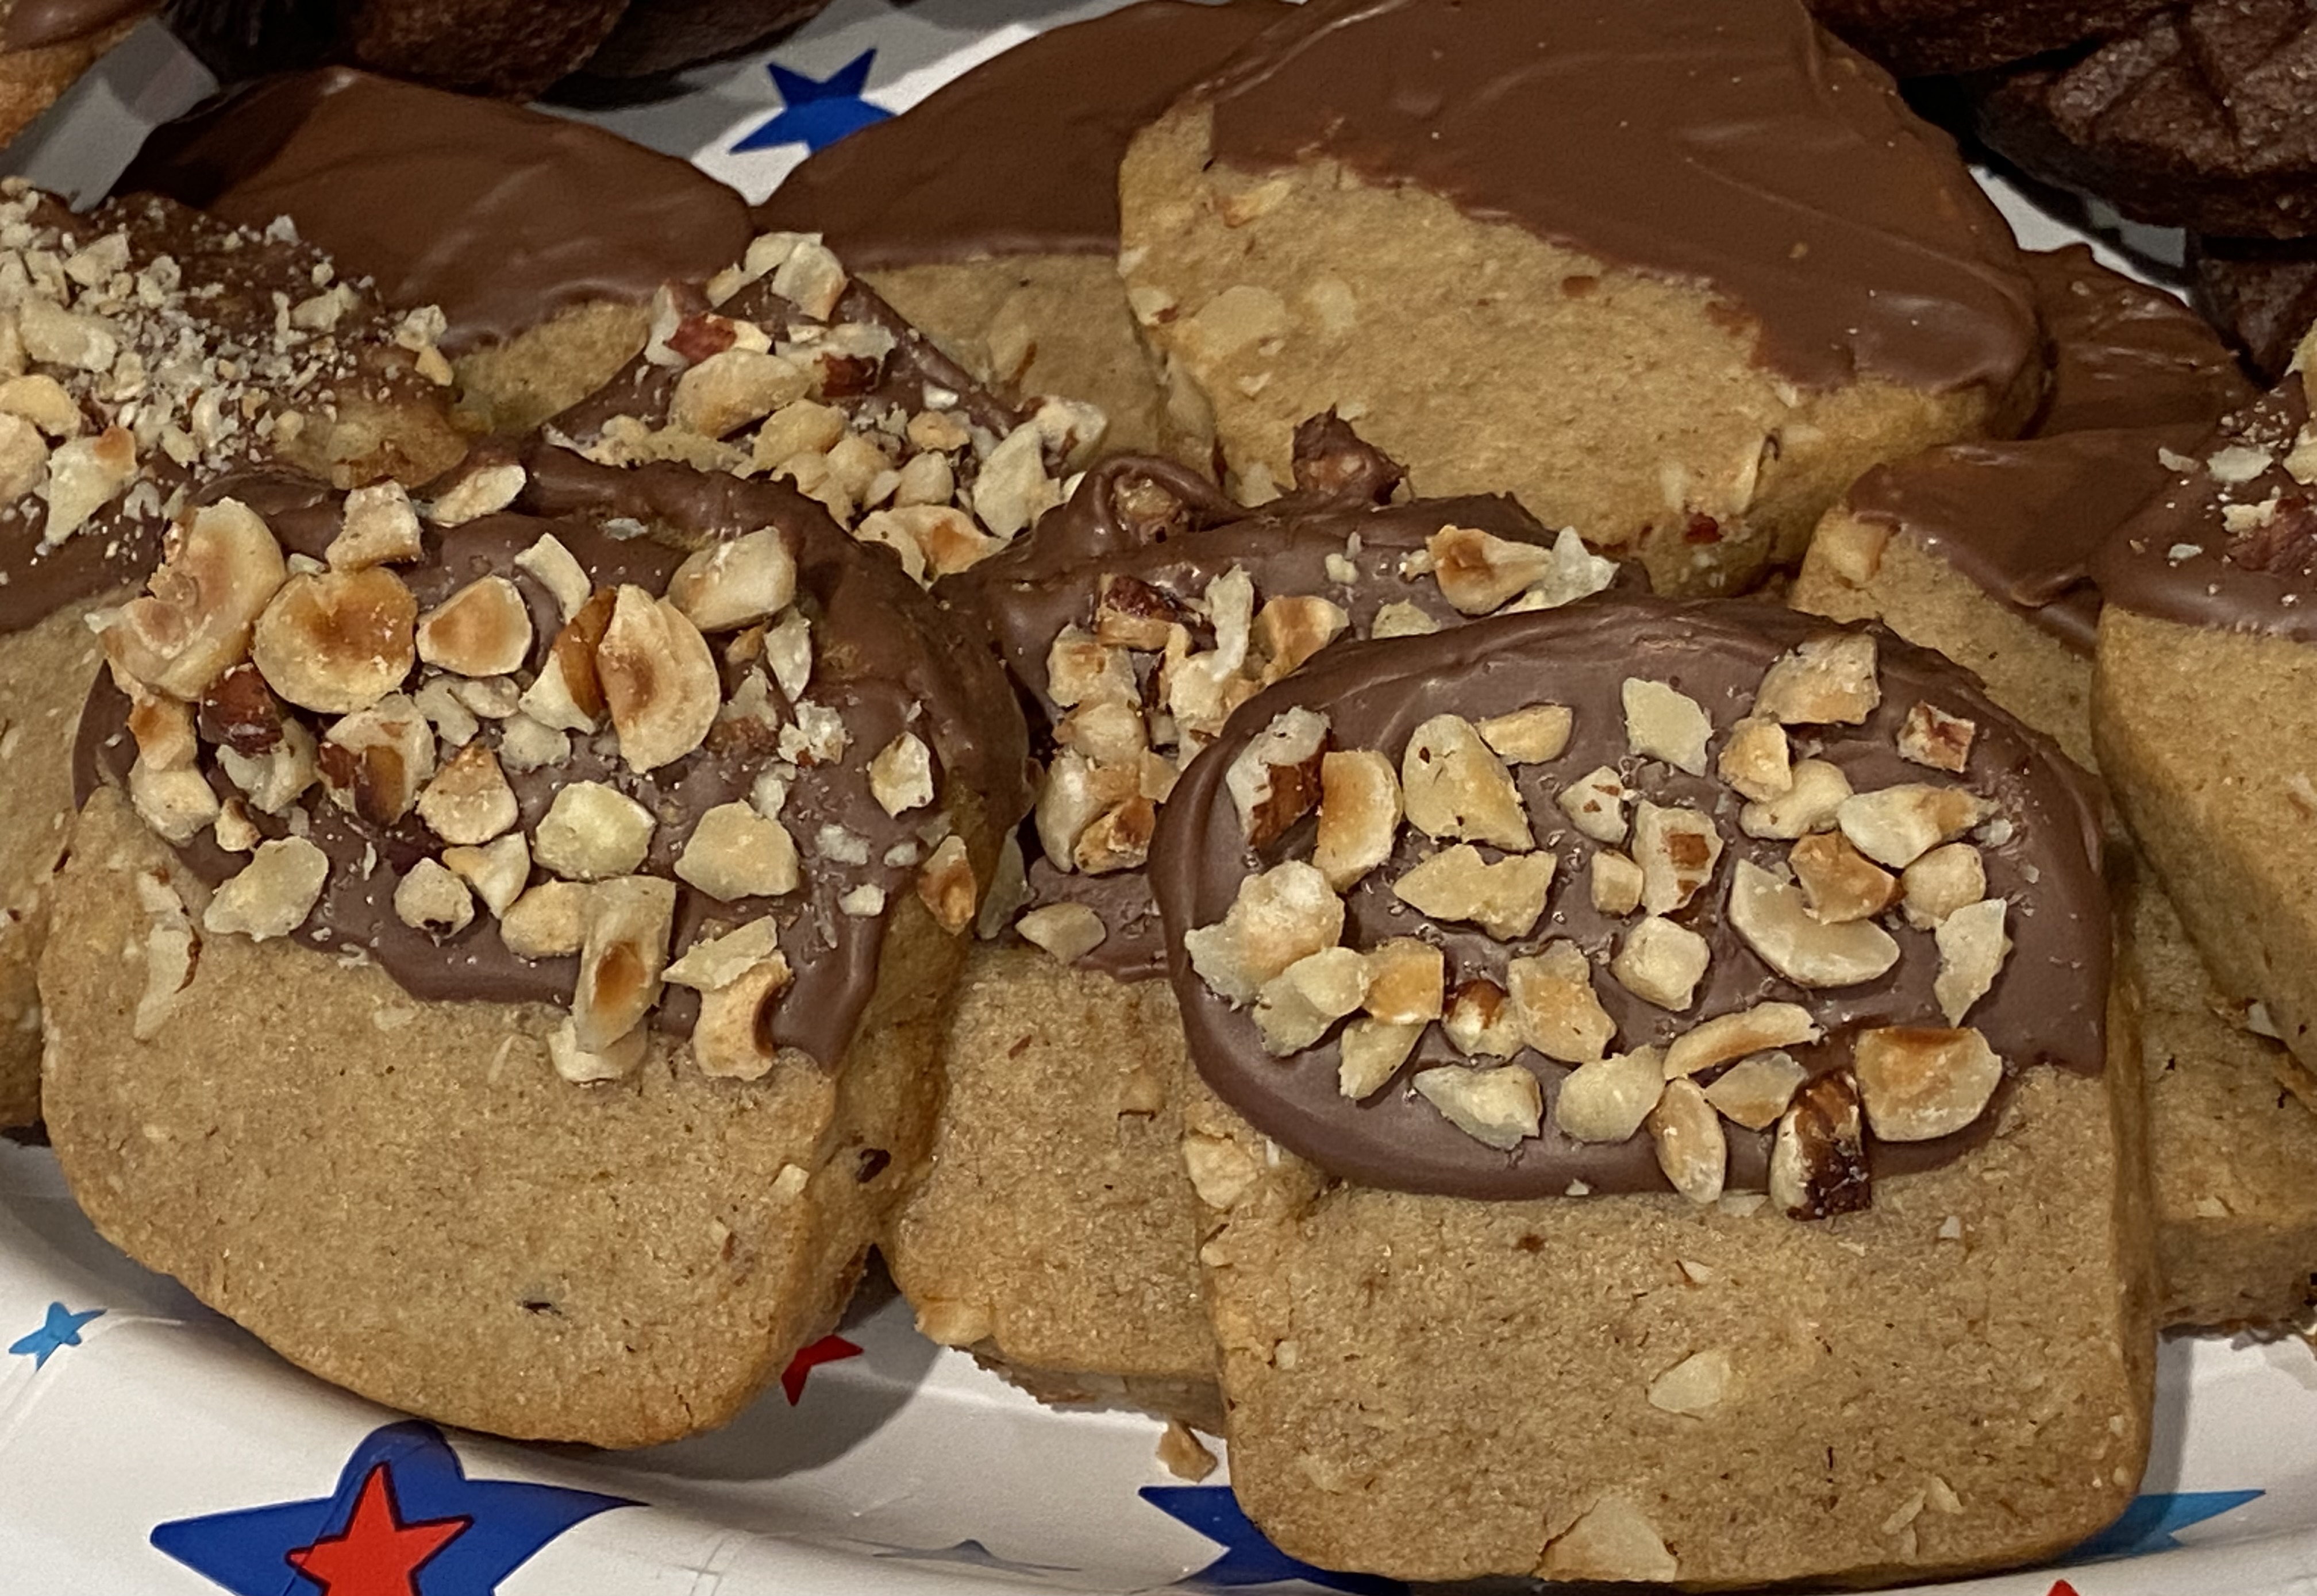
  5. Melt the chopped milk chocolate in the top half of a double boiler over hot water, stirring to prevent burning. When completely melted, remove from heat, dip half of each cookie in the melted milk chocolate and spread out on parchment paper. Sprinkle with the remaining chopped hazelnuts before the chocolate sets.
I don't often get a chance to make "fancy" cookies with fancy being defined, in this case, as being half-coated in chocolate and that half covered with chopped toasted hazelnuts.
But I had an in-person event to go to and it seemed like a good opportunity to do the extras for this one. They taste perfectly fine plain but they're also good dressed up with chocolate and more hazelnuts.
These cookies are thick enough that they didn't bake up crisp. Or at least I didn't bake them long enough to get crisp/hard. They aren't soft enough but have a good chewy texture. Although I don't normally like nuts in cookies, the hazelnuts worked well in these. I don't bake with hazelnuts often enough but I like the flavor they impart. They worked well with the brown sugar flavor in these cookies.
The event attendees liked them too so they're a good choice as a crowd pleaser. 

Saturday, February 4, 2023

Brown Sugar Brownies from The Ultimate Brownie Book

Brown Sugar Brownies - made January 19, 2023 from The Ultimate Brownie Book by Bruce Weinstein
1 cup all-purpose flour
1 teaspoon baking powder
1/2 teaspoon salt
1 cup (2 sticks) unsalted butter
5 ounces unsweetened chocolate
2 cups dark brown sugar, packed
3 large eggs
2 teaspoons vanilla extract
  1. Preheat oven to 350 degrees F. Line a 9 x 13-inch baking pan with foil and lightly spray with nonstick cooking spray
  2. In a small bowl, whisk together flour, baking powder and salt.
  3. In the top half of a double boiler set over hot water, melt together butter and unsweetened chocolate, whisking until completely melted and smooth.
  4. Remove from heat and pour into mixing bowl. Add brown sugar and mix for 3 minutes with an electric mixer or 6 minutes by hand until well combined and silky. Add eggs and vanilla; mix until just combined.
  5. Add dry ingredients and mix until just combined. Pour into prepared pan and smooth top. Bake 30-35 minutes or until toothpick inserted near the center comes out clean or with a few moist crumbs. Do not overbake. Remove from oven and let cool.
I make brownies almost every week for the care packages I send for Soldiers Angels. I almost always make my favorite brownie recipe because it bakes up thick, fudgy and rich without being too overwhelming. Plus I've made it so often that I have the recipe memorized and it takes me only a few minutes to mix it up and get it in the oven.

But I still occasionally try new recipes so I went with this one from one of my baking books. It makes a 9 x 13 pan so I also thought it would yield more brownies for more care packages. Which it did. Unfortunately it also made a thinner brownie than my go-to recipe. Don't get me wrong, this is the thickness most brownie recipes make. I just prefer them a little thicker, both as a personal preference and because they're less fragile and better for shipping that way.
These were good but a bit delicate, not quite cakey but also definitely not as dense and chewy as I prefer. Still, if you want a larger batch, this recipe works well to provide a good yield.

Friday, February 3, 2023

Stamped Cookies #27 - Kitchen Vixen's Shortbread Cookies

Stamped Cookies #27 - made dough January 14, 2022 from Kitchen Vixen
I'm including this recipe as the picture of the card I got in my latest Etsy order from Kitchen Vixen. You can also find it on her Facebook page.
All the cookie stamps you see in this post are all from Kitchen Vixen so I thought it was fitting to try her shortbread recipe. I've included the links to her Etsy shop for each stamp. I'm not affiliated with Kitchen Vixen and I don't make any money if you click on the links and subsequently make a purchase. I just like their products and believe in them.

I've posted about Jen and Mike (the owners) before and the high quality of their products as well as how genuinely nice they are in person.  


With Honor stamp
The cookies did puff up and spread slightly but surprisingly, even given that, the stamped impressions held up pretty well. They still held well enough for the design(s) to be recognizable including some of the finer details like the lettering in the Army stamp.
With Honor stamp

Army stamp
Super bonus is they tasted really good too. In my quest for good stamped cookie recipes, I'm finding the ones that hold the best impressions also tend to bake a little hard or else taste a little bland. This strikes a good balance, not too hard, not too soft and definitely delicious.
Independence Day stamp

Eva's Lace stamp
Here's a look at how I package some of the cookies before vacuum sealing them for mailing to deployed troops for Soldiers Angels. The cellophane cookie bags are from Amazon. I wrap each cookie in plastic wrap, put one cookie per cellophane bag, then vacuum seal 5-6 cellophane-bagged cookies in one sealed bag. It might be a bit overkill but I want to make sure the cookies stay as fresh as possible, no matter how long it takes for them to arrive.

Wednesday, February 1, 2023

Soft Chocolate Chip Cookies from 100 Cookies

 Soft Chocolate Chip Cookies - made dough January 14, 2023 from 100 Cookies by Sarah Kieffer
2 1/2 cups (355 grams) all-purpose flour
1 teaspoon baking soda
3/4 teaspoon salt
12 tablespoons (1 1/2 sticks, 170 grams) unsalted butter, room temperature
3/4 cup (150 grams) granulated sugar
3/4 cup (150 grams) brown sugar
2 large eggs
1 1/2 teaspoons pure vanilla extract
7 ounces (198 grams) bittersweet chocolate, coarsely chopped into chunks
  1. Preheat oven to 350 degrees F. Line baking sheets with parchment paper.
  2. In a medium bowl, whisk together flour, baking soda and salt.
  3. In the bowl of a stand mixer fitted with the paddle attachment, beat the butter on medium speed until creamy, about 1 minute. Add the granulated sugar and brown sugar and beat on medium until light and fluffy, 2 to 3 minutes. Scrape down bottom and sides of bowl to keep mixture even textured.
  4. Add eggs and vanilla, mix to combine.
  5. Add dry ingredients and beat on low speed until just combined. Portion into golf-ball-size dough balls and evenly space on baking sheets.
  6. Bake for 8 minutes, then lightly tap baking sheet in oven and continue baking cookies another 2 to 3 minutes (10-11 minutes total). Give pan one final tap in the oven then remove from oven and let cookies rest on baking sheet until completely cooled.
I'm so glad to have discovered this baking book just for this recipe alone where, unlike the Snickerdoodles from the same book, this chocolate chip cookie recipe didn't spread much and stayed decently thick. Some cookies I don't mind being thin but chocolate chip isn't one of them.

These are a good, simple recipe for chocolate chip cookies. The dough came together nicely, not too dry or too soft/sticky. I'm learning to adapt to this world of potential butter issues, especially with chocolate chip cookies.
Despite my years of baking instincts to follow the recipe EXACTLY, those same instincts and years of baking experience says to adapt to how ingredients seem to be now and make adjustments as needed. For chocolate chip cookies, while I do like whisking dry ingredients together to disperse the leaveners and salt more evenly with the flour, I held back 1/4 cup of the flour and after the combined dry ingredients were added, I added the held-back flour until the dough was the consistency I wanted.
The good news is I've noticed the recipes from 100 Cookies tend to match my weight measurements more than other recipes. I do the scoop and level method to measure flour and when I measure ingredients and weigh them, other recipes always have a lower weight for flour than how I measure out. Not 100 Cookies; we match almost exactly. And the dough consistency was perfect without me having to make any adjustments after all.
I copied the directions as is from the book but I always, always chill cookie dough first. That helps prevent spread and concentrates the flavors better as the dough "ages" in the refrigerator. These were good, especially 10 minutes out of the oven.

Monday, January 30, 2023

Butter Toffee Cookies from Julie Blanner

Butter Toffee Cookies - made dough January 15, 2023 from Julie Blanner 
1 cup unsalted butter, softened
1/2 cup granulated sugar
1/2 cup brown sugar, packed
1 teaspoon vanilla extract
1 egg
2 1/2 cups all-purpose flour
1/2 teaspoon baking powder
1/2 teaspoon baking soda
1/4 teaspoon salt
1 cup toffee bits
  1. In the bowl of a stand mixer fitted with the paddle attachment, cream together butter, granulated sugar and brown sugar until well combined, light and fluffy, 2 to 3 minutes. Mix in egg and vanilla extract until just combined.
  2. In a separate bowl, whisk together flour, baking powder, baking soda and salt. Add to butter mixture in two additions, mixing on low speed until just combined. Fold in toffee bits.
  3. Portion into dough balls, cover and chill for at least 2 hours.
  4. When ready to bake, preheat oven to 350 degrees F. Line baking sheets with parchment paper. Evenly space chilled dough balls. Bake 8 minutes or until edges are light golden brown. Remove from oven and let rest on baking sheets for several minutes before transferring to wire rack to cool completely.
I've been wanting to try out this recipe because of how they looked on Julie Blanner's blog: cute little morsels of buttery toffee cookie goodness. They reminded me of my friend AnnietheBaker.com's cookies in being cute, little and chubby.

As you can tell from the pictures, my attempt didn't come out as cute and chubby. I did make them little though with my smallest cookie scoop. The recipe said to only bake for 8 minutes. But at 8 minutes in my oven, while they hadn't spread yet, they were still definitely raw dough. Even though cookies continue baking on a hot baking sheet even after you remove it from the oven, I knew they were still too raw to take out. I don't mind underbaked cookies and actually prefer them but I don't care for raw ones.

Hence why I baked mine for longer, about 12-13 minutes and ended up with little, not flat or thin cookies but definitely with more spread than the original blog.


But don't let that put you off as these cookies were excellent. Just the right morsel-sized bite and they really were buttery toffee goodness.
These make perfect little tea cookies and were also easy to pack into care packages to fill in smaller gaps and corners.


Sunday, January 29, 2023

Double Chocolate Espresso Cookies from 100 Cookies

Double Chocolate Espresso Cookies - made dough January 11, 2023 from 100 Cookies by Sarah Kieffer 
1 1/2 cups (213 grams) all-purpose flour
1/2 cup (50 grams) Dutch-process cocoa powder
2 teaspoons ground espresso
1 teaspoon baking powder
1/2 teaspoon baking soda
14 tablespoons (198 grams) unsalted butter, room temperature
3/4 cup (150 grams) granulated sugar
3/4 cup (150 grams) brown sugar
1 tablespoon pure vanilla extract
3/4 teaspoon salt
1 large egg plus 1 large egg yolk
5 ounces (142 gams) bittersweet chocolate, coarsely chopped
2 tablespoons cocoa nibs, optional
  1. Preheat oven to 350 degrees F. Line baking sheets with parchment paper.
  2. In a small bowl, whisk together flour, cocoa powder, ground espresso, baking powder and baking soda.
  3. Slice 4 tablespoons butter into 4 pieces and place them in a large bowl. Melt the remaining 10 tablespoons butter in a medium skillet over medium-high heat. Brown the butter until dark golden brown and gives off a nutty aroma, 2 to 3 minutes. Pour the browned butter, scraping the bottom and sides of skillet for all the browned bits, over the 4 tablespoons butter in large bowl. Stir until all the butter is melted and combined.
  4. Stir in the granulated sugar, brown sugar, vanilla and salt until combined. 
  5. Whisk in the egg and yolk until fully combined and the batter is smooth and glossy, about 45 seconds. Let rest 2 to 3 minutes then whisk again for another 45 seconds.
  6. Add the flour mixture and use a rubber spatula to combine.
  7. Fold in the chopped chocolate and cocoa nibs, if using, mixing to distribute evenly.
  8. Form dough into golf-ball-size dough balls (about 45 grams each). Evenly space on baking sheet, about 6-7 cookies per sheet.
  9. Bake 8 to 9 minutes or until edges are set and middles are barely past the raw stage. For a more crisp edge, bake 10-11 minutes.
  10. Let rest on baking sheets for several minutes then transfer to wire rack to cool completely.
When I get onto a new baking book, you'll soon be able to tell as there will be a flurry of recipes from it on my blog in a short amount of time. Such is what’s happening with 100 Cookies by Sarah Kieffer. 
Since I borrowed this one and can't keep it forever, aka let it gather dust on my bookshelves, I got into a frenzy of typing up the recipes I wanted to try. And I know myself well enough that whatever I don't make "right away" is likely going to languish in my cyber files for...well, forever seems like a good estimate.
I didn't want to try ALL the recipes in this book (some weren't to my taste) but there were a decent number that caught my eye and taste buds. This was one of them. I'm not a coffee or espresso drinker but I've heard deployed service members like caffeine (helps with their long shifts) so I'm always open to coffee/espresso-flavored baked goods.
Since the author was kind enough to include weight measurements as well as volume ones, I weighed all the ingredients out for greater adherence to how she intended the recipe. That turned out to be a good call as this dough came together beautifully and is probably one of the easiest doughs I've worked with: not too soft or sticky, not dry or crumbly, but just easy to portion into dough balls.
As always, I chilled and froze the dough before baking and baked directly from frozen dough. That helped make a chubby cookie that didn't spread thin so this didn't fall prey to the too-much-water-in-the-butter issue that's been plaguing me for the past half year.
Taste-wise, this was rich and you can definitely taste the espresso. If you like the flavor, this is a great chocolate and espresso combination with a fudgy middle and crisp (but not hard) edges.