Wednesday, October 9, 2019

Lemon Bars with Lemon Curd

Lemon Bars - made September 13, 2019 from Pastry and Beyond
I have a tried and true lemon bar recipe that everyone loves but every once in awhile I like to try a new recipe for lemon bars. Just in case. I found a really good one that way so it never hurts to keep an open mind to new recipes. Says Recipe ADD Queen.
I haven’t made lemon bars in a long time though and I think I might’ve lost my touch. The lemon curd part turned out fine but the crust? Not so much. Most, though not all, crusts for lemon bars are made by cutting cold butter into a flour-sugar mixture. The key is to cut the butter in fine enough and thoroughly enough so that it’s evenly dispersed and when baked, makes a crust, not a floury layer not held together with enough dispersed butter. 

Guess which one I did? Yep. Too floury. I don’t know if I just didn’t cut the butter in properly or enough or if the recipe held too much flour. I assume the former as the original blog looks like the crust was fine. 
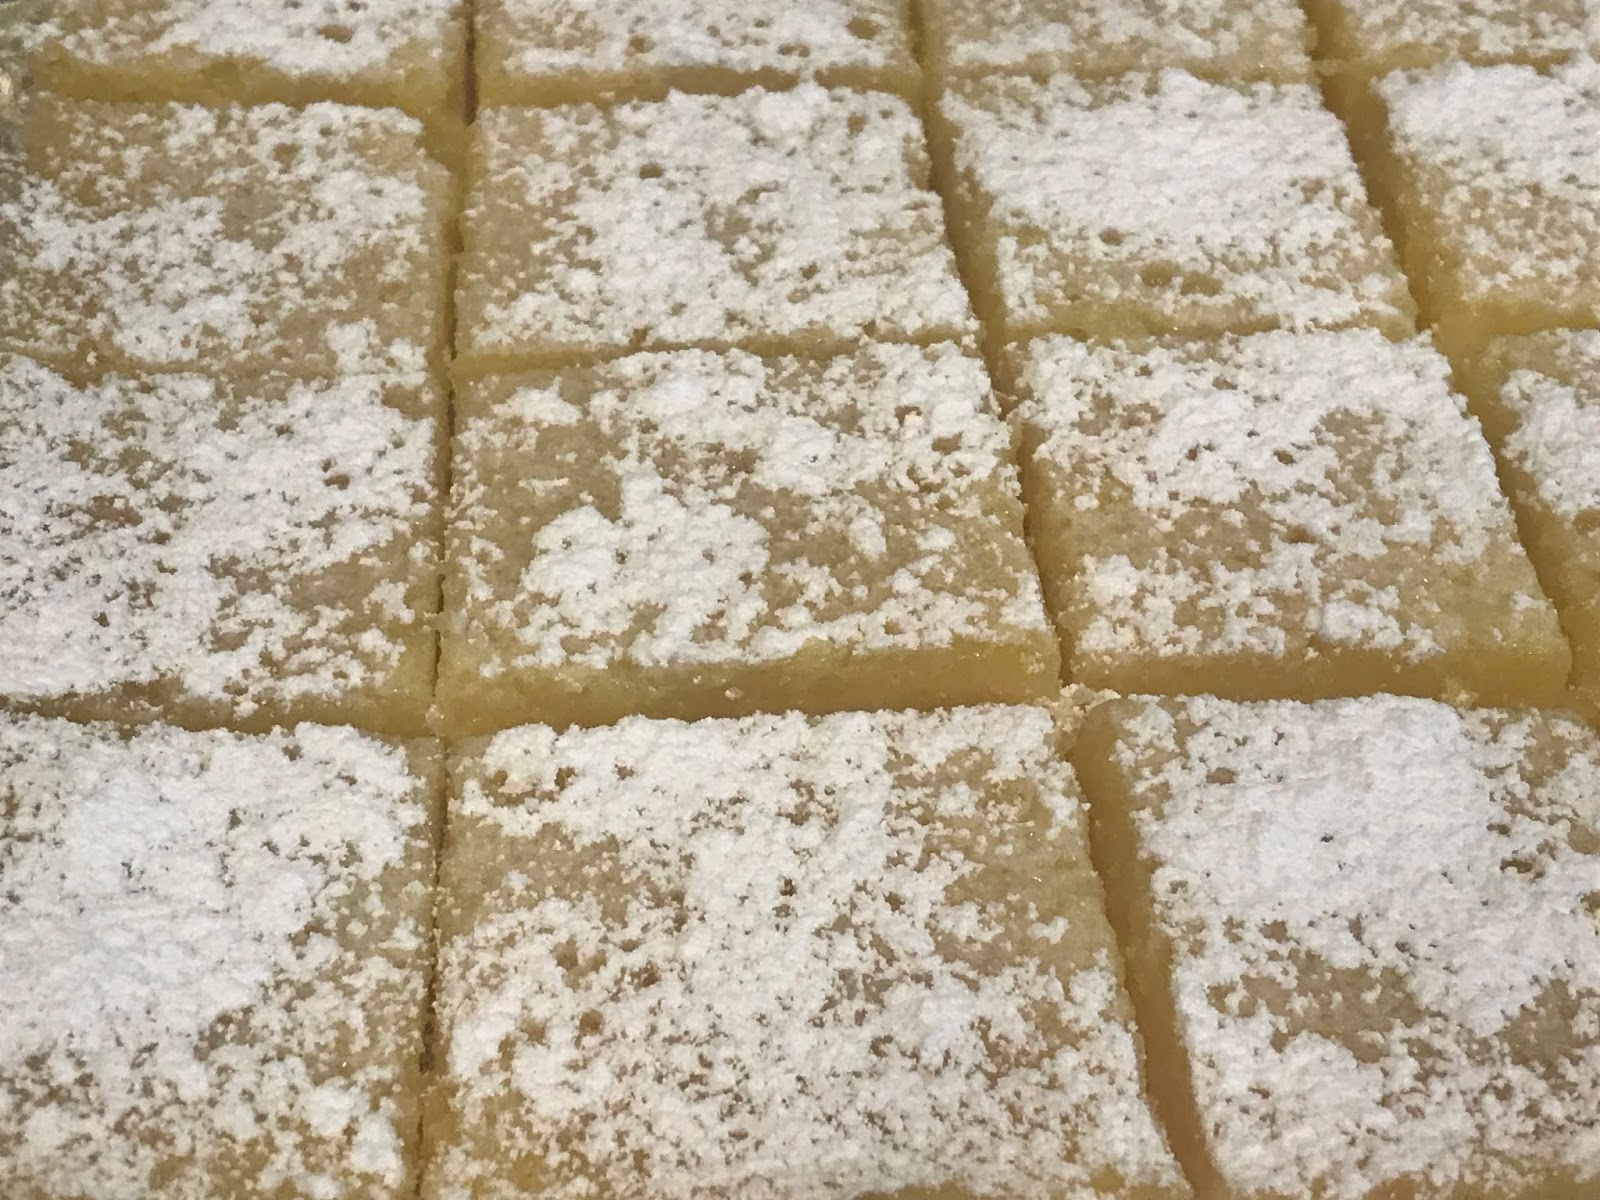
Which is not how my crust turned out. Sigh. On the plus side, the lemon curd layer was good. The only issue I had with it is it absorbed the powdered sugar dusting really quickly. Which isn’t necessarily a bad thing as that shows the top layer is moist. But, for looks, you want to only dust with powdered sugar literally right before serving or it’ll look like you don’t have any powdered sugar on top at all.

dry crust, too floury

Crust
1 1/4 cups (175 grams) all-purpose flour
1/2 cup minus 2 teaspoons (95 grams) granulated sugar
1/2 stick or 4 tablespoons (115 grams) unsalted butter, cut into cubes

Lemon Filling
3 large eggs
1/2 cup and 1 tablespoon (120 grams) granulated sugar
1/3 cup lemon juice
2 teaspoons lemon zest
2 teaspoons (30 grams) unsalted butter, melted and cooled
1 tablespoon (10 grams) all-purpose flour
powdered sugar for dusting the tops of the bars

  1. Preheat oven to 350 degrees F. Line an 8" baking pan with foil and lightly spray with nonstick cooking spray.
  2. Crust: mix the flour and sugar in a medium bowl. Add in the cubed butter and cut butter into flour mixture with a fork or two knives until the butter is the size of small peas and the mixture looks like breadcrumbs.
  3. Spread the mixture evenly in the prepared pan and bake for 20-25 minutes until golden brown.
  4. Filling: mix the lemon zest and sugar in a bowl with a fork or rub with your fingertips to increase the lemon flavor. Add the eggs and whisk until well combined. Add the cooled melted butter and lemon juice; mix well. Add flour and mix until incorporated.
  5. Pour filling over hot baked crust. Bake for 12-15 minutes until the filling is set but still soft. Cool to room temperature. Just before serving, generously dust with powdered sugar and cut into squares.

Sunday, October 6, 2019

Soft Sugar Cookies

Soft Sugar Cookies - made dough September 17, 2019 from Easy Family Recipes
I already have a new favorite sugar cookie recipe from Butternut Bakery that I discovered a couple of months ago so I wasn't really looking for a new one. But the pictures of Soft Sugar Cookies from Easy Family Recipes looked so good that I decided I had to make it for myself.
Turns out I have another new favorite sugar cookie recipe now. This isn't as sweet but tasted amazingly good and I loved, loved the soft texture. You get that from underbaking so please bake only until the edges are set and look golden brown. The middles might look a little raw and that's okay. Take out of the oven and let sit on the cookie sheets to bake a little longer but don't bake in the oven until it's puffy or cracks appear in the middle. They may be cooked all the way through by then and you'll miss out on the soft, dense texture.

This is my favorite kind of cookie. Make sure you use fresh butter and real vanilla. With this kind of classic simplicity, the taste is due entirely to the quality of the ingredients you use.

Really nice dough, easy to work with, not dry or crumbly, not too soft or sticky

1 cup unsalted butter
1 1/4 cups granulated sugar
1 egg
1 1/2 teaspoons vanilla extract (I used 1 teaspoon vanilla extract and 1/2 teaspoon vanilla bean paste)
2 3/4 cups all-purpose flour
1 1/2 teaspoons baking powder
1/2 teaspoon salt
  1. In the bowl of a stand mixer, cream the butter and sugar together until light and fluffy. Add in the egg and vanilla; mix until just combined.
  2. In a separate bowl, whisk together the flour, baking powder and salt.
  3. Add the flour mixture to the butter mixture in three additions, beating until just combined after each addition. Do not overmix.
  4. Portion the dough into tablespoon size dough balls. Flatten slightly into thick discs. Cover and chill or freeze for several hours or overnight.
  5. When ready to bake, preheat oven to 350 degrees. Line baking sheets with parchment paper. Evenly space dough discs on prepared baking sheets. Bake for 9-11 minutes or until center is just set. Remove from oven and let cool on baking sheets for several minutes. Transfer to wire cooling racks to cool completely.

Friday, October 4, 2019

Chocolate Sour Cream Bundt Cake

Chocolate Sour Cream Bundt Cake - made September 17, 2019 from Damn Delicious
As the blog says, this is damn delicious. Because it was.
Now that I live in higher altitude, I initially thought I would have to make some baking adjustments for "normal" recipes to turn out. But 9 months of baking in Reno hasn't really affected my baked goods, except possibly needing to bake them a little longer than usual.
However, I did realize I've been making mostly cookies and I'd already proven to myself (multiple times) that I don't live at a high enough altitude for my cookie recipes to be that impacted.
But I also realized I haven't really been baking cakes. It wasn't a conscious omission. It's just that when I've baked for my sister's Open Houses or for my parents' social engagements or just their own consumption, it's been more practical to make cookies for easy sharing since they're already individual portions.

So it was time to put a cake to the test. I didn't really alter this recipe in terms of ingredients or mixing method. Instead, based on my cookie baking experience at a higher altitude, I briefly increased the baking temperature.
The recipe calls for baking it at 350 degrees F. I preheated the oven to 375 degrees F and once the oven hit 350, I put the cakes in. Once the oven had fully preheated to 375, I left it at that temperature for 5 minutes then lowered it back down to 350 for the rest of the baking time.
The purpose was to get the cake structure to set quickly at the higher temperature so it wouldn't collapse as it finished baking. Not sure if that made any difference but the cakes did rise correctly and didn't collapse so I'm not going to quibble with it.
And, like I said earlier, this was damn delicious. Great chocolate flavor, perfect soft, tender crumb.
I didn't have any heavy cream when I made this (I thought I did but turns out it was the day of the expiration date and the cream had solidified - eek) so I made my own glaze with a combination of powdered sugar, cocoa and whole milk. It worked out well enough and added a nice richness to the softness of the cake crumb.


This made 3 mini bundt cakes and 2 cupcake-size cakes. I could've used a regular Bundt cake pan but I was in the mood to use my mini Bundt pans and am glad to say the cakes came out of the pans cleanly.
As always, watch the baking time and don't overbake these. Smaller cake pans require less baking time.

Cake
2 cups all-purpose flour
1 cup granulated sugar
1 1/2 teaspoons baking soda
1 cup unsalted butter
1/3 cup cocoa powder
1 cup water
1/2 teaspoon salt
2 large eggs
1/2 cup sour cream
1 teaspoon vanilla extract

Chocolate Glaze
1/2 cup heavy cream
1 1/2 tablespoons granulated sugar
4 ounces bittersweet chocolate, finely chopped
1 1/2 tablespoons corn syrup
  1. Preheat oven to 350 degrees F. Lightly coat mini bundt pans with nonstick cooking spray.
  2. In a large bowl, combine flour, sugar and baking soda; set aside.
  3. In a small saucepan, combine butter, cocoa powder, salt and 1 cup water over medium heat. Cook, stirring, until melted and combined, about 2-3 minutes. Pour mixture over dry ingredients and stir, using a rubber spatula just until combined. Beat in eggs, one at a time, until well combined. Beat in sour cream and vanilla until well combined.
  4. Pour batter evenly into bundt pans. Bake for 20-25 minutes or until a toothpick inserted near the center comes out with a few moist crumbs. Remove from oven and let cool for 10 minutes before inverting cakes onto a wire rack.
  5. Make the glaze: combine heavy cream and sugar in a small saucepan over medium heat. Remove from heat and stir in chocolate and corn syrup. Whisk until smooth. Drizzle the glaze evenly over the top of the cakes, allowing to drip down the sides. Let glaze set before serving.

Tuesday, October 1, 2019

Arroz Caldo - Filipino rice porridge

Arroz Caldo - made September 14, 2019 from Pilipinas Recipes
If it seems like I've been cooking more, it's because I have. Although I prefer baking to cooking, I'm finding cooking isn't as hard as I once thought and while I will always prefer baking, I've been pleasantly surprised lately that what I've been cooking has actually turned out and hasn't been an onerous experience.
And by "turned out", I mean the dishes have tasted like they're supposed to taste. Not just good to eat but how other, more experienced cooks have made them. Case in point, this Arroz Caldo. Arroz Caldo is the Filipino version of savory rice porridge, flavored with ginger and saffron, often made with chicken and traditional arroz caldo includes a boiled egg in each serving. It's comfort food all the way in Filipino cuisine

The beauty of arroz caldo is, beyond how easy it is to make, is you can make it as thick or as soupy as you want. Just thin it with chicken broth if it gets too thick or boil it as bit longer if it's too soupy. It's all in your preference.
Boil the eggs separately and add the peeled, whole boiled egg when you serve the arroz caldo. I like to soft boil my eggs then add it to the pot once I've turned the heat off. Arroz Caldo can also be made with tripe but I don't care for tripe so I left it out and went with chunks of boneless, skinless chicken breast instead.
Saffron is freaking expensive but you only need a pinch or two for flavoring. I cut the ginger pieces rather large so they'd been easier to see (and fish out) so you don't eat the actual ginger. It's also there for flavoring.
Top with crispy garlic
2 tablespoons vegetable oil
3 garlic cloves, diced
1 1-inch piece of fresh ginger, peeled and diced
1 small onion or shallot, diced
pinch of saffron
1 pound of boneless skinless chicken thighs, cut into 1-inch pieces
1 cup jasmine rice
5-6 cups low-sodium chicken stock or water
2 tablespoons fish sauce or salt, to taste
2 tops of green onions, thinly sliced for garnish
2 small limes or calamansi
Soft-boiled whole eggs, shelled
  1. In a pot, saute garlic in oil over medium heat and cook until golden brown and crisp, about 2-3 minutes. Transfer garlic to plate lined with a paper towel to drain; set aside.
  2. Add ginger, onion and saffron to the pot and cook until translucent, about 3 minutes. Stir in the chicken and brown for 5-6 minutes.
  3. Add rice, chicken stock and fish sauce or salt.
  4. Cover and bring to a slight boil, them simmer over low heat. Simmer until the chicken and rice are cooked through, stirring frequently, about 25-35 minutes. Add more stock or water, depending on how thick you want the porridge. Add boiled eggs. 
  5. Serve in bowls and top with crispy fried garlic, and green onion with lime juice and fish sauce on the side.

Sunday, September 29, 2019

Danish Butter Cookies...that became tarts

Danish Butter Cookies - made July 12, 2019 from Traveling Foodies
This is another recipe I made awhile back but never blogged about. I’m trying to clear out my queue and keep myself honest about what I’ve done and which recipes I’ve tried. This one is delayed because I made it wrong the first time and always meant to make it properly before blogging about it. But I haven’t had time to make it again as I’ve been making too many other things so I thought I’d better get this up before I forget it completely.


This one I clearly remember because I had such a hard time with it. The dough was so stiff that I couldn’t even get it piped properly. I went through three (burst) piping bags before I gave up and pressed the dough into tart pans, baked them then filled them with hazelnut spread before topping them with toasted hazelnuts. I put a plate of tarts together for my mom to take to a potluck.
It wasn’t until after I’d sent them off and was looking at the recipe again that I had a “doh!” moment. Because only then did I realize that I hadn’t added the egg. DOH! No wonder the batter was so stiff and couldn’t be piped out into a rosette or any other shape. Thankfully, the eggless dough tasted fine as a butter tart shell. Actually, it was pretty good. But, to do this recipe justice, I really should try again and make it properly with an egg this time.

1 egg (60 g)
200 g butter
130 g powdered sugar
320 g flour
2 tablespoons vanilla paste (approx 30 g)
  1. Preheat oven to 375 degrees F.
  2. Combine all ingredients in the bowl of a standing mixer with the paddle attachment. Cream on low speed until ingredients are combined; do not overbeat.
  3. Pipe wreaths onto baking sheets lined with parchment paper using a large open star tip. Bake for 7-8 minutes. Cool on the baking sheets for a few minutes before transferring cookies to wire racks to cool completely. Store in airtight container.


Thursday, September 26, 2019

Ultimate Brown Butter Chocolate Chip Cookies

Ultimate Brown Butter Chocolate Chip Cookies - made May 5, 2019 from Your Cup of Cake
I made these cookies awhile back and didn’t blog about them right away so I can’t remember them very well. All I had in my original notes is they were buttery. Which is not surprising since they use brown butter as a key ingredient.

I also must’ve made them for somebody, probably my sister for her to serve at one of her Open Houses, and nearly forgot to take pictures as all I have are these two pictures of the taste test cookie. I feel like I’m not doing them justice in this write up but I’ll blog them anyway so I have some record that I did actually make them. And probably liked them as it’s hard not to like a good chocolate chip cookie, even if I have dozens of them already.

1 cup unsalted butter
2 1/4 cups all-purpose flour
1 teaspoon baking soda
1/2 teaspoon salt
1 1/2 cups dark brown sugar
1/4 cup sugar
1 large egg
1 large egg yolk
2 teaspoons vanilla extract
2 tablespoons milk
1 1/4 cup chocolate chips
  1. Place butter in a small saucepan over medium heat and melt, stirring constantly, as butter foams. Cook, stirring until brown bits form on the bottom and butter emits nutty aroma. Remove from heat and let cool for 5-10 minutes.
  2. Combine flour, baking soda and salt in a bowl; set aside.
  3. Beat cooled brown butter, brown sugar and granulated sugar in the bowl of a stand mixer fitted with the paddle attachment. Add egg and egg yolk, one at a time, mixing briefly after each addition just to combine. Scrape down the sides of the bowl. Beat in vanilla extract and milk.
  4. Add the dry ingredients in 3 additions, mixing briefly after each addition just until combined. Do not overmix. Fold in chocolate chips. Cover and chill dough for at least 30 minutes. When dough is chilled enough to handle, portion into golf-ball-size dough balls, cover and chill or freeze another 2-3 hours or overnight.
  5. When ready to bake, preheat oven 350 degrees F. Line baking sheets with parchment paper. Evenly space dough balls on prepared baking sheets and bake for 10-12 minutes or until edges are golden brown and middles no longer look raw. Remove from heat, let cool on baking sheets for 2-3 minutes then remove to wire cooling rack to cool completely.

Monday, September 23, 2019

Bakery Style Sugar Cookies

Bakery Style Sugar Cookies - made dough September 4, 2019 from Tastes of Lizzy T
Time to confess my guilty secret. You know how I’m a complete and utter baking snob? Especially when it comes to cookies. I duck out of sight when Girl Scout cookie season comes as I’d rather bake my own. The original Tollhouse cookie recipe is so 4 decades ago when all I knew how to make were thin cookies. Mrs. Fields? No flavor except sweet.

BUT, would it surprise you to learn I almost always like those Otis-Spunkmeyer type sugar cookies you can find at any Subway? Or the kind where you buy the cookie dough from the local school’s fundraiser (the little girl across the street just sold me a bucket of cookie dough – I’m a sucker). I can be the world’s biggest chocolate chip cookie snob but when it comes to sugar cookies, my soul goes for pretty cheap.
So when I saw this recipe for “Bakery Style” sugar cookies, I know it meant those buy-them-almost-anything type of sugar cookies I usually go for. What intrigued me about this recipe was that it used a baking emulsion. I’ve never baked with an emulsion as a flavoring but with the exorbitant rise in vanilla prices, I thought it would be prudent to start.
I followed this recipe faithfully to the letter, from using European butter to the emulsion to brushing the tops of the cookies with heavy cream and vinegar and sprinkling with big sugar crystals. My faithfulness was rewarded with some amazing cookies. Seriously, I loved these cookies. I can’t even tell you why I liked them so much except that they had the perfect texture (light, airy crispy edges and chewy moist middles) and beautiful sugar-butter flavor. Like 10x better than Otis. 
My only beef with them is they spread thin and while that would normally be a baking sin in my world, these cookies were so good, I forgave them. I’m not sure if my dough was too soft before I froze it (and I baked from frozen dough) or I needed to bake them at a higher temp than the recipe called for or I made the dough discs too large as they spread into large thin cookies. Regardless, that didn’t detract from the taste or the texture of these cookies. I need to make the next batch a little small so the cookies won’t be so big but still….did I mention they were delicious?

2 3/4 cups all-purpose flour
1 teaspoon baking soda
1/2 teaspoon baking powder
1 cup European-style butter, softened
1 1/2 cups granulated sugar
1 large egg
3/4 teaspoon LorAnn Princess Cake & Cookie Bakery emulsion
1/2 tablespoon lemon juice
1/4 cup heavy cream
3/4 teaspoon white vinegar
extra sugar for sprinkling on top
  1. In a small bowl, stir together flour, baking soda, and baking powder; set aside.
  2. In a large mixing bowl, cream together butter and sugar until smooth. Beat in the egg, emulsion and lemon juice. Gradually blend in dry ingredients. Do not overmix.
  3. Scoop the dough into about 18 1 1/2" balls and place on an ungreased cookie sheet. Slightly flatten the top of each cookie with the bottom of a glass that has been dipped in sugar.
  4. Refrigerate cookies for at least 1 hour.
  5. In a small bowl, combine the heavy cream and vinegar (it will curdle). Use a pastry brush to brush this mixture on top of the cookies.
  6. Sprinkle the top of the cookies with extra granulated sugar or large sugar crystals.
  7. Preheat oven to 375 degrees F and line baking sheets with parchment paper. Evenly space chilled cookies on baking sheets. Bake for 10 minutes, removing the cookies just before the edges get brown.
  8. Cool for 5 minutes then remove to wire racks to cool completely.