Wednesday, October 11, 2017

Soft and Chewy Sugar Cookies

Soft and Chewy Sugar Cookies - made dough September 17, 2017 from One Bowl Baking by Yvonne Ruperti
These cookies are slightly misnamed. They're not hard but they're not soft like a cakey cookie either. They're chewy but they're also a bit crisp if you bake them properly. That's because of the oil. Anytime you have oil in a sugar cookie, that's what leads to its crispness and airy texture.
When you first mix the cookie dough, the oiliness is pretty prominent and makes for a soft dough. I had to chill the dough for 15 minutes before I even dared shape it into logs. You could also scoop the dough into cookie dough balls but I knew I wanted to make sandwich cookies and it was easier to make them into dough logs to cut after chilling and before baking.

Like I've done before, I like making this kind of sugar cookie to use as sandwich cookies. With cookie butter as the filling. You could also use Nutella or peanut butter but cookie butter is my go-to sandwich filling with sugar cookies.
This was a nice straightforward cookie. The cookies themselves are crisp and airy with a good vanilla flavor, complemented by the cookie butter filling. Excellent for serving at a tea or party.
1 cup plus 2 tablespoons granulated sugar
6 tablespoons unsalted butter, melted
3/4 teaspoon salt
1/2 cup canola oil
1 large egg
2 vanilla beans, seeds scraped and reserved, or 4 teaspoons vanilla extract
2 cups (10 ounces) all-purpose flour
1 teaspoon cream of tartar
3/4 teaspoon baking powder
3/4 teaspoon baking soda
1/2 cup granulated sugar, for rolling
  1. In a large bowl, combine the granulated sugar, melted butter and salt. Stir in the oil, egg and vanilla bean seeds or extract until combined.
  2. Add the flour, cream of tartar, baking powder, and baking soda, stirring until just combined. Do not overmix.
  3. Portion into small dough balls, cover, and chill or freeze for several hours or overnight.
  4. When ready to bake, preheat oven to 375 degrees F. Line baking sheets with parchment paper. Roll dough balls in 1/2 cup granulated sugar and evenly space on baking sheets. Bake, one sheet at a time, until edges are light golden brown and middles are no longer shiny or raw.
  5. Let cool for several minutes then remove cookies to wire rack to cool completely. 
  6. When cool, spread a layer of cookie butter on the bottom of half the cookies then sandwich with the other half.

Sunday, October 8, 2017

The Most Amazing Chocolate Cake

The Most Amazing Chocolate Cake - made October 2, 2017 from The Stay at Home Chef
I'm moving this up in the blogging order because I made this cake this week for a work potluck and had several requests for the recipe. Normally I bake 2-3 weeks ahead of when I post something but if I'm asked for the recipe, I try to accommodate sooner than later.
Typically, for potlucks, I try to bring something easy to serve and eat, usually cookies, brownies or easy-to-portion sheet cakes. They're easy to make and you can make the individual portions small so people can eat as much or as little as they want. For this potluck, I went off the beaten path in making this triple layer chocolate cake. I don't usually make cakes in three layers because even a small slice can be so intimidating to eat. But from a visual perspective, I have to admit, few things wow as much as three layers of cake and frosting, especially if both cake and frosting are chocolate.

This definitely has the wow factor, even hampered by my less-than-stellar (non) decorating skills when it comes to cakes. The batter is a bit thin which past experience tells me means this cake is likely to come out moist with a soft crumb. And so it did. When using this much cocoa, you also want to make sure the cake has a lot of liquid since cocoa is a drying agent. Between the buttermilk, water and oil, this definitely has the moisture factor.
If you want a dark, rich chocolate cake, you must use a dark, rich cocoa powder. That's where the chocolate flavor comes from and if you use a subpar or tepid cocoa, your cake won't have that chocolate punch. I (always) use Pernigotti cocoa but you can also use Valrhona, Scharffenberger or other high end cocoas. Some bloggers recommend Hershey's Dark; I've never tried it myself so I can't speak to it but I'm not going to lie. I'm a baking ingredient snob so Hershey's doesn't usually cut it for me.
The original recipe calls for baking the cake in three 9" round cake tins. I baked this in three 8" round cake tins and used the leftover batter for 6 cupcakes. You can go with 9" rounds but if you do 8", don't try to use all the batter in the 8" rounds. It'll make your cake too high when the layers are stacked up and you risk the batter overflowing the cake pans if you fill them too much before baking. I never time cakes but go by the toothpick test. Poke the toothpick near the center and if it comes out with a few crumbs or clean, take them out. I prefer a few moist crumbs rather than completely clean but you can also use the touch test; if the cake springs back when lightly pressed near the center, it's done.

The frosting recipe makes a fair amount of frosting. My usual error in frosting multi-layer cakes is I get paranoid I won't have enough frosting so I skimp on the frosting between the layers and end up with too much leftover frosting at the end which I try to use by plastering the sides and top. This time, I estimated (fairly) correctly and got enough between the layers. I had enough frosting leftover to frost the extra cupcakes as well as make a half-assed attempted to decorate the bottom of the cake with random "stars". Just don't look too closely at them in the pictures.

To cut some of the dark chocolate richness and provide a little texture, I sprinkled the top with milk chocolate toffee bits. It made for a decent presentation but it's okay to leave this plain if you don't like toffee or you know your cake eaters have nut allergies. You can also sprinkle crushed Oreos on top or drizzle caramel.
I liked this cake. It was rich, it was moist, it was chocolaty. I don't know that I would bake it other than for a large group gathering. Slicing thin slices is a bit tricky with so many layers and it got messy when I was trying to cut the last chunk. But the taste will compensate for the appearance if you can't make perfect slices.
butter and flour for coating and dusting the cake pans
3 cups (450 g) all-purpose flour
3 cups (650 g) granulated sugar
1 1/2 cups (155 g) unsweetened cocoa powder
1 tablespoon baking soda
1 1/2 teaspoons baking powder
1 1/2 teaspoons salt
4 large eggs
1 1/2 cups buttermilk
1 1/2 cups warm water
1/2 cup vegetable oil
2 teaspoons vanilla extract

Chocolate Cream Cheese Buttercream Frosting
1 1/2 cups butter, softened
8 ounces cream cheese, softened
1 1/2 cups unsweetened cocoa powder
3 teaspoons vanilla extract
7-8 cups powdered sugar
about 1/4 cup milk, as needed
  1. Preheat oven to 350 degrees. Butter three 9-inch cake rounds. Dust with flour and tap out excess. Line bottoms with parchment rounds, optional but recommended.
  2. Mix together flour, sugar, cocoa, baking soda, baking powder and salt in a stand mixer on low speed until combined.
  3. Add eggs, buttermilk, warm water, oil and vanilla. Beat on medium speed until smooth, about 2 minutes.
  4. Divide batter evenly among the three pans. Bake for 30-35 minutes or until a toothpick inserted near the center of each round comes out with a few moist crumbs, not raw batter.
  5. Cool on wire racks for 10 minutes then turn the cakes onto the racks and allow to cool completely.
  6. While cakes are cooling, make frosting: in a large bowl, beat together the butter and cream cheese until fluffy. 
  7. Add the cocoa powder and vanilla extract; beat until combined.
  8. Beat in powdered sugar, one cup at a time. Add milk as needed to make a spreadable consistency. 

Thursday, October 5, 2017

Caneles #2

Caneles #2 - made September 15, 2017 from iFood Blogger
Since my first experience with canelés was reasonably successful, I got all fired up to try them again, this time with the right ingredient (milk instead of cream). But (insert baking obsessive personality trait here), the lure of those damnably expensive copper canelé molds started to sing their siren song to me. And you know I have ears like a bat when it comes to stuff like that.
Yes, I broke down and bought one of those ridiculously expense copper canelé molds for $25(!). But I’m so cheap that I used reward points to pay for it so I spent nothing out of pocket. I’m crafty like that. I also bought a (much cheaper) set of 4 nonstick metal-but-not-copper molds. Otherwise it would take me a long time to make one batch of canelés with one little copper mold.

All the blogs detailing out how to make good canelés talked about how to season copper molds. According to Pierre Hermes, you should heat them in a hot oven for 20 minutes with melted butter. When using metal molds, the recipe I used said you needed to have a beeswax-butter combination to coat the inside of the molds to get that shiny, crunchy crust. I used the 40 grams of beeswax and 60 grams of butter per the recipe, melted and whisked them together. Then I poured the warm mixture into each mold until almost the top, turned the mold upside down to pour the mixture back into the bowl and kept it upside down to let the coating set and the excess drip out.
You want to work fast as the beeswax hardens quickly, similar to candle wax. You do not want to have a thick coating so make sure your mixture is very warm to hot, not lukewarm, and as soon as you’ve filled it almost to the top, turn it quickly over to pour out the mixture and keep the mold upturned. You don’t want any drippy mixture hardening at the bottom curved part of your mold. Do not chill the molds until after you’ve coated them with the beeswax-butter.
With the crispy outer shell since it was baked properly
 
When you’ve heated the oven to the first (and highest) temperature, fill the molds with your chilled batter and place on a foil-lined baking sheet to put in the oven. Don’t skip the foil. Even if the batter doesn’t overflow from the molds, the coating spits and spatters in the heat and it makes cleanup much easier if you have the foil lining.
Having had a successful first attempt with canelés, I was not prepared for failure. But fail, I did. Somewhat. The first batch came out mostly fine. The one in the copper mold came out perfectly. But the metal molds were a bit smaller and much darker so baking them all at the same time for the same length of time meant that while the slightly larger copper mold canelé came out perfectly, the smaller ones in the dark-colored metal molds came out too dark and had too much of a crunchy coating. I brought them to my parents’ house for them to try and my dad unknowingly referred to them as the “chocolate ones”. Uh, oops.
The second batch, I was more careful to watch the baking time but I made a tactical error in not doing the beeswax-butter coating on them. I thought the molds were still rather shiny and should already be greased enough from the first time. Yeah, no. Wrong again. They stuck to the inside of the molds and had to be pried loose which added to their misshapen appearance. Fail.
For the third batch, I coated the molds properly and watched the baking time on the smaller metal molds but then got too conservative and took them out too soon. The insides were done but I hadn’t left them in the oven long enough for the coating to become caramelized and crunchy. They still tasted good but that traditional canelé exterior was missing. Oops. Fail again.
Not baked long enough, soft outer shell

Canele mold not greased properly, canele not cooked long enough
Lesson from this second go-round is canelés may look simple and are easy to mix together but the process does have some pitfalls. They’re not insurmountable so just make sure you grease your molds each time and bake them long enough for that crunchy exterior to materialize.
The not-chocolate canele, baked too long

2 vanilla beans
500 ml cold whole milk
250 g granulated or cane sugar (I cut it to 225 g)
100 g all-purpose flour
50 g butter, melted
2 large eggs
2 egg yolks
4 tablespoons dark rum

For the mold coating
40 g beeswax
60 g butter

To season your copper canele molds for the first time: clean them then season them by coating with butter and placing for 20 minutes in a 500-degree F oven for 20 minutes or more. Remove from oven, clean with a paper towel while still hot and cool before using. Never wash the molds; simply wipe with a dry cloth or paper towel after each use.
  1. Slit the vanilla beans lengthwise and scrape the seeds with the back edge of a small knife. Combine the seeds, vanilla pods and milk in a heavy saucepan and bring to a gentle simmer. Turn off the heat and let sit for 2 minutes.
  2. In a separate bowl, whisk sugar, eggs and egg yolks. Add melted butter and whisk until combined.
  3. Remove the vanilla bean pods from the milk. Add 1/4 of the milk into the egg mixture and whisk. Add flour and mix until combined. Slowly whisk in the remaining milk, tempering the egg mixture gradually with the hot milk mixture and keeping the batter smooth. Add rum and mix until combined. 
  4. Cover and refrigerate at least 24 to 48 hours. For optimal caneles, this resting period is mandatory.
  5. When ready to bake, melt beeswax and butter in a heatproof glass measuring cup; whisk until combined. Pour melted mixture into each canele mold then turn upside down to pour the mixture back into the measuring cup and keep each mold upturned on a wire rack with a paper towel underneath to catch the drippings. Once cooled, chill in a freezer or refrigerator until ready to bake.
  6. Preheat oven to 550 degrees. Fill the molds with batter to 3/8 inch (1 cm) from the top. Place on a foil-lined baking sheet and bake the caneles at 550 degrees for 10 minutes. Without opening the oven, reduce the temperature to 375 degrees and continue baking for another 45-50 minutes.
  7. Remove caneles from the oven. Turn upside down to release the caneles from the molds and let cool on a wire rack. Let cool to room temperature. Best eaten on day they're made.

Monday, October 2, 2017

Caneles #1

Caneles - made September 2-4, 2017, modified from Eat, Little Bird
Mike, one of my coworkers, and I got into a conversation about desserts one day. His preference was for French sweets such as macarons, mille-feuilles and canelés . I’m not shy about declaring macarons are too sweet for me but I don’t mind mille-feuilles and canelés. I rarely make either of them though since mille-feuilles are a pain in the flaky-pastry-handling butt and I never got into caneles because the canelé molds are so expensive. He was a little appalled that I, a prolific baker, didn’t like his preferred desserts and didn’t make them.
Custard mixture with vanilla bean
But c’mon - those cute little copper canelé molds? Typically $25. Each. For one little canelé!! My thrifty little soul didn’t actually want to like canelés that much in case I did bring myself to spend that much on them. I know my weaknesses.
And so did Mike. One day he approached my desk and handed me a large padded envelope from Amazon. He had gifted me with the silicone canelé molds. I hadn’t thought about using silicone molds as a cheaper alternative since I don’t bake with silicone molds as a rule. But, once I had them in hand, I felt the only sincere expression of gratitude would be to use them and share the results. Yes, he knows me well. #chessmoves
I researched recipes on the internet for canelés, i.e. I stalked pinterest. In looking at the different recipes, it was easy to discover the ingredients are nearly identical in each recipe. It appears the tricky part of making canelés is the actual process of making them. I will spare you all the different blogs I researched and just give you the highlights:
  • Use real vanilla beans
  • Plan to make the batter at least two days before you’re going to serve the canelés. The batter must rest in the refrigerator before using. Some recipes say 1 day is okay, others recommend at least 2. No more than 4 days.
  • Bake at extremely high heat for the first 10 minutes (500-550 degrees) then lower the temperature to 375 degrees for the remainder of the time, depending on the size of your canelé.

After all the dire warnings about what can go wrong with canelés, I was a little nervous on my maiden run with them. Making the custard itself was easy and just like making pastry cream but even easier since you didn’t have to try and thicken it. Just make sure you temper the eggs with the hot liquid mixture.
I will confess to one “oops”. The first recipe I used was European in origin and I had to translate what they meant into American ingredients. Based on prior experience, I thought I got everything right. But I made one mistake in thinking “full cream milk” was heavy cream. I found out later it meant whole milk. By then it was too late (Day 2 in the fridge) because I’d already made it with heavy cream, not milk. My coworker Eileen reasonably asked why I hadn’t checked google first when I confessed my sins. Me: I thought I knew more than Google. It appears I was wrong.
Other than that mistake, the rest of the recipe process went surprisingly smoothly. I didn’t have the mushrooming issue that other canelé recipes warned darkly about. I didn’t overfill the silicone molds and when I popped them out of the oven and turned them over, they looked like actual honest-to-goodness canelés. Who knew they were so easy to make?

One cautionary note: it’s hard to tell when they’re done since these are custard desserts. They’re baked upside down so all you can see on top are the bottoms. The bottoms will brown quickly but you want the whole canelé outer crust to be evenly browned and that means baking them long enough. If you underbake them, not only will the outer shell be too pale but your custard inside will be runny. So this is one of the desserts where I recommend timing them in the oven.
The other thing to know about finicky canelés is they’re best eaten the day they’re baked. When freshly baked and completely cooled, the outer part is a crisp shell and contrasts nicely with the softness of the inner custard. Because the ingredients are so similar, the canelés reminded me of pastry cream but baked with a shell. Because that’s essentially what they are. My mistake with the heavy cream/whole milk issue notwithstanding, I have to say I enjoyed these. Uh oh. Wait for the next post.
500 ml (2 cups) heavy cream (or you can use whole milk like you're supposed to)
50 g (1.8 ounces) butter
1 vanilla bean
100 g (3.5 ounces) all-purpose flour
250 g (9 ounces) powdered sugar
1 teaspoon salt
2 eggs
2 egg yolks
60 ml (1/4 cup) rum
  1. Place the milk, butter and vanilla bean in a small saucepan; bring to a boil. Remove the pan from the heat and cool slightly. Remove vanilla bean and set aside for later use.
  2. Place the flour, powdered sugar and salt in a large mixing bowl.
  3. Place the eggs and egg yolks into a separate bowl and beat lightly. Add gradually to the dry ingredients, whisking slowly to incorporate. Gradually add the cream mixture, whisking to incorporate each addition until smooth and combined.
  4. Strain the batter into a clean bowl. Add the rum, whisking until combined. Return the vanilla bean to the mixture, cover the bowl with plastic wrap and refrigerate for at least 2 days and up to 4 days. 
  5. If using a silicone mold: Preheat oven to 460 degrees F (check the instructions on your silicone mold pan - mine says it can only go up to 446 degrees F). Place the silicone mold on a baking sheet and heat it in the oven for 4-5 minutes. 
  6. Remove the batter from the refrigerator and stir gently. Pour the batter into the molds, leaving a 1 cm border from the top. 
  7. Bake for 15 minutes then reduce the oven to 375 degrees F and bake for another 1 hour until the cakes have achieved a golden brown color. Remove the canneles immediately from the molds and cool on a wire rack.
  8. If using copper molds: preheat oven to 460 degrees F. Place the molds on a baking sheet and heat in the oven for 4-5 minutes. Generously grease the molds with melted butter. 
  9. Remove the batter from the refrigerator and stir gently. Pour the batter into the copper molds, leaving a 1 cm border from the top. 
  10. Bake for 15 minutes then reduce the oven temperature to 375 degrees F. Bake for another 45 minutes until the cakes have achieved a golden brown color. Remove the canneles immediately from the copper molds and cool on a wire rack.

Friday, September 29, 2017

Nutella Hazelnut Toffee Magic Cookie Bars

Nutella Hazelnut Toffee Magic Cookie Bars - made September 9, 2017 from Tasty Kitchen
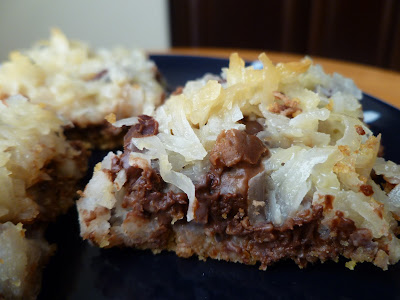
Back to the States and back to the recipes. Magic cookie bars could possibly be the most versatile bar cookies and the easiest ones to make. The basic elements: graham cracker crust, add-ins, coconut and sweetened condensed milk, are what makes a magic cookie bar.
But there’s a lot of wiggle room in the “add-ins” part of the bar. The most common are nuts and chocolate chips of all flavors (milk, dark, white, butterscotch, peanut butter, cinnamon, etc). This version takes it a step further and adds a layer of Nutella on top of the graham cracker crust. The nuts are hazelnuts in keeping with the Nutella theme and I used semisweet chocolate chips.
To make this easier, I would warm the Nutella very slightly, just enough so that it flows easily over the graham cracker crust. The crust isn’t very thick and it’s easy for the graham cracker crumbs to separate and lift off the rest of their brethren valiantly holding the crust together in order to stick to the Nutella if the Nutella is too firm. Microwave the Nutella so it’s more liquid and spreads more easily over the crust.
This version has you putting all the add-ins before laying the coconut over everything then pouring the sweetened condensed milk over it all. That makes for a plain landscape, if you will, since everything is hidden underneath the blanket of coconut. If you want things to look a bit more lively, reserve some of the chopped hazelnuts and chocolate chips to sprinkle over the coconut before you pour the sweetened condensed milk over it all.
This was a good magic cookie bar. Then again, I haven’t met a magic cookie bar I didn’t like. Feel free to get creative. Use more Nutella than the recipe calls for if you’re a Nutella freak; fly that flag! Be generous with the chopped hazelnuts (toast them first to get the best flavor) and the chocolate chips. Spread the coconut with a lavish hand. There’s no wrong way to make this.
1 1/2 cups graham cracker crumbs
1/2 cup melted butter
1/2 cup Nutella or more if desired
1/2 cup toasted hazelnuts, chopped
3/4 cup chocolate chips
1 cup toffee bits
1 cup coconut, flaked or shredded
1 14-ounce can sweetened condensed milk
  1. Preheat oven to 350 degrees F. Line a 9 x 13 pan with foil and lightly spray with nonstick cooking spray.
  2. In a large bowl, combine graham cracker crumbs and melted butter, mixing until combined. Press into an even layer in the bottom of prepared baking pan.
  3. Spread nutella evenly over crust. Layer on the chopped hazelnuts, chocolate chips and toffee bits.
  4. Cover with a layer of coconut then evenly pour the sweetened condensed milk over entire pan.
  5. Bake for 25-30 minutes or until top is slightly golden brown. Cool completely before cutting.