Sunday, May 22, 2016

Yellow Cupcakes with Chocolate Frosting

Yellow Cupcakes with Chocolate Frosting - made April 23, 2016, adapted from I Am Baker

This was originally going to be a yellow cake frosted with chocolate but I was making this recipe for a church potluck that at least 4 kids from Sunday School were going to attend so I made them as cupcakes instead. Because kids and cupcakes. Although I did reserve a little batter to make a small square cake as well.


These turned out okay. I don’t think I’m very good at making cupcakes. I get so paranoid about overbaking them that I have a tendency to take them out a minute or two too early and the cupcakes end up more dense than if I had baked them properly. The texture seemed fine but I think it could've been a bit more fluffy. The vanilla flavor was good though. And the kids liked the frosting. And remember I'm very picky so other people without my level of pickiness probably thought these were good.

2 1/4 cups all-purpose flour
1 1/2 cups granulated sugar
3 1/2 teaspoons baking powder
1 teaspoon salt
1 stick (8 tablespoons) butter, softened
1 1/4 cups milk
1/8 cup vegetable oil
1 tablespoon vanilla extract
3 large eggs
  1. Preheat oven to 350 degrees F.
  2. Combine flour, sugar, baking powder and salt; whisk to combine. Set aside.
  3. Beat butter until creamy, 1-2 minutes. Add dry ingredients and mix briefly.
  4. Add milk, oil, eggs and vanilla extract and beat to combine, 1-2 minutes.
  5. Scoop batter into cupcake liners, dividing evenly. Bake for 15-18 minutes or until a toothpick inserted near the centers come out clean. Cool completely.
Frosting
3 cups powdered sugar
1/2 cup cocoa powder
1/2 teaspoon salt
1 1/2 teaspoons vanilla
1 cup butter, softened
1/4 cup milk
  1. Whisk powdered sugar, cocoa and salt together.
  2. Beat butter until softened and creamy. Alternately add the dry ingredients and milk. Add vanilla. Beat until creamy. Add additional milk or powdered sugar as needed until desired consistency is achieved.

Wednesday, May 18, 2016

Macadamia Chocolate Chip Shortbread Cookies

Macadamia Chocolate Chip Shortbread Cookies - made dough April 16, 2016 from Crazy for Crust
Another portion control alert recipe. I had made this and the coconut sheet cake the same weekend so you can imagine my sugar overload then. But it was worth it.

I love shortbread anyway – all that sugar-butter-vanilla goodness is hard to beat. I didn’t think I would like it with the chocolate chips since I tend to be a vanilla purist. And you know I don’t care for nuts in my cookies. But this one beat the odds by being an exception to my pickiness and overcoming my prejudiced taste buds. Because it was good. Like 2-cookies good. Granted, the cookies are small but still. They warranted a second cookie between my jaws.

What’s different about this cookie is it uses raw cane sugar or turbinado sugar. Don’t be tempted to substitute regular granulated sugar! Run out to Target or Trader Joe’s and buy the real deal. Why? Because that’s what made these cookies so good. Turbinado sugar isn’t as refined as granulated sugar so it didn’t absorb into the dough or melt as much during baking. Consequently, it added a nice sweet random crunch to the cookies, somewhat like when you roll sugar cookies into large sugar crystals for added sweetness and crunch but these are inside the cookie. Pair with the buttery-salty flavor from the macadamia nuts and you have a winner of contrasting/complementing tastes and textures.
The dough tended to be a bit dry and crumbly so you do need to beat it a fair amount to get it to come together. Make sure you beat the butter first to nice, soft, creamy submission before you add the dry ingredients. If your dough isn’t coming together, add a dash more vanilla or vanilla bean paste but you don’t want  this dough soft or sticky. Once it comes together, it’s easy to shape into little thick discs. They hardly spread so they’ll end up mostly the size you shape them in. I like the look of having them be small but hearty-thick discs. That way you can also eat two of them and console yourself that two is okay because “they’re not that big”. Go with it.

1/2 cup unsalted butter, softened
1/3 cup turbinado sugar
1 teaspoon vanilla extract
1 1/4 cups all-purpose flour
1/2 teaspoon salt
1/3 cup macadamia nuts, finely crushed
1/2 cup mini chocolate chips
  1. Beat butter and sugar together until blended. Add vanilla.
  2. Whisk together flour and salt; add to butter mixture, mixing until incorporated and dough comes together.
  3. Add macadamia nuts and mini chocolate chips.
  4. Portion into 1" dough balls and shape into thick discs. Chill for at least an hour.
  5. Preheat oven to 350 degrees F. Line a baking sheet with parchment paper.
  6. Space evenly on baking sheet and bake for 10-12 minutes or until lightly golden. Do not overbake or you won't get the soft texture. Transfer to wire rack and cool completely.

Thursday, May 12, 2016

Vanilla Coconut Texas Sheet Cake

Vanilla Coconut Texas Sheet Cake - made April 16, 2016, adapted from from 5 Boys Baker
Portion control alert! I promised I would flag those recipes that are so good they break my 1-taste-test piece rule. Well, here you go. It’s either that or I had the slowest taste buds in the world that I had to keep trying “just one more bite” of this cake. Yup, it was that good. I had a piece when it was lukewarm and the frosting was still melty. To die for. I had a second piece when it was completely cool and the icing had set “just to make sure”. And to put my mind completely at ease, I had another one before I packaged up the rest to take into work. Granted, they were small-ish pieces but I probably didn’t need 3 over a 24-hour period. I just wanted them.
Why was this so good? First the texture was perfect: soft, cakey and moist plus the coconut I added to the batter gave it a little more chewiness, the good kind. Second, the butter-vanilla overtones were delicious. Unlike chocolate which can be rich enough to stop me at one piece, a really good vanilla cake doesn’t have that kind of failsafe. You just want to keep eating and eating. And eating (hello, third piece of cake).
What will really kill you is how easy this was to make. Since it falls into the Texas Sheet Cake class, it’s a simple matter of boiling the butter and water, adding the rest of the ingredients and mixing then pouring into the pan. That’s it. No waiting for butter to soften or eggs to come to room temperature. You can mix this up in the time it takes your oven to preheat. Just don’t add the eggs while the mixture is still hot or you’ll end up with scrambled eggs in your batter.  Don’t underbake this either or it’ll be too gummy. I baked it just over 30 minutes because I baked it in a 9 x 13 pan, not a sheet pan, since I think a thin slice of cake is hardly worth dirtying up a fork. The toothpick test can fool you so go by how brown the overall top of the cake looks as well as making sure there’s a bit of spring in the center when you push down lightly with your finger on top of the cake. If the cake doesn’t spring back even a little bit and instead remains sunken, your cake’s not done yet.
I cut back on the powdered sugar in the icing but it was still a bit too sweet for me. Go by taste and your preferences but I would recommend less than the 4 cups of powdered sugar in the recipe. I was also generous with the vanilla and vanilla bean paste but that’s because I like 
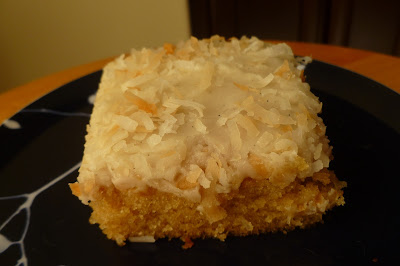
vanilla. And when, not if, I make this cake again, I wouldn’t toast the coconut for the garnish on top and instead go with untoasted, sweetened flaked coconut. I didn’t like the texture contrast with the toasted coconut but I liked the coconut itself, just wanted it to be as chewy as the coconut in the batter. 
I had three people at work tell me after that this was the best thing I’d ever brought in and/or it was their favorite dessert. If that doesn’t convince you to try it, remember me and my jaded taste buds ate 3 pieces, offset by only 2 workouts.
1 cup butter
1 cup water
2 cups flour
2 cups sugar
2 eggs
1/2 cup sour cream
2 teaspoons vanilla extract
1 teaspoon salt
1 teaspoon baking soda
1/2 cup coconut, optional

Frosting
1/2 cup butter
1/4 cup milk
4 1/2 cups powdered sugar (or less if you don't like frosting to be too sweet)
1 1/2 teaspoons vanilla extract
Toasted coconut, optional
  1. Preheat oven to 350 degrees F. Line a 9 x 13 pan with foil and lightly spray with nonstick cooking spray.
  2. In a large saucepan, bring the butter and water to a boil. Remove from the heat and stir in the sugar, eggs, sour cream and vanilla extract. Add the flour, salt and baking soda; stir until just combined.
  3. Pour into prepared pan. Bake for 25-28 minutes or until toothpick inserted in the center comes out clean and top springs back when lightly pressed.
  4. To make the frosting: in a medium saucepan, bring butter and milk to a boil. Remove from heat and add the powdered sugar and vanilla extract. Mix until smooth. Pour over warm cake and garnish with toasted coconut.

Saturday, May 7, 2016

Chocolate Coconut Bliss Cookies

Chocolate Coconut Bliss Cookies - made dough March 13, 2016 from The Monday Box
These are almost like a German chocolate cake in cookie form. I say almost because it doesn't have nuts (you know I don't like nuts in my cookies) or the sweet frosting. But it does have chocolate and coconut.
As you can see, the cookies stayed thick and chubby. They were also moist. I pressed some coconut on top of the cookies before baking as the original recipe recommended and I found that was a good idea so people know what kind of cookie it is: chocolate coconut goodness.

I liked that these were moist and fudgy and I love coconut so this was a good cookie to me. Not much else to say about it except if you're a coconut lover and a chocoholic, you can combine two loves into one cookie with this recipe.

8 ounces semisweet chocolate, chopped
1/4 cup unsalted butter
2/3 cup all-purpose flour
1/2 teaspoon baking powder
1/4 teaspoon salt
2 large eggs
3/4 cup brown sugar, packed
1 teaspoon vanilla extract
1 1/2 cups chocolate chips
1 cup sweetened shredded coconut, divided
  1. Melt chopped chocolate and butter in the top half of a double boiler set over hot, barely simmering water. Whisk until melted and smooth.
  2. In a medium bowl, whisk together flour, baking powder and salt.
  3. In the bowl of an electric mixer, beat eggs, brown sugar and vanilla until fluffy.
  4. Mix in melted chocolate-butter mixture.
  5. Add in flour mixture until just combined.
  6. Stir in chocolate chips and 1/2 cup coconut.
  7. Scoop into golf-ball-size dough balls, press a handful of coconut over each dough ball, cover and chill for several hours or overnight.
  8. Preheat oven to 350 degrees F. Line two baking sheets with parchment paper.
  9. Evenly space frozen dough balls on baking sheets. Bake for 10-12 minutes. Cool on baking sheet for 5 minutes then remove to wire rack to cool completely.

Tuesday, May 3, 2016

Oatmeal Chocolate Chip Cookies swirled with dulce de leche

Oatmeal Cookies Swirled with Dulce de Leche - made dough April 9, 2016 from Milk & Cookies by Tina Casaceli
I've thinned out my collection of baking books somewhat but still have a goodly number of them so I still feel the need to keep trying recipes from them just to get some use out of them. It's just been so easy to troll for recipes on pinterest that I have to keep reminding myself to use the recipes on my bookshelves too.

I went with this one from Milk & Cookies as it was supposed to be the "base dough" for oatmeal cookies. That means it was intended to be versatile for add-ins to make different kinds of oatmeal cookies. I decided to fancy it up with dulce de leche. My initial plan was to "stuff" dulce de leche inside a cookie dough ball so when the cookies baked, I hoped they would stay thick so that when you bit into one, creamy dulce de leche would be in the middle of the bite. I laid out a little cookie dough inside a mini muffin cavity, dropped a scoop of dulce de leche in the middle, covered with more cookie dough and sealed into a ball.
Ah, the best-laid plans. It turns out "stuffing" dulce de leche inside an oatmeal cookie works fine when you're working with the dough. But come baking time, the oatmeal in the dough doesn't make for good walls to keep the dulce de leche trapped inside. When I baked them, not only did the cookies spread more than I would have liked, the dulce de leche also leaked out and settled on the bottom of the cookie. Alas, cookie fail.
But it was only partial failure as the cookies caramelized nicely thanks to the brown sugar and the dulce de leche ended up more swirled than stuffed inside the cookie. Which still made for some yumminess in the cookie itself. So although they didn't adhere to my original vision and they may not be all that to look at, these were still pretty delicious.

1 1/2 cups all-purpose flour
1 tablespoon ground cinnamon
1 teaspoon baking soda
1/2 teaspoon salt
1 1/2 cups (12 ounces) unsalted butter
1 cup (7 ounces) light brown sugar, firmly packed
1/2 cup (3 1/2 ounces) granulated sugar
2 large eggs
1 tablespoon pure vanilla extract
3 cups (9 ounces) old-fashioned rolled oats
2 cups chocolate chips, optional but recommended
  1. Combine the flour, cinnamon, baking soda, and salt; set aside.
  2. Cream the butter in the mixing bowl of a stand mixer using the paddle attachment. Gradually add the brown sugar then the granulated sugar. Beat at medium speed for about 4 minutes or until light and creamy.
  3. Add the eggs, one at a time, and beat just to incorporate, scraping down the sides of the bowl with a rubber spatula. Beat in the vanilla to combine. Gradually add the dry ingredients and the oats. Do not overmix. Mix in chocolate chips with wooden spoon.
  4. Portion dough into 1/2-golf-ball-size balls, flatten slightly, place a scoop of dulce de leche in the center, cover with second 1/2 ball of dough and seal, rolling into ball. Repeat with remaining dough. Chill or freeze, covered, for several hours or overnight.
  5. When ready to bake, preheat oven to 350 degrees F. Line several baking sheets with parchment paper and evenly space dough balls about 2 inches apart.
  6. Bake for 12-15 minutes or until light browned at the edges and middles no longer look raw or shiny. Remove from oven, let cool for 2 minutes then, using a small metal spatula, transfer cookies to wire racks to cool completely.

Saturday, April 30, 2016

Soft Baked Red Velvet Cookies

Soft Baked Red Velvet Cookies - made dough March 19, 2016 from Bakes by ChiChi
I’m kind of ambivalent about these cookies. I certainly like the artistic concept of them: wonderfully dark red cookies with white chocolate chunks for interesting contrast in appearance, taste and texture. But I think I missed somewhere on execution because mine didn’t look as good as the original blog I got the recipe from. Plus I wasn’t wowed by the taste. It’s possible I just wasn’t in the mood for cookies or red velvet at the time I made these (pigs do fly, you know) or I didn’t bake them properly or something.

It’s a standard cookie recipe in that you throw the ingredients together and I followed my normal process of making dough balls, freezing them and baking off the frozen dough for less spread. These did spread somewhat so that was a disappointment. They weren’t as pretty as the ones I was trying to copycat from the original blog. And the taste didn’t grab me either even though I used the good cocoa.

I know, not a rousing endorsement, eh? You could still try them, especially for Valentine’s Day, Christmas, Memorial Day and 4th of July. But I think I’ll stick with my red velvet cookies with cream cheesefrosting if I really want red velvet.

1/2 cup unsalted butter, room temperature
1/4 cup full fat cream cheese
3/4 cup brown sugar
1/4 cup superfine granulated sugar
1 3/4 cups all-purpose flour
1/8 cup cocoa powder
1 teaspoon baking soda
1 egg
2 teaspoons vanilla extract
1 teaspoon white vinegar
1 tablespoon milk
red food coloring
1 1/2 to 2 cups white chocolate chips or chunks
  1. In the bowl of a stand mixer, beat butter, cream cheese and sugars until light and fluffy, about 4 minutes.
  2. Sift together flour, cocoa powder and baking soda; set aside.
  3. Whisk together egg, vanilla extract, vinegar. milk and red food coloring. Add to sugar mixture and mix until combined.
  4. With the mixer on low speed, slowly add flour mixture and eat just until combined. Do not overmix. Mix in white chocolate chips and/or chunks.
  5. Portion dough into golf-ball-size dough balls and flatten slightly into thick discs. Cover and chill or freeze overnight or for several hours.
  6. Preheat oven to 350 degrees F. Line several baking sheets with parchment paper.
  7. Evenly space discs on baking sheets and bake 9-11 minutes or until edges are set and middles no longer look raw. Remove from oven and let cool for 5 minutes before moving cookies to wire racks to cool completely.

Monday, April 25, 2016

Soft Nutella Chocolate Chip Cookies - hold the chips

Soft Nutella Chocolate Chip Cookies - made dough March 19, 2016 from American Heritage Cooking
Usually I’m good about following a new recipe exactly then making modifications later on. But sometimes I get bold and, coupled with a flash of inspiration, I’m getting more comfortable with just doing my own baking thing. There’s no law that I have to follow a recipe exactly the way it’s laid out. That was just my own mantra. But hey, mantras can change.
Sometimes I just look at a picture of a cookie and immediately want to make it so I can have something that looks as good as that picture I saw. Sometimes it turns out, sometimes it doesn’t. I was inspired by the picture of this one because you can tell just by looking at it that the texture is going to be perfect. Chewy, soft perfection. And because I wanted that chewy soft perfection to be unmarred by the more rigid texture of chocolate chips, I decided to omit the chips completely and instead, added dollops of Nutella in the batter. Because I figured the 1/3 cup of Nutella that goes directly into the batter couldn’t be enough to make it super Nutella-y, right? So why not actual pools of Nutella swirled throughout the cookie?

So that’s what I did. I made the cookie dough first, dropped Nutella dollops on top, “swirled” it once or twice with a spatula (and I mean swirl, not mix or else you’re just incorporating the Nutella into the dough again and not leaving distinct pockets of Nutella), then scooped out into balls of dough. You want generous amounts of pure Nutella in each dough ball. Freeze then bake later on. These turned out pretty well and I was glad I made the modification because then they really were “Nutella cookies”. And delicious ones at that.
1 3/4 cups all-purpose flour
2 teaspoons cornstarch
1 teaspoon baking soda
pinch salt
1/2 cup unsalted butter, softened
heaping 1/3 cup Nutella
1/2 cup light brown sugar, packed
1/4 cup granulated sugar
1 large egg
2 teaspoons vanilla extract
1/2 cup Nutella (or more), for dolloping
  1. Whisk together flour, cornstarch, baking soda and salt in a medium bowl; set aside.
  2. Beat together butter, Nutella, sugars, egg and vanilla on medium-high speed in the bowl of a stand mixer fitted with the paddle attachment until well combined, about 3-4 minutes. 
  3. Reduce speed to low and slowly add the flour mixture until just combined, scraping down the sides of the bowl.
  4. Dollop the Nutella on top of the dough and swirl very slightly. Do not try to mix into the dough but leave distinct swirls of Nutella. Scoop into golf-ball-size dough balls, cover and chill or freeze for several hours or overnight.
  5. When ready to bake, preheat oven to 350 degrees F. Line baking sheets with parchment paper. Evenly space dough balls about 2 inches apart on baking sheets. Bake 9-11 minutes or until the edges are set and the middles no longer look raw or shiny. Let cool for 5 minutes before moving to wire rack to cool completely.