Monday, November 16, 2009

Peanut Butter Brownies


Peanut Butter Brownies - first baked 6.26.09, now baking 11.16.09

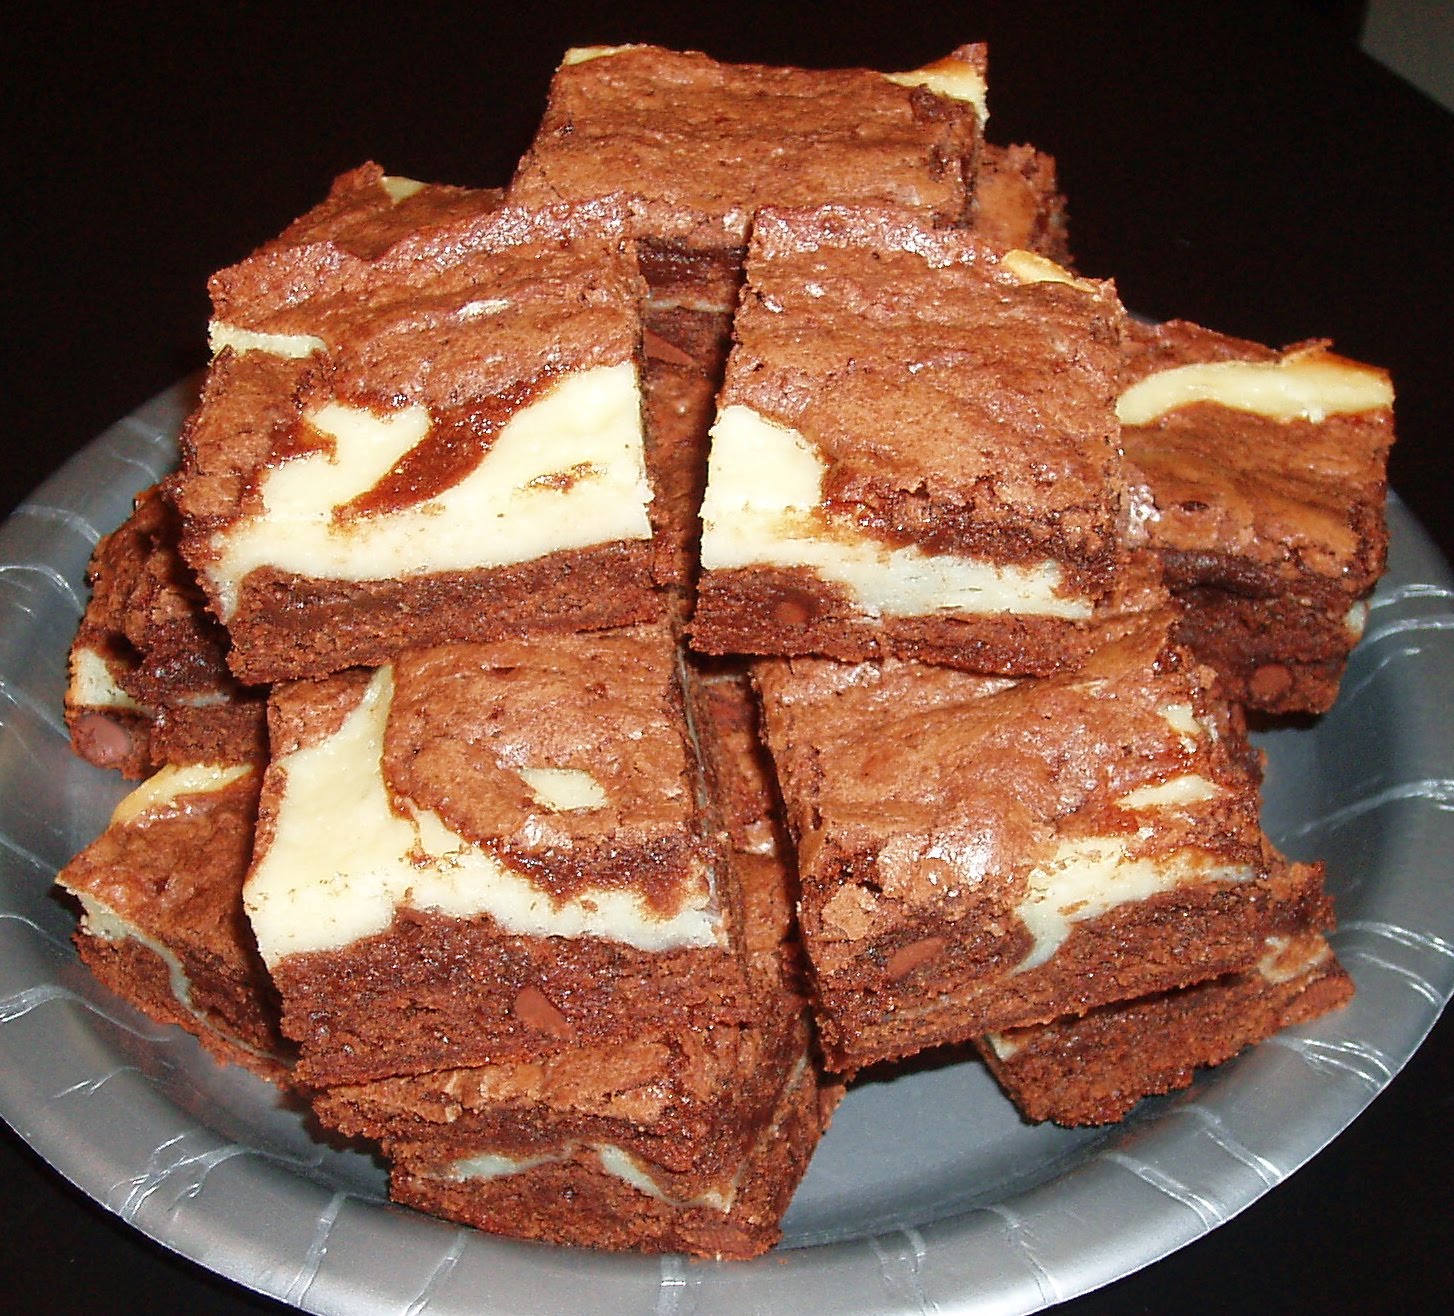
I have these brownies in the oven right now. I'd made these once before, hence where the current picture comes from. If you like peanut butter, these are good brownies to make. It's a peanut butter layer on the bottom, then the brownie layer and you sprinkle peanuts on top before baking. Despite my diatribe against nuts in brownies, I'm okay with them when they're layered on top. In culinary school, our chef instructor always told us if you're going to mix the nuts into a batter or dough, you should always toast them first to bring out the flavor. If they're going to be baked on top of something and (theoretically) will be toasted as part of the baking, there's no need to toast them. I ignore that direction because I always toast nuts first before using them, no matter how they're being used. It brings out their flavor and makes them a bit more crunchy. Can't trust that to happen if you put them on top of wet dough or a soft batter. Toast 'em first.

This recipe is from The Good Cookie by Tish Boyle, also another good baking book to have. Most, if not all, of the recipes I've tried from this book have turned out pretty well and it offers more than just the standard cookie or brownie. When you've made as many brownies and cookies as I have over the years, you'll want something a little different from the norm as well.

Peanut butter layer
1 cup creamy peanut butter
1/3 cup granulated sugar
1 large egg

Brownie layer
1 cup granulated sugar
1/3 cup firmly packed light brown sugar
½ cup (1 stick) unsalted butter, cut into tablespoons
2 ounces unsweetened chocolate, coarsely chopped
1 tablespoon light corn syrup
½ cup all-purpose flour
½ teaspoon baking powder
1/8 teaspoon salt
2 large eggs, at room temperature
1 ½ teaspoons vanilla extract
¼ cup unsalted peanuts, chopped

1. Position a rack in the center of the oven and preheat the oven to 325°F. Line an 8-inch square baking pan with aluminum foil so that the foil extends 2 inches beyond two opposite sides of the pan. Lightly butter the bottom and sides of the pan.
Make the peanut butter layer
2. In the bowl of an electric mixer, using the paddle attachment, beat the peanut butter, sugar and egg at medium speed until blended, about 1 minute. Scrape the mixture into the prepared pan and smooth or pat it into an even layer. Set aside.
Make the brownie layer
3. In a medium saucepan, combine the sugars, butter, chocolate and corn syrup. Heat over low heat, stirring constantly, until melted and smooth. Remove the pan from the heat and let cool for 20 minutes, or until tepid.
4. In a small bowl, whisk together the flour, baking powder and salt; set aside.
5. Whisk the eggs one at a time, into the cooled chocolate mixture, mixing well after each addition. Whisk in the vanilla extract. Using a wooden spoon, stir in the flour mixture until blended. Scrape the brownie batter over the peanut butter layer and smooth the top with a rubber spatula. Sprinkle the peanuts evenly over the batter.
6. Bake the brownies for 45 to 52 minutes, or until a toothpick inserted in the center of the brownies comes out with a few moist crumbs clinging to it.
7. Cool the brownies in the pan on a wire rack for 1 hour, then cover the pan with plastic wrap and refrigerate for at least 2 hours until chilled.
8. Using the ends of the foil as handles, lift the brownies out of the pan. Using a sharp knife, cut into 9 squares. Serve chilled.

Store in an airtight container in the refrigerator for up to a week.

Chocolate Chip Fudge Cake

Chocolate Chip Fudge Cake - baked November 15, 2009

This is what I would call a “picnic cake”. Because you don’t frost it, it’s easy to pack up and take along with you or send in a care package. It’s easy to make in one bowl, you bake it on one pan and you just cut and serve. At first I thought this cake wouldn’t be very chocolaty because it doesn’t have that much baking chocolate but the chocolate chips make up for it. It has a perfect cakey texture which I like in all my cakes – it’s lighter than a pound cake but more dense than a sponge cake. So I consider it “cakey”. If you’re short on time, this is a great cake to throw together. Just watch the baking time – because the batter fills up the pan to make a thick layer, you have to make sure you bake it long enough for the middle to bake but not so long that the corners and ends dry out.

This recipe is also from Fearless Baking by Elinor Klivans. So far, I’m really liking this baking book. I’ve probably made at least a dozen or more recipes from it and only one didn’t turn out (an orange layer cake). But all the others have been so good that I’m thinking that the one failure was more my fault than the book’s because I don’t think I baked the orange cake layers long enough. I may have to try it again just to make sure it wasn’t operator error. The only thing about the book is the directions are somewhat long-winded since she’s aiming for a more novice audience. I tend to skim the directions to get the gist of it then do my own thing. For instance, I don't see the point of melting the unsweetened chocolate in the oven as this recipe calls for. I always melt my chocolate over a double boiler so I can stir it as needed and don't have to bother with popping something in and out of the oven or the microwave. You run less risk of burning the chocolate this way too.

Chocolate Chip Fudge Cake

3 ounces unsweetened chocolate, chopped
1 ¼ cups unbleached all-purpose flour
1 teaspoon baking powder
½ teaspoon baking soda
¼ teaspoon salt
¼ pound (1 stick) soft unsalted butter
1 cup plus 2 tablespoons granulated sugar
2 large eggs
2 teaspoons vanilla extract
1 cup sour cream
½ cup water
1 2/3 cups (10 ounces) semisweet chocolate chips
Powdered sugar for dusting the top of the cake, optional

1. Mix the cake: Position an oven rack in the middle of the oven. Preheat the oven to 175˚F. Butter the bottom and sides of a 9 x 9 x 2-inch square baking pan or an 11 x 7 x 2-inch rectangular baking pan.
2. Put the unsweetened chocolate in a small ovenproof container and place it in the oven to melt. It will take about 12 minutes to melt. As soon as the chocolate melts, remove it from the oven and stir it smooth. Increase the oven temperature to 325˚F. Set the chocolate aside to cool slightly while you mix the cake.
3. Sift the flour, baking powder, baking soda, and salt together onto a piece of wax paper or into a medium bowl and set aside.
4. Put the butter and granulated sugar in a large bowl and beat with an electric mixer on medium speed until the mixture looks smooth and creamy, and the color lightens, about 2 minutes. Move the beaters around in the bowl if using a handheld electric mixer. Stop the mixer and scrape the mixture from the sides of the bowl and any that becomes caught in the beaters as needed throughout the mixing process. Decrease the speed to low and mix in the melted chocolate, mixing just to combine it with the other ingredients. Increase the speed to medium and add the eggs, one at a time, beating for 1 minute after adding each egg. Decrease the speed to low and add the vanilla and sour cream, mixing just until the sour cream is incorporated. Add half of the flour mixture and mix to incorporate the flour. Add the water, mixing to incorporate it. Add the remaining flour mixture, mixing just to incorporate it. Stop the mixer and scrape the sides of the bowl after the last addition of flour. The batter is ready when the final addition of flour is mixed completely into the batter. If any flour is clinging to the sides of the bowl, stir it into the batter. Use a large spoon to stir in the chocolate chips.
5. Use a rubber spatula to scrape all of the batter into the prepared pan, spreading it evenly.
6. Bake and serve the cake: Bake for about 40 minutes, until the top feels firm and a toothpick inserted in the center of the cake comes out slightly sticky but not coated with liquid. If the toothpick penetrates a chocolate chip, test another spot. Cool the cake thoroughly in its pan, about 1 ½ hours. Dust with powdered sugar if desired. Cut into squares to serve. Leave leftover cake in the pan, and cover and store it at room temperature for up to 3 days.

Chocolate Chip Cookie & Fudge Brownie Pie

I’ve had people tell me how much they enjoy reading this blog which is nice to hear as sometimes I feel like I’m just talking to myself (which is okay too as I do that all the time anyway, lol). But if you do end up making a recipe that I’ve posted and made changes that made it better (or worse), I’d love to hear about it via a comment here or an email. Or even if you just tried a recipe and liked it or hated it or had questions, let me know. I’m always trying new recipes and like to experiment so it’s fun to hear of other people’s experiences as well. I’ll always post the recipe as is from wherever I got it from but if I make any changes, I’ll note it in the blog post itself. And don’t worry about hurting my feelings if something turned out terribly or not to your liking. We all have different tastes and I don’t expect everyone to share my taste buds. Otherwise, the world would be overrun in milk chocolate, chocolate chip cookies would only be eaten 10 minutes out of the oven, there’d never be nuts in brownies, fruit would mostly be eaten by itself and not incorporated into anything, jam and jelly might as well go out of existence, and shortening and margarine would be banished forever. In case you can’t tell, I have very strong likes and dislikes about baked goods. In the words of my friend Albie, “I like what I like and I want things the way I want them.” Yeah, that.

Yesterday afternoon, I had another bakefest. I'd already blogged about the Double Fudge Cream Cheese Brownies. The 2nd thing I made was Chocolate Chip Cookie & Fudge Brownie Pie – the title of this recipe pretty much speaks for itself. You start with a chocolate chip cookie layer, partially bake the chocolate cookie crust, take it out and let it cool for 30 minutes so the center will sink and the edges will be slightly raised like a pie. Then you “fill” the top with a brownie layer. This is my kind of pie.

I actually didn’t bake it in a pie pan because I was portioning it out to give away and it’s easier to cut from a square than a round shape so I made it in an 8-inch square baking pan instead of a 9-inch pie pan. I was originally going to make it in a 9-inch square baking pan instead of a pie pan but the batter seemed so little that I thought using a 9-inch pan might make the “crust” a little too thin. Consequently, this turned out to be more of a two-layer confection than any kind of pie. But it also turned out pretty well so you can call it whatever you want. After partially baking the chocolate cookie crust, I barely (and purposely) baked the pie with the brownie topping for the 20 minutes that the recipe called for. So the “topping” turned out pretty soft and fudgy. I think if you bake it longer, it’ll be more firm but that wasn’t the texture I was going for. Since this is two layers, putting it together might seem like it takes a bit longer but it’s not that hard. Make the chocolate chip cookie crust first and while it’s partially baking and cooling, you can make the brownie topping.


Chocolate Chip Cookie & Fudge Brownie Pie - from Fearless Baking by Elinor Klivans, baked 11.15.09

Chocolate Chip Cookie Crust
¾ cup unbleached all-purpose flour
½ teaspoon baking soda
¼ teaspoon salt
5 tablespoons soft unsalted butter
1/3 cup packed light brown sugar
3 tablespoons granulated sugar
1 large egg
½ teaspoon vanilla extract
1 cup (6 ounces) semisweet chocolate chips

Brownie Topping
6 tablespoons (¾ stick) unsalted butter, cut into 8 pieces
3 ounces semisweet chocolate, chopped
1 ounce unsweetened chocolate, chopped
¼ cup unbleached all-purpose flour
¼ teaspoon baking powder
1/8 teaspoon salt
1 large egg
6 tablespoons granulated sugar
1 teaspoon vanilla extract

1. Mix and bake the crust: Position a rack in the middle of the oven. Preheat the oven to 325˚F. Butter a 9-inch pie pan.
2. Sift the flour, baking soda, and salt together onto a piece of wax paper or into a medium bowl and set aside.
3. Put the butter, brown sugar, and granulated sugar in a large bowl and beat with an electric mixer on medium speed for about 1 minute until the mixture looks smooth and creamy. Move the beaters around in the bowl if using a handheld electric mixer. Stop the mixer and scrape the mixture from the sides of the bowl and any that becomes caught in the beaters as needed throughout the mixing process. Mix in the egg and vanilla until they are blended in thoroughly. Decrease the speed to low and add the flour mixture, mixing just until it is incorporated and there is no loose flour. Use a large spoon to stir in the chocolate chips. Use a rubber spatula to scrape all of the dough into the pie pan, spreading it evenly over the bottom of the pan. Bake 15 minutes. Cool 30 minutes. The center will sink slightly.
4. Mix the topping: Put the butter, semisweet and unsweetened chocolate in a heatproof container set over, but not touching, barely simmering water in a saucepan. Stir the mixture often over the hot water until the butter and chocolate are melted and smooth. As soon as the chocolate mixture melts, remove the container from over the water and set it aside to cool slightly for about 5 minutes.
5. Stir the flour, baking powder, and salt together in a small bowl and set aside.
6. Put the egg, granulated sugar, and vanilla in a large bowl and beat with an electric mixer on medium speed for about 1 minute until the mixture thickens and the color lightens slightly. Move the beaters around in the bowl is using a handheld mixer. Decrease the speed to low and mix in the melted chocolate, mixing just to combine it with the other ingredients. Add the flour mixture, mixing just until the flour is incorporated. Use a rubber spatula to scrape all of the batter over the partially cooled chocolate chip cookie layer, spreading it evenly.
7. Bake and serve the pie: Bake for about 20 minutes, until a toothpick inserted in the center of the brownie layer comes out with a few moist crumbs, but not wet batter, clinging to it. Cool the pie thoroughly in the pan.
8. Serve the pie at room temperature. Leftover pie can be covered with plastic wrap and stored at room temperature up to 3 days. Ice cream and warm old-fashioned hot fudge sauce make a good accompaniment.

Sunday, November 15, 2009

Double Fudge Cream Cheese Brownies

This is one of the very first brownie recipes I remember making from scratch that I still bake to this day. I think I probably discovered this recipe in my early college days or thereabouts, around the same time I found the lemon bar recipe and from the same cookbook. I'd said I wasn't a big fan of cream cheese and this recipe has just 3 ounces of it - perfect :). The thing to watch for with this recipe and any other brownie recipe that's baked in a 9 x 13 pan is the baking time. With this size pan, it's so easy to overbake the edges and corners while waiting for the middle to bake. Just keep an eye on it. You'll know it's done when a toothpick inserted in the corner comes out clean and one inserted in the middle comes out with moist crumbs but not raw batter.

I made these again tonight to freeze and use throughout the week - work meetings, social gatherings and possibly to bring down to Southern CA this weekend when my parents and I make the drive down for Thanksgiving week. In fact, this is pretty much going to be brownie baking week since brownies are so versatile and travel well.
Double Fudge Cream Cheese Brownies from Land O Lakes Treasury of Country Recipes - made 11.15.09

Brownies:
1 cup butter
4 ozs unsweetened chocolate
2 cups sugar
1 1/2 cups all-purpose flour
4 eggs, slightly beaten
1 teaspoon salt
1 teaspoon baking powder
2 teaspoons vanilla extract
1 cup semisweet chocolate chips

Filling
¼ cup sugar
2 tbsp butter, softened
3-oz package cream cheese, softened
1 egg
1 tbsp flour
½ teaspoon vanilla

1. Heat oven to 350˚F.
2. In a 2-quart saucepan, combine 1 cup butter and unsweetened chocolate. Cook over medium heat, stirring occasionally until melted (4-6 minutes). Stir in remaining brownie ingredients except chocolate chips. Fold in chocolate chips. Spread half of batter into greased 9” x 13” baking pan.
3. In small bowl, stir together all filling ingredients. Spread over brownie mixture. Spoon remaining batter over cream cheese (batter will not entirely cover cream cheese mixture). Bake for 30-35 minutes or until brownies begin to pull away from sides of pan.


Friday, November 13, 2009

Brrrrr-ownies

At work we’re having a fundraising drive for our employee foundation which grants money to various charities that are championed by employees. Within my group, we’ve been having a little competition on which group can get their donation rate the highest and for the past couple of days I’ve been bringing in brownies to the group in the lead – they were the recipients of the Black Bottom Brownies yesterday. Last night I made these brownies to bring in for them today.

Whenever I need to bring in something, I flip through my collection of 202 baking cookbooks (I kid you not, I have that many and I know I do because I made myself count them so I could stop being in denial over how many I actually have) and see what I can make. Most people might stick to a tried and true recipe but I can usually read through a recipe and gauge how well it’ll turn out. Either that or I’m willing to take the risk. Plus I like trying out new recipes because it makes me feel like I can justify having 202 baking books.

Most brownie recipes are pretty basic but can be dressed up accordingly. That’s what I did with these. They’re called Brrrrr-ownies - the “brrrrr” affectation was meant to refer to the York peppermint patties the original recipe calls for and these are supposed to be mint chocolate brownies (“brrrr”, cold, mint, get it?). I like mint and I like chocolate but not together. To me, that’s like brushing my teeth then eating a piece of chocolate. Uh, no. So I took the liberty of substituting Snickers bars for the peppermint patties and I think that worked just fine. I put some pieces of Snickers in the batter itself but also sprinkled Snickers liberally over the top of the brownie batter before putting the pan in the oven. They partially melted and partially sank into the batter but I think that gives the brownies some character. The brownie itself is a nice, fudgy texture which serves as a good backdrop for the Snickers. For the unsweetened chocolate, I just used Baker’s unsweetened which is available at any grocery store (orange box sold in 8-ounce packages) and for the bittersweet chocolate, I used Guittard’s semisweet baking chocolate which I bought at Sur La Table. They come as “buttons” and are sold by the box. These aren’t the same as chocolate chips and are more used or better used as baking chocolate. You can also use bittersweet chocolate like Lindt, Valrhona, or any other good-quality chocolate. You can find good brands at reasonable prices and they’re worth it.


Brrrrr-ownies from Baking From My Home to Yours by Dorie Greenspan, baked 11.12.09

5 tablespoons unsalted butter, cut into 5 pieces
3 ounces bittersweet chocolate, coarsely chopped
3 ounces unsweetened chocolate, coarsely chopped
2/3 cup sugar
2 large eggs
1 teaspoon pure vanilla extract
Pinch of salt
1/3 cup all-purpose flour
1 cup (6 ounces) York Peppermint Pattie Bites (or an equal weight of patties), chopped into bits

1. Center a rack in the oven and preheat the oven to 325˚F. Line an 8-inch square baking pan with foil, butter the foil and place the pan on a baking sheet.
2. Set a heatproof bowl over a saucepan of gently simmering water. Put the butter in the bowl, top with the chopped chocolates and stir occasionally until the ingredients are just melted – you don’t want them to get so hot that the butter separates. Remove the bowl from the pan of water.
3. With a whisk, stir in the sugar. Don’t be concerned when your smooth mixture turns grainy. Whisk in the eggs one by one. Add the vanilla and whisk vigorously to bring the batter together and give it a shine before gently stirring in the salt and flour; stir only until incorporated. Switch to a rubber spatula and fold in the peppermint pieces. Scrape the batter into the pan and smooth the top with the rubber spatula.
4. Bake the brownies for 30 to 33 minutes, or until the top is dull and a thin knife inserted into the center comes out almost clean. (The tip of the knife may be a touch streaky.) Transfer the pan to a rack and cool to room temperature.
5. When they are completely cool, turn out onto a rack, peel away the foil and invert onto a cutting board. Cut into sixteen 2-inch squares.

Thursday, November 12, 2009

Black Bottom Brownies

Black Bottom Brownies - November 11, 2009

The real baking therapy last night were these brownies - "Black Bottom Brownies" from the Sweet Melissa Baking Book. I had said yesterday was such a bad day that I needed more baking therapy than popping frozen cookie dough into the oven and these brownies were it. This is a brownie layer on the bottom and a chocolate chip cheesecake layer on top. For the most part, these turned out okay. People at work liked them (it was a 5-compliment, stop-me-in-the-hallway-to-tell-me-so brownie) but I'm my own worst critic and I think these could've been better. For one thing, they were so thick and it took so long to bake the cheesecake layer that the bottom brownie layer dried out at the corners and edges and even a bit in the middle. If you look closely at the picture, the lighter color of the very bottom of the brownies contrasts with the darker color of the brownie right underneath the cheesecake layer. The lighter the color, the drier the brownie. And we know how I feel about dry brownies. You'll also notice some of the tops of the cheesecake layer are browned golden and some are creamy white. That's because the edges and corners turned golden in the time it took for the cheesecake layer to set while the middle remained pale.

If I make these again, I would probably use less brownie batter and/or make it more liquid. You'd lose the dense texture but it might help with the moisture issue. And I would take it out sooner even though the cheesecake layer didn't look done and just let the cheesecake chill and firm. I actually baked it for 5 minutes less than the recipe suggested but that was still too long for the brownie layer. Although the recipe called for regular chocolate chips, I used the mini chocolate chips for aesthetic reasons - mini chips look prettier in a cheesecake layer.

Here's another little-known fact about me: I don't like cheesecake. Which may be another reason I'm only lukewarm on these brownies. Some people are astounded that I don't like cheesecake. We'll call them (duh) cheesecake lovers. I'm not one of them. Cheesecake lovers can wax poetic about all kinds of cheesecake while I look baffled. I can handle a little cream cheese but it needs to be mixed with something else like chocolate. A cream cheese swirl brownie? Okey-doke. This kind of layered cheesecake brownie? Okaaaaaayyyyyy. An actual cheesecake? Nah. I just don't like the taste of cream cheese that much and need it diluted by a stronger flavor like chocolate.

I still remember when I worked at eBay and my coworkers surprised me on my birthday with a cheesecake from The Cheesecake Factory. It was so nice of them that of course I couldn't tell them I didn't like cheesecake. So I sucked it up and ate a piece. Fortunately they got chocolate cheesecake so it went down better than a plain cheesecake.

Black Bottom Brownies

For the brownie bottom
6 ounces best-quality unsweetened chocolate
½ pound (2 sticks) unsalted butter
1 2/3 cups all-purpose flour
½ teaspoon baking powder
½ teaspoon kosher salt
4 large eggs plus 2 large egg yolks
2 cups sugar
1 tablespoon pure vanilla

For the cheesecake layer
1 pound (two 8-ounce packages) cream cheese, at room temperature
1 ½ cups sugar
¼ teaspoon kosher salt
6 large eggs
1 ½ teaspoons pure vanilla extract
2 cups (one 12-ounce package) semisweet (58%) chocolate chips

1. Position a rack in the center of your oven. Preheat the oven to 325˚F. Lightly butter a 9 x 13” pan. Line the pan with parchment paper or aluminum foil.
2. In the top of a double boiler over simmering, not boiling, water, melt the chocolate and the butter, stirring to combine. Set aside to cool to warm.
3. In a medium bowl, whisk together the eggs, egg yolks, sugar and vanilla until smooth.
4. Pour the chocolate mixture into the egg mixture and combine with a whisk. Add the flour mixture to the chocolate/egg mixture and stir until just combined. Pour the brownie batter into the prepared pan, and spread evenly.
5. To make the cheesecake layer: In the bowl of an electric mixer fitted with the paddle attachment, cream together the cream cheese, sugar and the salt until light and fluffy, about 5 minutes. Add the eggs, 2 at a time, and mix well after each addition. Scrape down the sides of the bowl. Stir in the vanilla.
6. To complete the brownies: Pour the cheesecake mixture over the brownie layer. Sprinkle the chocolate chips evenly over the cheesecake layer.
7. Bake for about 1 hour and 15 minutes or until lightly golden. Remove to a wire rack to cool. Cool completely before slicing and store in an airtight container in the refrigerator. May be served cold or at room temperature.

Wednesday, November 11, 2009

Baking Therapy & Chewy Peanut Butter Cookies


Everyone needs at least one coping mechanism, whether it's to deal with the stresses of the job, family issues, relationships, random occurrences or just whatever life throws at you. In case it's not obvious, one of my coping mechanisms is baking (the other two are exercise and reading, in case you're wondering). There's something comforting about the act of baking itself, regardless of what I'm making, that helps me cope and deal with life in general. I can shake off a bad day, soothe tumultuous thoughts and emotions, and just get myself re-calibrated with a baking (therapy) session. It's not even about the end product as oftentimes I don't eat what I make. I give it away and that in itself helps too because I like sharing what I make.

Today was a bad day. I had planned on baking tonight anyway because I was meeting a few coworkers for a birthday lunch (one of theirs, not mine) but this kind of day called for more than just popping the peanut butter cookie dough I'd made over the weekend and baking them. This kind of day called for baking. But let's do the peanut butter cookies first - this is the 4th recipe I've tried from the Sweet Melissa Baking Book. Actually I had baked a batch of these last night and tried one for lunch today. The rest of the dough I baked off tonight to bring in tomorrow. If you like soft, chewy, straightforward, no frills peanut butter cookies, this is a good one to try. The dough was soft when it was first made so if you don't chill or freeze them first, I suspect they would spread a lot. As it was, I froze the dough balls and they still spread but it was okay. Don't expect these to be thick and chunky - they had the typical spread of a cookie. Because I baked them from frozen dough, I couldn't/didn't make the cross hatches with a fork that's typical of peanut butter cookies but given how the cookies spread, I don't think any cross hatches would've been that pronounced anyway. Overall, a good cookie. So far the recipes from the Sweet Melissa Baking Book have been turning out.

Chewy Peanut Butter Cookies - November 11, 2009

½ cup smooth peanut butter
8 tablespoons (1 stick) unsalted butter
½ cup granulated sugar
½ cu firmly packed light brown sugar
1 large egg
1 ¼ cups all-purpose flour
½ teaspoon baking powder
¾ teaspoon baking soda
¼ teaspoon salt

1. Position a rack in the top and bottom thirds of your oven. Preheat the oven to 325˚F. Line two cookie sheets with parchment paper or aluminum foil.
2. In the bowl of an electric mixer fitted with the paddle attachment, cream the peanut butter with the butter and sugars until light and fluffy, 3 to 4 minutes. Beat in the egg.
3. In a separate bowl, whisk together the flour, baking powder, baking soda, and salt.
4. Add the flour mixture to the peanut butter mixture and mix until combined. Be sure to scrape down the sides of the bowl so that everything is combined evenly.
5. Scoop the dough by the rounded tablespoonful and roll into balls. Place the balls about 2 inches apart on the prepared cookie sheets, and press down slightly. Using a fork dipped in flour, press down on the cookies first one way and then the other to form an “X” pattern, creating the crosshatch effect. (The cookies should now measure approximately 2 inches in diameter.) Bake for 10 minutes, or until the edges are lightly golden. Overbaking will cause these chewy cookies to become crunchy so try to avoid it.