Thursday, May 25, 2023

Double Chocolate Nutella Toffee Cookies from Buuck Farms

Double Chocolate Nutella Toffee Cookies - made dough May 15, 2023, adapted from Buuck Farms Bakery
1/2 cup unsalted butter, softened
3/4 cup (155 grams) dark brown sugar
2 tablespoons (25 grams) granulated sugar
1 large egg, room temperature
1 teaspoon vanilla extract
1 1/4 cups (190 grams) all-purpose flour
1/2 cup (50 grams) Dutch process cocoa powder
1/2 teaspoon baking soda
1/4 teaspoon salt
1 cup semisweet chocolate chips
1/4 cup Nutella
chopped toffee or toffee bits
  1. In the bowl of a stand mixer fitted with the paddle attachment, cream butter, brown sugar and granulated sugar for 2-3 minutes, scraping down sides and bottom of bowl as needed.
  2. Add egg and vanilla; mix for another 3 minutes, until fluffy and lightened in color.
  3. In a separate bowl, whisk together flour, cocoa powder, baking soda and salt. 
  4. Add dry ingredients to mixer in 2 additions beating on low speed after each addition until just combined. Fold in chocolate chips.
  5. Portion dough into golf-ball size dough balls. Make an indent in the center of each dough ball with the back of a spoon. Fill indent with Nutella. Cover and chill dough for 30 minutes up to overnight.
  6. When ready to bake, preheat oven to 350 degrees F. Line baking sheets with parchment paper and evenly space cookies. Bake for 10 minutes then remove from oven and sprinkle toffee bits over Nutella centers. Let rest on baking sheets for 2-3 minutes before transferring to wire rack to cool completely.
This cookie is the perfect blend of chocolate, Nutella and toffee. I took some liberties with the original recipe as I didn't have salted butter so I substituted unsalted and it was fine. The original recipe also called for the butter to be "slightly melted". I didn't know how melt-y it was supposed to be so I just took slightly cold butter, cut it into cubes and beat it for 2 minutes before adding the sugars and beating it some more.
To make the indents, I used a tart tamper (yeah, that term sounds funny to me too but that's what it really is called). You can also press the curved side of a tablespoon in the center of the dough ball and swirl it around until the center indent is the size you want it.
The dough was easy to work with and I'm a fan of Nutella so I made sure the wells were nice and deep so I could fit more Nutella into them.
I didn't sprinkle the toffee bits over the Nutella centers until the cookies had come out of the oven. I don't like to bake toffee if I can avoid it as the high heat melts them and when they cool down, sometimes the toffee bits get hard to eat as they're too chewy. I prefer the original crunch of toffee combined with the creaminess of the Nutella filling.

Taste-wise, this was excellent. The chocolate paired well with the Nutella (does anything not pair well with Nutella?) and the toffee bits add a nice sweetness and crunch.


Tuesday, May 23, 2023

Heath Bar Cookies from Big Oven

Heath Bar Cookies - made dough May 13, 2023 from Big Oven
2 1/2 cups all-purpose flour
1/2 teaspoon salt
1 teaspoon baking soda
1 cup unsalted butter, softened
3/4 cup granulated sugar
3/4 cup brown sugar, firmly packed
2 large eggs
1 teaspoon vanilla extract
2 cups Heath English Toffee Bits
  1. Preheat oven to 350 degrees. Line baking sheets with parchment paper.
  2. In a small bowl, whisk together flour, salt and baking soda; set aside.
  3. In the bowl of a stand mixer fitted with the paddle attachment, cream together butter, granulated sugar and brown sugar until well combined, smooth and fluffy, 2-3 minutes.
  4. Add eggs, one at time, beating after each addition. Mix in vanilla.
  5. On low speed, add dry ingredients in two additions, mixing until just combined after each addition. Do not overmix. Fold in toffee bits.
  6. Portion dough into golf-ball-size dough balls and evenly space on prepared baking sheets. Bake 10-11 minutes or until edges are set and middles no longer look raw. Remove from oven and let rest on baking sheets for several minutes before transferring to wire rack to cool completely.
My cookies came out a little thinner than the ones pictured on Big Oven's blog. The dough was a bit soft and sticky when I first mixed it so I ended up adding almost another 1/4 cup of flour. That helped but it was still a bit sticky. I didn't want to add anymore in case it changed the texture of the cookie so I simply chilled it after I portioned it into dough balls.
What I've been doing with any cookie dough lately is, after I portion them into dough balls and cover them, I chill them in the refrigerator for a few hours up to overnight. Then I put the cookie dough balls in a ziploc freezer bag and freeze them for at least another day before baking straight from frozen dough. The purpose of doing both is refrigerating the dough lets it "age", letting the dough absorb the flour and as it dries out slightly in the refrigerator, the flavor gets more concentrated. And I always like to bake straight from frozen dough to prevent spread.

That trick usually works well but in this case, these cookies still spread. Not too badly though but still a bit thin. In terms of flavor, these were a bit sweet, not unexpectedly as the toffee baked into the cookies makes it so. I expected more of a brown sugar caramel flavor but I got mostly the toffee sweetness. If you like toffee or Heath Bars, this is a good cookie version. If you don't want it so sweet, cut back on the toffee bits and add chocolate chips. Although then they won't be Heath Bar cookies as much as chocolate chip cookies with toffee bits.


Sunday, May 21, 2023

Funfetti Pudding Mix Cookies from Cooking Classy

Funfetti Pudding Mix Cookies - made dough May12, 2023 from Cooking Classy 
2 1/4 cups all-purpose flour
3/4 teaspoon baking soda
1/4 teaspoon salt
14 tablespoons unsalted butter, softened
1 1/4 cups granulated sugar
1 large egg
1 large egg yolk
1 teaspoon vanilla extract
3/4 teaspoon almond extract
1 3.5-ounce package instant vanilla pudding mix
2/3 cup sprinkles, plus more for topping
  1. Preheat oven to 350 degrees (postpone this step if not planning to bake cookies right away). Line baking sheets with parchment paper.
  2. In a mixing bowl, whisk together flour, baking soda and salt; set aside.
  3. In the bowl of a stand mixer fitted with the paddle attachment, cream together butter and sugar until well combined and fluffy. Mix in egg, egg yolk, vanilla extract and almond extract.
  4. Mix in vanilla pudding mix.
  5. On low speed, add the dry ingredients in 2-3 additions, mixing after each addition until just combined. Do not overmix. Fold in sprinkles
  6. Portion dough into golf-ball-size balls and evenly space on prepared baking sheets. You can also chill or freeze the dough balls at this point if you don't plan on baking right away. Just cover and chill until firm then place in freezer bags to freeze.
  7. Bake cookies in preheated oven for 9-10 minutes. Gently press additional sprinkles on top if desired. Let rest on baking sheets for several minutes then transfer to wire cooling rack to cool completely.
These did not turn out as well visually as I had hoped. But that was user error on my part as I used the wrong sprinkles. Wrong sprinkles means the ones that can't withstand high heat during baking and melt or bleed into the dough.
The sprinkles I used are really meant for just garnishing on top of frosted baked goods. Oops. I had bought them to add to cookies for a Memorial Day care package going out to a deployed military service member as part of my volunteer work with Soldiers Angels. I sent them anyway and hoped they cared more about taste than appearance.

Taste-wise, these are still pretty good. They did spread more than I had hoped even though I froze the dough and baked from frozen dough. Without the sprinkles, they're a nice sugar cookie. If you're going to use sprinkles, make sure you use the right ones. 

Friday, May 19, 2023

Rolo Chocolate Chip Blondies From Averie Cooks

1/2 stick butter, melted and cooled slightly
1 cup dark brown sugar
1 large egg
1 tablespoon vanilla extract
1/2 teaspoon salt
1 cup all-purpose flour
1 cup semisweet chocolate chips
30-36 Rolo candies
  1. Preheat oven to 350 degrees F. Line 8 x 8-inch baking pan with foil and lightly spray with nonstick cooking spray.
  2. Whisk together melted butter and brown sugar until combined. Add egg, vanilla extract and salt; whisk to combine. Add flour and stir together until combined.
  3. Fold in chocolate chips.
  4. Spread half the batter evenly over bottom of prepared pan. Line unwrapped Rolos in a 5 x 5 formation. Gently spread remaining batter over Rolos, trying to cover completely. 
  5. Bake 22-27 minutes or until edges are set. Remove from oven and gently press remaining Rolos, chopped in half, over top of hot blondies. Let cool completely before cutting and serving.
I'm not usually a blondie fan. In general, they seem like chocolate chip cookies in bar form and I'd rather have chocolate chip cookies in cookie form with their crisp edges and chewy middles. This Rolo version from Averie Cooks changed my mind. These were excellent and were more like a "fudgy" blondie with rolos.
The original recipe says to use 36 Rolos and line them in a 6 x 6 formation over half the batter then cover with the rest of the batter. You can see I only managed a 5 x 5 formation, partly because I only had 31 Rolos and partly because I didn't line them up very well, very closely or in a straight pattern. The great thing about this recipe though is that doesn't matter. No one's going to judge your Rolo placement on these, I promise.
Additionally, there wasn't enough batter to completely cover the Rolos and that's okay too. I probably used more than half of the batter for the bottom layer because I didn't want the Rolos to sink too easily to the bottom. Hence why I didn't have enough batter to cover the Rolos completely. Again, totally okay. This isn't a test; it's a blondie.
Rather than try to stuff the remaining 6 Rolos inside the blondie, I chose to chop them in half and, as soon as I took the pan out of the oven, sprinkled the chopped Rolos over the top of the blondie and let the residual heat melt them into the tops. 
As mentioned, these were delicious. I loved the flavor and the texture as well as the addition of the Rolos to give these an extra caramel kick. When baking with Rolos, I do recommend you cover the Rolos inside the blondie as much as possible (it's okay if the chocolate peeks through the batter as long as the caramel doesn't) and only top with the garnish after the blondies come out of the oven. Then you won't have any caramel part of the Rolos exposed during baking which would make the caramel too chewy and hard once cooled.


Wednesday, May 17, 2023

Crumbl Cookies review #38 - Lemon Cheesecake

Crumbl Cookies review #38 - Lemon Cheesecake, visited May 10, 2023
I missed my goal of trying to publish this the week it was available so I'm playing catch up today.

I got a 4-pack last week (yes, the frozen pieces of Crumbl cookies in my freezer are stacking up nicely) since last week's line up included one of my favorites: Pink Velvet. I got 2 of those plus a Hazelnut Mudslide but I've already reviewed those so the only new-to-me flavor I got was the Lemon Cheesecake. I had waited to go on Wednesday as that's supposed to be when my store has the test cookie but last week they didn't do a test cookie for some reason so I got the Hazelnut Mudslide in its place. Although I probably could've gotten a third Pink Velvet and I woudn't have been sorry about it.
Before I get into the review of the Lemon Cheesecake, look at the perfection of that 4-pack. I have to reiterate how consistently nice of a job the Sparks, NV Crumbl does with its cookies, both in appearance and the bake itself.
Now on to the Lemon Cheesecake. At first I wasn't going to get this at all since I don't like the tang of cheesecake. But several of the online fan reviews I read bemoaned the fact that it didn't taste like cheesecake at all so my taste buds perked up and I decided to try it. I'm glad I did as this was delicious.
Look at that perfect cookie texture - dense and chewy. The "cheesecake" topping, in fact, did not taste like cheesecake but was more like their normal cream cheese frosting. Sometimes I find Crumbl's frosting a little overwhelming but this one worked really well because of the tart lemon curd on top. It was delicious and perfectly offset the sweetness of the frosting. I enjoyed this one a lot and would definitely get it again. Oh, this was supposed to be served chilled but I don't like chilled cookies so I let it come to room temperature before I ate it and it was perfect.


Monday, May 15, 2023

Crumbl Copycat Chocolate Chip Cookies from Binge-Worthy Bites

1 1/2 cups salted butter
1 1/2 cups dark brown sugar
3/4 cup granulated sugar
1 1/2 tablespoons vanilla extract
3 1/2 tablespoons light corn syrup
2 large eggs
1 teaspoon baking powder
1/2 teaspoon baking soda
2 teaspoons cornstarch
1/4 cup milk powder
4 cups all-purpose flour
2 1/2 cups milk chocolate chips
  1. In the bowl of a stand mixer fitted with the paddle attachment, cream butter until light and no lumps remain. Add brown sugar and granulated sugar and beat for 5 minutes on medium speed, scraping down the sides and bottom occasionally to keep mixture even textured.
  2. Add vanilla and corn syrup and mix for another 3 minutes.
  3. Add one egg and mix until well combined. Add second egg and mix again until well combined.
  4. Add baking soda, baking powder and cornstarch, mixing until combined.
  5. Add milk powder and mix until combined.
  6. Add flour in 3-4 additions, mixing on low speed until just combined. Do not overmix. Fold in milk chocolate chips.
  7. Preheat oven to 375 degrees. Line baking sheets with parchment paper.
  8. Portion dough into baseball-sized dough balls, cover and chill while oven is preheating.
  9. Evenly space 4 dough balls on prepared sheets. Bake for 9 minutes then rotate pan. Bake another 4-5 minutes. Remove from oven and let rest on baking sheets for 20 minutes. Serve warm.
It's National Chocolate Chip Day (May 15)! And nothing epitomizes chocolate chips than their starring role in a chocolate chip cookie (thanks, Ruth Wakefield, for that accidental and brilliant use of chopped chocolate)
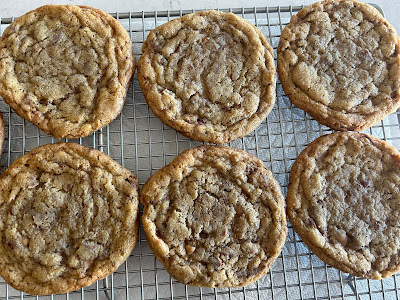
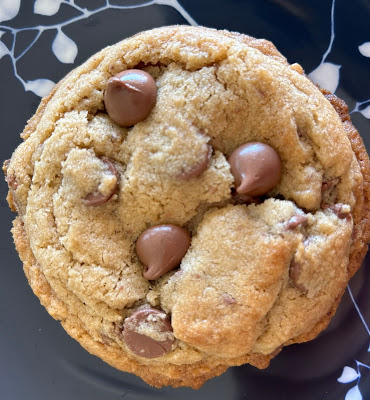
Chocolate chip cookies are the most popular items in military care packages to deployed troops so I make them for almost every package I send out. And thanks to pinterest, I'll never run out of recipes to try for making them. I'm really glad I tried this one because it was excellent. The pictures are just from the test cookie as I haven't baked the rest of the batch off yet for care packages.
But what a test cookie it was. Crisp edges, molten chocolate, chewy middles, caramelized brown sugar flavor. This recipe has a couple more ingredients not in your typical chocolate chip cookie recipe (corn syrup and milk powder) but if you can, I highly recommend going the little extra mile to make the recipe as is. This could be my new go-to favorite in the foreseeable future. Considering the dozens, if not hundreds, of recipes just for chocolate chip cookies that I've tried over decades, that's saying something.

Friday, May 12, 2023

Thick Oreo-Stuffed White Chocolate Chip Cookies from One Happy Bite

1 cup unsalted butter, cold
1 cup brown sugar
1/2 cup granulated sugar
2 large eggs
2 teaspoons vanilla extract
1 1/2 cups cake flour
1 1/2 cups all-purpose flour
1 teaspoon baking powder 
1 teaspoon baking soda
1/2 teaspoon salt
1 cup white chocolate chips
1 cup crushed Oreos (about 10 Oreo cookies)
15 Oreo cookies
  1. In the bowl of a stand mixer fitted with the paddle attachment, cream together cold butter, brown sugar and granulated sugar until well combined, 2-3 minutes.
  2. Add eggs, one at a time, mixing on low speed until just combined. Scrape down sides and bottom of bowl as needed to keep mixture even textured. Add vanilla extract and beat until pale and creamy.
  3. In a separate bowl, whisk together cake flour, all-purpose flour, baking powder, baking soda and salt.  Add dry ingredients to butter mixture in 2-3 additions, mixing on low speed after each addition until just combined. Stir in crushed Oreos and white chocolate chips, mixing on low speed until evenly distributed.
  4. Cover and chill dough for 15-30 minutes. Then scoop out dough, flattening to discs. Place a whole Oreo in the center of one disc and cover with another, sealing the edges by rolling into a tall ball, completely encasing the Oreo. Repeat with remaining dough. Cover and chill rolled cookies for several hours or overnight.
  5. When ready to bake, preheat oven to 375 degrees F. Line baking sheets with parchment paper and evenly space 6 dough balls per sheet, at least 2 inches apart. Bake 12-14 minutes or until edges are golden brown. Remove from oven and let cool for 15 minutes on the baking sheet before transferring to wire rack to cool completely.
So...it's been awhile since I've posted a new recipe that I've tried out. Not coincidentally, it's also been awhile since I've been able to bake anything. First I was sick and I don't bake when I'm sick. Second, I had an international trip so I was out of the country for a couple of weeks. Then, 4 days after I got back, I moved. Three weeks later, I've finally gotten an internet connection, got my furniture in place, got my stuff moved up and have unpacked (almost) everything.
Just as importantly, I also had enough time to organize all my baking stuff and (sort of) remember where I put everything in my new kitchen. And finally I was able to go grocery shopping and stock up on baking ingredients again.
Work didn't stop while all this was going on and I'm working on a significant project so I also had to fit in cookie dough-making time into my schedule. But the stars finally aligned and I'm back in business. Or at least volunteering as these went into a care package for a deployed service member on a Navy ship somewhere.
You've heard me say I love Oreos and don't tend to favor cookies and cream sort of cookies, despite my partiality for the Oreos that go into them. I have to admit though, I liked these cookies more than I expected.
The dough was a dream to work with, not too soft or sticky and not dry or crumbly. So it was easy to flatten pieces of dough into discs and press them around a whole Oreo cookie for the "stuffing".
I also tested out my new oven for the first time when baking these cookies. So far so good, although, as usual, I didn't time the cookies but just went by how they looked. The recipe says to bake at 375 degrees and I suggest going with that if you want uniformly thicker cookies. I baked the first baking sheet at 350 and they spread a bit more, particularly at the edges. The higher temp had less spread and the Oreo stuffing didn't look like such a lump. Overall, not a bad recipe to christen my new kitchen with. Not bad at all.
I liked how the second sheet turned out at 375 as they didn't spread as much and didn't have thinner edges. Regardless of the baking temp, these were delicious. The Oreo softens in the middle so it's a consistently chewy-soft texture and the flavor was also really good.