Thursday, April 18, 2019

Bakery Review: Victoria Pastry Company

Victoria Pastry Company - visited March 16, 2019
Last year, I bought season tickets to San Francisco’s musical theater season. I’ve never bought season tickets before as usually, if there’s a particular show I wanted to see, I’d just buy tickets to that individual show and skip the others. But this particular season had several shows I was interested in: Miss Saigon, Charlie & the Chocolate Factory and Anastasia. Buying season tickets also offered first access for a return performance of Hamilton which I’d already seen but wouldn’t have minded seeing again. So it seemed worth it to splurge on a season ticket.


That is, until I moved out of state after watching only two shows. Oops. Fortunately, I was still working and commuting back to the Bay Area often enough that I could time my return trips to coincide with a couple of the shows I had tickets for. This particular weekend was for Hello, Dolly.


Victoria Pastry was on my list, not only because it was highly rated on “must try” bakery lists published about SF, but because it was walkable from the Powell St BART station. On paper, aka google maps, it’s a 1.2 mile walk. Which isn’t bad; I’ve walked farther in quest of baked goods. There’s just a slight wrinkle that 1.2 miles in San Francisco more than likely means hills. Which it did in this case. But still doable.


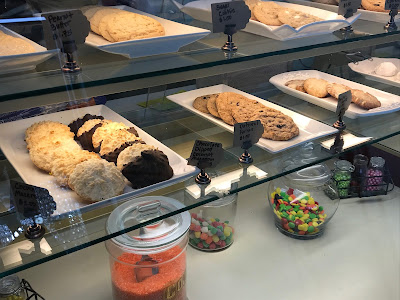
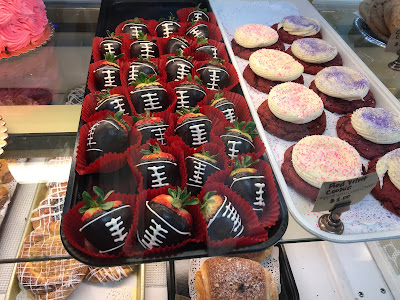
It did turn out to be a nice walk with the added bonus of a quad burn going up and down the hills. The bakery itself was small but nicely laid out with its display cases providing a nice selection of individual servings of various cakes, cupcakes, cookies and pastries. 

My standard SOP in trying out a new bakery is to get 2-3 items. It may not be enough to give a fair rating to a bakery but past experience says I can’t load up like I’d like because I’d never finish them in enough time while they were fresh and I don’t want to rate day old stuff, much less consume them. That wouldn’t be fair either.

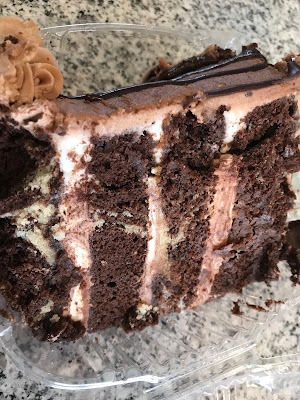
So for this trip, I went with a red velvet cupcake and a multi-layer slice of chocolate fudge cake. There were several choices for chocolate cake but I went for the straight chocolate cake with chocolate frosting. Best to keep things simple.

Both were simple, straightforward desserts which is what I prefer. As usual, I scraped off most of the frosting on the cupcake. If only more bakeries were like Sibby’s and just did a thin covering of frosting but alas, the norm seems to be the puffy frosting tower. No matter, it’s not a big deal to scrape aside. I feel bad for wasting it but I genuinely don’t like (or eat) that much frosting. The cupcake itself was good. Not super red velvet-chocolaty flavor but the texture is better than most of the cupcakes I bake from scratch. 


The chocolate cake slice was rich, moist and definitely very chocolaty. The mousse filling and chocolate ganache topping did me in. The flavors were good but I think I would’ve preferred more cake, less mousse and less topping. It makes for a really rich dessert and moderation is key for maximum enjoyment so I recommend sharing with a friend or three or spacing it out over several sittings.


Tuesday, April 16, 2019

Restaurant Review: Manila Bakery & Cafe

Manila Bakery & Cafe - lunch on February 23, 2019
My parents also newly moved to Reno and I was driving them around to get the lay of their new land, so to speak. Back in their old stomping grounds, we were all familiar with the restaurants they liked to go to and where everything is. To try something new, trusty Yelp pointed us to the Manila Bakery & Café for Filipino food.

I’ve blogged before that, as a rule, we don’t eat out at Filipino restaurants very often. They’re not as prevalent as Chinese or Thai places, they tend to be a little more expensive than most Asian restaurants (except for Japanese cuisine) and, honestly, my mom is such a good cook that we almost never find anything as good at Filipino restaurants as what my mom makes in her own kitchen. 

However, we do try them when we find them and we found Manila Bakery & Café. Thanks to yelp, I discovered they have a lunch buffet on Saturdays so that’s when we went. When you think “buffet”, you probably imagine the long stretches of food like the buffet at a casino with its wide variety of dishes. This buffet was a lot smaller and only contained several dishes: chicken adobo, fried chicken, sinigang (tamarind soup), beef stew, a vegetable dish called pinakbet, pancit bihon (a noodle dish) and, of course, really good rice.

The dining space was really small. You lined up at the counter to pay for the buffet lunch ($12.99 per person) then waited for a table to clear. The counter had display cases offering a variety of baked goods, including Filipino baked goods like ube crinkle cookies, ensaimada, leche flan (Filipino version of a crème caramel) and siopao (Filipino steamed pork buns) and not-so-Filipino offerings like bear claws and cupcakes.
I didn’t get pictures of the buffet stand as, once we got a table and lined up for food, I didn’t want to hold up the line trying to take pictures of the dishes. The place was crowded, partly because it was so small, but also because it seemed like there were people wanting buffet. The waitstaff was kept busy replenishing the buffet dishes and clearing tables.
I’m quite fond of sinigang and the only thing about it is to really appreciate the broth, it’s best with rice. When you’re trying to cut back on rice, that’s not such a good thing. But the sinigang broth was delicious. The chicken adobo was also good. I wasn’t as much of a fan of the fried chicken as the breading was a bit tough and some parts had more breading than chicken. It was also a little greasy (deep fried, so, yeah). The rice was perfect though. I don’t like dry rice; this was moist and perfect.
This is a good place to go if you want quick Filipino food but I don’t recommend coming as a large party since the seating space is so limited.

Sunday, April 14, 2019

Bakery Review: Isabel's Bakery

Isabel's Bakery - visited February 2, 2019
I still have so many posts to catch up on. And hopefully I will now be able to as I wrap up my last days at my full-time job. Did I mention I was retiring? Or trying to. Or semi-retiring. It’s a bit muddled right now. But I will have several glorious weeks of full-time do-nothing-ness coming up. Not that I’ll do nothing, of course. But I won’t be working! 
So I’m hoping that means I’ll have time to be able to do something more with my blog. What exactly, I don’t know. I’m losing interest in blogging about the same ol’ same ol’ and I’m sure people are losing interest in reading about it as well. Problem is, I’m not sure what direction to take next. Truthfully, I need/want to lose 20 pounds. I’ve lost 8 already. But to turn this into a weightloss blog seems like a hard 180-degree turn, not left or right but rather upside down and inside out. I mean, hello, the past 9 and a half years of blogging about sugar, butter and flour but now let’s talk about working out 4 hours a day and drinking Skinnyfit tea? Okay, maybe I won’t go quite that drastic.

For now, let’s talk about Isabel’s Bakery, a local bakery in Sparks, NV that I visited about 8 pounds ago.  I was still in my phase of ferreting out local bakeries to try in my neighborhood (have car, will drive to any yelp-rated bakery). I visited on a Saturday afternoon. Like many places in Reno, I could easily find parking and while the bakery had a fair number of customers, there were no ridiculous crowds like they have in the Bay Area. I got in line and, while I waited for my turn, snapped pictures of every showcased dessert I could see, which is par for my course.

A couple was seated at one of the café tables with one of the bakery workers, perhaps even the owner. They were doing a wedding cake tasting so now I know Isabel’s does wedding cakes. As I perused the display cases, I noticed a yummy-looking slice of layered marble cake individually packaged that had a sign saying it was 50% off as a “Saturday special”. I’m always up for a bargain so that was one of my purchases.

My other splurge was a mini red velvet cake that wasn’t quite so mini but wasn’t so huge that I couldn’t finish it in a sitting or three. They had mini lemon cakes in the same size and I waffled a bit between the two but ended up choosing the red velvet.


I tried both cakes when I got home. That day’s lesson: when a bakery offers something 50% off, it’s typically because it’s “day old”. I should’ve remembered that. Not that there’s anything wrong with day old (most of the time) but if I’m trying a place for the first time and only make two purchases, I shouldn’t have one of those purchases be a day-old piece of cake as it’s unlikely that’ll be the bakery’s best offering on which to base a first impression. 


If properly packaged, day-old cakes can be just as good as freshly made. But proper packaging means tightly wrapping all exposed areas of the cake with plastic wrap and, if the climate is cool enough, not putting it in the refrigerator. Air and refrigeration are a cake’s enemy (wrapped in the freezer is fine but not the fridge). They dry the cake out easily so even a well-made, freshly-baked cake can dry out the same day it's made if left exposed to air. Which is what happened to this cake. And that was a shame because the few bites I could find that hadn’t been exposed to air (meaning I scraped aside the outer parts of the cake slice to find the unexposed bits) were quite good, tasty and moist. But the slice wasn’t large enough to yield that much unexposed cake so I didn’t get more than a few bites before I had to toss the rest. Penny-wise of 50% off became pound-foolish of wasted cake. Lesson learned.


I did better with the red velvet cake. The main downside is it was covered in so much frosting that I had to peel away most of it to get to the cake. At least it was “so much frosting” to me because I’m not a frosting person. The upside is once the frosting was pushed aside, the actual cake itself was much smaller and I didn’t feel as piggish eating it in two sittings. Winner. The red velvet was also good and had a great cakey texture. I could probably bake something like it myself, however immodest that sounds, but I may not be able to make a better one and I’ve certainly made worse ones.


Overall, I’d like to go back to Isabel’s Bakery and try more of the delicious-looking offerings. And I’d stay away from 50% off bargains. Spend for full-price. It’s worth it.

Friday, April 12, 2019

The Motherlode Layered Cookie Bars

The Motherlode Layered Cookie Bars - made April 1, 2019 from Picky Palate
This is one of the rare things I’ve baked since I moved. I just haven’t been in the mood to bake lately. Which sounds odd but there you have it.

But once I broke out my stand mixer, I was committed. For one thing, this has four layers. Three of those layers are made from scratch. You essentially make two complete cookie doughs for 2 of the layers, cheat on one layer by using pre-mixed cookie dough and throw together a very simple layer for the fourth one.

I haven’t bought sugar cookie dough in years. Maybe decades. And since my hiatus, it appears that they don’t sell them in logs anymore that you slice and bake but in flat packages where the cookie dough is already portioned. Which is fine if you want to bake individual cookies. I needed them for the bottom layer so I rolled each individual cookie into an even thickness and patched a package’s worth of cookie dough into a single layer.
For the chocolate cookie layer, I only made a half recipe. The original recipe says to just use half so I figure it was just as well to only make a half recipe in the first place. Turns out I was half – haha – right. The dough is a bit stiff and doesn’t roll out like a sugar cookie dough. Instead I had to dollop it over the sugar cookie layer and spread it around but it doesn’t take kindly to being spread. So instead of a smooth even layer, I had patches, thick in some places, thin in others plus some mocking gaps that told me I should’ve just made the original recipe so I wouldn’t run out of dough to cover the gaps.

The third layer was supposed to be a peanut butter layer. You know my indifference to peanut butter so I thought it would be better so substitute Nutella for the peanut butter and make as is. Hmm, not sure that was a good idea either as the Nutella stiffened up when the egg was added and didn’t spread smoothly either.

By the fourth layer, when I was wondering if I was a baking idiot, I had learned my lesson and made the chocolate chip cookie layer as is, ensuring I had plenty of dough to form the top layer as the overall blanket layer.

Also by the fourth layer, my baking pan was heavy. As anticipated, baking time took longer than the original recipe said and I did end up covering the top loosely with foil to prevent it from getting too brown.

When all was said and done, after all that effort, I wanted to be able to say these bars were amazing and well worth investing all the mixing time and ingredients. Umm, well, they were good. But my Nutella experiment didn’t work very well. For some seriously weird reason, I could almost taste peanut butter in the cookie. My layers weren’t distinct enough, the Nutella layer blended in too well with the chocolate layer, the flavor of the chocolate layer overwhelmed the other layers, I couldn’t even taste the sugar cookie layer and this seemed more like a brookie – a brownie layer and a chocolate chip cookie layer. It was good but not sure I’d go to the trouble again.
Layer 1: Sugar Cookie
1 roll of Pillsbury Sugar Cookie Dough

Preheat oven to 350 degrees F. Line a 9 x 13" baking pan with foil and lightly spray with nonstick cooking spray. Press sugar cookie dough into bottom into an even layer.

Layer 2: Double Chocolate Chip Cookie (use only half for the layer, reserve the other half to make cookies)
1 cup butter
1 cup granulated sugar
3/4 cup brown sugar
2 eggs
1 teaspoon vanilla
1 3/4 cups flour
1 1/4 cups cocoa powder
2 teaspoons baking soda
1/4 teaspoon salt
1 1/2 cups chocolate chips
  1. In a large bowl, cream together the butter and sugars until light and fluffy. Slowly add eggs and vanilla until well-combined.
  2. In another bowl, combine flour, cocoa, baking soda and salt. Slowly add to wet ingredients then stir in chocolate chips. Layer 1/2 the recipe over the sugar cookie layer, pressing gently into an even layer.
Layer 3: Nutella Cookie
1 cup creamy hazelnut spread
1/2 cup granulated sugar
1 egg

Place all ingredients into a bowl and mix until combined. Press over chocolate cookie dough into an even layer.

Layer 4: Chocolate Chip Cookie (recipe makes double what you'll need)
1 cup (2 sticks) butter
3/4 cup granulated sugar
3/4 cup brown sugar
2 eggs
1 tablespoon pure vanilla
2 1/2 cups all-purpose flour
1 teaspoon baking soda
1/2 teaspoon salt
2 cups mini chocolate chips
  1. Cream butter and sugars until well combined. Beat in eggs and vanilla until just combined. 
  2. Place flour, baking soda and salt into a large bowl; mix to combine. Slowly add to wet ingredients and mix until just combined. Fold in chocolate chips. 
  3. Spread half the dough over the peanut butter layer into an even layer.
  4. Bake for 35-45 minutes or until center of dough is mostly cooked through. Edges will be brown. Lightly cover the top with aluminum foil for the last 15 minutes of baking.
  5. Let cookies cool completely. Let out of pan with edges of foil. Drizzle top with 1/2 cup melted chocolate chips if desired.