Butter Cookies for Molding - made August 21, 2022 from Caroline Kallas (from Molded Cookies of the World Facebook page)
 |
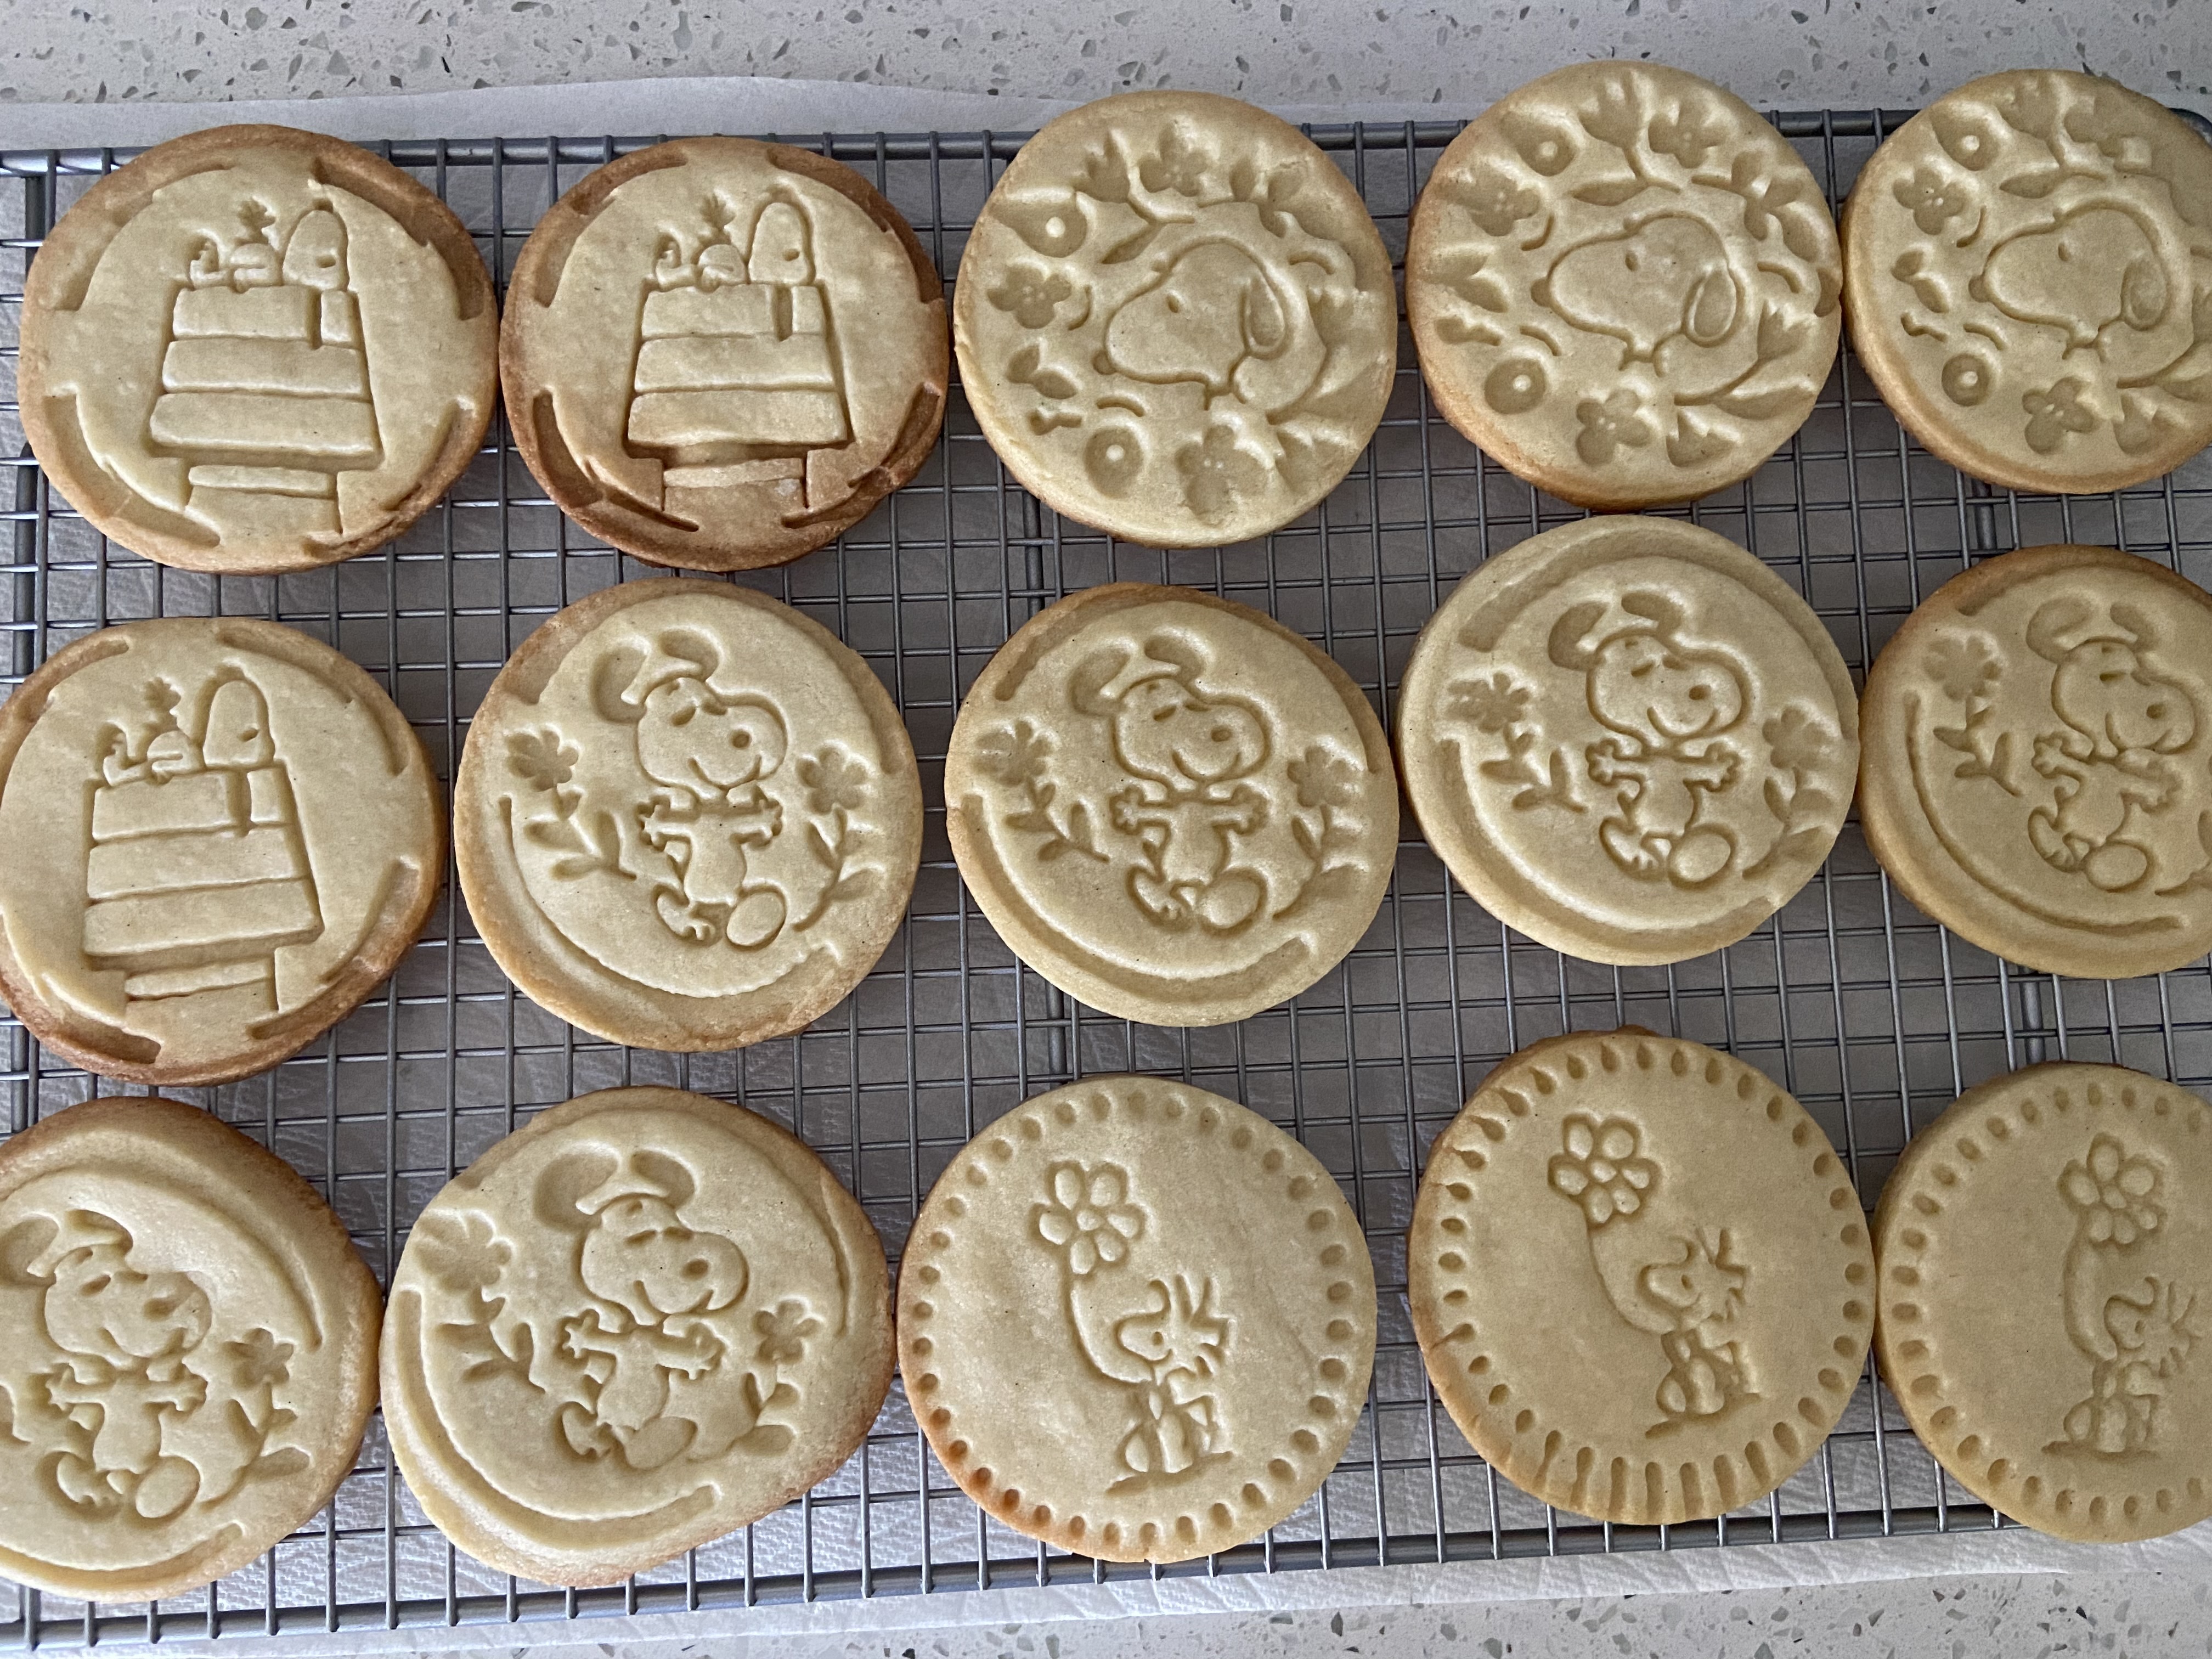
| Baked cookies - kept the impressions |
 |
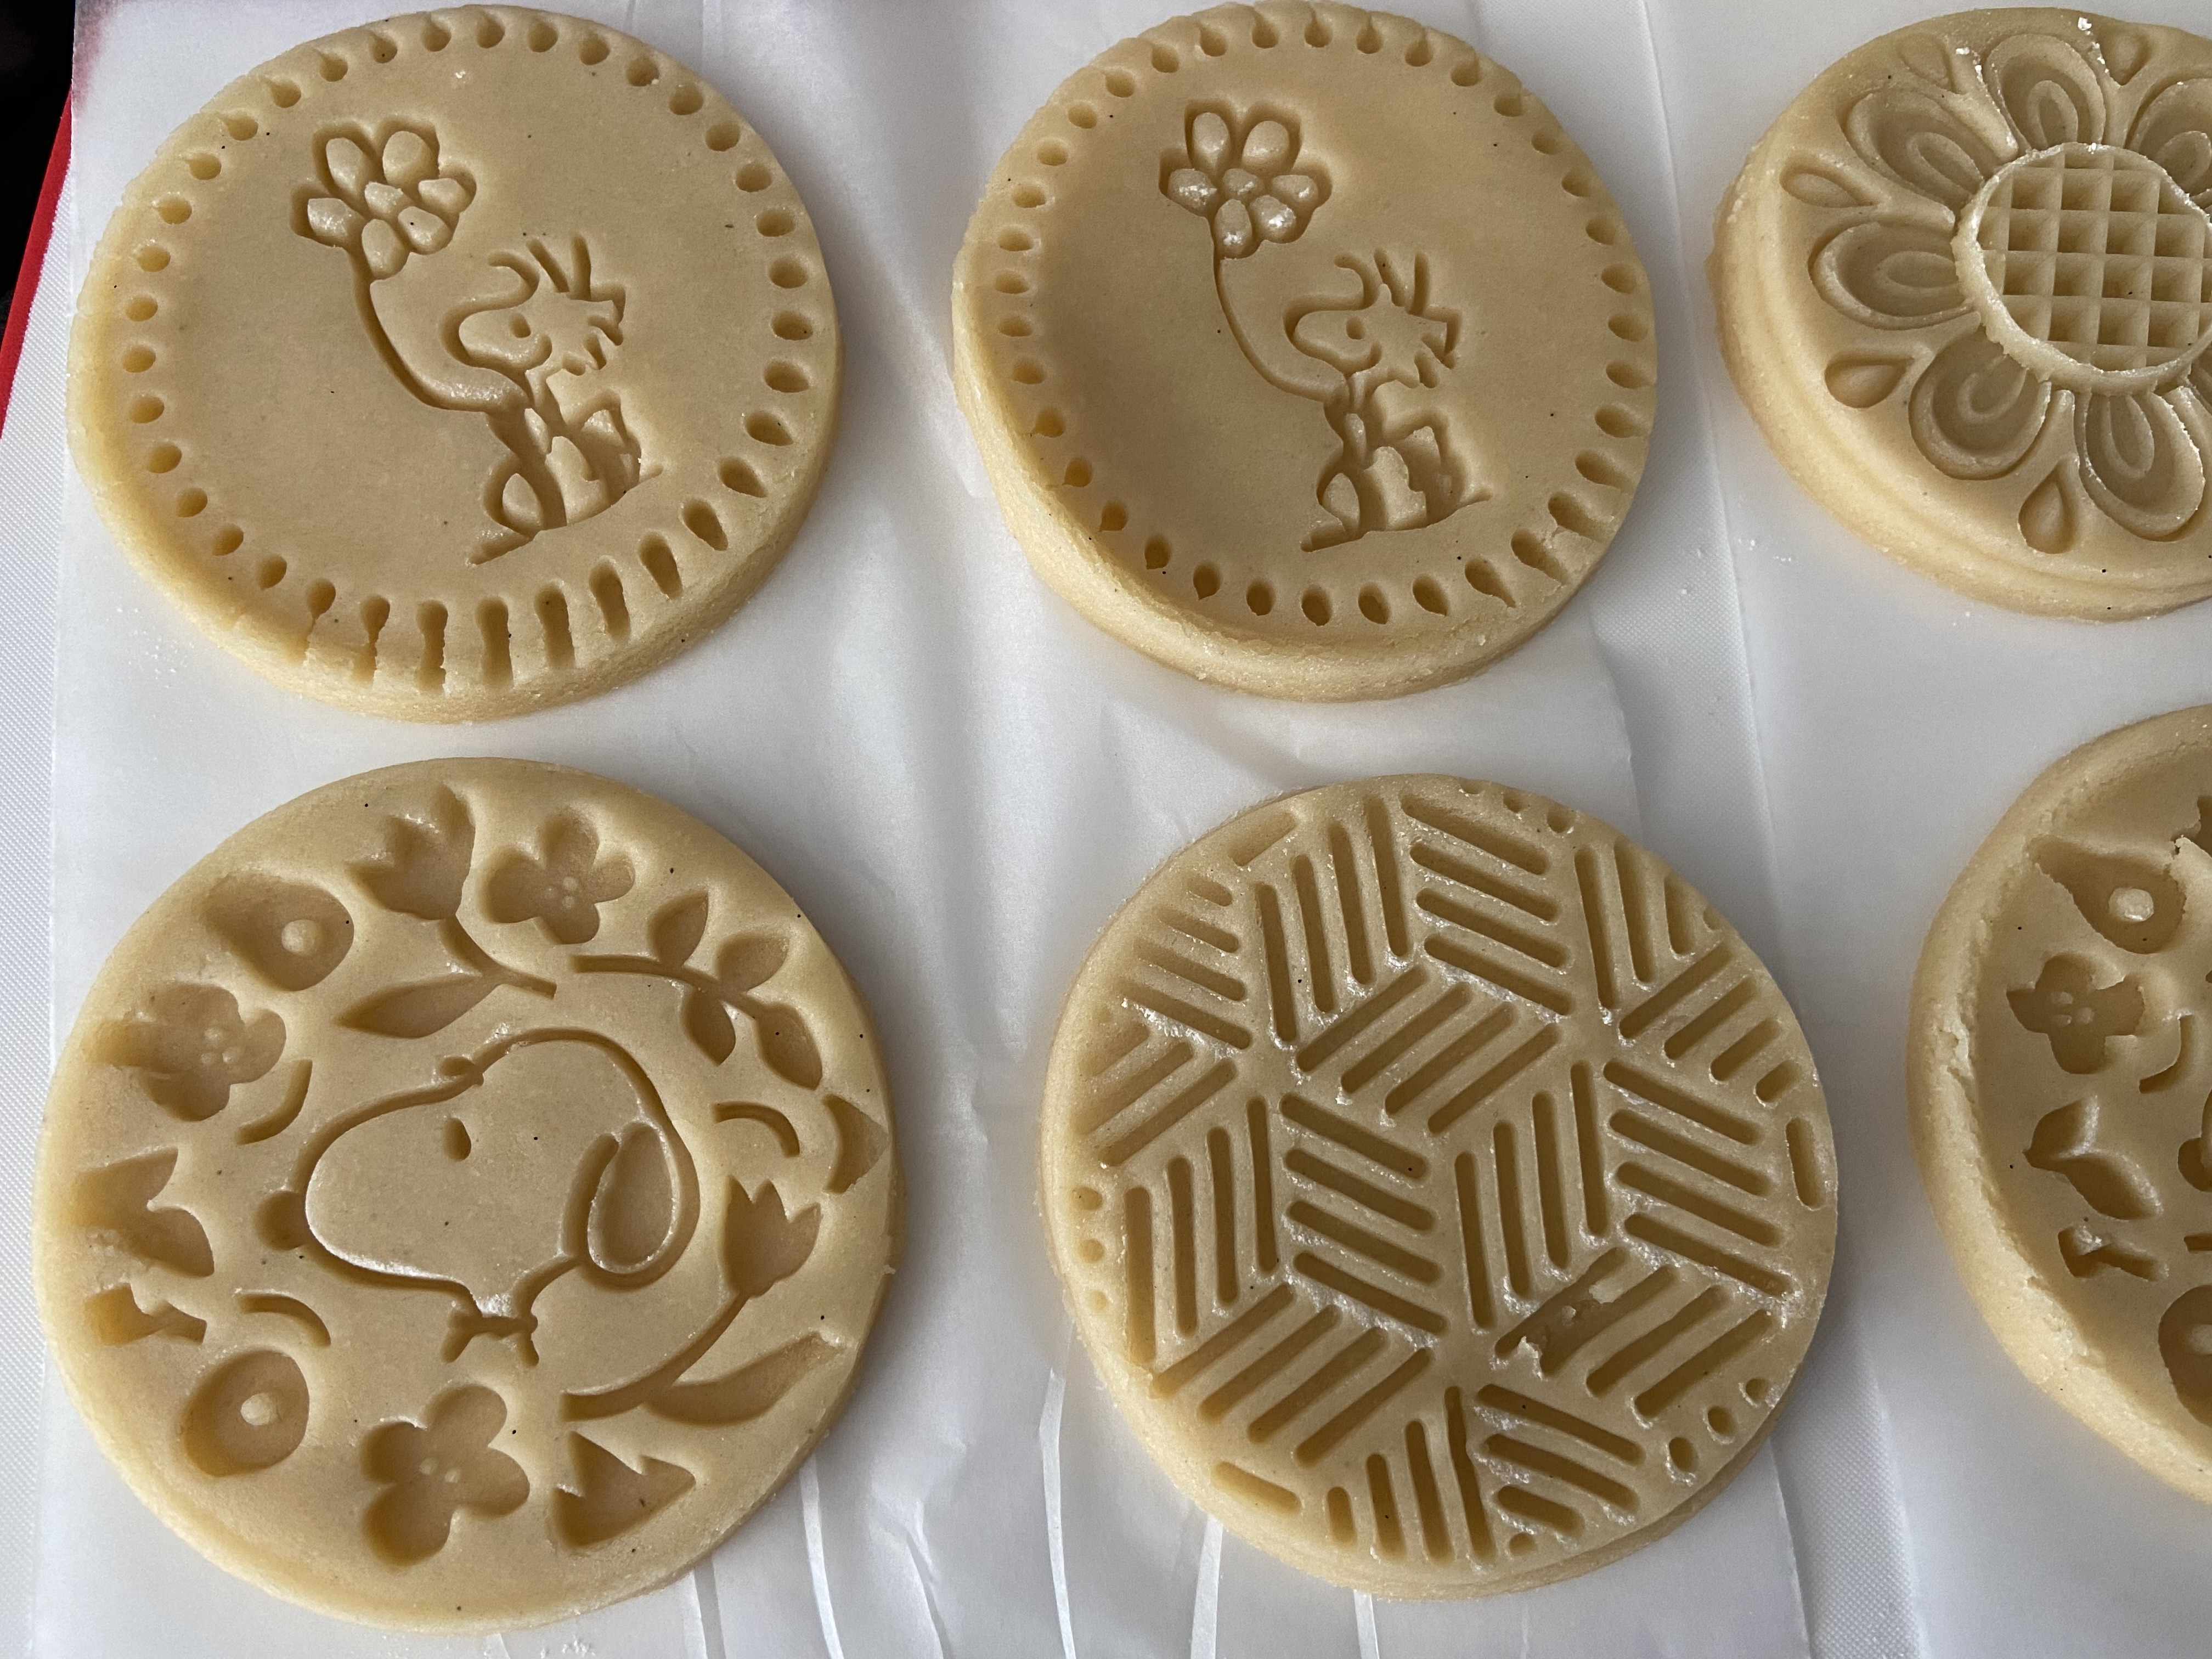
| Unbaked cookies |
1 cup (2 sticks) butter
2 large eggs
1 teaspoon salt
2 teaspoons vanilla extract
1 1/2 cups granulated sugar
2 tablespoons heavy cream
4 cups all purpose unbleached flour
- Preheat oven to 350 degrees F. Line baking sheets with parchment paper.
- Beat butter, salt, and vanilla extract until combined and creamy. Add sugar, beating until light. Add eggs and beat until smooth and combined.
- Incorporate 3 cups of flour, mixing on low speed then add cream. Add the rest of the flour, beating until just combined. Dough is done when it begins to
clean the sides of the mixer bowl.
This dough does not like to sit or be refrigerated, use immediately after making. However, if it's really soft, chill for 10-15 minutes before using.
- Cut or stamp with cookie molds, stamps and cutters. Evenly space on baking sheets. Bake time will vary depending on cookie size and mold depth. A medium cookie (3 to 4
inches) takes about 10 minutes. Bottoms should remain very pale. Cookies firm up as they cool.
I haven't tried out a real stamped cookie recipe in awhile (the
Butter Delights didn't count as that wasn't a recipe really meant for stamping) but wow, I'm glad I found this new recipe.
I found it through a Facebook group I'm a member of called Molded Cookies of the World and the admin is Kitchen Vixen (Jen), the etsy seller I met at the Cookie Con in Reno who's also the creator of the military seal molds I've posted about before. Jen is amazing, a highly talented artist and baker and shares her talents through her Kitchen Vixen etsy shop and her facebook pages.
The facebook group is always full of pictures of beautifully stamped or molded cookies with seriously next-level extra of aesthetic beauty in cookie form. Some are butter cookies, sugar cookies or springerle cookies. I found this butter cookie recipe in the files of that page and thought I'd give it a whirl as I'm on a never-ending quest to find good cookie recipes that will hold an impression after baking and taste good. So far my previous 19 efforts have typically netted one or the other but seldom both. Until this one.
The pictures speak for themselves and you can also probably tell what my earlier efforts look like as I haven't done cookie stamping in awhile and had to relearn some basic habits to get clean edges and even impressions. It took me a little while so you can see the gamut of my efforts in these pictures.
But no matter as I'm just happy the impressions didn't bake out and remained pretty faithfully to their pre-baked version, always a challenge with stamped cookie recipes. This one turned out beautifully. And they tasted as a good butter cookie should - simple, straightforward butter taste.
The original recipe calls for using the dough right after mixing and not chilling it but, given the warm summer weather I made these in, I do recommend that if your dough is warm or too soft, roll it out between 2 sheets of parchment paper and chill it for 10-15 minutes first before stamping and cutting. Some of my initial misshapen efforts were due to skipping the chilling step then finding the dough too malleable and losing shape when I tried to stamp, cut and move it.
You don't want to chill the dough too long though. Just long enough for it to handle easily between parchment, soft enough to take the impression from your cookie stamp and firm enough to be cut with a cookie cutter and moved gently with a spatula.

I got these Snoopy cookie stamps from Williams Sonoma early this year. I think they were part of the spring line as they're not available on their website now. For once I'm glad of my cookie-stamp-acquiring nature as I got these when I saw them even though it's taken me almost 7 months to finally use them. But I love them and I love finding a recipe where the Snoopy renditions stayed faithfully through the baked product. If you like crisp cookies, bake them a little longer or roll the dough a little thinner. If you like more chewy butter cookies, bake only until the edges are just light golden brown. I liked them both ways. These taste best when eaten as soon as they're cooled. They're still fine the next day but a little more chewy and not as crisp. If you bake them too long, they will get hard. I need to try tweaking the recipe so they’ll have a softer texture but I don’t want to mess with it too much and risk losing how well the impressions hold during baking.

But at least now you (or I) can break out all your fun cookie stamps and use them with confidence that the stamped impressions will make it to your baked cookies.


These cookie stamps are adorable! (I'm a sucker for anything Snoopy haha.) Glad you found a good cookie stamp recipe!
ReplyDeleteI love all things Snoopy too! I was thrilled the impressions came through so well on this one.
Delete