Tuesday, June 21, 2016

Cake Boss Chocolate Chip Cookies

Cake Boss Chocolate Chip Cookies - made dough May 6, 2016, adapted from Key Ingredient
Another chocolate chip cookie recipe in the "Good" category. My bar is so high for chocolate chip cookies that the odds are really, really low of finding another standout one. Sadly, this one didn’t beat those odds. It was still a good cookie and had I been earlier in my chocolate chip cookie baking career, it might’ve gotten higher marks.

The edges browned and crisped up obligingly, the middles were chewy and this was a very tasty cookie. But this still spread too much for my taste and it didn’t stand out amongst the hundreds (yes, hundreds) of recipes I’ve tried over the years for chocolate chip cookies. I baked it from frozen dough but it still spread rather flat-ish. I baked at a higher temp on the convection setting in an attempt to “freeze” the cookie to a certain thickness before it spread too much. That only very partially worked. Still flatter than I would’ve liked.

The taste was good but it didn’t stand out for me. Although, when I brought these into work, I did get positive feedback from one of my coworkers in the form of, “did you bring in those M&M cookies? OMG, I had it for breakfast.” Accompanied by a reverent tone I reserve when speaking of cookie butter. So someone liked these a lot.
1 cup (2 sticks) butter
1 cup granulated sugar
1/2 cup dark brown sugar
1 teaspoon baking soda
1 teaspoon salt
1 teaspoon vanilla
2 large eggs
2 1/4 cups all-purpose flour
1/2 teaspoon cinnamon
2 cups semisweet or milk chocolate chips or chunks
3/4 cup M&M baking bits
  1. In a bowl, whisk together flour, cinnamon, baking soda and salt. Set aside.
  2. Cream butter and sugars together in the bowl of a stand mixer using the paddle attachment until thoroughly combined. Add eggs, one at a time, beating just until incorporated. 
  3. Add dry ingredients, in three batches, mixing until just combined. Do not overmix.
  4. Add chocolate chips or chunks and M&M baking bits. Portion dough into golf-ball-size dough balls, cover, and chill or freeze for several hours or overnight.
  5. When ready to bake, preheat oven to 350 degrees F. Line several baking sheets with parchment paper. Evenly space frozen dough balls on baking sheets. Bake 13-15 minutes, turning midway through baking time, or until just golden brown at the edges and middles are no longer shiny or raw. Remove from oven, let cool for a few minutes then remove to wire racks to cool completely.

Sunday, June 19, 2016

Copycat Mrs Fields Cookies with Caramel-Filled Chocolate Chips

Copycat Mrs Fields Cookies - made dough April 16, 2016 from Averie Cooks
First up in the "Good" category
There was a period in my adolescence when I would’ve sold my soul – or at least rented it out – for the recipe of the real Mrs. Fields’ cookies. I loved those things. It was the first time in my early memory where I remember you could buy a cookie at the mall and they were delicious. Prior to Mrs. Fields’, if you wanted a “homemade” cookie, you made it at home.  I spent years trying to recreate those cookies and despaired of ever coming up with a thick, chewy chocolate chip cookie recipe. The recipe on the Nestle Tollhouse package just couldn’t cut it. Even now, years later when I have no less than 4 go-to recipes for my “perfect” chocolate chip cookie, any new ones that claim to be a knock off of the Mrs. Fields’ cookie catches my eye.
I had read Debbi Fields’ autobiography and scored through all the cooking magazines that talked about the tips she sparingly gave about how to make her cookies. Besides the usual yada yada about using the freshest ingredients (who doesn’t do that? No, don’t tell me), I remember her talking about the key was to bake at a low temperature. That always seemed counterintuitive to me because a lower baking temperature just gives the cookie more time to spread. You don’t want that. But this copycat recipe advocated the same thing so I thought maybe I was just wrong.

I did all the usual, mix it with cold butter, don’t overmix, portion and freeze the dough balls, preheat the oven fully on the convection setting and bake from frozen dough. I did 2 test batches, one baked at the recommended 300 degrees F and one at the usual 350 degrees F, both on the convection setting. Now here’s the thing: the cookies baked at the lower temp spread out more and flattened. The next baking sheet of frozen dough balls, still from the same batch of cookie dough, baked at the higher temp, spread less and baked thicker. Intuitive, right? Consider my head scratched because I don’t know how Mrs. Fields did it but I can’t replicate it.

No matter. It was one good lesson learned that it's still better to bake at a higher temperature (at least 350 degrees) if you don't want flat cookies. These were good cookies and turned out well but they didn’t knock any one of my top 4 favorites from their elevated perch. One last note, for the chocolate chips, I used the “Delightfuls” which were slightly larger than normal chips filled with caramel. I thought they would be the mini version of the caramel-filled Hershey kisses with flowy caramel. Nope. Actually, if you didn’t know the chips were filled with caramel, you would never have guessed. They just seemed like normal chocolate chips. There didn’t seem to be enough caramel inside the chips to make an impression. Just a note in case you think the Delightfuls are worth the extra $$s instead of a bag of  regular chocolate chips. Nah, they’re unfortunately not as Delightful as expected. It didn’t detract from the goodness of the cookie but my higher hopes for gooey, melt-y caramel chocolate goodness were dashed.
1 cup dark brown sugar, firmly packed
1/2 cup granulated sugar
1 cup (2 sticks) cold unsalted butter, cut into 1/2" cubes
2 large eggs
2 teaspoons vanilla extract
2 1/2 cups all-purpose flour
1/2 teaspoon baking soda
1/2 teaspoon salt
2 cups (12 ounces) semisweet or milk chocolate chips
  1. In the bowl of a stand mixer fitted with the paddle attachment, beat the butter and sugars together to form a grainy paste, 4-5 minutes, scraping down the sides of the bowl as needed.
  2. Add the eggs and vanilla and beat on medium-low speed until just combined.
  3. Add the flour, baking soda and salt; beat on low speed until just combined. Do not overmix. Add chocolate chips.
  4. Scoop into golf-ball-size dough balls, cover and chill or freeze for several hours or overnight.
  5. When ready to bake, preheat oven to 300 degrees F. Line baking sheets with parchment paper and evenly space frozen dough balls. Bake 15-16 minutes or until edges are brown and tops no longer look raw. Let cool on baking sheet for 5 minutes before removing cookies to a wire rack to cool completely.

Saturday, June 18, 2016

Chocolate Chip Cookie Recipes Galore

Chocolate Chip Cookies - recipes coming up
Heads up that I’m about to start a series of posts on different chocolate chip cookie recipes. I hadn’t started out with this series in mind. Instead, I had made a couple of different recipes at different times just to try them. And since I’m always behind on blogging, I’ve had them for some time. Then one weekend, my niece had asked if I could make chocolate chip cookies for her coworkers. She needed 3 dozen and most of the recipes I had pinned on my pinterest board made anywhere from 12-18 cookies so I figured it would be a good chance to try out several cookie recipes at once. Which then led me to wonder about the differences between the recipes and how that would alter the texture or taste of any of them. It was the closest thing to “scientific testing” I was likely to do but this was something that has always been nagging at me (insert first world problem here).
Why were there so many variations and what really changed between them? Why was one cookie better than another? What made it so? What really constituted “better”? How could varying different proportions of what are essentially the same base ingredients really changing the cookies? How do different ways to mix together cookie dough change the cookies themselves that much? So many questions, so many recipes to try.
I already had two by default before I even embarked on this, er, quest. Baking for my niece added another 4 kinds. And I added more from there.
Before I unveil them – and you know it’ll be a protracted process with all of these different recipes – I’ll give you a sneak preview of what I’ve tried (the ones pictured here are the ones I liked best). First, let’s be clear. There’s never a bad chocolate chip cookie. Not the way I make them, says me immodestly.  Second, regardless of the ingredients list, I have my own process for mixing cookie dough and baking cookies that has stood me in good stead through the years and countless cookie recipes. I will be sharing those so you, too, can make amazing, pack-the-pounds-on cookies that’ll be worth those empty calories (let’s not kid ourselves). And third, remember, what’s “the best” to one person may not be the best to another. Just so you know, my criteria of what makes THE BEST chocolate chip cookies are they’re thick and chubby, loaded with milk chocolate chunks or chips (you can substitute semisweet if you’re not me), have crisp edges, chewy ooey gooey middles, and an amazing caramelized brown sugar flavor complemented by the melty goodness of (milk) chocolate chips/chunks. No nuts! If you like any of those things, read on, MacDuff. Loosen your belt, factor in extra workouts for the next few weeks, run an extra mile or five and kiss that bikini body goodbye.
Lastly, because there’s never a bad chocolate chip cookie (see above paragraph) but there are gradations of good cookies, rather than stack ranking each recipe by number, I’m going to group them into broader categories: good, great and best. Remember my picky scale? That means “good” to me is usually “these are delicious” to most other people. “Great” to me = “OMG, these are amazing” from others. My “best” means I had more than 1 cookie and other people’s reactions range from “that’s my favorite cookie ever” to “I hate you, I can’t fit into my clothes anymore, are there anymore cookies left?”
To provide a little suspense, we’ll start with the Good category, move to Great and end with Best. I encourage you to make your own experiments and decide where you’d put each cookie into which category.

Before we begin, here are my cookie tips for all of the recipes, no matter which one you try:
  1. Use butter. If it isn’t butter, don’t bother. If you use margarine, I wash my hands of you. Really.
  2. Milk chocolate chunks – I like to buy the Pound Plus bar from Trader Joe’s, chop it up and use in ONE recipe. You can substitute semisweet if that’s what you prefer. I did have to use chocolate chips in some of the recipes out of necessity, meaning I didn’t have the TJ’s bar on hand when I made the dough,
  3. Chill the dough. No matter what. Trust me. Portion into dough balls and chill, covered, in the refrigerator or put directly in freezer bags and put in the freezer. To develop the flavors the most, chill for 24 hours in the fridge, then, if you have the patience of a saint, put in the freezer for overnight then bake.
  4. Substitute at least ¼ cup of the granulated sugar with turbinado or raw cane sugar. It gives an extra crunch in the chewy texture of your cookie and makes them a little different. I didn’t do this with all of the cookies I tried but for the ones I did, I liked those cookies much better.
  5. Use dark brown sugar, even if the recipe calls for light brown. Dark brown provides more caramelized brown sugar flavor.
  6. Don’t bake at less than 350 degrees. I often preheated the oven to 375 or even 400 degrees, put the cookies in at 375 for a few minutes then lowered the heat to 350 or 360. This helps the cookies set faster before they spread too much. But I don't recommend baking the whole time at 375 or 400 or else the chips start to burn before your cookies are done. Ask me how I know.
  7. Don’t overbake! Ever. Bake just until the edges are golden brown and the middles don’t look like raw melted dough. If the edges are already too brown and the middle still looks doughy, take them out anyway. Once they set, they’ll still be okay.
  8. Make the dough balls big, at least golf-ball size. This isn’t the time to be dainty.
  9. Don’t bake too many at once. The beauty of making dough balls and freezing them is you can bake only as many as you need when you need them.
That’s enough food for thought – haha – for now. First cookie recipe goes up tomorrow.

Thursday, June 16, 2016

Foolproof Flaky Biscuits

Foolproof Flaky Biscuits - made May 25, 2016 from Dessert Now, Dinner Later
I mentioned previously how we had these super amaze-balls biscuits at one of our work cafeterias awhile back. Yes, I still remember them and I occasionally still think about them. That’s how good they were.
And in typical, grand obsessive style, I decided to take a whack at making them myself. I had some buttermilk I bought to make banana bread for my extended family (16 mini loaves – you have no idea how sick I am of making banana bread right now) and it seemed like a good way to use it up. I always liked how good biscuits had flaky layers and thought there was something in how they were mixed that brought out those flaky layers.
It turns out, if you want layers in your biscuits, the best way to achieve that was to make layers of dough. Well….okay. That’s kind of obvi, now that I think about it. That’s what this recipe does – you make the dough, cut it into thirds and place the thirds on top of each other before cutting out the biscuits. There are your layers.
Since I was only making these for myself (goodbye, low-carbing), I just made a half recipe. It was too much trouble to make 3 layers so I only made 2 with the half-recipe of dough that I had. Y’all know the tricks to making biscuits? Use cold butter, handle as little as possible and when you cut into the dough to make round biscuits, don’t twist the cutter as you lift it up. Just straight down and straight up or you’ll ruin the layering at the outer edges. Bake at high heat and take out when golden brown.
My biscuit dough ended up a trifle too floury and I didn’t want to keep working the butter and buttermilk into it for fear of toughening up the dough. So I swept the excess flour away. The biscuits turned out pretty well. They look better when you brush melted butter over them after baking so they have a bit of shine. And they were fantastic when eaten warm with melted butter. Still not quite as good as our cafeteria’s so I’m going to have to break down and ask our culinary team for the recipe.
2 cups all-purpose flour
1 tablespoon sugar
1 tablespoon baking powder
1 teaspoon salt
1/2 cup butter, cold, cut into tablespoons
3/4 cup buttermilk, cold
  1. Preheat oven to 450 degrees F.
  2. In a large bowl, mix the flour, sugar, baking powder and salt.
  3. Cut in the butter with a pastry blender or two knives until pea-size pieces.
  4. Add the buttermilk all at once and form into a ball
  5. Roll dough onto a lightly floured surface, into a 6 x 9" rectangle. Cut the rectangle into thirds.
  6. Stack each third on top of one another and roll the dough into a 6 x 9" rectangle again.
  7. Using a 2 1/4" or 2 1/2" biscuit rutter, cut 9 biscuits and place them on a silicone-lined or parchment-lined baking sheet.
  8. Bake for 10-12 minutes or until golden brown on top and bottom.

Saturday, June 11, 2016

"The Best" Oatmeal Chocolate Chip Cookies

"The Best" Oatmeal Chocolate Chip Cookies - made dough May 14, 2016 from Averie Cooks
Whenever a cookie claims to be the best in its title, I always have to place the words in quotes since that’s not my claim but someone else’s, typically the person whose blog I got the recipe from. It isn’t meant to cast aspersions on their claim and they could have a super stupendous cookie. But I don’t like to make a personal claim about it being “the best” because what makes something the best cookie to one person doesn’t necessarily make it the best for someone else.

In the case of oatmeal cookies, some people might like thin, crispy cookies. In which case, this soft, chewy cookie wouldn’t be for them. Some might consider cakey cookies the best. This chewy cookie wouldn’t be for them either. But if you like good, chewy, moist oatmeal cookies with a nice brown sugar overtone complemented by semisweet chocolate, then, heck yeah, this is a really good oatmeal cookie.

They spread a bit more than I cared for, even though I did the frozen dough ball thing before baking, but that didn’t detract from their taste. I like oatmeal cookies well enough and this was a good one. I don’t know that I’ve quite found my personal “best” oatmeal cookie just yet but I certainly enjoy the search.

1 large egg
1/2 cup (1 stick) unsalted butter
1/2 cup light brown sugar, packed
1/4 cup granulated sugar
1 tablespoon vanilla extract
1 1/2 cups old-fashioned whole rolled oats
3/4 cup all-purpose flour
1/2 to 1 teaspoon cinnamon, to taste
1/2 teaspoon baking soda
pinch salt, optional
1 heaping cup chocolate chips
  1. In the bowl of a stand mixer fitted with the paddle attachment, cream egg, butter, sugars and vanilla. Beat on medium-high speed until creamed and well combined, about 4 minutes.
  2. Scrape down sides of the bowl and add oats, flour, cinnamon, baking soda and optional salt; beat on low speed until just combined, about 1 minute.
  3. Add chocolate chips and mix briefly to combine. Do not overmix.
  4. Portion dough into golf-ball-size balls, cover and chill or freeze for several hours or overnight.
  5. When ready to bake, preheat oven to 350 degrees F and line several baking sheets with parchment paper. Evenly space frozen dough balls on baking sheets. Bake 11-12 minutes or until edges have set and tops are just set, even if slightly underbaked, pale and glossy in the center. Do not overbake. Cookies firm up as they cool. Allow cookies to cool on baking sheet for about 10 minutes before serving or removing to wire rack to cool completely.

Monday, June 6, 2016

Southern Tea Cakes Revisited

Southern Tea Cakes - made June 5, 2016, recipe from Dianne Vickers
Although I have a backlog of posts to put up, I'm blogging out of order to address a recent issue. My blog posts occasionally get featured on the Stir It Up! food page of the Christian Science Monitor and last week, they had included my post on Southern Tea Cakes. There’s an option for readers to provide feedback which then gets forwarded to the blogger. One such feedback I received from the post had a very negative reaction as a Southerner took exception to my interpretation of what a Southern Tea Cake was like, claiming I had “killed these” (not in the millennial slang sense) and that my picture was “nothing like a large, soft cookie which is what our Tea Cake is suppose [sic] to be. Why would you tell people to roll it in a ball and freeze it and lump it up like this? Just make up your own recipe and name it something else rather than using a long named, part of a long well loved recipe and try making it into something it is not.” The reader admitted to being a “hater of people missing [sic] around with my Southern Traditions” and went on to agree with my admittance of not being from the South and never having heard of Southern Tea Cakes with an emphatic “OBVIOUSLY”.
I will admit to being taken aback at the vehemence greeted by a cookie post, a recipe that I had found on pinterest and made according to the original blogger’s post and naming convention (as opposed to creating it on my own and subverting the name). I will further admit my initial reaction would not have done credit to my West Coast upbringing, my Filipino-American heritage or my Christian religion. Fortunately, one or all three factors prevailed and stifled the knee-jerk impulse to respond to dislike with further dislike. That accomplishes nothing but to breed more ill will and wouldn't honor my values.
My second, more pragmatic reaction was to think what a shame this person missed a teaching opportunity to educate me and others on what a real Southern Tea Cake is, obviously something important enough to her to write in and give her opinion. I am teachable and when I make an error, I not only want to find out about it but I also would like to know how to do it correctly so that the error doesn’t continue and won’t be further propagated by me or anyone else.
Fortunately, someone commented on the post directly on my blog, also informing me my version of the Southern Tea Cake wasn’t what she, Dianne V, grew up with but she didn’t stop there and instead helpfully supplied her Grandmother’s recipe which she said was very old and welcomed me to try it. In addition, a personal friend, Melvina, who’s also from the South, passed along her mother’s 
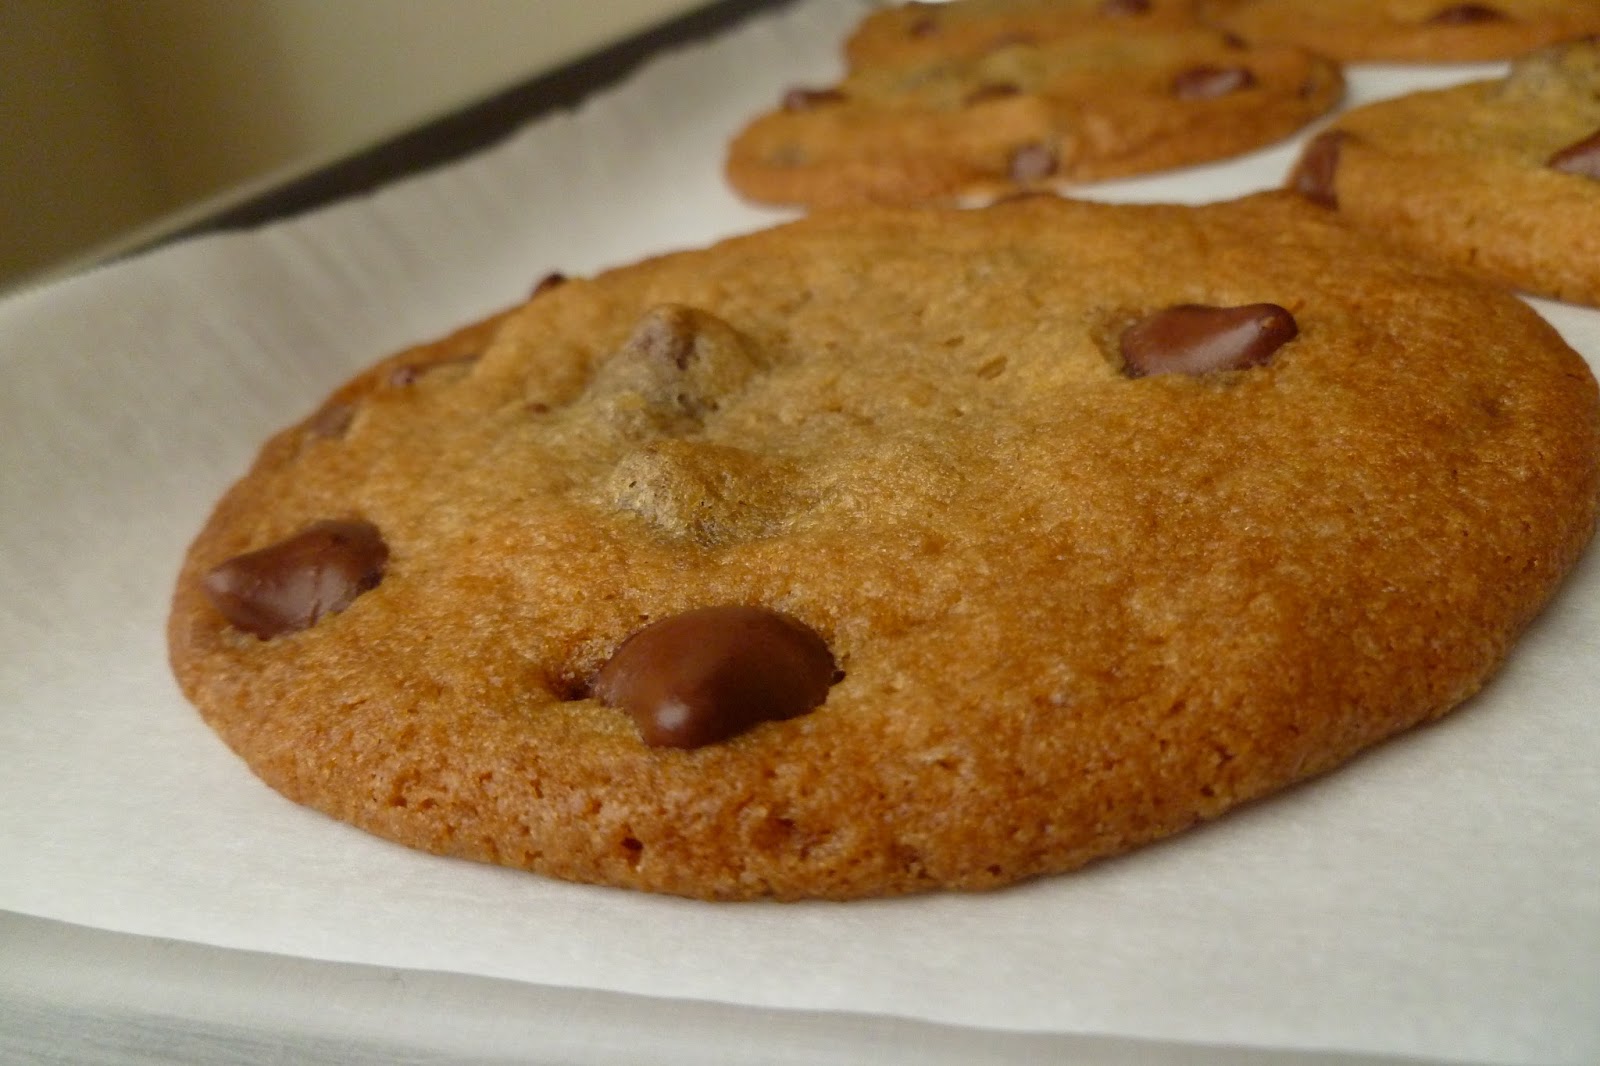
recipe to me after I related the story. I decided to try Dianne’s recipe first and that’s what you see pictured here. I did halve it since I didn’t need so many cookies. Turns out I portioned it a bit generously since my half recipe only yielded just over a dozen cookies whereas the full recipe was supposed to make 3-4 dozen.
I wasn’t sure how much a “small bag” of self-rising flour (as written in the recipe) was since self-rising flour isn’t as common in my area as it is in the South. Melvina told me it was typically 2 pounds. I researched online and translated a pound of all-purpose flour is equal to 3 1/3 cups. My digital scale confirmed that, using the dip-and-sweep method of measuring flour. You can make your own self-rising flour by adding baking powder and salt. 1 cup of all-purpose flour + 1 ½ teaspoons baking powder + ¼ teaspoon salt = 1 cup self-rising flour. Or so say multiple sources on Google. Which is what I used since I don’t normally buy self-rising flour and they didn’t have small bags of it at the store.
Using those adjustments, I made the recipe. The dough was beautifully easy to work with and I patted it into thick discs, bypassing the directions to roll it into a ball and flatten – same results. I wasn’t sure how long to bake it for since the bottoms of the cookie turning golden brown signal they’re done but it’s hard to check the bottom of a baking cookie. The proxy is to watch the edges and take them out as soon as they show a little color. The tops will also “dry” and show some cracks. It’s easy to overbake these so watch carefully. Baking time also depends on the size and thickness you make the cookies. I didn’t refrigerate or freeze them but they had enough flour in them that they didn’t really spread which was nice.
I ate half of the taste test cookie while it was still lukewarm and it was delicious. I loved the texture. Normally I don’t like cakey cookies but I’ll make the exception for a good vanilla butter cookie that’s thick and chubby. I ate the second half of the taste test cookie when it was completely cool and it was still good. The butter and vanilla flavors really come out. So it’s important to use fresh butter and real vanilla extract. Don’t settle for imitation anything or margarine.

I love old recipes that have withstood the test of time so thank you, Dianne, for sharing your grandmother’s recipe and educating me on what a real Southern Tea Cake from a Southerner is like.
Below is recipe as posted by Dianne, except what's in blue are my edits
2 eggs
4 sticks butter
2 cups sugar
1 small bag (2 lbs) self-rising flour (see blog post for substitutions)
2 tablespoons vanilla

All Ingredients Should Be Room Temperature.
No Substitute On Butter. Use Butter.

Preheat Oven To 350 Degrees. Use Ungreased Cookie Sheet.

Using Hand Mixer Beat Butter And Sugar Together, Add Eggs, Beat Well. Add Vanilla Beat Well.

Add Flour A Little At A Time Until Hand Mixer Begins To Struggle (You can mix the whole batch by hand if you want to. My Grandmother never had a mixer so she mixed by hand). Continue To Add Flour A Little At A Time Mixing By Hand. Dough Should Not Stick To Hands Or Feel ‘Packy’. (SOFT BUT FIRM) Depending On Weather, May Not Need WHOLE Bag Of Flour Or May Need A Little More Than A Bag. 

Pinch Off Dough In Golf Ball Size Pieces, Roll In Hands And Flatten. Put On Cookie Sheet, Pieces Not Touching. Bake Until Sides Of Bottoms Begin To Color. Bottoms Will Be Nice Brown, Tops Will Be Pale. Should Make 3 – 4 Dozen Tea Cakes Depending On Sizes Made. 

Sunday, June 5, 2016

Perfect Soft and Chewy Snickerdoodles

Perfect Soft and Chewy Snickerdoodles - made dough May 6, 2016 from Beyond Frosting
I have a favorite snickerdoodle recipe so I don’t know why I try new ones since nothing has ever unseated my favorite nor is it likely to. Wait, that’s a lie. I do know why. I just like making snickerdoodles and even if a new recipe isn’t better than my favorite one, I have an excuse to try a new recipe because it might be better and even if it isn’t, I end up with a batch of snickerdoodles. Win win.

The downside is when the new recipe isn’t as good as my favorite, my hopes are dashed when I take the first bite. But it’s all relative because the minor (and frankly, expected) disappointment is offset by, you know, biting into a snickerdoodle.
These were good but spread more than my favorite recipe and were just a tad too sweet for me. Next time I’d probably add a little cinnamon to the cookie dough itself and more cinnamon to the rolling cinnamon-sugar mixture. I also ran out of cinnamon from Penzey’s and instead have been using Spice Island cinnamon I received as a gift. It’s good but I have to admit, the Penzey’s cinnamon is better and more cinnamon-y. When making snickerdoodles, having great cinnamon is key.

1 cup (2 sticks) unsalted butter
2 cups sugar
2 large eggs
1 teaspoon vanilla extract
3 cups flour
1/2 teaspoon baking soda
1/2 teaspoon cream of tartar

1/4 cup granulated sugar
1 tablespoon cinnamon
  1. Combine butter with sugar and beat on medium speed until well creamed together.
  2. Add eggs, vanilla and vanilla extract. Mix until combined.
  3. In a separate bowl, combine flour, baking soda, and cream of tartar. Slowly add into batter and beat on medium-low speed until just combined and dough forms.
  4. Refrigerate dough for at least 30 minutes. Portion into golf-ball-size dough balls, cover and chill or freeze several hours or overnight.
  5. When ready to bake, preheat oven to 375 degrees F. Line baking sheets with parchment paper.
  6. Combine 1/4 cup sugar and cinnamon in small bowl. Roll dough balls into mixture, coating completely. Evenly space dough balls on baking sheets.
  7. Lower temp to 350 degrees F and bake cookies for 10-12 minutes. Allow to cool for several minutes then remove to wire racks to cool completely.