Wednesday, July 31, 2013

Pure Chocolate Chunk Cookies

Pure Chocolate Chunk Cookies - made dough July 23, 2013 from Pure Chocolate by Fran Bigelow
The title of this recipe is completely "truth in advertising".  It really is pure chocolate.  I used 85% Lindt bittersweet and tried a smidge of the cookie dough to see what it tasted like.  It was almost a little too dark chocolate for me so I ended up experimenting and rolling the dough balls in confectioners' sugar before baking.  It turned out to be the right move because the sweetness of the sugar was a perfect complement to the dark fudginess of the cookie itself. You can skip it if you're more of a dark chocolate purist but it's a good option if you have more of a sweet tooth than a chocolate tooth.
The texture is soft, moist and fudgy - all good things in a chocolate cookie.  BUT you'll only achieve that texture as long as you don't overbake it and if you use a good-quality chocolate. I made mine small since I knew these would be rich and just under 10 minutes was the perfect length of time to bake them in my oven.  Err on the side of underbaking than risk overbaking.
12 ounces semisweet chocolate, finely chopped
1 1/2 ounces unsweetened chocolate, finely chopped
1 stick plus 2 tablespoons unsalted butter, room temperature
3/4 cup plus 2 tablespoons brown sugar
2/3 cup sugar
1 1/2 teaspoons pure vanilla extract
3 large eggs
1 3/4 cups cake flour, sifted then measured
8 ounces bittersweet chocolate, cut into 1/4-inch chunks
1/2 cup confectioners' sugar, sifted, for rolling (optional)
  1. In a double boiler, melt the semisweet and unsweetened chocolates over low heat until melted and smooth.  Let cool to lukewarm.
  2. In a mixer fitted with the paddle attachment, beat together the butter, sugars and vanilla extract until light and fluffy, 3 to 5 minutes.  Beat in the eggs, one at a time, stopping several times to scrape the bowl.  Pour in the melted chocolate and mix to combine.
  3. Fold in the sifted flour by hand until no traces of white remain.  Fold in the bittersweet chocolate chunks.  Chill for 1 hour.
  4. When ready to bake, preheat oven to 325 degrees.  Line 2 cookie sheets with parchment paper or Silpats.
  5. Using a scoop or large spoon, scoop 2 tablespoons of dough for each cookie, roll in sifted confectioners' sugar (if desired) and place on lined cookie sheets, leaving about 2 inches of space between cookies.
  6. Bake for 12 to 14 minutes or until cracked and puffed on top. For smaller cookies, bake 9 to 10 minutes.  Let cool on sheets for about 10 minutes.  Transfer to racks to cool completely.

Tuesday, July 30, 2013

Muffin Bakers! Submit your winning recipe!

Are you a muffin baker extraordinaire?  Want to win a signed copy of Joanne Chang's Flour, Too AND have bragging rights that you have an awesome muffin recipe that'll get featured online for the world to drool over?

Then send the recipe of your best homemade creation to The Christian Science Monitor's Stir It Up! at food@csps.com.  Contest rules are here.  Deadline is tomorrow, July 31, so pass the word along!

As a side note: no, I will not be entering.  Simply because I tend to have a heavy hand with muffins and I could probably count on the fingers of one the number of times I've made really good muffins.

Pinky: Glazed Doughnut Muffins
Index finger: Pineapple Upside Up Muffin
Thumb: Pralines and Cream Pecan Caramel Muffins

Uh, still have 2 more fingers and I ran out of good muffin recipes I've made....

Monday, July 29, 2013

Banana Pecan-Coconut Bread Pudding

Banana Pecan-Coconut Bread Pudding - made July 20, 2013, recipe adapted from All-American Dessert Book by Nancy Baggett
My niece and her boyfriend were visiting me one weekend and, as always, I asked them "what do you want me to make for dessert?"  She chose her favorite Red Velvet Cookies and he chose the Banana Caramel Bread Pudding I'd blogged about earlier.  But, being me, I couldn't resist trying a similar but different recipe for bread pudding and adding my own modifications to it.  I kept the key elements such as bread pudding and caramelized bananas.  But I also kept to the coconut and pecans in the original recipe.
However, I didn't toast the coconut and I didn't chop the nuts or include them in the custard or mix them in with the bread like the original recipe called for.  Instead I just layered them on top so they would get crisp during baking.  Nuts get soggy when you mix them into wet doughs or batters and stay soggy even after baking.  I don't like that texture so I kept them on top to toast.
This plan turned out to be only marginally successful.  I didn't toast the nuts before I layered them on top, figuring they would toast during the baking of the bread pudding.  And they did but they didn't seem like they quite toasted enough.  Next time, I would probably lightly toast them first before putting them on top.  If they get too brown, just loosely cover with foil to prevent over-browning before the bread pudding is done.
I also started off baking this in a water bath as directed but after 25 minutes, it didn't look anywhere near done while the top was almost perfectly browned already so I removed it from the water bath, wiped the bottom and sides of the dish and baked it directly on the oven rack.  It puffed up obligingly after that and 20 minutes later, was done without being over done.  I added the warm caramelized bananas on top before serving (simply melt butter and add brown sugar, whisk to combine then add sliced bananas until soft and caramelized).  I liked this as much as the earlier recipe and very much enjoyed the addition of the coconut.  Next time though, I would leave off the pecans entirely.  I'm just not a fan of nuts in desserts like bread pudding.  Or else I would caramelize the pecans separately and add it to the caramelized bananas right before serving.  This is best eaten when the bread pudding is lukewarm and the caramelized bananas are freshly made and still hot to warm.

4 cups cubed (1/3 inch) crusty French or Italian bread, including crust (I used 16 ounces of challah)
1 cup sweetened flaked coconut, lightly toasted
2/3 cup coarsely chopped pecans, toasted
4 large eggs
Scant 2/3 cup packed light brown sugar
1 ¼ cups whole milk
3/4 cup heavy whipping cream
1 ¼ teaspoons vanilla extract
1/2 cup mashed banana
½ cup semisweet chocolate morsels or mini morsels, optional (I left them out)
  1. Lightly grease a 7 x 11-inch baking dish with nonstick cooking spray.  Spread the bread cubes in the dish.  Toast in the oven, stirring once or twice, until lightly crisp, 11 to 15 minutes; set aside. 
  2. In a medium bowl, using a fork, beat the eggs until frothy and smooth.  Add the brown sugar, stirring until it dissolves.  Stir in the milk, cream, vanilla and mashed banana until well blended.  Stir in half the coconut and all of the chocolate morsels, if using.  Pour the egg mixture over the bread.  Press down lightly until all of the bread is submerged.  Cover with plastic wrap and let bread soak in the mixture overnight or for several hours.
  3. When ready to bake, preheat oven to 325°F.  Sprinkle remaining coconut and the toasted pecans over the surface.
  4. Set the dish in a slightly larger roasting pan or broiler pan.  Place on the oven rack.  Add ¾ inch hot water to the pan.  Bake just until the pudding feels in the center when lightly tapped and is nicely browned on top, 35 to 45 minutes.  If bread pudding does not seem to be baking but the top is getting brown, remove from water bath and bake directly on oven rack.  Cover top loosely with foil to prevent it from becoming too brown.  When puffed and brown, transfer to a wire rack.  Let cool for at least 15 minutes.  Serve warm with ice cream or caramelized bananas.

Sunday, July 28, 2013

Oatmeal Chocolate Chips


Oatmeal Chocolate Chips - made dough July 19, 2013 from Rosie’s Chocolate-Packed, Jam-Filled, Butter-Rich,No-Holds-Barred Cookie Book by Judy Rosenberg
In case you haven't noticed, I've been trying to use recipes from my baking books more often instead of salivating over the ones I pin from pinterest.  I've also been fixated on the baking books from Rosie's Bakery and thumbing through the simpler ones for cookie doughs I can stockpile in my freezer and bake off as I meet with friends.
One of Rosie's recipes for oatmeal cookies fit the bill.  I made the dough and instead of freezing right away like I normally do, I portioned these into dough balls and refrigerated them overnight instead.  I'd read that it's good to do that with oatmeal cookies to give the oats time to absorb the liquid in the dough.  After chilling overnight, I moved the dough balls into the freezer then baked them off a few days later.
I was a little concerned in the baking as by the time the middles weren't raw or doughy-looking, the entire cookie was almost golden brown and I was afraid they had been overbaked or baked until "done" rather than underdone.  But it actually worked out okay because the cookie was still soft and moist.  I don't know if chilling overnight before freezing was a factor but this was a good cookie.  It doesn't have a spice such as cinnamon or nutmeg like some oatmeal cookies do but I liked its simple straightforwardness - a good, chewy oatmeal cookie with chocolate chips.

1 ¼ cups all-purpose flour
6 tablespoons whole wheat flour
1 teaspoon baking soda
1 teaspoon salt
1 ¼ cups (2 ½ sticks) unsalted butter, room temperature
1 ¼ cups light brown sugar, lightly packed
½ cup granulated sugar
2 teaspoons pure vanilla extract
2 large eggs
2 tablespoons milk
2 ¼ cups quick oats
8 ounces (1 ¼ cups) semisweet chocolate chips
  1. Preheat the oven to 375°F.  Line several baking sheets with parchment paper.
  2. Sift both flours, baking soda and salt together into a small bowl and set aside.
  3. Using an electric mixer on medium-high speed, cream the butter, both sugars and vanilla together until light and fluffy, 1 ½ minutes.  Scrape down the bowl with a rubber spatula to keep mixture even-textured as needed.
  4. Add 1 egg and beat at medium speed for 10 seconds.  Scrape the bowl and add the second egg and milk.  Beat on medium speed until blended, 10 seconds.  Scrape the bowl.
  5. Add the flour mixture and mix on low speed until almost blended.
  6. Add the oats and blend on medium speed for 10 seconds.  Scrape the bowl and add the chocolate chips; blend on low speed for 10 to 15 seconds until incorporated.
  7. Drop the cookies by generously rounded tablespoons 2 inches apart on the prepared baking sheets.  Bake until the edges are golden and the centers are lighter in color and just set, 14 to 16 minutes.  Cool them on the baking sheets.
 

Saturday, July 27, 2013

Bakery Review: Jin's Bakery

Jin's Bakery - visited July 19, 2013

I tried another local bakery a week or so ago.  In the yelp reviews for Paris Baguette, Jin's Bakery came up in comparison so I decided to do my own research.  For bakeries, it's best to go in the morning when the offerings are more likely to be freshly stocked as opposed to late in the day when you not only have to make do with whatever's left but it's been a longer time since it was taken out of the oven.  Considering I view a chocolate chip cookie more than 10 minutes out of the oven as starting to go stale, you can imagine how picky I am about freshness.
Jin's Bakery was smaller than I expected based on how the outside looked.  The shot above is about 2/3 of the store (not counting the kitchen area) with the remaining 1/3 being a display case with refrigerated baked goods.  But it was bright and clean and that's pretty much what you want from any bakery.
There weren't a lot of labels on the trays of baked goods so I didn't always know what I was choosing from.  Some of the things that were labeled were custard buns and sweet breads filled with red bean or sesame or taro, none of which I eat so I passed.  I ended up selecting what looked like cinnamon sugar doughnut twists, a mocha chiffon roll and a castella.  The castella was so I could have something to compare to Paris Baguette.
What I thought were cinnamon sugar twists weren't quite it.  The coating was not cinnamon sugar.  In fact, it wasn't really sweet at all.  It was almost like a cheese powder in texture but without really being cheesy in flavor.  The twist itself, at first taste, reminded me of Pillsbury biscuit dough that had been fried instead of baked - it had that kind of flavor and texture although the outside coating wasn't crisp.  It wasn't bad but it was no Stan's doughnut.  I think it took awhile to wrap my head around it because my eyes expected one taste and texture but my taste buds were sending a different signal to my brain so I experienced some cognitive dissonance on this one. I also think it's a matter of what you're used to.  I'm used to twisty "doughnuts" being sweet.  For people who don't like sweets, this would be a good option for them.
I did better with the mocha chiffon roll.  As a rule, I don't go out of my way for a chiffon cake.  Nothing wrong with it but the spongy texture doesn't win out over a pound cake or a cakey cake for me.  However, this one was pretty good: lightly flavored with mocha and not too much (barely any) frosting, which is what I like.  A hallmark of Asian bakeries is most of their offerings aren't very sweet.  I don't hold it against them but I do know what to expect.  Of the three things I bought, the chiffon roll was the best.
The castella was a bit more moist than the one from Paris Baguette but not quite in a good way.  One thing I know from my previous years of consuming mamon from Goldilocks Bakery is when a mamon is more than a day old, it starts to moisten and you can tell the sponge isn't as fresh.  What makes me leery about when it gets to that stage is it's really easy for mold to set in.  Fortunately, mold isn't hard to spot in a yellow sponge cake and I'm diligently paranoid to always check before I consume one.
The outer layer of this had the moistness that signaled this might not have been made hours before I bought it but perhaps the day before and the inner sponge was starting to have a dry mouthfeel.  It was still fine but I give the nod to the castella from Paris Baguette over this one just because the one from PB was more fresh.
The lady who rang up my order was very nice and the bakery is worth trying.  Not sure anything really compels me to return to try anything else but I'm glad I went and discovered what it's like for myself. Oh and it was also a little more expensive than Paris Baguette but by less than a dollar.  My 3 purchases at Paris Baguette had totaled to $5.60.  The three things I bought from Jin's Bakery came to $6.25.  Not enough to break the bank.

Friday, July 26, 2013

M&M Cookies

M&M Cookies - made dough July 18, 2013 from Picky Palate
I made this cookie dough from start (taking the butter out of the fridge) to finish (scooping out the dough balls and putting them in the freezer to chill) in 15 minutes.  The only reason I know it took 15 minutes is I timed it because I made these before work and I didn't want to be late to the office. Normally I don't have time to bake or mix up cookie dough in the morning because that's when I work out.  But I was feeling too low-energy to workout that morning, probably because I stayed up late the night before reading a book (nerd alert).  Since I was awake anyway (because I have an annoying habit of waking up before my alarm goes off) but I didn't feel like exercising, I lay in bed an extra 30 minutes (telling myself every 5 minutes that I really should get up) then spent the rest of my normal exercise time making cookie dough.  I'm not sure that was the right calorie trade off to make but whatevs, right? (Although I did run 4 miles later that day to prep for the taste test cookie.)
As you can guess, 15 minutes doesn't allow for letting butter come to room temperature but since I hardly ever do that anyway, I had no problem dumping cold butter into my Kitchen Aid stand mixer and letting the mixer do the work of softening it up.  When working with cold butter, you want to beat it just enough to get the lumps out but not so much that you incorporate a lot of air into it and warm up the butter too much.  I typically beat it about a minute or so and even if it's still lumpy, I add the sugars and beat it another minute or two until the mixture is incorporated and there are no butter lumps.  Then proceed with adding the rest of the ingredients.

This was fairly good but rather typical of a chunky chocolate chip cookie with M&Ms in it.  It's more of a brown sugar cookie than a butter or sugar cookie.  Careful not to overbake it.  I did my usual baking time for the first batch and took it out as soon as the middle didn't look raw but once the cookies had cooled, it seemed like they had baked just a trifle too long.  Meaning they were baked but not underbaked which is how I like my cookies.  So for the next batch, I deliberately underbaked them and that was much better.
1 stick or 1/2 cup unsalted butter
1/2 cup granulated sugar
1/2 cup packed light brown sugar
1 large egg
1/2 teaspoon pure vanilla extract
1 1/2 cups all purpose all-purpose flour
3 tablespoons instant vanilla pudding mix
1/2 teaspoon baking soda
1/2 teaspoon salt
3/4 cup mini chocolate chips
1-1 1/2 cups mini M&M’s
  1. Preheat oven to 350 degrees F and line a large baking sheet with a silpat liner or parchment paper.
  2. In a large mixing bowl ,cream butter and sugars until well combined. Add egg and vanilla, mixing to combine. Add flour, pudding mix, baking soda and salt, stirring to combine. Add chocolate chips and M&Ms, stirring to combine.
  3. With a medium cookie scoop, place dough 1 inch apart from each other. Bake for 10-12 minutes until edges are golden and the middles no longer look raw or doughy. Let cool on cookie sheet for 2-3 minutes before transferring to cooling rack.

Wednesday, July 24, 2013

Bakery Review: Pink Elephant Bakery

Pink Elephant Bakery - visited July 15, 2013
My coworkers and I are forming an official bakery exploration group, embarking on lunchtime field trips to try out different bakeries around the office.  And since most of them are marketing people, they were creative enough to come up with the name "Sugar Rush" to call our we'll-eat-sweets-anywhere-anytime group (thanks, Julie, for the name, lol).  Our first outing was to Frost and our second was to Pink Elephant, a Mexican bakery or panaderia.
I found Pink Elephant on yelp simply by searching for the highest rated bakery in the area.  They had a 4.5-star rating based on 103 reviews so it seemed like a good option to try.  We piled into 2 cars and, armed with GPS and google maps, made the quick drive over.  Although it wasn't that far, I'd never been to Pink Elephant before. It seemed to be in an older part of town and the bars on the windows gave me a bit of pause since you don't usually see that on a bakery.
Tres Leches cakes in the middle shelf: Cookies 'n Creme, Caramel & Original
Inside, the bakery itself was a large room with display cases full of colorful baked goods lining 3 of the 4 walls. The place was very neat and there were two nice ladies working behind the counter who were patient (and probably quietly amused) with this group of 7 women who came to ooh and ahh over the colorful, eye-candy displays.  According to yelp, Pink Elephant was known for their Tres Leches cake and there were 4 kinds in the display case; Cookies and Creme, Caramel, Mocha and Original which had strawberry jam in the middle.  I'm not a fan of jam so I went with the Caramel Tres Leches.

The cookies looked nice but looked like they were "fully baked" rather than the underbaked look I prefer so I passed on those.
Several types of pan dulce
Another common type of baked good in Mexican bakeries is pan dulce so I did get one of those to try.  When we got back to the office, I tried the pan dulce first.  The bread was a bit dense and rather, well, bread-y.  After the first bite, I warmed it up in the microwave for 10 seconds and much preferred the warmer texture than the room temp one.  It wasn't bad and somewhat reminiscent of a Filipino ensaimada but more dry and less sweet, despite the cinnamon sugar coating.  But it was filling so I didn't have room for the Tres Leches or the apple tart I also got until later that night.
Pan Dulce
Pan Dulce - tasted better warm
I haven't had Tres Leches very often and I've only made it once but I've had good tres leches cake before and I know what it tastes like.  The reviews were right in that Pink Elephant does make a good tres leches cake.  I don't know that I would make a special trip there just to buy this cake but it was delicious.  The layers were moist (of course) and the caramel flavor was superb. I scraped off most of the frosting only because I'm not a frosting person but I liked the cake itself.
Top view of Caramel Tres Leches Cake
Caramel Tres Leches Cake
The third thing I got at Pink Elephant was a slice of apple tart. I was trying to find something similar to what I'd gotten at Paris Baguette so I could do somewhat of an apples to apples (haha) comparison of the two bakeries.  I have to admit that unfortunately, the apple tart at Pink Elephant was not enjoyable.  I expected a flaky pastry and it definitely had layers but whereas a typical flaky pastry should be soft-crisp and buttery, the pastry on this apple tart was rubbery and dry, like it was lacking butter or even shortening.  I tried the first bite at room temperature but it was tough as leather so I warmed it up a little to see if the texture would improve.  It didn't.  Still tough when warm.  Pastry only gets this hard if it's too old or it was overworked and hard in the first place.  I ended up throwing it away after only two bites as the calories weren't worth it.
Apple Pastry
All in all, I'm not sure I understand that 4.5-star rating unless it was just on the Tres Leches cake alone.  And once again, my coworkers had the same feedback on the baked goods they bought so we're all pretty consistent on our taste preferences and it's not just me being overly picky.  I'm glad we went and tried it out though as we all agree the field trip itself with all of us laughing and having fun was better than all the baked goods we've tried.  And no one's enthusiasm seems to have dampened from trying out more bakeries so "Sugar Rush" will continue its field trips.  Stay tuned.

Monday, July 22, 2013

Cream Cheese Pound Cake

Cream Cheese Pound Cake - made July 13, 2013 from Rosie's All-Butter, Fresh Cream, Sugar-Packed, No-Holds-Barred Baking Book by Judy Rosenberg
Don't let the modest appearance of this cake fool you.  If you like tender, almost melt-in-your-mouth cakes, this delivers.  Despite cream cheese being a headliner in the title, you can't really taste the tang of the cream cheese very much.  Instead, the cream cheese contributes to the soft texture of the cake.  Interestingly, this cake rose pretty high in the pan despite not having any chemical leavening.  Instead, the air incorporated from beating all the ingredients together really contributed to both the height and tender crumb.  The cake did deflate a bit once I took it out of the oven but it doesn't fall like a souffle.  It simply isn't as high as anymore once it stops baking.
It did form a bit of a crust on the outside due to the eggs being beaten so thoroughly once they're mixed into the batter, almost like the crispness of a meringue.  That made it a little tricky to get out of the pan cleanly, hence the humble outside of the cake.  I could've dressed it up or covered it with a little glaze but I liked this cake plain.  The art of a good recipe and a good cake is when it doesn't need anything to fancy it up but simply tastes good on its own.  This would be one of those cakes.  If you absolutely want to dress it up in some way, I'd suggest serving with fresh summer berries, both for color and flavor.

3 cups cake flour
1 1/2 cups (3 sticks) unsalted butter, at room temperature
1 package (8 ounces) cream cheese, at room temperature, or warmed lightly in microwave
3 cups sugar
1 tablespoon vanilla extract
6 large eggs, at room temperature
  1. Preheat the oven to 325 degrees F.  Lightly grease a 10-inch tube pan with nonstick cooking spray.
  2. Sift the cake flour into a small bowl and set aside.
  3. Cream the butter, cream cheese, sugar and vanilla in a medium-size mixing bowl with the mixer on medium-high speed until light and fluffy about 2 minutes.  Stop the mixer once or twice to scrape the bowl with a rubber spatula.
  4. Add the eggs one at a time to the butter mixture and mix on medium speed after each addition until blended, about 10 seconds.  Scrape the bowl each time.  When all the eggs are added, mix 30 seconds more.
  5. Stir the flour gently into the batter with a rubber spatula.  Then mix on low speed for 5 seconds, scrape the bowl, and blend until the batter is smooth and even, 5 to 10 seconds.
  6. Pour the batter into the prepared pan.  Bake the cake on the center oven rack until golden and firm to the touch and a toothpick inserted near the center comes out clean, about 1 hour and 35 minutes.
  7. Let cake cool in the pan for 5-10 minutes before inverting and unmolding gently.  Let cool completely.

Sunday, July 21, 2013

Bakery Review: Icing on the Cake

Icing on the Cake - visited July 13, 2013
One of the questions I'm often asked as a baker, third only to "what's your favorite dessert?" and "what's your favorite thing to make?", is "what's your favorite bakery?"  I usually hem and haw because it's hard to pick ONE favorite place where I like everything they make as opposed to one bakery that makes one thing fabulously well and another bakery that makes something else worthy of homage.  But there is one bakery in Los Gatos, CA that comes close and that would be Icing on the Cake.  I was first introduced to it at a former company when my group ordered a banana cake from there for one of my coworkers for his birthday.  Something came up where we couldn't have the cake on the day we picked it up so it went into the fridge and we had to celebrate the following day.  What stuck in my memory was, even after an extra day in the refrigerator, the slice of banana cake I had was delicious.  Moist, flavorful and with an awesome fluffy texture.  Usually I don't even like refrigerating cakes because that dries them out.  But the banana cake from Icing on the Cake not only survived the overnight chilling but it was probably better on its second day than many bakery cakes I've had on their first day.
Inside Icing on the Cake
Ever since that fateful day, I've become a fan.  At first it was just because of their banana cake; in fact, there was a time when I obsessed about trying to recreate it.  I could get the taste down but not the fluffy texture.  My obsession was such that I even considered applying to work there part-time (on top of my 60-70 hours-a-week full-time day job at the time) just so I could learn how to make it.  Yes, I was that obsessed.  AND that's probably the highest compliment I as a baker could pay to any bakery :).  I finally accepted that I couldn't make a banana cake as good as Icing on the Cake, it wasn't practical to give up sleeping to take on a second job to learn how to make it and I would have to content myself with making the long-ish drive to Los Gatos to get some banana cake.  Now, it's become my tradition around my birthday to make the drive there and buy myself a piece of banana cake.

There are several things I love about Icing on the Cake.  First, they are a small business started by Lynn Magnoli that has become successful and grown because they put out quality products.  They didn't grow and flourish because of fancy marketing or glitzy outreaches.  They grew because they tasted good.  There's a "homemade goodness" to their baked goods that I haven't experienced in any other bakery I've tried.  By that I mean almost everything I've tried is something a good baker can make in his or her own kitchen (their banana cake being my personal exception!).  And the reason I like that is because it's not decorated super fancy but it's quality made with fresh ingredients.  Which is what any baker strives to do and why people make their own homemade baked goods.  Icing on the Cake has managed to capture that homey taste and I always associate that homemade goodness with their products.

Second and on a more practical note, I like them because, in addition to whole cakes, you can buy individual-sized portions of everything.  Not just cupcakes or big, thick cookies but also brownies, bar cookies and cake slices.  You can imagine how important that is when I want a slice of banana cake but not a whole cake...because I would probably eat the whole thing and end up feeling sick afterwards.  To contribute to the homey-ness factor, the individual cakes and bar cookies are wrapped in plastic wrap similar to how I wrap up baked goods and give them away in goodie bags.  No fancy packaging - just simply showcased, delicious products.

The third reason I'm such a fan is they have a wonderful variety of baked goods to offer.  Since they're a bit far for me to drive just for a piece of banana cake, I make a point of buying a couple of other things to try each time I go, just to taste test, of course.  Their cakes are my favorite and I can personally recommend the lemon, the German chocolate cake and the marble cake.  Probably the only thing I haven't liked - and it's more of a personal preference than anything wrong with the cake itself - is their carrot cake.  As I've blogged before regarding my favorite carrot cake recipe, I like my carrot cakes to just have carrots in it, not all the other extras like nuts, pineapple and raisins.  Icing on the Cake's Super Chunky Carrot Cake lives up to its name in that it has so much other "stuff" in it, it actually crumbles (although the cake is moist) as there's barely enough cake to hold all the raisins, nuts, etc together.  But that's just one cake out of dozens of baked goods that are surefire winners so I can't complain.
The banana cake of my obsession
See that fluffy texture?  That's what I can't replicate, no matter how many times I've tried.  And I've tried....and tried...and tried some more.
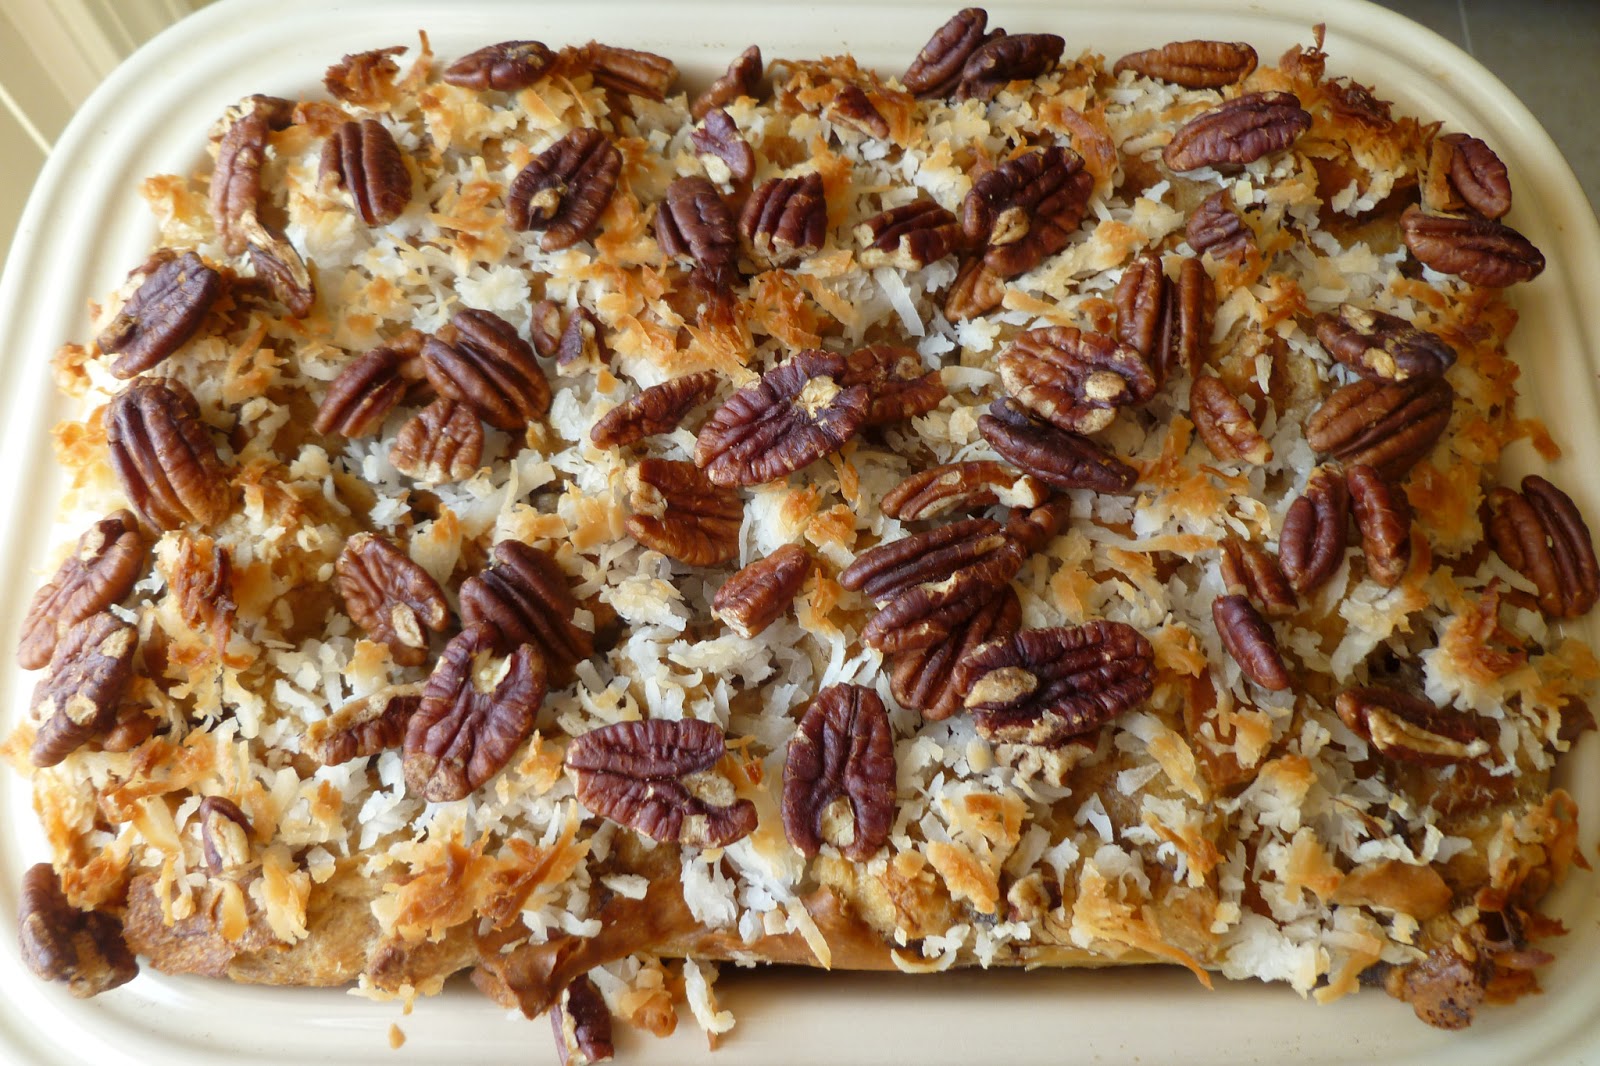
For this year's trial taste test(s), I chose a slice of their coconut pound cake.  I love the moistness and texture of this cake as well as the coconut.  The only thing that gave me pause is I think they used coconut or almond extract or both in this and I'm not a fan of the taste of either of those extracts - it's just too artificial-tasting to me.  Extract taste aside, I did appreciate that while there was a healthy amount of frosting on the cake, it wasn't drowning in it and I only had to scrape off a minimal amount to go with my cake.
I love the homemade-goodness look of their coconut pound cake.
The third thing I tried was a cookie.  I forgot what they called this in the bakery display but it's basically an Orange Cookie with frosting.  The sales person who waited on me put the cookie in the bag with only the thin paper liner on the bottom along with the wrapped slices of cake so it got a little smushed when I tried taking it out.  Regardless though, this was a nice, moist cookie, perfectly flavored with fresh orange.  It's the type of cookie I could make myself (and have) but still, it was good.  Sometimes you don't want to go to the trouble of whipping up a batch of cookies and you just want one, perfectly yummy cookie.  Icing on the Cake is there for you.
Now the only drawback there might be for Icing on the Cake is they can be a little pricey in comparison to other bakeries but they're not too outside the norm.  The 3 things I bought came to $10.75 which might seem a little expensive for 2 slices of cake and a cookie.  I don't think it's outrageous considering cupcake places like Sprinkles charge $3.25 a cupcake and many other bakeries charge $4-$5 for a slice of cake or an individual-size dessert.  Plus, let's face it, even if it was costly, I'd rather pay a little more to get the best instead of saving a couple of bucks for something mediocre.  And I consider this bakery one of the best.

Disclaimer: I am not affiliated with any of the bakeries I've blogged about or will blog about in the future.  These are my own honest observations. :)