Monday, September 8, 2014

Double Triple Oreo Brownies

Double Triple Oreo Brownies - made September 1, 2014, recipe adapted from Yammie's Noshery
Although I've been getting some intermittent baking in, unless my freezer is stocked with cookie dough and slabs of brownies or individually wrapped slices of cake residing in freezer bags, I feel unprepared. Unprepared for what, I'm not exactly sure. Armageddon? I'm sure we're all going to need sweets then. I know I will. Still, I like having a well-stocked freezer for when I have social occasions and I need to pass out goodie bags or if I'm moved to send a care package.

When that happens, the best thing to do is find a brownie recipe that makes a 9 x 13 pan. That yields plenty of brownies for future needs. I also happened to have a package of Double Triple Oreos that's been sitting in my pantry begging to be used. In case you've never heard of the Double Triple Oreo, it's a three cookie Oreo with two cookies sandwiching the original vanilla cream filling and the third cookie enclosing a chocolate creme layer to make one fat cookie. These Oreo people are brilliant. I bought the package in a moment of weakness, thinking I'd try them out before baking with them. Then I forgot about them for awhile. Until now.
The original recipe only called for chocolate chips to be added to the brownies but I conveniently ignored that for my Oreo add-in. You actually can't tell by looking at the picture that I put in the Oreos but they're there. The chocolate cookie part is evident to the sharp eye but the particular pieces I took a picture of didn't have the vanilla creme filling in the visible edges of the brownie. I only had a small piece of this to taste test and I didn't really get an Oreo chunk in it so I don't know if my experimental add-in really added anything. The brownie itself is good although, with the chocolate coming from the cocoa and the chemical leavening being baking powder, it was lighter and more cakey than I preferred my brownies to be. It was still good though and my freezer temporarily held some advance preparation for the end of the world.
I say temporarily because they're gone now. I decided to frost them with Nutella and, because I don't believe in being subtle, I sprinkled the remaining Double Triple Oreos over them and brought them into work today. So they're really gone. Armageddon will have to wait.
2 sticks of butter
2 1/4 cups of sugar
4 large eggs 
1 tablespoon vanilla
1 1/4 cups of cocoa powder
1/2 teaspoon salt
1 teaspoon baking powder
1 1/2 cups all-purpose flour
2 "sleeves" of Double Triple Oreos, cut into chunks
  1. Grease a 9x13 in. pan. and preheat the oven to 350ยบ.
  2. Mix together the butter and sugar in a microwave safe bowl. Heat in the microwave, stirring about every 30 seconds, until the mixture is bubbly and smooth (you can also do it on the stove top if you want). Add in the eggs and vanilla and beat until smooth. 
  3. Mix together the cocoa powder, salt, baking powder, and flour and add to the butter mixture, mixing until smooth. Stir in the chocolate chips. 
  4. Pour the batter into the pan. Bake for about 28 minutes. 

Sunday, September 7, 2014

Marceline's Confectionery Shop - Downtown Disney

Marceline's Confectionery Shop - visited August 30, 2014

My third and last Disney post from last weekend: as part of my walking rounds on the Saturday of the half marathon weekend, I just happened to come across a confectionery shop in Downtown Disney. You know, like a moth to a flame. It was early enough that I had the shop almost entirely to myself as it was too early for the sweets-loving crowd to show up and eat chocolate. I myself try not to derail my good eating intentions until at least after lunch but that’s not to say I can’t look at sweets, at any time of the day. And take copious pictures of them.


I didn’t buy anything then but after spending a few hours at Disneyland (all I could manage in the heat plus my friend and I rode the rides we wanted to ride), I did stop by on my way back to my hotel. On my weekend bucket list, I knew I wanted to eat something Mickey-shaped. Sounds silly, I know, but when in Rome…


The thing I've discovered about the whole Disney franchise is nothing's really unique within the parks' territory. By that I mean, that mouthwatering truffle or that fat snickerdoodle you saw in a bakery cafe is also more than likely available at other Disney outlets within the park and in Downtown Disney. Fudge by the piece at Marceline's? You can also get it by the tray in stores within Disneyland and California Adventures. I only make this point to give reassurance that should you miss one thing somewhere, never fear, you can easily find it again elsewhere as long as you're within the Disney sphere. Just once you leave Disney, it would be harder to find but within it, it's everywhere.


At Marceline's, I went with a mini Mickey turtle – caramel and pecans enrobed in milk chocolate and roughly shaped to look like Mickey’s head. Close enough. I also chose an English toffee square. I’m a sucker for toffee.

The bottom is dipped in white chocolate and rolled in red sanding sugar

As part of the confectionery shop, there’s also a display window for people to gawk at several employees putting the decorating touches on the candy apples. I loved watching them turn candy apples into artistic masterpieces and they did it so efficiently and quickly, you figure they had to have had a lot of practice and experience.


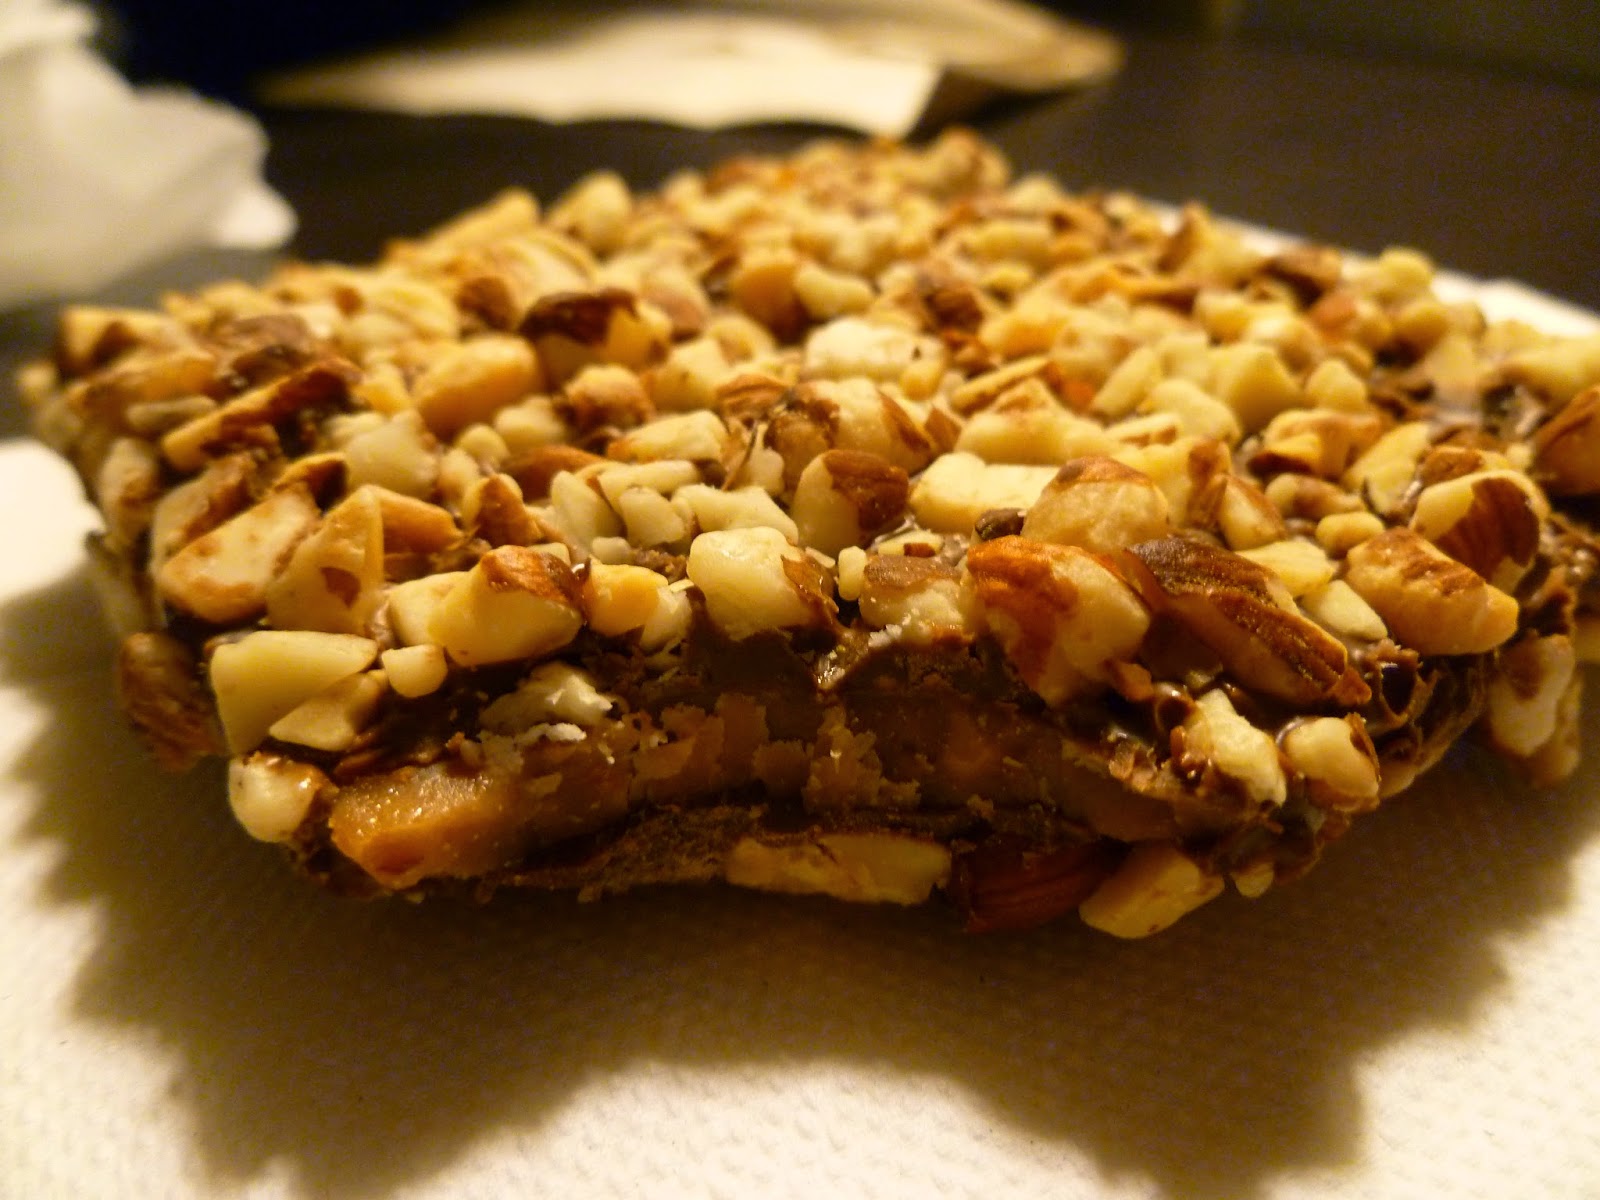
 All in all, it was a fun shop to visit. Lots of temptations but I stuck to my two calorie bombs and called it a day. The mini Mickey turtle was good, the caramel was the perfect texture and consistency, not too soft or too chewy. I would’ve preferred a turtle with almonds instead of pecans but it was still good. But the toffee was my favorite. It wasn’t so hard that your teeth were in danger of cracking when you took a bite but still had a good snap. Plus it was covered in milk chocolate and rolled in chopped toasted almonds. Really, that’s my idea of a perfect confection. Good thing I was going to run 13.1 miles the next day. After finishing that huge square, I was going to need the calorie burn.
Mickey-shaped caramel pecan turtle

English Toffee - best ever

Saturday, September 6, 2014

Coconut Blondies

Coconut Blondies - made September 1, 2014, modified from Better with Sugar
Another easy bar cookie if you're pressed for time and need something quick and simple to make. Which is what I was and what I needed when I got back from the Disney weekend on Labor Day, sore and tired but still wanting to bring something into work the next day.

This takes almost no time to put together; you mix up all the ingredients, pour into a pan and bake. If you love coconut and the flavor of brown sugar, you'll like this bar cookie. The original recipe called for making it in a 9 x 13 pan but with the amount of batter this makes, that seemed like the bar cookies would be too thin so I baked it in a smaller pan and adjusted the baking time. This is rather buttery but has a good flavor with the brown sugar and the wonderful chewiness of the coconut. The white chocolate is a nice touch for a pure blondie experience. Let cool completely before eating or it may be too mushy. I know in the pictures it already does look mushy but that's the fudgy version of a blondie.
3/4 cup butter, melted
1 1/2 cups brown sugar, packed
1 egg + 1 yolk
1 tablespoon vanilla extract
1 cup + 2 tablespoons all-purpose flour
1/2 teaspoon salt
1 cup + 2 tablespoons sweetened shredded or flaked coconut
1 1/2 cups white chocolate chips
  1. Preheat the oven to 350 degrees F. Line a 9"x 9" pan with aluminum foil and lightly spray with nonstick cooking spray.
  2. In a medium bowl, mix together the melted butter with the brown sugar. 
  3. Beat in the egg and then the yolk. Stir in the vanilla. 
  4. In a small separate bowl, mix together the flour and salt. Then mix the flour/salt into the wet ingredients. Stir until combined, but don't overmix.
  5. Fold in the coconut and white chocolate chips.
  6. Pour the batter into the prepared pan, and bake for 22-23 min. It's done when the edges are golden, and a toothpick inserted into the center comes out clean. Let cool on a wire rack.

Friday, September 5, 2014

Bakery Review: La Brea Bakery, Downtown Disney

La Brea Bakery - visited August 30, 2014
While I was in Anaheim for the half marathon, I was hanging out – of course – around Disneyland. Since I wasn’t running the 10K, I had all day Saturday to kill. One of my fitness friends was running the 10K and we agreed to meet at Disneyland after the race so we could go on a few rides that morning. The park didn’t open until 9 am and while I was waiting for her to finish, shower and head over to the park, I treated myself to breakfast at La Brea Bakery at Downtown Disney.


I had heard of Nancy Silverton’s La Brea Bakery and even have one of her cookbooks but they’re primarily in Southern California so I’d never been to one before.  The lines were fairly long as people who’d completed the 10K and their supporters were at the park early, also killing time before the parks opened. But, like all lines in the Disney sphere, they’re handled very efficiently and fairly quickly. The Downtown Disney location is separated into the formal cafรฉ/restaurant part (longer wait for a table) and an “Express” section where you place your order at the counter, they prepare it, hand it over after some minutes and you find your own seating in their outdoor patio area or elsewhere.

I hadn’t eaten but wanted protein so I opted for a ham, egg and cheese panini.  I knew La Brea Bakery was known for its bread so I definitely wanted something with bread so I could try it. I also got what looked like a “downtowner” which is what Gayle’s Bakery in Santa Cruz calls a cinnamon-roll-shaped puff pastry rolled in cinnamon sugar. Gayle’s version is light and flaky but unfortunately, La Brea’s was not. I think if I’d been able to eat it warm, I would’ve liked it better since I’m partial to warm bread. But, at room temperature, it was more dense and a bit dry. It had a drier texture than a typical cinnamon roll so I opted to just eat the center coil. Even that would’ve been better warm.


The panini though was served warm and it was delicious. There’s not much that can go wrong with ham, egg and cheese, especially when you’ve woken up early and hadn’t eaten for 3 hours. Even so, it was a good (and filling) way to start the day. Loved the bread they used for it too.


Wednesday, September 3, 2014

Nutella-Swirled Chocolate Chip Blondies

Nutella-Swirled Chocolate Chip Blondies - made August 26, 2014, modified from Averie Cooks
Quick, easy bar cookie alert! If you like chocolate chip cookies and Nutella, this is their bar-form cousin. The original recipe was a peanut butter version, made so by the addition of peanut butter chips but I like to showcase Nutella on its own and not have it compete with another strong flavor so I opted to use chocolate chips instead and keep the chocolate theme going.


This recipe is so easy, there’s not much I can say about it. It’s also delicious as I’ve become used to all of Averie Cooks’ recipes being. Be generous with the Nutella and swirl it with the batter but don’t over-swirl if you like the decadence of Nutella to be distinguishable. And who doesn’t because isn’t that the point of adding Nutella to baked goods? If I wanted to improve these just the tiniest bit, I might double the recipe but bake it in a 10” or even 9” pan to make the bars a little thicker. But I’m greedy like that.

1/2 cup unsalted butter (1 stick), melted
1 large egg
1 cup light brown sugar, packed
1 tablespoon vanilla extract
1 cup all-purpose flour
1 cup chocolate chips
about 1/3 cup Nutella (more if you wish)
  1.  Preheat oven to 350F. Line an 8-by-8-inch baking pan with aluminum foil, spray with cooking spray; set aside.
  2. In a large, microwave-safe bowl melt the butter, about 1 minute on high power.
  3. Cool briefly before adding the egg so that it doesn't cook. Add the egg, brown sugar, vanilla, and whisk until smooth.
  4. Add the flour and stir until just combined, don't overmix. Stir in the chocolate chips.
  5. Turn batter out into prepared pan, smoothing the top lightly with a spatula.
  6. Evenly add and swirl the Nutella. To create the marbled pattern shown, drizzle Nutella over batter in 5 wide, evenly spaced, parallel lines, each spanning the length of the pan. Like 5 rows of long train tracks. Rotate pan 90-degrees. With a toothpick, starting at the top of the pan, "draw" 4 or 5 evenly spaced lines through the Nutella. You're dragging the toothpick perpendicularly through the first set of lines to create the marbling.
  7. Bake for about 20 to 25 minutes, or until done. A toothpick inserted in the center should come out clean, or with a few moist crumbs, but no batter. Allow bars to cool in pan for at least 30 minutes before slicing and serving.