Friday, December 15, 2023

Snickers Bar Blondies from Can't Stay Out of the Kitchen

1/2 cup unsalted butter, softened
3/4 cup granulated sugar
3/4 cup brown sugar, packed
2 large eggs
2 teaspoons vanilla extract
1 1/2 cups unbleached all-purpose flour
1 teaspoon baking powder
1/2 teaspoon salt
3 cups Snickers bars, chopped into chunks
  1. Preheat oven to 350 degrees F. Line 9 x 9-inch baking pan with foil and lightly spray with nonstick cooking spray.
  2. In the bowl of a stand mixer fitted with the paddle attachment, cream together butter, granulated sugar and brown sugar until light and fluffy.
  3. Add eggs and vanilla extract, mixing until combined
  4. Add flour, baking powder and salt, mixing on low speed until just combined.
  5. Fold in chopped Snickers. Pour batter in an even layer into prepared pan. Bake 25-30 minutes or until golden brown. Cool completely before cutting.
Still working my way through leftover Halloween candy and trying to use different types of recipes for them. Instead of chocolate brownies or cookies, I went with this blondie bar that incorporates chunks of Snickers bars.

As blondies go, this was pretty good. It's a straightforward brown-sugar-based blondie with chopped up Snickers in it. The only issue I had with it is the top is crusty. I prefer a softer bite and the texture underneath the crusty crust was fine. You just have to get past the crust. It's not super hard or anything but it's definitely a crust.

It isn't a deal breaker and I just happen to be one of those weirdos who don't like a crust on either my blondies or my brownies. It's why I tend not to mix batter too much after eggs are added because if you (over)beat eggs, they form more of a meringue-like crust when your batter is baked. And guess who doesn't like meringues? Yeah. Me.

Monday, December 11, 2023

Coconut Mug Cake from Mildly Meandering

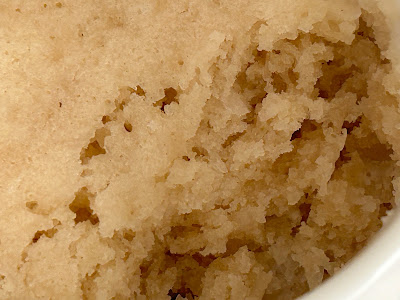
Coconut Mug Cake - made November 11, 2023 from Mildly Meandering
1/4 cup all-purpose flour
2 tablespoons granulated sugar
2 tablespoons coconut
1/4 teaspoon baking powder
1/4 cup milk
2 tablespoons butter
1/2 teaspoon coconut emulsion or extract (I used vanilla extract)
  1. In a small bowl, combine all ingredients and stir. 
  2. Pour batter into mug and microwave for 1:30 to 2 minutes or until cooked through.
I've never really made mug cakes before or if I had, it was so long ago that I've forgotten. But I wanted to use up some milk and this seemed the easiest way. As a baker, it's almost impossible for me to let ingredients go to waste. It’s also because I was raised by first generation immigrant parents and wasting any kind of food is just.not.done. This recipe has the added advantage of not using any eggs so I didn't have to worry about halving or third-ing an egg.
This was actually quite delicious. I was pleasantly surprised by not only how easy it was to whisk together but how well it turned out. The texture reminded me of puto, the steamed Filipino vanilla cakes. But it was much easier to make.
And it was delicious. I didn't have coconut extract so I used vanilla and that worked just fine. The coconut flakes added a nice chewiness to the texture and the flavor. But I love coconut so it’s hard to go wrong with it. Mug cakes might be my new favorite thing and, at least for the moment, supplants a warm cookie when I need a sugar fix.
I made this at night so the lighting isn't the best. Which is a shame as the pictures don't do this little cake justice. If you want a warm, single serving dessert you can make in under 5 minutes, a mug cake is definitely the way to go. Just don’t cook it too long in the microwave or the texture will become rubbery. Err on the side of caution and put it in for less time then just pop back it in the microwave and cook 10 seconds at a time until you’re happy with the texture.

Friday, December 8, 2023

Buttermilk Brownies from The Timeless Baker

Buttermilk Brownies - made November 10, 2023 from The Timeless Baker
1/2 cup all-purpose flour
1/2 teaspoon baking powder
1/2 teaspoon salt
4 ounces semisweet chocolate, chopped
4 tablespoons unsalted butter
1 cup granulated sugar
2 large eggs
1/3 cup buttermilk
1 teaspoon vanilla extract
  1. Preheat oven to 350 degrees F. Line 8 x 8 baking pan with foil and lightly spray with nonstick cooking spray.
  2. In a mixing bowl, whisk flour, baking powder and salt.
  3. In the top half of a double boiler set over hot water, melt chocolate and butter, whisking until completely melted and smooth. Remove from heat and cool for several minutes.
  4. In a large mixing bowl, combine melted chocolate mixture, sugar, eggs, buttermilk and vanilla extract, beating on low speed until combined.
  5. Add dry ingredients and mix on low speed until just combined.
  6. Pour batter into prepared pan and bake for 30 to 35 minutes or until a toothpick inserted near the center of the brownies comes out with a few moist crumbs. Cool completely before cutting and serving.
December 8 is National Chocolate Brownie Day and I just happen to have been experimenting with new brownie recipes lately so I finally get to match a post with a food holiday (yay, me). 

I only ever seem to bake with buttermilk when I have to use it up after I've made my tried and true recipe for banana bread. Then it becomes a matter of trying out whatever recipes I want to make before the expiration date.
In this case, I wanted brownies for my military care packages. Buttermilk brownies are often a misnomer to me as they often turn out to be more like chocolate sheet cake than even the cakiest brownies.
These were more on the brownie side for once, albeit they still had a soft texture. But they weren't too cakey or delicate so they still lived up to their brownie moniker. Flavor wise they were pretty good, not quite with the chocolatey richness of my go-to brownie recipe but still decent brownies, especially if you need to use up leftover buttermilk.


Monday, December 4, 2023

Crumbl Cookies review #59 - Chocolate Swiss Roll and Nutter Butter Brownie Sandwich (tester)

Crumbl Cookies review #59: Chocolate Swiss Roll and Nutter Butter Brownie Sandwich (tester) - visited November 7 and 8, 2023 
Chocolate Swiss Roll
 Now (December 4), it’s National Cookie Day and what better way to acknowledge it than by talking about the cookie shop I’ve been going to most often? Although, in all honesty, I've been out of the country for a few weeks with no access to Crumbl and I just got back a few days ago. If I've been slacking off on the Crumbl Cookies reviews, it's because I've been slacking off on eating Crumbl Cookies. But it hasn't just been because I've been gone. Lately the flavors have either been ones I've already tried or ones I haven't been interested in. Plus I was still working down my freezer stash.
But I finally got back into the Crumbl game before I left and the week these two flavors came out. The Chocolate Swiss roll was a new one to the line up and the Nutter Butter Brownie Sandwich was a test cookie.
I got the Chocolate Swiss Roll first as I "just happened" to be driving by my local Crumbl (okay, I was at Costco and the Crumbl was across the street) and it wasn't test day yet. Since I only planned to get the one flavor plus the test cookie, I was fine getting a single cookie on separate days. 
The best part of Crumbl cookies is eating them warm and since I try not to eat more than 1/4 of a cookie a day (okay, sometimes half a cookie or two 1/4 cookies if I had a lot of workouts on tap that day), it's just as well to get them as a single purchase on separate days. That's more expensive in the long run but a more moderate and enjoyable cookie experience.
I don't normally get Crumbl's chocolate cookies as 90% of them are too rich for me. But I've found I like the brownie ones better and they don't send me into chocoholic overdrive. So I ended up liking the Chocolate Swiss Roll just fine. It's more like a soft brownie without the crusty edges. I liked the ganache on top as well. It was like a set chocolate glaze. The swirl of marshmallow frosting was a tad too sweet for me so I ended up scraping most of it off and just enjoying the cookie base. 
Glad I tried it. Don't think I need to get it again unless there was no other flavor I wanted to try but as chocolate cookies go, I preferred this one along with the chocolate cookie featuring Oreo.

The Nutter Butter Brownie Sandwich was the test cookie this particular week and I almost passed on it because peanut butter cookies are wasted on me. But it was a sandwich cookie which I tended to like and I figured the chocolate part would sweeten the deal. Plus I like to support test cookies as much as I can so my store can continue to be a tester store.
Nutter Butter Brownie Sandwich


I think I like the concept, the execution and the look of this cookie more than the actual taste of it. If you're a peanut butter chocolate lover, you'll think I'm crazy for being so lukewarm about it and that this cookie would make your top 5.
But I'm back to "I like the cookies but I'm just not a big peanut butter fan". Actually, I think I would've like the cookie sandwich and even the filling better without the peanut butter drizzle over the top cookie. I get they do the drizzle to make the sandwich look prettier and to amp up the peanut butter flavor but that's exactly why I didn't like it. The drizzle made the cookie messy when I broke it into pieces and I could've used less peanut butter flavor, not more. But that's a personal preference. For all you chocolate peanut butter lovers, this sandwich cookie is for you.

Sunday, December 3, 2023

Bakery review: Grand Traverse Pie Company

Bakery Review: Grand Traverse Pie Company - received November 2, 2023
December 3 is National Apple Pie Day so it seems like the perfect time to do this review of the Grand Traverse Pie Company, especially since I ordered 2 pies from them, both apple based.
I love pie but rarely make it myself because I've yet to master pie crust and don't have enough of an eating audience to consume multiple crust-making attempts. It's just easier to buy pies, preferably from good bakeries, not the freezer aisle at the grocery store. 
Goldbelly is my go-to for trying out small businesses and new bakeries that ship across the country. It can be a little pricey though so I have to pick my moments. Fortunately, they ran a promo that offered $20 off any purchase and Grand Traverse Pie Company was offering a buy 1, get 1 free deal. Plus, hello, free shipping. All that helped my justification efforts in paying "so much" for a couple of pies.
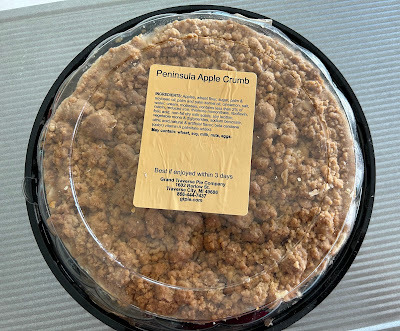
I went with the Apple Crumb with Pecans and Caramel and the regular Apple Crumb Pie. Before you ask how I could possibly consume 2 pies....I can't. But I was hosting another baking meetup at my house the day after I received these and all the extras go to the employees of a local nonprofit so it was a good way to try a slice from both pies and not have the rest go to waste or (my) waist.
The Apple Crumb with Pecans and Caramel was freaking amazing. I'm very picky about my pies since those calories have to be worth it. This one was. The apples were not too soft or too hard, their slight tartness was offset by the sweetness of the caramel and the not-too-soft texture of the apples went perfectly with the crunch from the pecans. Soooo good.
The crust was good too, both the bottom pie crust and the crumb topping. I'm a big fan of pie crust and it's to my eternal sorrow that I haven't been able to consistently make a good one. This one was flaky and tender.

I had tried the caramel pecan apple pie first and had the regular apple crumb pie after the baking meetup. Granted, I was already shot full of sugar by the end of the evening so perhaps I didn't have the same level of receptivity to this one. But, since I forgot to even take a picture of the apple crumb pie slice I ate, you can see I wasn't as into this pie. It was still good but compared to the pecan caramel one, this one was a little plain. If I'd had it first, I would've waxed more poetical. For the purists, this is an excellent choice. For a little pizzazz, go with the one with pecans and caramel. Either way, you can't go wrong. Happy National Apple Pie Day!

Friday, December 1, 2023

Nestle Crunch Oatmeal Cookies from Eat Move Make

Nestle Crunch Oatmeal Cookies - made dough November 9, 2023 from Eat Move Make 
1/2 cup plus 6 tablespoons butter, softened
3/4 cup brown sugar, firmly packed
1/2 cup granulated sugar
2 large eggs
1 teaspoon vanilla
1 1/2 cups all-purpose flour
1 teaspoon baking soda
1 teaspoon ground cinnamon
1/2 teaspoon nutmeg
1/2 teaspoon salt
3 cups oats
1 1/2 cups Nestle Crunch bars, coarsely chopped
  1. Preheat oven to 350 degrees F. Line baking sheets with parchment paper.
  2. In the bowl of a stand mixer fitted with the paddle attachment, cream together butter, brown sugar and granulated sugar on medium speed until creamy and well combined, 1-2 minutes.
  3. Add eggs and vanilla; mix to combine.
  4. Add flour, baking soda, cinnamon, nutmeg and salt on low speed, mixing until just combined.
  5. Add oats and mix on low speed until combined. Add chopped Nestle Crunch bars and mix on low speed until disbursed.
  6. Portion dough into golf-ball-size dough balls and evenly space on baking sheets. Bake 10-12 minutes or until edges are set and middles no longer look raw. Let cool 1 minute on baking sheet then transfer to wire rack to cool completely.
I've been able to use up my leftover Halloween candy bars at a fairly good clip (thank you, pinterest, for all the recipe ideas). This one is essentially an oatmeal cookie with chopped up Nestle Crunch bars.
If you don't like your oatmeal cookies overly spiced, this one is a good option. It's only got cinnamon and nutmeg and those are in reasonable quantities. If that's still too much for you, omit the nutmeg. 

This has my hallmarks of a good oatmeal cookie recipe. It has more oats than flour and not too much spice. The dough was easy to work with and the cookies didn't spread much so they stayed reasonably thick.
I like to send oatmeal cookies in my military care packages for Soldiers Angels as they ship well and don't dry out too easily. Plus the oats give them a heartiness beyond the regular sugar-sweetness of a chocolate chip cookie.

The chopped up Nestle Crunch bars also worked well in this cookie. They provided both sweetness and a little crunch to the cookies. The chocolate didn't melt or puddle as much as I expected. Instead they behaved more like chocolate chips which were soft and melty while the cookies were warm but solidified again once cool.

I'll have to remember all these recipes for next year if I end up with a lot of excess Halloween candy bars again. So far all the recipes I've tried for using them up turned out pretty well. This one was no exception.