Thursday, September 28, 2023

Crumbl Cookies review #54 - Brown Sugar Cinnamon ft Pop Tart and Snickerdoodle Sandwich (test cookie)

Crumbl Cookies review #54: Brown Sugar Cinnamon ft Pop Tart and Snickerdoodle Sandwich (test cookie), visited September 20, 2023
Brown Sugar Cinnamon ft Pop Tart

I was going to skip this particular week (which was last week as I'm only posting this now) as the flavors weren't compelling to me but I had to get the test cookie so, since I was at Crumbl anyway, I picked the Brown Sugar Cinnamon ft Pop Tart to try.

I typically like Crumbl's brown sugar cookie bases but since I've never been a big fan of pop tarts, I didn't feel a particular pull towards this cookie. But, try it, right? I did end up liking the cookie itself and appreciated the light glaze icing on top.
I also thought my store did an excellent job on the brown sugar filling, as in, there was a good bit of stuffing inside, which isn't always the case at other stores. But the Sparks store does an excellent job with stuffed cookies. 
As I expected, I didn't care for the pop tart garnish on top. I ended up taking them off after a test bite. They don't add anything but more sweetness to the cookie and it had enough of that. Overall, this was a decent cookie, if a bit basic, and not compelling enough for me to get again. But I'm glad I tried it so now I know.

Snickerdoodle Sandwich cookie
I did expect to like the snickerdoodle sandwich as I like Crumbl's snickerdoodles and this was just two of them sandwiched with a vanilla filling. 
And, as expected, I liked this cookie. A lot. I'm still not big on creme fillings but this was similar to the filling in the cannoli test cookie and I liked that well enough. I loved the snickerdoodle cookies and a sandwich cookie essentially gives you two for the price of one. So it's a good deal all around.
I know people complain that Crumbl has too many snickerdoodle or cinnamon-based cookies but I'm not one of them. I would definitely get this cookie again once it hits the regular rotation.

Wednesday, September 27, 2023

Crumbl Cookies review #53 - Apple Crumb Cake (test cookie)

Crumbl Cookies review #53 - Apple Crumb Cake (test cookie), visited September 14, 2023

I have mixed feelings about this test cookie, the Apple Crumb Cake. I love me a good test cookie and apple is one of the few fruits I don't mind in baked goods. Apple pie is a perennial favorite.
I liked the base cookie for this (nice brown sugar base), I liked the streusel crumble on top (good crunch) and I liked the glaze drizzle (much better than a mountain of frosting). I even liked the taste of the filling. You know what I didn't like? Look closely at the filling; see any apples? Yeah, me neither.
I'm sure there were some small pieces in there somewhere; after all, the lumpiness didn't just come from the cookie base. I don't know if the particular scoop of filling on my cookie just missed the apple pieces in the vat of filling they came from or there really are very few actual apples in the filling recipe. Regardless, I got mostly gelatinous filling like you'd get in an apple pie. It was good from a taste perspective but oddly, I kinda would like some apples in an apple crumb cake cookie. So this was a half miss/half hit test cookie for me.

Sunday, September 24, 2023

Stamped Cookies #32 - Orange Shortbread Cookies from Glenda Embree

Stamped Cookies #32 Orange Shortbread Cookies - made dough September 10, 2023 from Glenda Embree
1 cup butter, softened
1/2 cup powdered sugar
1 tablespoon orange zest
1 1/2 cups all-purpose flour
3/4 cup cornstarch
  1. In the bowl of a stand mixer fitted with the paddle attachment, cream together butter, powdered sugar and orange zest until combined, 2-3 minutes.
  2. Add flour and cornstarch, mixing to combine. Dough will be a little dry.
  3. Portion into golf-ball size dough balls and roll into smooth balls, using the warmth of your hands to keep dough together and smooth.
  4. Roll each ball in granulated sugar and evenly press cookie stamp on each ball. Cut with round cookie cutter if desired for a smooth round. Cover and chill for 30-45 minutes.
  5. When ready to bake, preheat oven to 300 degrees F. Line baking sheets with parchment paper and evenly space cookies. Bake for 20 minutes or until edges are slightly golden and middles no longer look raw. Remove from oven and let rest on baking sheets for several minutes before removing to wire rack to cool completely.
I'm on a roll with stamped cookie recipes. I've been meaning to try this one for awhile but kept forgetting to get an orange when I went grocery shopping. But I finally managed it.
I love this particular set of stamps from Nordic Ware and use it every time I make a citrus-flavored stamped cookie because it's perfect for lemon and orange shortbread cookies.
I only made a half recipe of this as I didn't want to invest that much butter (original recipe called for 2 cups) unless I know how successfully a recipe is going to turn out. The main thing that gave me pause on this one is how much cornstarch there is relative to flour and the other ingredients. Past experience says that while cornstarch contributes to a more tender texture of a cookie, too much can also contribute to a drier mouthfeel and a more bland flavor.

First, the positives: you can see from the pictures that this recipe holds the stamped impressions beautifully and that's exactly what I look for in a stamped cookie recipe. Otherwise, what's the point of stamping your cookies? The dough handled perfectly and was easy to work with. You don't have to chill this for very long to get it easy to work with.


Second, the less positive? As I was afraid of, this does have a slightly drier mouthfeel and it's not very buttery. The amount of cornstarch and flour makes this a more hardy cookie rather than a delicate buttery one. This is more for people who like a drier snap or crisp to their shortbread rather than the buttery goodness of Walker-like shortbread. It was still good but if I hadn't stamped these cookies, I would've probably liked them better if they were lightly glazed with a simple glaze of powdered sugar whisked with orange juice. Still, it's hard to beat how faithfully the stamped impressions held.


Friday, September 22, 2023

Stamped Cookies #31 Fall Spice Stamped Cookies from Nordic Ware

Stamped Cookies #31 Fall Spice Stamped Cookies - made dough September 4, 2023 from Nordic Ware
1 cup unsalted butter, room temperature
1 cup dark brown sugar, packed
1 large egg
1 teaspoon vanilla
2 2/3 cups flour
1 tablespoon pumpkin spice or cinnamon (I used Penzey's pie spice)
1/2 teaspoon salt
extra granulated sugar for rolling
  1. In the bowl of a stand mixer fitted with the paddle attachment, cream together butter and brown sugar on medium speed until light and fluffy, 2-4 minutes. Beat in egg and vanilla.
  2. In a medium bowl, whisk together flour, pumpkin spice or cinnamon and salt. Add flour mixture to wet ingredients in two additions, mixing on low speed after each addition, until just combined and dough forms. Cover and chill for 15-30 minutes.
  3. When ready to bake, preheat oven to 350 degrees and line baking sheets with parchment paper.
  4. Roll dough into large balls, roll in granulated sugar to coat and press evenly with cookie stamps. Trim edges if desired. Evenly space cookies on prepared sheets.
  5. Bake for 12-15 minutes or until edges are set. Let rest on baking sheet for several minutes before removing to wire rack to cool completely.
I haven't tried out a new stamped cookie recipe in a few months because when I do make stamped cookies, I go to Kitchen Vixen's shortbread recipe for the best impressions after baking as well as the best flavor.
erk, you can tell where I had a few brown sugar lumps in the dough

But, I was foolish enough to be idly surfing Williams Sonoma's website and searched "cookie stamps" on a whim (gah, these costly whims) and lo and behold, my pearl-clutching shock that there were new cookie stamps available. 
Actually there were three new-to-me sets of cookie stamps I hadn't seen before but let's focus on this one first (never fear, the other two will make an appearance in a future post). It's the fall set from Nordic Ware. Now, I have almost every set of cookie stamps on Nordic Ware's site and these are not on there as of this writing. So I don't know if these are a Williams Sonoma exclusive or if they'll eventually appear at Nordic Ware.
Doesn't matter as I.had.to.get.them. As you can see, I did. My favorite is the maple leaf stamp, followed by the pine cone then the acorn. The acorn design doesn't lend itself to as deep or clear impressions as the other two so it's a slightly distant third for me. But honestly, I love them all anyway, especially the set together.
The recipe is from the Nordic Ware fall cookie stamp box. It's similar to their other cookie stamp recipes, just flavored with pumpkin spice or cinnamon. I didn't have pumpkin spice handy so I used Penzey's pie spice which is made up of cinnamon, vanilla sugar, mace, ginger, nutmeg, anise seed and clove. It worked just fine. The edges were crisp and the middle was chewy-soft which I liked. I made the cookies a little thick, hence why they didn't bake crisp all the way through. You can make them thinner but it becomes harder to work with to get a clean impression and be able to separate the dough from the stamp without breaking. Make sure to chill the dough first to make it easier to work with. And if you don't have square cookie cutters in the right size (I didn't), use a pizza cutter to trim the edges for a clean cut.

Tuesday, September 19, 2023

Chocolate Espresso Cookies from A Farm Girl's Dabbles

Chocolate Espresso Cookies - made dough August 26, 2023 from A Farm Girl's Dabbles 
1 cup unsalted butter, melted and cooled
1 1/3 cups granulated sugar
5 tablespoons maple syrup
1 large egg
1 teaspoon vanilla extract
1 1/3 cups all-purpose flour
3 tablespoons cocoa powder
1 teaspoon espresso powder
1 1/2 teaspoons baking powder
1 teaspoon salt
brown or white sugar, for rolling
  1. In the bowl of a stand mixer fitted with the paddle attachment, beat together melted butter and granulated sugar until light and fluffy, about 4 minutes. Add maple syrup, egg and vanilla, beating on medium speed until combined.
  2. In a medium bowl, whisk together flour, cocoa powder, espresso powder, baking powder and salt. Add to butter mixture on low speed in two additions, beating after each addition until just combined. Portion into golf-ball-size dough balls, cover and chill for an hour or longer.
  3. When ready to bake, preheat oven to 350 degrees F. Line baking sheets with parchment paper.
  4. Roll chilled dough balls in brown sugar or granulated sugar, coating completely. Evenly space on baking sheets, leaving 2 inches apart.
  5. Bake 9-11 minutes or until tops are puffed and cracked. Remove from oven and let cool on baking sheets.
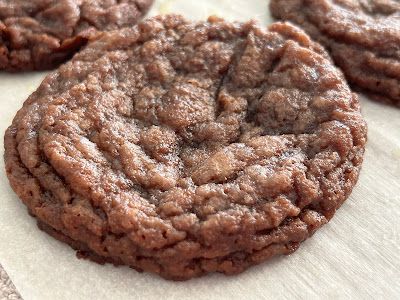
At first glance (and second and third), you can tell this was a cookie fail. The cookies spread too much and are misshapen because they baked right into each other as they spread. From their appearance, you can immediately tell there isn't enough flour.
But what I'm not sure of is whether the recipe doesn't call for enough flour or if I simply didn't add the right amount it called for. When I make cookie dough, I typically whisk the dry ingredients together in a bowl as part of my mise en place. But since I'd been going through a period of flat cookies, I've taken to going by appearance of the dough. Sometimes that calls for withholding some flour and other times for adding more. But when you combine all the dry ingredients together in one bowl, you can't as easily withhold the flour since it's all mixed in with the leavenings and salt.
So my seemingly brilliant solution is to mix all the dry ingredients except the last 1/4-1/2 cup of flour, to be added at the end only if the dough seems sticky and needs more flour. Good idea, right? Welp, it is if you don't forget to add the flour you originally withheld. My problem with this one is I genuinely can't tell you if I did withhold the flour and forgot to add all of it in or if I did measure correctly and the recipe just needs more flour. Mine looks nothing like they're supposed to from A Farm Girl Dabble's blog. Her cookies look perfect. Mine, not so much. 
The first bakes are pictured above, all baked from frozen dough. Fortunately, with the remaining (frozen) cookie dough balls (pictured below), I tried the trick of rounding the cookies with a large round cookie cutter as soon as they came out of the oven so the edges smooth out into the circular shape the cookies are supposed to be. Wow, it actually worked. Except for the one below in the top left. That was my trial run and I didn't quite get all the edges inside the cookie cutter when I was swirling. But hey. it worked on the other ones. Believe it or not, the ones below came out of the oven almost as rough looking and misshapen as the ones above. But capturing each misshapen cookie inside a larger round cookie cutter and swirling immediately after you take them out of the oven while they're still hot got them into shape.

From a flavor perspective, the chocolate and espresso weren't particularly strong. Instead the butter and greasy texture (due to not having enough flour) took over the flavor profile and texture. It wasn't bad but I think it could've been better. Next time I need to pay more attention and make sure I add the right amount of flour. 


Sunday, September 17, 2023

Milk Chocolate Macadamia Coconut Cookies by Modern Honey

Milk Chocolate Macadamia Coconut Cookies - made dough August 19, 2023 from Modern Honey
1 cup butter, cut into cubes
1 cup brown sugar, packed 
1/2 cup granulated sugar
2 large eggs
1 teaspoon vanilla 
3 cups all-purpose flour
1 teaspoon cornstarch
3/4 teaspoon baking soda
3/4 teaspoon salt
2 cups milk chocolate chips
1 cup sweetened flaked coconut
1 cup macadamia nuts, roughly chopped
  1. Preheat oven to 400 degrees F. Line baking sheets with parchment paper
  2. In the bowl of a stand mixer fitted with the paddle attachment, cream together butter, brown sugar and granulated sugar until light and fluffy, about 4 minutes.
  3. Add eggs, one at a time, then vanilla, mixing to combine after each addition.
  4. On low speed, mix in flour, cornstarch, baking soda and salt in two to three additions, mixing just until combined. Do not overmix. 
  5. Stir in chocolate chips, coconut and macadamia nuts. Portion dough into golf-ball size balls and flatten tops slightly. Evenly space on lined baking sheets. Bake 9-10 minutes or until edges are golden brown and middles no longer look raw. Remove from oven and let rest on baking sheets for 10 minutes before transferring to wire rack to cool completely.
I must be on a roll with putting nuts in cookies. But I've long ago made an exception to macadamia nuts since they don't soften in baking like their other nutty (bad pun woefully intended) counterparts. Once they cool, they're as crisp as ever.
I typically pair macadamia nuts with coconut or white chocolate or both. This recipe swaps out the white chocolate for milk chocolate. I'm running out of good quality white chocolate chunks and haven't replenished my supply yet so using milk chocolate chunks was ideal. For milk chocolate, I prefer to buy Trader Joe's Pound Plus milk chocolate bar and cut it into chunks for cookies. They taste and look better than going with chocolate chips.

I liked this cookie. It's got a little more going on than a straightforward milk chocolate chip cookie because of the macadamia nuts and coconut so the purist in me had to adapt. But I like macadamia nuts, coconut and milk chocolate separately and they worked together in this cookie. They also didn't spread much, something I always look for in a good cookie.

The edges were crisp and the coconut adds a little more of that crisp-chewy texture as well as sweetness. You can sub out semisweet chocolate chunks or chips for the milk chocolate if you prefer more chocolate and less sugar (that's not me).