Wednesday, July 7, 2021

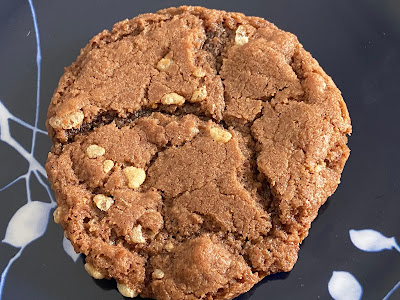
Chewy Coconut Cookies

Chewy Coconut Cookies - made dough June 26, 2021 from Kirbie Cravings
I'm going to keep this short and blog out of order because, if you're a coconut lover, you need to scroll all the way down to the recipe and make these. Preferably now. You'll thank me later.

This is probably one of the best coconut cookies I've ever had. Normally I like my cookies to be soft and chewy with maybe a little bit of crisp at the edges. This was more crisp except for the center but that's part of what made them so good.

I made a couple of modifications which I noted in the recipe. Namely, I used vanilla extract instead of coconut extract because, much as I love coconut, I hate coconut extract and its metallic artificial taste. Vanilla extract worked just fine.

This is also perfect to make in the summer and hot temps because there's nothing to melt if you were to pack some for a picnic and eat one or five. Enjoy.


2 3/4 cups all-purpose flour
1 teaspoon baking soda
1/2 teaspoon baking powder
1 cup butter
1 1/2 cups granulated sugar
1 egg
1 teaspoon coconut extract (I used vanilla)
1 cup shredded unsweetened coconut (I used sweetened, flaked coconut)
  1. In a medium bowl, whisk together flour, baking soda and baking powder; set aside.
  2. In the bowl of a stand mixer fitted with the paddle attachment, cream together butter and sugar until fluffy and well combined, 2-3 minutes. Beat in egg and extract.
  3. Add the flour mixture in 2 additions, mixing briefly on low speed until just combined. Do not overbeat. Add coconut and mix just until combined.
  4. Portion dough into golf-ball-size balls and flatten slightly into thick discs. Smooth edges with your fingers so no coconut pieces stick out. Cover and chill or freeze for several hours or overnight.
  5. When ready to bake, preheat oven to 350 degrees F. Line baking sheets with parchment paper. Evenly space dough discs on prepared sheets. Bake 10-12 minutes or until edges are set and lightly golden brown and middles no longer look raw. Let rest on baking sheets for several minutes then transfer to wire rack to cool completely.

Friday, July 2, 2021

Triple Fudge Oreo Crunch Cookies

I don't normally bake with shortening but when sending military care packages to the Middle East during the summer months, that's exactly what we're advised to do. Because of the potentially long mailing time (typically my packages can get to their destination in 10 days to 3 weeks) and the triple digit heat, butter-based baked goods can go rancid.
Rancid is not a word anyone, baker or recipient, can look forward to. So I try to suppress my baking snobbery and go with shortening or partial shortening in recipes during the summer months.
Rather than experiment by subbing in shortening when butter is called for in an original recipe, I tend to use recipes that start off with shortening in the first place. No worries about substitution and someone else has already tested them out, right?
Such was the case here. I'm a fan of Oreos so it wasn't a hardship to pick this recipe to send out in desert-bound care packages. The flavor was good. The texture was more crisp than chewy which is the effect of the shortening. My snobbery had to be suppressed for safety and durability but this was a good stand-in for a butter-based cookie.

1 cup butter-flavored shortening
1 1/2 cups granulated sugar
2 large eggs
1 teaspoon vanilla
2 1/4 cups all-purpose flour
1/2 cup unsweetened cocoa
1 teaspoon baking soda
1 teaspoon salt
1 1/4 cups chocolate chips
12-15 Oreos, roughly cut into quarters
3/4 cup white chocolate chips
  1. In the bowl of a stand mixer fitted with the paddle attachment, cream together shortening and granulated sugar until light and fluffy, 2-3 minutes. Add eggs, one at a time, beating just until combined, after each addition. Beat in vanilla.
  2. In a medium bowl, whisk together flour, cocoa, baking soda and salt. Add to mixing bowl in two addition, mixing until just combined after each addition, until no flour streaks remain.
  3. Fold in chocolate chips, Oreos and white chocolate chips.
  4. Portion dough into golf-ball-size dough balls and flatten slightly. Cover and chill or freeze for several hours or overnight.
  5. When ready to bake, preheat oven to 350 degrees F. Line baking sheets with parchment paper and evenly space dough balls. Bake 9 - 11 minutes or until edges are set and middles no longer look raw. Cool cookies on baking sheets for 5 minutes then remove to wire rack to cool completely.

Wednesday, June 30, 2021

M&M Chocolate Cookie Bars

We've been having a heat wave lately which always discourages me from turning my oven on to bake. Fortunately or unfortunately, I haven't been sleeping very well so I have a tendency to wake up around 3 or 4 am on most days. After a fruitless 30-60 minute attempt to fall back asleep, I give in to the inevitable and get up. Usually I get my workout(s) done while it's still cool and before I log in for work. 
This time around, I took advantage of the cool very-early-morning temps to bake these bars in preparation for the next care packages going out to deployed military service members for Soldiers Angels. Since I'm not particularly skilled in decorating baked goods, I rely (heavily) on themed M&Ms to add some color, particularly red, white and blue M&Ms to pick up on the 4th of July holiday.

This is a straightforward bar cookie, somewhat a cross between a blondie and a shortbread. It's not as moist as a regular blondie but also without the crisp buttery texture or flavor of a shortbread. So I'm a little conflicted whether I like these or not since it doesn't commit to being either a blondie or a shortbread. And I thought I had commitment issues.
Nevertheless, since I was baking them for military care packages, I guess it's not as critical that *I* like them as much as they're still tasty, can travel well and make it in decent shape to their destination to a desert climate. And I always tell myself they've got to be better than an MRE, right?
1/2 cup unsalted butter
1/4 cup granulated sugar
3/4 cup brown sugar, packed
1 large egg
1 teaspoon vanilla extract
2 cups all-purpose flour
1 3.5-ounce instant vanilla pudding mix
1 teaspoon baking soda
1/4 teaspoon salt
3/4 cup chocolate chips
3/4 cup M&Ms
  1. Preheat oven to 350 degrees F. Line a 9 x 13" pan with foil and lightly spray with nonstick cooking spray; set aside.
  2. In the bowl of a stand mixer fitted with the paddle attachment, cream butter for 30 seconds. Add granulated sugar and brown sugar; beat for 3 minutes, until light and fluffy.
  3. Add egg and vanilla extract; mix until incorporated.
  4. In a separate mixing bowl, whisk together flour, pudding mix, baking soda and salt. Add to butter mixture in two additions, mixing briefly after each addition until just combined. Fold in chocolate chips and M&Ms.
  5. Press dough into an even layer in the prepared pan. Garnish top with additional chocolate chips and M&Ms if desired. Bake for 22 - 25 minutes or until the top is golden brown. Remove from oven. Cool completely before cutting.

Tuesday, June 29, 2021

Peanut Butter Oatmeal Bars

Here's an easy hack to make a holiday-appropriate baked good: red, white and blue M&Ms incorporated into the dough and sprinkled on top before baking.
The bar cookie itself is easy to mix together and, with both oatmeal and peanut butter, has a hearty flavor and dense chewy texture. In other words, it was perfect to send in a military care package for Soldiers Angels.
Because it doesn't have any frosting and isn't really that "delicate", it's also ideal to take to a summer picnic as you don't have to worry about anything melting under a hot summer sun. Except perhaps the chocolate chips and really, there's nothing wrong with having melt-y chocolate chips in a bar cookie.

1/2 cup butter, softened
1/2 cup brown sugar
1/2 cup granulated sugar
1/2 heaping cup creamy peanut butter
1 large egg
1/2 teaspoon vanilla
1 cup all-purpose flour
1/2 teaspoon baking soda
1/4 teaspoon salt
1 cup old-fashioned oats
1 1/2 heaping cups chocolate chips and/or red, white & blue M&Ms or a combination of both
  1. Preheat oven to 350 degrees F. Line an 8 x 8" baking pan with foil and lightly spray with nonstick cooking spray/
  2. In the bowl of a stand mixer fitted with the paddle attachment, cream the butter, brown sugar and granulated sugar. Add peanut butter and beat until combined. Add egg and vanilla; beat until just combined.
  3. In a separate bowl, whisk together flour, baking soda and salt. Add to peanut butter mixture and mix on low speed until just combined. Stir in oats and chocolate chips/M&Ms. Spread evenly into prepared pan. Bake for 16-20 minutes or until edges are golden and a toothpick inserted near the center no longer comes out with raw batter. Do not overbake.

Sunday, June 20, 2021

Ferrero Rocher Nutella Crunch Brownies

Ferrero Rocher Nutella Crunch Brownies - made June 19, 2021

I got the idea for these brownies from Queenslee Appetit. She not only had some of the best brownie pictures I've ever seen with clean cuts and lick-my-screen brownies stuffed with Ferrero Rocher but also the brilliant idea of stuffing brownies with Ferrero Rocher
Not that the concept is new but for some reason, I rarely think of it. Probably because, as a general rule, I don't buy Ferrero Rochers and don't have them as a pantry staple because I would eat them. That may sound non-logical but trust me, my waistband finds it perfectly rational.
But I was inspired by her pictures to load up on one of my favorite chocolates so I could make these brownies. I used her brownie recipe but rather than topping with the fudge layer in her original recipe, I went with my standby of Nutella Crunch topping.


I also upped the ante by adding chopped toasted hazelnuts to the topping to pair with the whole hazelnuts centered within each Ferrero Rocher.

You can use your favorite brownie recipe for the base layer but bake in a slightly bigger pan because the nutella crunch layer may make the brownies too thick otherwise. Not usually a bad problem to have but I assume you want to be able to bite into these. So if you have a recipe for an 8 x 8 pan of brownies, bake them in a 9 x 9 pan instead and bake for a shorter time since the brownies will be thinner and not take as long.

The Nutella Crunch layer? To die for. Not to mention a good way to use up any leftover Rice Krispies in the box if you didn't use them all up for making Rice Krispie treats. You're welcome.

Your favorite brownie recipe or try the one from Queenslee Appetit (make the brownie layer only).

For the Nutella Crunch layer:
1 tablespoon butter
3/4 cup Nutella
1 cup semisweet chocolate chips
2-3 cups Rice Krispies (adjust amount based on however much you need to coat each crispy rice cereal)
1/2 cup chopped hazelnuts, lightly toasted, reserve a handful for garnish
  1. Once the brownies have come out of the oven, prepare the topping.
  2. In the top half of a double boiler set over hot water, combine butter, Nutella and chocolate chips. Stir until melted and smooth. Remove from heat.
  3. Add crispy rice cereal and stir to coat completely. Add hazelnuts. Spread topping in an even layer over warm brownies. Smooth top and sprinkle with additional chopped hazelnuts if desired.

Friday, June 18, 2021

Coconut Toffee Chocolate Chip Bars

Coconut and toffee - hard to beat that combination if you're a coconut lover or a toffee lover or both.
With summer coming up (although with the current heat waves hitting the country, it feels like summer already pranced right in and sat down), these are good for picnics and any other outdoor activities where you have to pack a quick snack and don't want to worry about frosting melting into a mess or fragile baked goods wilting.
It's not that healthy of course but so few things on my blog are. But they are easy to make and pack (and ship) well. In extreme heat, there's only the chocolate to melt and melty chocolate chips aren't a bad thing in a sturdy, chewy bar cookie.
Crust
1 1/4 cups all-purpose flour
1 cup old-fashioned oats
2 cups flaked coconut
1/2 teaspoon salt
3/4 cup brown sugar
1 cup butter, softened
1 egg
12 ounces semisweet chocolate chips

Filling
1 14-ounce can sweetened condensed milk
1/4 cup light corn syrup
8 ounces toffee bits
  1. Preheat oven to 350 degrees F. Line a 9 x 13 baking pan with foil and lightly spray with nonstick cooking spray.
  2. Crust: Combine flour, oats, coconut and brown sugar in the bowl of a stand mixer and mix at low speed.
  3. Add butter and mix until a crumbly dough forms. Add egg and beat until combined. Stir in chocolate chips.
  4. Reserve 1 1/2 cups of dough for topping. Press remaining dough into an even layer in the prepared pan. Bake 10 minutes.
  5. Filling: combine sweetened condensed milk and corn syrup in a small bowl and mix until combined. Pour evenly over hot crust. Sprinkle with toffee bits. Top evenly with reserved crust mixture.
  6. Bake 25 to 35 minutes until golden brown. Cool and cut into bars.

Thursday, June 10, 2021

Giant Red Velvet Cookies

Giant Red Velvet Cookies - made May 7, 2021 from Kar for a Bite 
I love red velvet and I love giant cookies. White chocolate and red velvet are a classic combination, pleasing to the eye and taste buds. At least, these ones were.

The only thing I don't like when baking with white chocolate is how they brown in the oven during baking. It just doesn't look as aesthetically pleasing as when they're still un-browned white chocolate. You can get around this by baking with the white chocolate inside the cookies then, as soon as you take them out of the oven, press more white chocolate chunks on top of the hot cookies, pressing them lightly to adhere on top of the cookies.

As you can tell, I didn't do that for this batch. But regardless of how they looked, these cookies were delicious. You don't have to make them as "giant" cookies but if you make them smaller, be sure to adjust baking time accordingly. I like them large enough that you can really get that fudgy texture and have something to sink your teeth into.


1 cup butter, softened
1 cup brown sugar, packed
1/2 cup granulated sugar
2 large eggs
4 tablespoons red food coloring or 1 tablespoon red gel food coloring
1 tablespoon vanilla extract
2 1/2 cups all-purpose flour
3/4 cup cocoa powder
1 teaspoon baking powder
1/4 teaspoon baking soda
1 teaspoon salt
2 cups white chocolate chips
  1. In the bowl of a stand mixer fitted with the paddle attachment, cream the butter, brown sugar and granulated sugar until combined and fluffy, 1-2 minutes. Add eggs, red food coloring, and vanilla, mixing on low speed until combined.
  2. In a separate bowl, whisk together flour, cocoa powder, baking powder, baking soda and salt. Add in two additions to butter mixture, mixing briefly after each addition until just combined. Fold in white chocolate.
  3. Portion dough into 12 equal parts and shape into thick discs. Cover and refrigerate or freeze for several hours or overnight.
  4. When ready to bake, preheat oven to 350 degrees F. Line baking sheets with parchment paper and evenly space cookie dough discs two inches apart. Bake for 15-17 minutes or until edges are set and middles no longer look raw. Let rest on baking sheets for 5 minutes then transfer to wire rack to cool completely.

Thursday, June 3, 2021

Brown Butter Nutella Crunch Cookies

Brown Butter Nutella Crunch Cookies - made dough May 9, 2021 from Toasty Oasis 
Much as I love Rice Krispie treats, especially the cookie butter version, the most First World problem with them is I never use up the whole box of Rice Krispies to make them. So I'm left with a partial box that isn't enough to make another batch of Rice Krispie treats but are too much to throw away (which I wouldn't do anyway as my Filipino upbringing would abhor wasting even 1 puffed grain of rice). Yet if I don't use them soon enough, they'll go stale.
I don't know why I never thought of using them in cookie recipes sooner or more often. I think I just had a one-track (or two-track) mind that they could only be used in Rice Krispie treats or my Nutella Crunch brownies. I don't eat them as straight cereal; I only bake with them. Enter Nutella Crunch Cookies.
These turned out pretty well because, well, Nutella.... As with all sandwich cookies, err on the side of making these small since you'll be eating two of them as a sandwich cookie. I also took the precaution of flattening them slightly to start their baking from a disc shape rather than a round bake. It helps with more even baking and increases your chances of ending up with a more uniform shape.
True to their title, they do have some crunch, both from the Rice Krispies in the dough but also in the texture of the cookie itself. You still don't want to overbake though. You don't want the texture of a crisp Oreo or the blackened look of one either.

3/4 cup unsalted butter, melted and browned
6 tablespoons granulated sugar
1 cup light brown sugar
1 tablespoon vanilla extract
2 large eggs, cold from refrigerator
1 cup Nutella
2 1/2 cups all-purpose flour 
3/4 teaspoon baking soda
1 1/4 teaspoons salt
1 1/2 cups crispy rice cereal (45 grams)
  1. In a mixing bowl, pour hot melted browned butter over granulated sugar and brown sugar and stir to combine. Whisk in vanilla extract then eggs, one at a time, whisking after each addition. Stir in Nutella, mixing until combined and smooth,
  2. In a separate bowl, whisk flour, baking soda and salt. Add to butter-Nutella mixture in two additions, stirring to combine after each addition. Fold in crispy rice cereal.
  3. If dough is too warm or soft to portion out, cover and chill for 30 minutes. Then portion into golf-ball-size dough balls, cover and chill or freeze for several hours or overnight.
  4. When ready to bake, preheat oven to 350 degrees F. Line baking sheets with parchment paper and evenly space dough balls. Bake for 10-11 minutes or until edges have set and middles no longer look raw. Let rest on cookie sheet for several minutes then remove to wire rack to cool completely. Sandwich with Nutella if desired.