Saturday, May 16, 2015

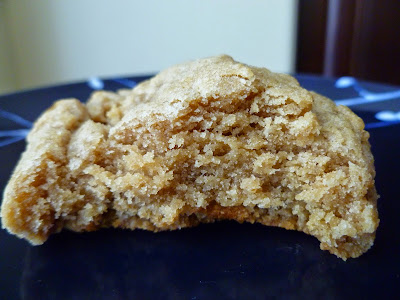
Biscoff-Stuffed Snickerdoodles

Biscoff-Stuffed Snickerdoodles - made dough May 9, 2015 from The Biscoff Cookie & Spread Cookbook by Katrina Bahl
Don’t put away that jar of cookie butter just yet. Yes, another recipe using Biscoff or Speculoos, your choice. This time we take the classic snickerdoodle and up the ante by “stuffing” it with cookie butter.
Of course, you don’t actually stuff it, not like you would a turkey, for instance. Instead, you portion off some snickerdoodle cookie dough, flatten into a thick disc, put a dollop of cookie butter in the center, and then either wrap the dough around it or place another disc of cookie dough over it and seal the edges. It depends on how big you make your disc and whether it’s enough to enclose the cookie butter completely.
I do a combination of both. I use enough dough to come up the sides of the cookie butter dollop but not enough to completely enclose it so I put a bit more dough on top, seal any cracks and roll into a smooth ball. Then, because I’m almost incapable of baking cookie dough without freezing it first (because I like thicker cookies), I do place them in freezer bags and deposit in my freezer until I’m ready. 
I do not roll the dough balls in cinnamon sugar until I’m ready to bake them. You might want to take the dough balls out of the freezer once you turn your oven on to preheat then roll them in the cinnamon sugar right before you line them up on the baking sheet and put in the oven. That gives them a few minutes to thaw which will help the cinnamon sugar adhere better. If you’re having difficulty coating them, let them thaw for a little longer (5-10 minutes usually does the trick) then roll them again. When you take the cookies out of the oven, sprinkle more cinnamon sugar on top while they’re still hot. Be careful not to overbake them! 
I thought these cookies were delicious. I like the cookie butter paired with the vanilla butter cinnamon flavor as the more vanilla flavor provides a good backdrop to showcase the cookie butter flavor. I gave some to a friend who visited me for dinner and his feedback the next day was “it was GOOOOODDDDD”.  I think I got the right number of O’s and D’s from his email in there. So there you have it: a third party endorsement of this cookie. 
3 cups all-purpose flour
1 teaspoon baking soda
2 teaspoons ground cinnamon
1/4 teaspoon salt
2 teaspoons cream of tartar
1 cup butter, softened
1 cup granulated sugar
1 egg
1 teaspoon vanilla extract
1/2 cup creamy Biscoff spread

1/3 cup granulated sugar
2 teaspoons ground cinnamon
  1. Whisk together flour, baking soda, cinnamon, salt and cream of tartar.
  2. In a large bowl, cream butter and sugar together for 2 minutes until light and fluffy.
  3. Add vanilla and egg until incorporated.
  4. Slowly add the dry ingredients to the wet ingredients until just combined.
  5. Using a small cookie scoop, scoop out balls of dough and flatten into discs. Place a spoonful of Biscoff cookie spread in the middle of one and place another disc on top, sealing the edges to encase the cookie butter completely. Roll gently into a round ball. Repeat with remaining dough. Chill or freeze for several hours until firm.
  6. Preheat oven to 375 degrees F. Line a baking sheet with parchment paper. Roll dough balls in cinnamon-sugar mixture and space evenly on cookie sheet, 2 inches apart. Bake 10-12 minutes and remove to wire rack to cool completely. Sprinkle with more cinnamon-sugar if desired.

Thursday, May 14, 2015

Biscoff Sheet Cake

Biscoff Sheet Cake - made April 28, 2015, adapted from Biscoff Cookie & Spread Cookbook by Katrina Bahl
Before I get into the recipe, I want to note that my blog hit a milestone sometime over the night and surpassed 1 million page views - yay! I started my blog 6 years and 8 months ago, almost to the day and never thought far enough ahead of how long I would keep this up or dreamed that I would get to a million views. Thanks to everyone who contributed to that number! In the early days, I used to marvel at getting any page views at all :). So thank you! Now back to the regularly scheduled programming....
Second recipe from my new baking book and it’s another winner. You know how much I love my sheet cakes. This is made in a similar manner to a Texas Fudge Cake and is equally easy to make and equally delicious as well.

The cake itself doesn’t have a strong cookie butter flavor but it has a great cakey texture and the frosting on top contributes the additional cookie butter dimension. If you want to make this even easier and amp up the cookie butter, you can skip the frosting and just frost it with straight cookie butter. If you’re going to do that, though, let the cake cool for at least 5-10 minutes then frost the cake while it’s warm rather than when it’s still oven-hot. Either way, yeah, it’s really good.

1 cup granulated sugar
1 cup brown sugar, packed
2 cups all-purpose flour
1 teaspoon salt
1 teaspoon baking soda
2 eggs
½ cup buttermilk
1 teaspoon vanilla
¼ cup creamy Biscoff spread
1 cup water
½ cup butter
1 cup chocolate chips, optional (I left them out)

Frosting
½ cup butter
1/3 cup buttermilk
½ cup creamy Biscoff spread
3 ½ cups powdered sugar
1 tablespoon vanilla extract
  1. Preheat oven to 350 degrees F. Line a 9 x 13 pan with aluminum foil and spray lightly with nonstick cooking spray.
  2. Whisk together the sugars, flour, salt and baking soda. Set aside.
  3. In a separate bowl, whisk together the eggs, buttermilk and vanilla; set aside.
  4. In a medium saucepan, bring Biscoff spread, water and butter to a boil. Remove from heat and add the dry ingredients followed by the egg mixture. Stir well and transfer to prepared pan. Sprinkle with chocolate chips if desired.
  5. Frosting: Bring butter, buttermilk and Biscoff spread to a boil. Remove from heat and stir in the powdered sugar followed by the vanilla. The frosting will be thick.
  6. Pour evenly over the cake while the cake is still warm from the oven and the frosting is still hot.

Tuesday, May 12, 2015

Biscoff Cloud Cookies

Biscoff Cloud Cookies - made dough April 28, 2015 from The Biscoff Cookie & Spread Cookbook by Katrina Bahl
Meet my new favorite cookie. I’m not even kidding. I’m sure something else will supplant it at some future point but for now, it’s the Cookie Butter Cloud Cookie. You know how I’ve felt like I was in a baking slump? Nothing on pinterest looked interesting to me and I’d even started deleting pins from my baking pinboards because, let’s face it, I’d had  them pinned for so long without making them that it was unlikely I’d ever make them. I got tired of the pins mocking me so I deleted them. Let’s hear it for conflict avoidance.
I tried turning to my existing baking books because somewhere in 200+ books, there should be “a few” recipes I’d want to make, right? But, like my pinned recipes, some of my baking books I’d flipped through so often and tagged what I wanted to make (that’s how we “pinned” things the old-fashioned way) that nothing looked exciting or compelling for me to make. Which is a bad sign of the baking slump I was in.
So like any good baker with recipe ADD, I did the logical thing. If 200 baking books don’t yield a recipe you want to try and the endless recipes on the interest don’t captivate the baking muse, you talk yourself into buying another baking book. I know, I know, I’m not supposed to because I have “enough”. In my defense, I instituted all the normal shopping rules: wait 24 hours, keep asking myself “do I really need it?” (Of course not. Doesn’t matter.) Then buy it anyway because sometimes being an adult gets old and $14 isn’t going to break my budget.
The book was smaller than I expected and in paperback; apparently $14 doesn’t buy as much as it used to. No matter. On my first pass, I tagged half a dozen recipes I wanted to make right off the bat. That’s how it usually goes when I get a new cookbook. I’m all fired up to bake every single recipe in it, bake a few then it joins the ranks on my bookshelves until I think to pick it up again and try to rekindle that initial spark.
No matter, it’s new, it’s fascinating and this is the first recipe I made from it. And it’s a winner. Doesn’t spread much, the edges get crisp, the cookie butter flavor says “hello, here I am” and the texture is amazing. If you like chewy cookies and abhor cakey cookies, this is the cookie for you. Of course, as always, do not overbake. 8 minutes like the recipe says or, if your oven doesn’t blast as hot as it should, 10 minutes tops. Let it set or it’ll be too gooey and the edges won’t be crisp if you eat it too soon. If you want to foray all the way to the end of the decadence spectrum, add a dollop of cookie butter on top while it’s just barely lukewarm then let your teeth sink into blissful goodness. Ah, cookie butter.
½ cup unsalted butter, room temperature
1/3 cup creamy Biscoff spread
¾ cup brown sugar, packed
½ cup granulated sugar
1 egg
1 teaspoon vanilla extract
2 cups all-purpose flour
1 tablespoon cornstarch
½ teaspoon salt
½ teaspoon ground cinnamon
  1. In the bowl of a stand mixer, beat together butter, Biscoff spread, brown sugar and granulated sugar at medium speed until combined.
  2. Add egg and vanilla and beat on low speed until combined.
  3. Whisk dry ingredients together and add in two batches to the butter-sugar mixture. Mix only until just combined.
  4. Form into golf-ball-sized dough balls and chill or freeze until firm, several hours or overnight.
  5. When ready to bake, preheat oven to 350 degrees F. Line a baking sheet with parchment paper and space cookies evenly, 2 inches apart.
  6. Bake for 8 minutes, remove from oven and let cool for several minutes before transferring to a wire rack. Let cool completely.


Monday, May 11, 2015

Restaurant Review: Willow Street Pizza

Willow Street Pizza - dinner on March 20, 2015
This is a long overdue restaurant review, mostly because I forgot I’d gone there and hadn’t blogged about it at the time. So it’ll be a quick one since all the (I’m sure) witty things I was going to write about have escaped my memory and would only fall flat now if I took a stab at resurrecting them. I hate when that happens.
In any case, I met a friend here, partly because it was close to her house and convenient for her to skip out on her husband and kids to meet me for dinner and partly because my cousin Christine gave me a gift card to Willow St. Two birds, one stone.

We got there fairly early (6 pm) so while the restaurant was somewhat full, it wasn’t overly crowded and we didn’t have to wait long for a table. Probably because we were willing to sit at a high top close to the bar area. I’d been to Willow St before but not for some years. I had a vague recollection that their pizza was pretty good but I didn’t know that I was in the mood for a pizza. I compromised and got the calzone. My friend Cindy went further afield with a burger.
The sign of a good pizza place is how good their crust is. Which can also be signaled by their bread as presumably it’s a similar, if not the exact same, recipe. Our server brought out a round loaf of still-warm bread. Bliss. It’s hard not to like warm bread and the carbo gods know they have my number. My chicken pesto calzone was also pretty good, albeit the pesto “sauce” was more liquid than I would’ve liked and soaked into the bread. But that didn’t stop me from (over) eating the generous portion they served. Hey, it was good and I was hungry.
For once I didn’t get dessert. I know, I’m disappointed in myself too but honestly, it was a really big calzone and I shouldn’t have eaten it all but I did. Serves me right. It just means I have to go back again, plan more carefully and save room for dessert.

Saturday, May 9, 2015

Biscoff Mug Cake

Biscoff Mug Cake - made April 24, 2015 from Country Cleaver
I should declare this Cookie Butter Week. Or however long it’ll take me to blog the next few recipes in which cookie butter is going to be the star ingredient. Sometimes I have a one-track mind and that track gave way to the cookie butter train.

Although 95% of the stuff I bake I give away, every so often, I make an individual dessert that’s only enough to be consumed by me, me, me. Because let’s face it, sometimes I don’t want to make a big baking production and I just want a bite or two of something. Enter the mug cake.
I’ve tried making a mug cake before but I overestimated the cooking and underestimated the strength of my microwave so I ended up with a mug of overbaked, rubbery cake. It wasn’t pretty. The only thing that got me to try again was seeing this recipe for Biscoff Mug Cake on pinterest.  The beauty of mug cakes is you mix the ingredients in a mug, pop it in the microwave and in a minute or two, you have dessert. All made from scratch and all you have to wash afterwards is the mug, the fork you used to mix the ingredients with and the spoon you used to eat it.
This was no different. Add the ingredients, blend briskly with a fork, pop it in the microwave and then hover to make sure you don’t overcook it again. This took less than 2 minutes to “bake”. I checked it at a minute and a half then popped it back in for 15 more seconds. Take it out, snap a picture and – I can’t lie – top with a spoonful of cookie butter to melt over the hot cake, take more pictures, take a bite. Then swoon.
This was delicious. The cake itself wasn’t super cookie-butter-flavored so it helped to have the cookie butter “frosting” over it. But the texture was nicely cakelike and it’s hard to fuss about warm cake with cookie butter melting over it. The only thing I would caution is this made a sizeable mug cake, enough for 2 servings. It’s best eaten warm so you might want to grab a second spoon and share it with someone. The best thing is if you eat it too fast and it wasn’t enough for the both of you, you can whip up another one and be eating a second mug three minutes later.
4 tablespoons all-purpose flour
1/4 teaspoon baking powder
pinch of salt
3 tablespoons sugar
1 egg
3 tablespoons milk
3 tablespoons vegetable oil
3 tablespoons Biscoff spread

In a large mug, whisk together all ingredients until smooth. Microwave for 2-3 minutes, or until set. Each microwave is different, use your best judgement for your machine.
Let cool until you can handle the mugs, they will be hot. Top with a small dollop of Biscoff spread so it melts or top with whipped cream. Serve while warm.

Thursday, May 7, 2015

Restaurant Review: Tong Soon Garden

Tong Soon Garden - dinner on May 1, 2015, 4-star rating on yelp
I met a friend for dinner last week. We always like to try new places either around where we work or live to check out local restaurants. Yelp is an invaluable source when we need suggestions of where to eat.
This time around, we went for Chinese food at Tong Soon Garden. I was caught in traffic and ended up a few minutes late, exacerbated by the fact that I missed the restaurant the first time around because it was literally right on the main street and not tucked away in a strip mall like I had thought so I overshot it and had to double back.
Fortunately it wasn’t that crowded so we already had a table. The menu was a standard Chinese menu, meaning lots of choices. Price points were slightly higher, meaning most main dishes were in the $10-$15 range. Most Chinese restaurants typically have a good selection in the $10 or under price point. However, the higher range was immediately explainable when our orders came out in much larger portions than I’m used to getting at a typical Chinese restaurant. They were definitely on the generous side.
Fried Chicken Wings

We ordered an appetizer of fried chicken wings, Sweet and Sour Pork Peking Style and Beef Chow Fun. There were only 2 of us but we had enough to feed at least 6 people. The wings were delicious and full of flavor as they also came in some sort of glaze. I was less thrilled with the Sweet and Sour Pork Peking Style. I ordered it Peking style because, based on my experiences in other restaurants, it had more flavor and sweetness than the regular sweet and sour pork. Which was also true in this case but the sauce wasn’t as good as I’ve had elsewhere and the pork pieces were on the skinny side, especially when you factor in the breading. Actually, it had more breading than I expected as I also thought Peking style meant less breading.
Sweet and Sour Pork, Peking Style
The Beef Chow Fun was good but the beef to noodles ratio leaned a bit skimpy on the beef and there were lots of chow fun noodles. I also didn’t like the bean sprouts and would’ve preferred the dish without it. So of the 3 dishes, the fried chicken wings were the best. I also have to give props to the service as they were quick. Our food came out so fast it made me wonder how much was ready-made and just sitting by the kitchen door. Except for the chow fun, the other two dishes had to be fried at the last minute to have crispy exteriors and the mere minutes between ordering and the food arriving didn’t seem like enough time to fry that much food. Yet they were crispy where they should’ve been.
Beef Chow Fun
If you want a nice Chinese restaurant for a large party with fast service, this is a good place to go. Parking in the back isn’t all that plentiful so I suggest car pooling. You can park on the street but since it’s in the main drag with lots of traffic, I don’t recommend it. 

Tuesday, May 5, 2015

Baked Banana Streusel French Toast

Baked Banana Streusel French Toast - made April 25, 2015, adapted from Sunset Brunch cookbook
I still had the (overpriced) loaf of brioche I'd bought from Voyageur du Temps in my freezer and decided it was time to put it in use as well as use up some milk before it expired.
I started off with this recipe for baked French toast from a very old cookbook that my mom had from back in the day. I've never made much from it but since it was a brunch cookbook and I needed a French-toast-like recipe, it was a good place to start.
I did add the banana, the streusel and the glaze on my own to make it more bread pudding like instead of plain French toast. For the most part it worked. The streusel was good, nice and crisp-crunchy after it's cooled slightly.

I recommend eating this the same day you make it though as the butter-brown sugar syrup that results from the streusel makes the underside of the bread a bit too sweet the next day.
Good dish for a brunch. If you don't like bananas, you can keep this plain and omit them for a more traditional cinnamon streusel French Toast bake.
4 eggs
1 cup milk
1/4 cup sugar
1 teaspoon cinnamon
1/2 pound challah, cut into thick slices then cubed

Streusel
1 cup brown sugar
1/2 cup flour
1/4 cup butter, cut into pieces
1/2 teaspoon cinnamon

1-2 large bananas, sliced into rounds

Glaze
1 cup powdered sugar
2-3 tablespoons milk or until desired consistency
1 teaspoon vanilla

  1. Whisk eggs and milk together in large bowl; add sugar and cinnamon. Add challah cubes and let soak for at least an hour, covering bread completely with mixture.
  2. Make streusel, cutting in cold butter until streusel is coarse crumbs. Squeeze handfuls together to make large clumps.
  3. Preheat oven to 350 degrees F and grease 8 x 8 pan or similar size. Arrange soaked bread in even layer. Place sliced bananas evenly on top. Sprinkle with streusel, covering top as evenly as possible.
  4. Bake for 45-50 minutes or until custard is set and streusel is browned. Let cool for 15 minutes.
  5. Whisk together glaze ingredients and drizzle over top of streusel. Serve warm.

Sunday, May 3, 2015

Mashed Sweet Potatoes

Mashed Sweet Potatoes - made April 24, 2015 from Table for Two
I love sweet potatoes. Being a plain eater, it should come as no surprise that my favorite way to eat them is….plain. Boiled, baked or fried, it doesn’t matter as long as it’s just me and the sweet potato.

Once in awhile, I try out a recipe to “add stuff” to them. As is the case with these mashed sweet potatoes. It seemed harmless enough as the ingredients being added and the way the sweet potatoes are prepared was no different than making regular (starchy) white potatoes – add butter and milk and mash the heck out of them. Sweet potatoes are even better than white potatoes (to me) so this should be even better given that treatment, right?
Wrong. This was okay, don’t get me wrong but sweet potatoes already have so much flavor on their own that I felt adding the milk and butter was unnecessary and detracted from the pure sweet potato flavor since now you also tasted the butter while the milk diluted the sweet potato. I have nothing against butter, you know of my love for butter. Just not with my sweet potatoes. 
2 1/2 pounds sweet potatoes, peeled and cut into 2-inch cubes
3 tablespoons unsalted butter
1/4 cup half and half or whole milk
1 teaspoon salt, or to taste
  1. Bring a pot of water to boil then add the sweet potatoes. Boil until fork tender.
  2. Drain the sweet potatoes then place in a large bowl. Using a potato masher or a fork, mash the potatoes to desired consistency. 
  3. Stir in the butter, half and half or milk and salt and beat until combined. Serve warm.

Saturday, May 2, 2015

Banana Sheet Cake with Cream Cheese Frosting (#15)

Banana Sheet Cake with Cream Cheese Frosting - made April 19. 2015 from Simply Recipes
After my last two baking debacles (Snickerdoodle AppleCobbler and Snipdoodles), I needed an easy win to offer the baking gods that I couldn’t fail three times in a row. And nothing’s easier than a sheet cake or had a high probability of being a winner than a banana sheet cake with cream cheese frosting. Plus it’s been awhile since I made yet another attempt to try and duplicate the banana cake from Icing on the Cake. This is attempt #15 in case anyone’s lost count.
I didn’t expect this would be a lot like Icing on theCake’s texture since it didn’t have what I’d consider some progress in my previous 16 attempts to replicate their banana cake texture, namely cake flour for a softer crumb. But still, it turned out to be a pretty good cake nonetheless and soothed my baking ego that I wasn’t a total loser just because my previous two baking attempts were semi (or wholly) failures.
This was good and a bit standard, meaning not sure I’ll remember it a few months from now or feel the urge to make it again, but if you need a quick, easy and tasty banana cake to feed a crowd, this will do nicely. As always, make sure you’re using overripe bananas and don’t overbake it.
2 cups all purpose flour
  • 1 teaspoon baking soda
  • 1 teaspoon cinnamon
  • 1/2 teaspoon salt
  • 1/2 cup (1 stick) unsalted butter
  • 1 cup white granulated sugar
  • 1/2 cup brown sugar
  • 2 eggs
  • The scraped insides of one vanilla bean or 1 teaspoon of vanilla extract
  • 1 cup of mashed ripe bananas (2 large or 3 medium bananas)
  • 1/2 cup full fat sour cream

Frosting
  • 6 ounces cream cheese, room temp
  • 4 Tbsp (1/4 cup) unsalted butter, room temp
  • 2 cups powdered sugar
  • 1 teaspoon vanilla extract
  • 1 teaspoon lemon juice

  1. Preheat the oven to 350°F (175°C) . In a medium bowl, whisk together the flour, baking soda, cinnamon, and salt.
  2. Beat together in a mixer the butter and sugars. Beat in the eggs one at a time. Mix in the vanilla and mashed bananas.
  3. Mix in half of the flour mixture, then the sour cream, then the other half of the flour mixture.
  4. Spread batter evenly in a greased 10x15 baking pan. Bake at 350°F (175°C) for 20 minutes, or until nicely browned and the surface bounces back when you press it with your finger. Cool completely before frosting.
  5. To make the frosting, mix all of the ingredients together with an electric mixer. If too stiff to spread, add a teaspoon or two of water. Spread the frosting evenly over the cake and slice to serve.