Friday, November 17, 2023

Copycat Red Velvet Oreos from Dixie Crystals

Copycat Red Velvet Oreos - made dough October 27, 2023 from Dixie Crystals 
Cookies
1/2 cup unsalted butter, softened
1/2 cup powdered sugar
1/2 teaspoon vanilla extract
pinch of salt
1 cup all-purpose flour
2 tablespoons cocoa powder
red gel food coloring

Filling
1/4 cup unsalted butter, softened
1/4 cup shortening
1/2 teaspoon vanilla extract
1 3/4 cups powdered sugar
  1. In the bowl of a stand mixer fitted with the paddle attachment, beat together butter and powdered sugar until well combined and creamy, 2-3 minutes. Add vanilla extract and salt; mix until combined. Add a drop of red food coloring and mix to combine.
  2. In a separate bowl, whisk together flour and cocoa powder. Add to butter mixture in 2 additions, mixing on low speed. Add red food coloring, drop by drop, mixing on low speed, until desired uniform colored is achieved.
  3. Divide dough in half and roll each half between two sheets of parchment to 1/4" thickness. Wrap in plastic wrap and chill for at least 30 minutes.
  4. When ready to bake, preheat oven to 350 degrees F. Line baking sheets with parchment paper.
  5. Remove chilled dough from refrigerator, stamp or roll with embossed rolling pin and cut into small rounds with a round cookie cutter. 
  6. Evenly space round, stamped cookies on the baking sheets. Bake 12 minutes. Remove from oven and let rest on baking sheet for 5 minutes then transfer cookies to wire rack to cool completely.
  7. Make the filling: Cream together butter and shortening until uniform and well combined. Add vanilla and mix to combine. Add powdered sugar in 2-3 additions, beating after each addition until combined.
  8. Place filling in piping bag fitted with icing tip #10 and pipe onto the bottoms of half the completely cooled cookies. Top with remaining cookies.
I've never had the (storebought) Red Velvet Oreos before so I don't know how well these compare to the real thing. I also only ate a tiny runt cookie that was the tail end of the dough and barely made enough to make a tiny stamped cookie.
What I did have was pretty good. Although I didn't make the filling from the original recipe that I've included here. I had some cream cheese frosting left from a banana cake I made for a local get together so I used that instead. I'm less impressed with how well the dough held the stamped impressions though. It's hard to tell from the pictures but this dough seems more suited for stamps with larger impressions and not finer details like lettering. I'll have to try this recipe again with different stamps. These were a test run for a Christmas cookie exchange I'm hosting in December and I didn't have a chance to take more pictures before I gave them away to the employees of a local nonprofit. Another reason to try them again.

Wednesday, November 15, 2023

Coconut Bundt Cake from Chef in Training

Coconut Bundt Cake - made November 3, 2023 from Chef in Training
1 box white cake mix, dry, not prepared
1 3.4-ounce box instant vanilla pudding mix
4 eggs
1/2 cup sour cream
1/2 cup granulated sugar
3/4 cup oil
3/4 cup water
1 teaspoon coconut extract
1 cup sweetened coconut flakes

Cream Cheese frosting
12 ounces cream cheese, softened
4 cups powdered sugar
1 teaspoon vanilla
1/4 teaspoon salt
1/2 cup toasted coconut
  1. Preheat oven to 350 degrees F. Grease and flour a bundt pan; set aside.
  2. In the bowl of a stand mixer fitted with the paddle attachment, combine cake mix, pudding mix, eggs, sour cream, sugar, oil, water and coconut extract; beat for 3 minutes. Stir in coconut.
  3. Pour into prepared Bundt pan and smooth top. Bake for 45-50 minutes or until a toothpick inserted in the thickest part of the cake comes out with a few moist crumbs.
  4. Cool for several minutes and loosen sides of pan with small spatula. Invert onto a serving plate and cool completely.
  5. Make frosting: Combine all ingredients in a mixing bowl and beat on high until smooth. Spoon frosting into a piping bag and pipe the frosting over the top. Sprinkle with toasted coconut.
November 15 is National Bundt Day so this seems like a good day to share this recipe. This cake is supposed to have cream cheese frosting but I had run out of powdered sugar at the time I made it so I made do with a sprinkling of the remaining spoonful of powdered sugar that I had left.
Fortunately, this cake actually doesn't really need a frosting (says the non-frosting person). It was light and cakey with a good chewiness from the coconut. Since the base is a cake mix, it's super easy to make. Just throw all the ingredients into a mixing bowl, mix, pour into the Bundt pan and bake. Plus that it also came out of the pan easily and intact. It was delicious. I liked both the flavor and the texture. Definitely a keeper. So says the non-cake-mix baking snob. Happy National Bundt Day!

Sunday, November 12, 2023

Lemon Snowball Cookies from Lifestyle of a Foodie

Lemon Snowball Cookies - made dough October 20, 2023 from Lifestyle of a Foodie
1 cup butter
2/3 cup powdered sugar
1/2 teaspoon vanilla extract
1 teaspoon lemon extract
zest of 1 lemon
1 tablespoon lemon juice
2 1/4 cups all-purpose flour
1/2 teaspoon salt
yellow gel food coloring, optional

3/4 cup powdered sugar for rolling
  1. Preheat oven to 325 degrees F. Line baking sheets with parchment paper.
  2. In the bowl of a stand mixer fitted with the paddle attachment, cream together butter and powdered sugar until well combined and fluffy. Add vanilla extract, lemon extract, lemon zest, lemon juice and a tiny amount of yellow food coloring if using. Mix until combined.
  3. Add flour and salt, mixing on low speed until combined and dough forms.
  4. Portion dough into small cookie dough balls and evenly space on baking sheets. Bake for 20 minutes. 
  5. Remove from oven and roll hot cookies in powdered sugar then place on wire rack to cool completely. Once cooled, roll cookies again in powdered sugar.
The tl;dr on these? Delicious. They look like Mexican wedding cakes, Russian tea cakes, buttery tea balls or any other name you would normally give to buttery balls, typically packed with toasted pecans.
However, these are the lemon version, no nuts. But just as good. The principle is the same in that you roll the cookies in powdered sugar right out of the oven. The heat melts some of the powdered sugar into the cookie. Then once it's completely cool, you roll it in powdered sugar again. This time most of the sugar will adhere, creating a "snowball". A really good lemon one.
This is a great cookie for the holidays, especially if you have gift recipients or party goers who are allergic to nuts. I did use a few drops of lemon food color to make a really lemony yellow cookie. No need to use any food color at all as it won't affect the taste. I just wanted to see how it would look as lemony yellow cookie against the white of the powdered sugar.

Friday, November 10, 2023

Biscoff Butter Cookies from Cambrea Bakes

Biscoff Butter Cookies - made dough October 14, 2023 from Cambrea Bakes 
1/2 cup unsalted butter, room temperature
1/3 cup cookie butter
2/3 cup brown sugar, packed
1 large egg
1 teaspoon vanilla extract
1 1/2 cups all-purpose flour
1/2 teaspoon salt
1/2 teaspoon baking soda
extra cookie butter for tops
  1. In the bowl of a stand mixer fitted with the paddle attachment, cream together butter, cookie butter and brown sugar until light and creamy, 2-3 minutes.
  2. Mix in egg and vanilla on low speed until combined.
  3. Add flour, salt and baking soda, mixing on low speed until combined.
  4. Portion dough in golf-ball size dough balls. Make a slight indent in the center and fill with a teaspoon of cookie butter. Cover and chill for an hour or overnight.
  5. When ready to bake, preheat oven to 350 degrees F. Line baking sheets with parchment paper and evenly space dough balls. Bake 10-12 minutes or until edges are set. Remove from oven and let rest on baking sheet for several minutes before transferring to wire rack to cool completely.
I've made multiple biscoff cookie recipes and most of them turn out well, although some don't have a strong cookie butter flavor. This one does and the genius of ensuring that is the dollop of cookie butter that's placed on top of each cookie before baking. 

Because then you're literally biting into a pool of cookie butter on top. Genius, I say. The cookie base itself is also quite good, moist, brown sugar-y and cookie-butter-y.


To make sure there's enough cookie butter, I made small indents in the center of each cookie dough ball, chilled then, then before baking, I placed a dollop of cookie butter in each indent. That way the cookie butter stayed mostly in the middle and even the parts that spread out over the top of the cookie didn't run too much (or at all) down the sides. So all the cookie butter goodness was concentrated on top of the cookie.

Wednesday, November 8, 2023

Stamped Cookies #33 Buttery Shortbread Cookies from Weekend at the Cottage

Stamped Cookies #33 Buttery Shortbread Cookies - made dough October 27, 2023, modified from Weekend at the Cottage
3/4 cup old-fashioned rolled oats
2 1/2 cups unbleached all-purpose flour
1/2 cup cornstarch
1 1/4 cups confectioners' sugar
1/2 teaspoon kosher salt
1 1/8 cups (17 tablespoons) unsalted butter, chilled and cut into 18 tablespoons
1 egg white (if dough is too dry or floury)
1 teaspoon vanilla butter emulsion (if dough is too dry or floury)
granulated or icing sugar for sprinkling
  1. Preheat oven to 300 degrees F. Line baking sheets with parchment paper.
  2. Pulse oats in food processor until finely chopped. Transfer to mixing bowl and add flour, cornstarch, sugar and salt.
  3. Transfer back to food processor and add butter pieces. Run on low setting until shortbread dough forms
  4. Turn out dough onto workspace and divide in half. Wrap one half in plastic wrap and place in refrigerator. Roll out second half into desired thickness and cut or stamp out cookies. Transfer stamped cookies to lined baking sheet and chill or freeze while you roll out and stamp the second half of the dough.
  5. Bake cookies, one sheet at a time, for 10 minutes or until lightly golden. Remove from oven and let rest on baking sheet for several minutes before transferring cookies to wire rack to cool completely. Sprinkle with granulated or icing sugar if desired.
New cookie stamp alert! This time, this set of silicone Disney cookie stamps. They're available from Williams Sonoma as of this writing. After Snoopy and Hello Kitty (and friends), I can't resist a good Disney stamp.
You can see this recipe held the stamped impressions beautifully. The dough was a little hard to work with as it was rather dry. I had to switch from using my food processor to my Kitchen Aid stand mixer and I had to add a teaspoon of vanilla butter emulsion and an egg white before the dough came together. Otherwise it was just a floury mixture that didn't bind together. I suggest trying to make the recipe without the emulsion and the egg white and only adding one or both of those if your dough won't come together without it.
The upside is the impressions held so well after baking. The downside? This doesn't have a lot of flavor. That's the challenge of some of the stamped cookie recipes. You can get around it a couple of ways. One is to make the cookies thinner and then sandwich them with nutella or cookie butter to amp the flavor of the whole cookie. The other is to use a flavored oil or extract to add more flavor. I made mine too thick so next time I'm going to roll out the dough much thinner and make these as sandwich cookies.

Monday, November 6, 2023

Kit Kat Cookies from Imperial Sugar

Kit Kat Cookies - made dough November 1, 2023 from Imperial Sugar
3/4 cup unsalted butter, room temperature
3/4 cup light brown sugar
1/4 cup extra fine granulated sugar
1 egg
1 egg yolk
1 teaspoon vanilla extract
1/2 teaspoon baking soda
1 teaspoon kosher salt
2 cups all-purpose flour
1 1/2 cups (8 ounces) Kit Kat bars, coarsely chopped, plus more for garnish
3/4 cup chopped chocolate or chocolate chips, melted and slightly cooled but still liquid (I used Nutella)
  1. Preheat oven to 350 degrees F. Line baking sheets with parchment paper.
  2. In the bowl of a stand mixer fitted with the paddle attachment, cream together butter, brown sugar and granulated sugar on medium speed for 2 minutes.
  3. Add egg, egg yolk, vanilla, baking soda and salt; mix for 1 minute until combined, scraping down the sides and bottom of bowl to keep mixture even textured.
  4. Add flour, 1 cup at a time, mixing on low speed after each addition until just combined. Do not overmix. Fold in chopped Kit Kat bars, disbursing evenly.
  5. Remove bowl from mixer and drizzle in melted chocolate. Using the back of a wooden spoon, swirl melted chocolate throughout cookie dough, leaving ribbons of chocolate. Alternatively, dollop Nutella on top of dough before scooping. 
  6. Portion dough into golf-ball-size dough balls and evenly space on baking sheets. Bake for 9-10 minutes until edges are lightly golden.
  7. If desired, immediately press extra chopped Kit Kat bars onto tops of warm cookies. Transfer to wire rack to cool completely.
I'll be incorporating candy bars into my baking for awhile. In fact, while I was waiting for trick or treaters to show up on Halloween night, I was already surfing Pinterest for recipes on how to use up the specific candy I had bought. 

I figured it would be easy enough to add Baby Ruths and Snickers to brownies but I wanted something different for Kit Kats. I like Kit Kats well enough but rarely eat them. Okay, I rarely eat "grocery store chocolate" in general but when I do, I prefer something with caramel like $100,000 bars.

But I have nothing against Kit Kats and was glad to try out this recipe. It turned out really well, like a really good milk chocolate chip cookie but with Kit Kats instead of chocolate chips.
The original recipe called for melting chocolate chips and swirling them into the cookie dough before scooping. I made it easy on myself and just dolloped Nutella on top of the cookie dough, scooped out dough balls, dolloped more Nutella on top of the remaining dough and scooped some more. That way I ended up with generous pockets of Nutella in each dough ball.
Chop the Kit Kats coarsely and fold in by hand after you've finished mixing the dough and before dolloping the Nutella on top. You don't want the Kit Kats to be crushed or crumbled too much. Reserve a handful of the chopped Kit Kats to press onto the newly baked cookies as soon as you take them out of the oven. 
This was delicious. Stayed thick, had crisp edges and the Kit Kats added both the sweetness of milk chocolate and a slight crunch from the wafers inside. And you can never go wrong with pockets of Nutella in the cookie.

Saturday, November 4, 2023

Peanut Butter Butterfinger Cookies from The Food Charlatan

Peanut Butter Butterfinger Cookies - made dough November 1, 2023 from The Food Charlatan 
3/4 cup butter, softened
1/2 cup granulated sugar
1/2 cup brown sugar, packed
1 cup peanut butter (not natural peanut butter)
1 large egg
1 1/2 teaspoons vanilla
1 1/2 cups all-purpose flour
1/2 teaspoon baking soda
1/2 teaspoon baking powder
1/4 teaspoon salt
16 ounces Butterfingers, coarsely chopped
  1. In the bowl of a stand mixer fitted with the paddle attachment, beat butter until smooth and creamy. Add granulated sugar and brown sugar, beating for 2 minutes until fluffy. Scrape down sides and bottom of bowl to keep mixture even textured.
  2. Add peanut butter and mix to combine. Add egg and vanilla, beating until just combined.
  3. Add flour, baking soda, baking powder and salt, mixing on low speed until just combined.
  4. Fold in chopped Butterfingers until evenly disbursed. Portion dough into golf-ball-size dough balls, cover and chill for 15-60 minutes.
  5. When ready to bake, preheat oven to 350 degrees F. Line baking sheets with parchment paper. Evenly space chilled dough balls. 
  6. Bake cookies for 10-12 minutes or until edges are set and middles no longer look raw. Remove from oven and let rest on baking sheets for 5 minutes before transferring to wire rack to cool completely.
It's National Candy Day (November 4). I don't know where these food holidays come from but I assume this particular one coming so close on the heels of Halloween had some kind of purpose. Like to remind people to use up their leftover Halloween candy in some way?
Okay, maybe not but that's what I'm going with. I had moved to a new neighborhood earlier this year so I didn't know what to expect in terms of trick or treating. Last year in Las Vegas, I had literally no kids show up at the door. The year before, in my old house in Reno, I had so many kids I ran out of candy. Eeek.
I'm not into the costume part of Halloween for myself but I am all about the candy. And for the past few years, I've been buying the full-size candy bars from Costco. Because candy and kids, right? It's once a year so why not be that house that gives out the full-size bars? 
Not wanting to risk running out, I stocked up on 4 boxes of candy bars. Which means I had 100 bars to give out. Then, come Halloween night, I had 25 kids trick or treat at my door. Oops, overshot that estimate by 3 miles.
But it does mean I have plenty of candy bars to incorporate into my future baking. So here we are. I'm not a big Butterfinger fan (what's with all those flakes?) so I had to look up recipes on how to use up Butterfingers on pinterest and found this recipe.
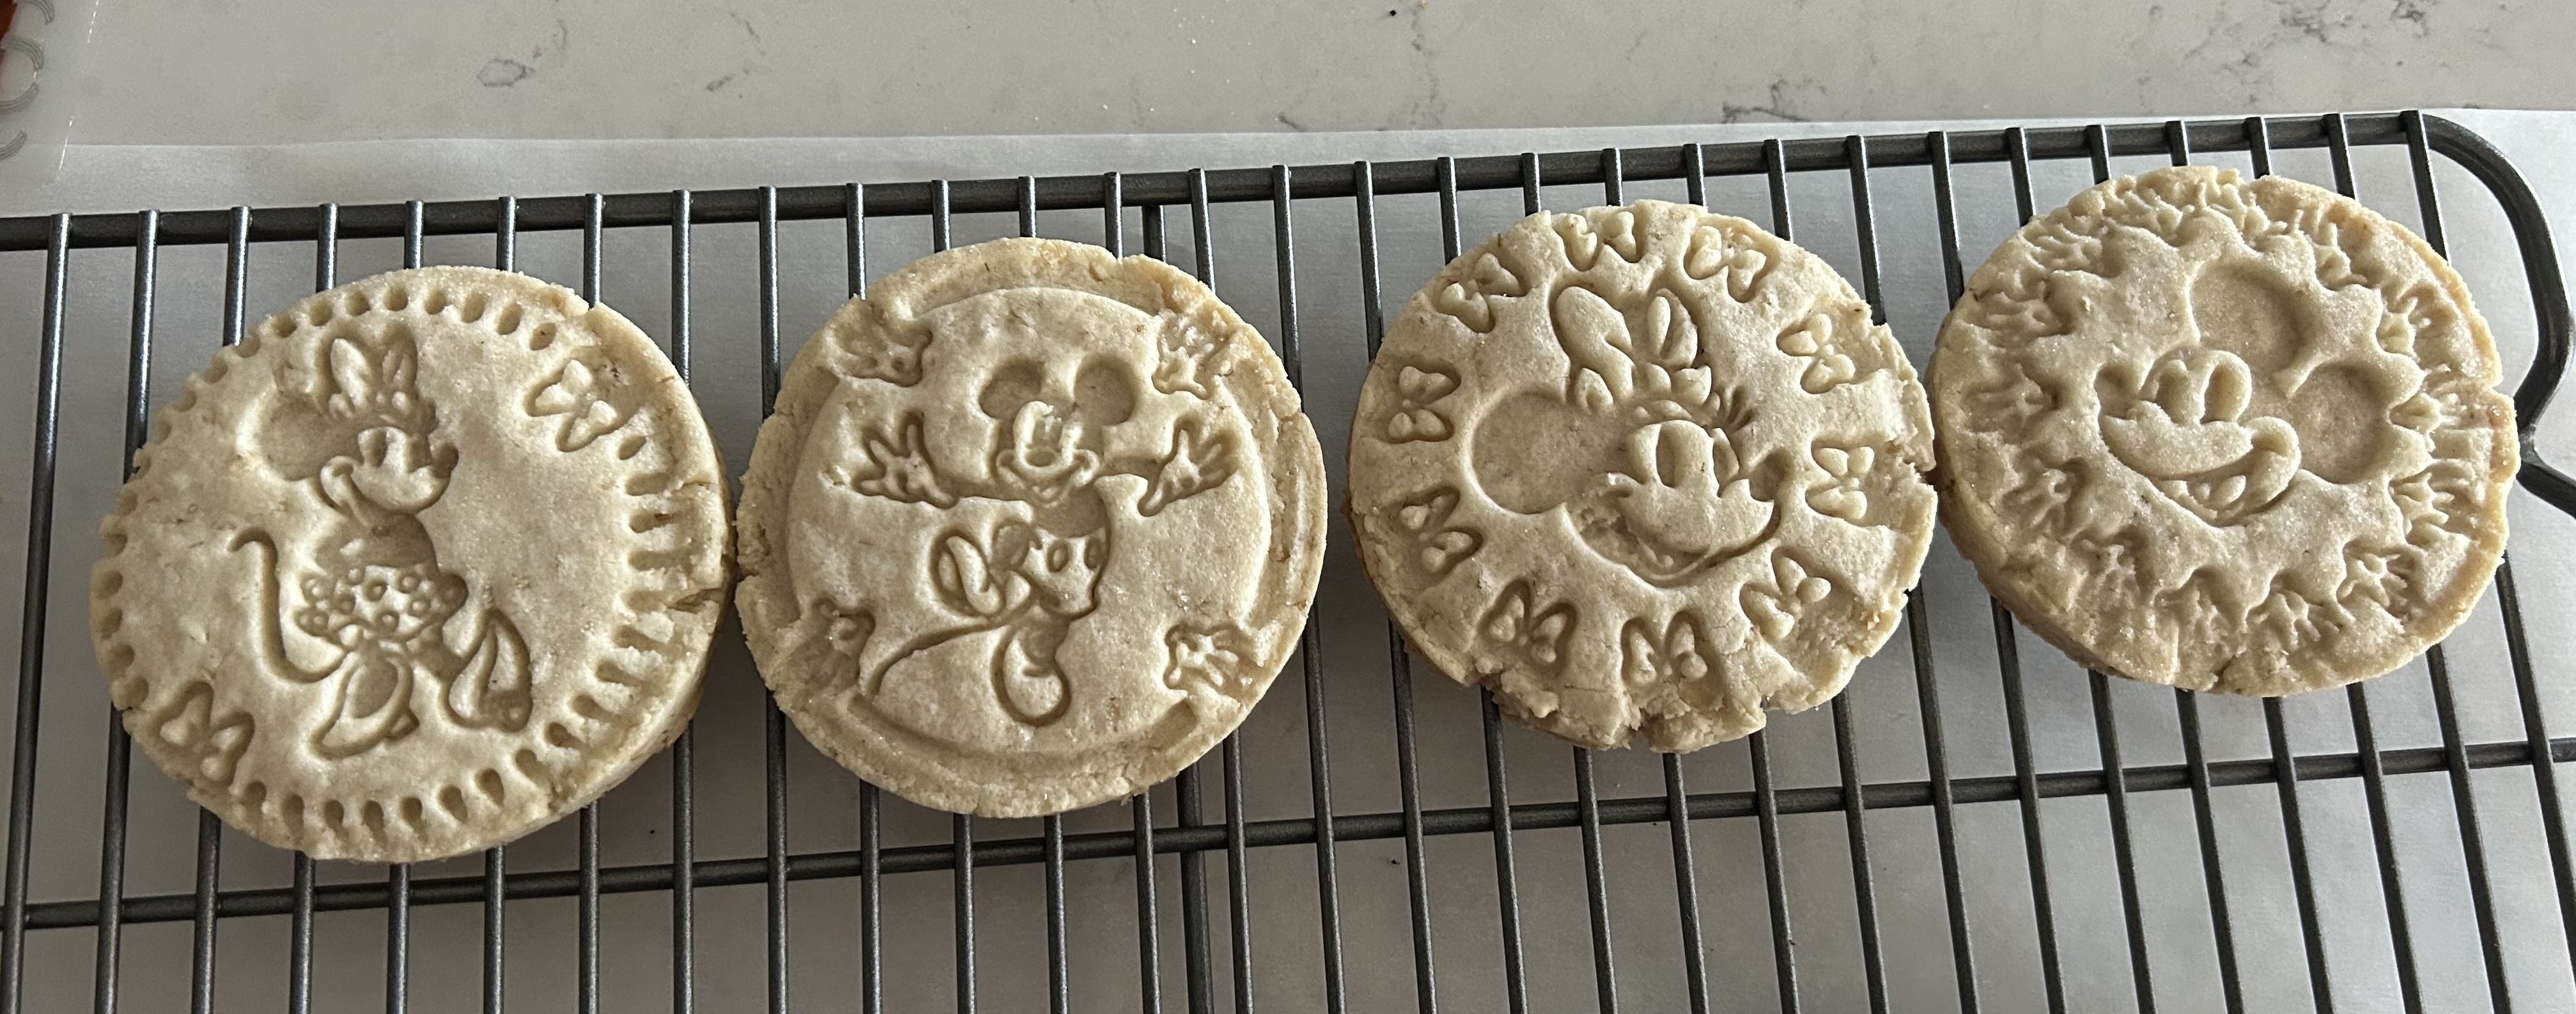
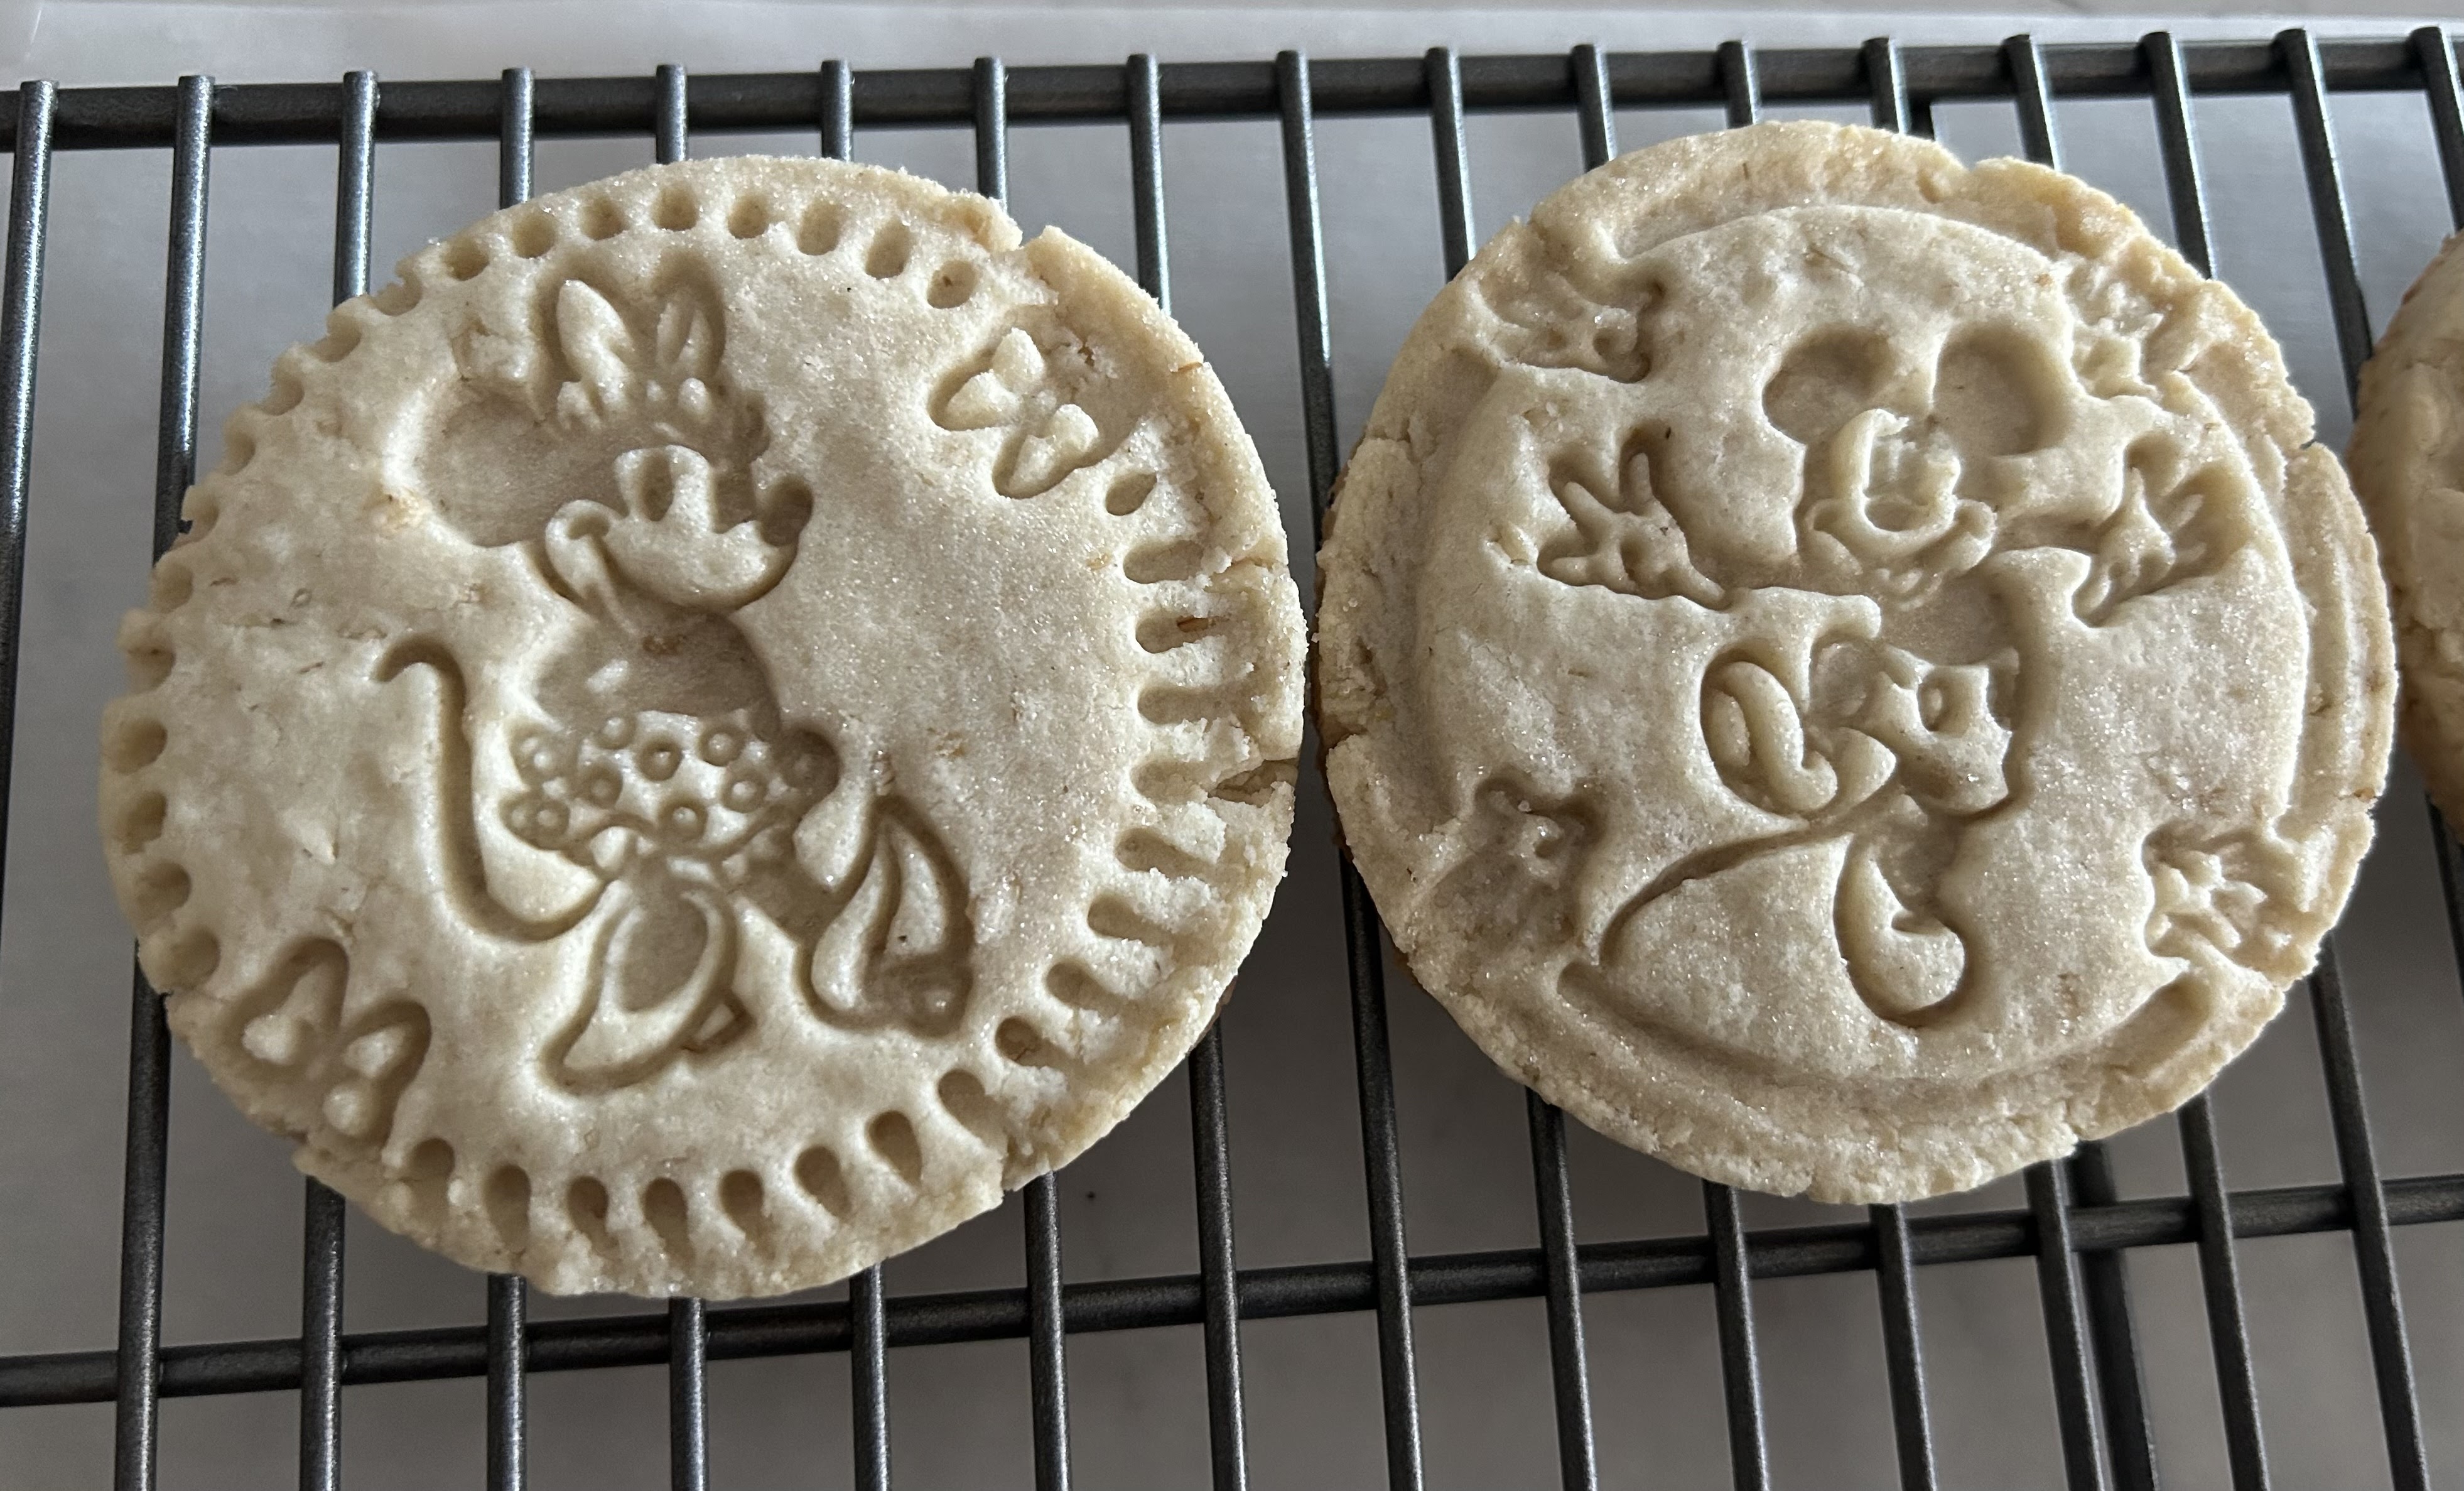
Chop up Butterfinger bars, which was not easy as the layers crumbled into, well, crumbs. Then add to the dough. When you bake anything that has a caramel-ish component, prepare for leakage in the cookies. Which means the cookies can come out misshapen. This is where using the swirl trick comes in handy. Take a round cookie cutter larger than the cookies and swirl each cookie around it as soon as they come out of the oven while they're still hot. All the cookies you see pictured were misshapen out of the oven but I swirled them to neat roundness as soon as I could.
I have to confess, much as I don't like Butterfinger candy bars, this was an excellent cookie. Didn't spread much, swirled nicely round, great texture and good flavor. Let the cookies cool completely before trying them so the Butterfingers will add a little crunch rather than be melty-chewy. This might be the only way I'll eat a Butterfinger. This one's definitely for both peanut butter lovers and Butterfinger lovers. But even if you're not either, this was really good. 

Friday, November 3, 2023

Oreo Chocolate Chip Cookies from Stephanie's Sweets

Oreo Chocolate Chip Cookies - made dough October 14, 2023 from Stephanie's Sweets 
2 3/4 cups all-purpose flour
1 teaspoon baking soda
1 teaspoon salt
1 cup unsalted butter, room temperature
1 cup brown sugar, packed
1/2 cup granulated sugar
1 teaspoon vanilla extract
1 large egg
1 large egg yolk
1 1/2 cups semisweet chocolate chips
1/2 cup Oreo crumbs (5 cookies crushed until fine)
3/4 cup Oreo pieces (6 cookies broken into small and medium pieces)
  1. In a medium bowl, whisk together the flour, baking soda, and salt; set aside. 
  2. Blend the 5 Oreos into fine crumbs using a blender. Measure off ½ a cup, save the rest to top the cookies. Use the blender to pulse the 6 Oreo cookies into pieces.
  3. In the bowl of a stand mixer fitted with the paddle attachment, cream together the butter, brown sugar, and sugar. Beat on high until light and fluffy. Scrape the bottom and sides of the bowl. 
  4. Add in vanilla, egg, and egg yolk. Mix until just combined.
  5. Slowly add in the dry ingredients on low speed until just combined. Add in chocolate chips, Oreo crumbs, and Oreo pieces. Chill for 40 minutes.
  6. Preheat oven to 350°F. Line 2 baking sheets with parchment paper. Scoop the cookies using a large 3 oz cookie scoop. Place 6 cookie dough balls on a baking sheet and freeze until the oven is preheated. Scoop the rest of the dough on the other cookie sheet and place in the refrigerator while the others bake.
  7. Bake the cookies for 13-15 minutes. The edges will be lightly golden brown and the middle with be slightly underdone. Let the cookies sit on the pan for 4 minutes. Use a biscuit cutter to scoot the cookies in a circular motion until round. Top with Oreo pieces and extra chocolate chips. Sprinkle Oreo crumbs on top. Transfer to a wire rack to cool completely.
I hadn't used up all the Oreos in the package for the Gideon's Bakehouse Cookies and Cream copycat so I tried out this recipe that's been on my pinterest board for awhile.

This one isn't meant to be all covered in Oreos like the Gideon's Bakehouse recipe but still has the same elements. It's also not meant to be as big either but I still made them fairly large. They didn't spread much so stayed nicely thick.

I liked these cookies, maybe even a trifle more than the Gideon's Bakehouse one. It's slightly more sweet but not too sweet and the Oreo chunks added a nice crunch without overwhelming the cookie.


Plus the texture was on point. Underbake it a tad so you get the moist "fudgy" texture. These were also sturdy enough to make for good candidates to mail in a care package. Which is exactly what I did with them.