Saturday, April 25, 2015

Peanut Butter (Crunch) Brownies

Peanut Butter (Crunch) Brownies - made April 12, 2015 from The Flying Brownie by Shirley Fan
The “crunch” is in parentheses in the title because it was supposed to come from sprinkled toasted peanuts on top of the brownie and I didn’t do it. I didn’t have peanuts on hand when I made this since I rarely bake with peanuts. Heck, I don’t even buy crunchy peanut butter. I’m an almond and pecan girl myself. 

But I did sprinkle the top of the brownie with chocolate chips and mini peanut butter cups, available at Trader Joe’s. (Honestly, I don’t work there but I shop there a lot.) The mini peanut butter cups are usually the main reason I bake peanut butter-flavored stuff. I’m not an avid peanut butter fan but the mini peanut butter cups are cute. Yep, that’s all it takes for me to bake with them. Plus, the advantage of making peanut butter baked goods is I can eat a sliver as a taste test and be completely indifferent to the rest of the batch and let them go to others without a pang. I have friends who are peanut butter fanatics who just gave me the side eye but I’m just keepin’ it real.

Anyway, this is a easy fudgy brownie to make and dress up for the peanut butter-ness. You make the brownie batter, swirl it with melted peanut butter then top off with a generous amount of chocolate chips and peanut butter cups. You can add the toasted peanuts that I eschewed if you wish. If you don’t have a Trader Joe’s and access to those cute mini peanut butter cups, the regular size ones will do – just cut them into halves or fourths for maximum cuteness effect. You can even add peanut butter chips as well in keeping with the chocolate and peanut butter theme. There’s no going wrong between the two flavors.
This was a typical brownie for me, meaning a sliver was fine and I moved on. Chocolate peanut butter lovers would probably rhapsodize about it so this would be a good one to try out on them.
8 tablespoons (1 stick) unsalted butter
4 ounces unsweetened chocolate
1 1/4 cups sugar
1/4 teaspoon salt
2 large eggs
1 teaspoon pure vanilla extract
1 cup all-purpose flour
2 tablespoons unsweetened cocoa powder
1/2 cup creamy or crunchy peanut butter
1 cup chocolate chips
1/2 cup crushed lightly salted peanuts or 1 cup mini peanut butter cups or both
  1. Preheat the oven to 350 degrees F. Line an 8-inch square pan with foil and lightly spray with nonstick cooking spray.
  2. Melt the butter and chocolate in the top half of a double boiler set over hot water. Stir until melted, blended and smooth. Remove bowl from the heat and stir in the sugar and salt; mix to combine. Set aside to cool.
  3. Add the eggs, one at a time, stirring after each one to incorporate fully. Add vanilla. Fold in flour and cocoa, and mix until just combined.
  4. Microwave the peanut butter until loose and runny, 10-15 seconds. Fold the peanut butter into the brownie batter, leaving some streaks. Pour the batter into the prepared pan and scatter the chocolate chips, peanut butter cups and peanuts, if using.
  5. Bake until a toothpick inserted into the center of the pan comes out with a few moist crumbs, about 30 minutes.
  6. Cool brownies completely before slicing.

Thursday, April 23, 2015

Cheesy Tortellini Bake

Cheesy Tortellini Bake - made April 18, 2015
Once a month, we have a potluck at our church after our Sunday service. It’s a chance for members to get together informally and chat for longer than the few minutes after the service when everyone heads out. I always take advantage of such gatherings to try out a new dessert recipe as there’s usually more than a dozen people, sometimes up to 2 dozen, and it’s an extra opportunity to bake beyond my Monday morning dessert offering at work each week.

Lately though, I’ve been noticing that other people were also bringing desserts and the amount of “real food” was dwindling, something that afflicts almost every potluck I’ve ever been to. Dessert is just easier and when church service is an hour beforehand, it’s hard to keep dishes warm if they need to be served warm. We do have a couple of members who can be counted on to bring savory dishes but there was a growing number of desserts also coming in.
This time around, I decided I’d better play it safe and bring a savory dish, just in case. And with my cooking skills, playing it safe also involves mostly putting ingredients together rather than actually “cooking”. So this easy tortellini bake was perfect. I made it up after searching pinterest for ideas and it turned out to be really easy to brown some lean ground beef and sausage, throw in a ready-made jar of marinara sauce, a can of diced tomatoes and chopped fresh basil. Add fresh tortellini and some cheese, and simmer until tortellini is tender.

I went a further step of placing it in a bakeware dish, sprinkling the top with cheese and baking it for half an hour right before I left for church. Cover and wrap in a blanket, and, even after sitting in my car during the church service, it was still somewhat warm by the time it got served. You can skip that part if you want to make this in a crock pot and just keep the crock pot on low until serving.

The only thing I got wrong was I overestimated on the amount of pasta I needed and it ended up being a little dry because I had too much pasta in there. So I revised the amount of tortellini down in the recipe below. I could have probably rectified that by adding an extra can of diced tomatoes but – let’s not kid ourselves. I cook so infrequently that I bought only what I thought I needed and didn’t have an extra can of tomatoes on hand. But still, I thought this turned out pretty well. And I’m glad I brought it because, as I had suspected would happen, the desserts outnumbered the savory dishes at the potluck.
1/2 pound lean ground beef
4 chicken apple sausages, chopped into chunks
1 24-ounce jar of marinara sauce
1 14.5-ounce can of diced tomatoes
1/2 cup fresh basil, sliced chiffonade
1/2 cup quattro fromaggio plus more for garnish
12 ounces fresh tortellini, cooked al dente
  1. Brown ground beef and chicken apple sausage in large stock pot. Drain of excess fat.
  2. Add marinara sauce, diced tomatoes and basil. Bring to a boil and reduce heat to bring to low simmer.
  3. Simmer 10 minutes. Preheat oven to 350 degrees F.
  4. Add cheese and stir until melted. Add tortellini. Pour mixture evenly into large, greased casserole dish. Sprinkle with more cheese.
  5. Bake until heated through and cheese on top is melted. Serve warm.

Monday, April 20, 2015

Stuffed Snowballs

Stuffed Snowballs - made dough April 11, 2015 from Crazy for Crust
I had held back some of the cookie butter cups from the brownies I’d made earlier so that I could use some of them for these Stuffed Snowballs. The original stuffing for these was meant to be peanut butter cups but I don’t tend to color within the lines when I can substitute peanut butter with cookie butter. Truthfully, the main reason I wanted to try this recipe is so I could use the cookie butter cups in them. I like snowballs, also known as Mexican Wedding Cakes, and it was intriguing to experiment with making them better because I think they’re already pretty good as is.
This type of cookie dough is perfect for “stuffing” because it’s easy to work with, isn’t too dry or too sticky. Take a small scoop, flatten it in the palm of your hand, place the cookie butter cup (or peanut butter cup) in the center and bring up the dough around it to encase it. Don’t worry about having too little dough to cover it all since you can simply place a small amount of dough over the remaining part of the candy cup that’s still exposed and seal the dough around it to encase it fully. If you want perfectly round-looking cookies, roll the dough ball round and chill before baking.

Since the snowball is more of a butter cookie rather than a chocolate one, this worked out better for me than putting them in brownies. The cookie butter cup was still enrobed in the dark chocolate but the chocolate-cookie butter combo was muted inside the snowball so I didn’t have issues with the chocolate fighting with the cookie butter for flavor dominance.

The trick to that melt-in-your-mouth aspect of a snowball is to roll the still-warm cookies in confectioners’ sugar a few minutes after you take them out of the oven. I would caution against rolling them right after you take them out of the oven as they’ll be too hot and too fragile to coat so they’ll be at high risk for crumbling rather than rolling. But don’t wait for too long either or else the sugar won’t adhere and “melt” into the cookie as well. I like to give it at least 3-5 minutes for the cookies to firm up a little, roll them quickly into confectioners’ sugar, set them back on the cookie sheet and then re-roll them once they’re completely cooled.
If you eat this just after the cookie has cooled, the inside cookie butter cup is still soft and melt-y. If you wait a few hours instead, the candy cup will firm up. Either way, you can’t go wrong. 
1 cup butter, softened
1/2 cup powdered sugar
1 teaspoon vanilla
2 1/4 cups flour
1/4 teaspoon salt
3/4 cup toasted pecans, finely chopped
24 cookie butter cups (available at Trader Joe's)
powdered sugar for rolling
  1. Mix butter, 1/2 cup powdered sugar, and vanilla with an electric mixer until fluffy. Add flour and salt and mix until the dough comes together. Stir in nuts.
  2. Scoop 1 tablespoon of dough and flatten with your hands. Place 1 cookie butter cup in the center and place another tablespoon of dough over it. Seal the edges together, completely covering the cookie butter cup and roll into a sealed ball. Repeat with remaining dough and cookie butter cups.
  3. Chill or freeze for several hours or overnight.
  4. When ready to bake, preheat oven to 375 degrees F. Line cookie sheets with parchment paper and space cookie dough balls evenly on cookie sheets.
  5. Bake cookies for 10-12 minutes or until bottoms are just slightly brown. Remove from oven and cool for just a minute. Fill a small bowl with additional powdered sugar and roll each cookie in the sugar until coated. Let cool completely then re-roll in powdered sugar for a thicker coating.

Saturday, April 18, 2015

Cookie Butter Cup Fudgy Brownies

Cookie Butter Cup Fudgy Brownies - made April 11, 2015, recipe adapted from The Good Cookie by Tish Boyle

So the name for these might be a little awkward. The original name was Chocolate Peanut Butter Surprise Brownies and I used the base of that recipe for these because it’s one of my favorite brownie recipes ever. You know how I love my brownies so that’s saying a lot.
But instead of peanut butter cups, I went with these cookie butter cups, another product extension I found when I was at Trader Joe’s. You’d think they’d run out of ideas of what to do with cookie butter but they keep proving me wrong. The funny part is, when I’m at Trader Joe’s, it isn’t like I go wandering the aisles looking for stuff I might like to buy. No, normally I know what I want, I have a list, I go in, grab what I need and check out. I don’t even make eye contact with people, for heaven’s sake, as I tend to shop like I’m on a mission and I’m being timed. But it’s like my eye is honed like a finely trained, eagle-eyed, well, eagle, pouncing on (cookie butter) prey, grasping it unerringly in my claws. Plus they were nestled right by the big blocks of “Pound Plus” milk chocolate I like to buy and chop into chunks for chocolate chip cookies so it isn’t like I could miss them. Once again, those Trader Joe’s people know what they’re doing.
I did pause before I put this in my basket though when I saw it was cookie butter cups covered in dark chocolate. Remember I don’t like chocolate and cookie butter together and I particularly don’t care for dark chocolate. But once those two seconds had passed, into my basket it went anyway. I immediately thought of testing these out with this brownie recipe to see if I might like cookie butter and chocolate together that way.

The original recipe for these brownies calls for aligning the candy cups in 3 rows of 4 or 4 rows of 3, it doesn’t matter. If you want to have one candy cup in the center of each piece, that actually makes for rather big pieces. I try to do at least 4 rows of 4 or, if you want decently small brownie squares just a little bigger than the candy cup, 5 x 5 works as well. The tricky part is cutting them so that each candy cup is at the center of each square. This is the stage I often mess up. Especially if I’m not doing 4 x 4 or 5 x 5 arrangements.
To increase your chances of cutting these correctly, use slightly more than half the batter as the bottom layer, arrange the candy cups evenly spaced then cover with the remaining batter. However, don’t cover it so thickly that you can’t see the indentations or “lumps” where the candy cups are. When done properly, after the brownie has baked, you should see enough of an indentation from most of the candy cups that you know exactly where to slice the brownie. If you cover them too much and the batter smooths into an even top, it isn’t the end of the world though. It just won’t be a “surprise” that there’s a candy cup inside the brownie because you’ll be able to see it from the cut edge.
As you can see, I didn’t follow my own advice in not covering the candy cups completely. Yup, messed up the cuts. Oops. I can’t say taste-wise that this experiment with the cookie butter cups was a success either, at least not to my taste buds. The brownie itself I still loved because it has the best fudgy texture and rich decadent chocolate taste. The cookie butter flavor, so beloved when I’m eating it with flavors more on the vanilla side of the spectrum, didn’t work for me in a dark chocolate brownie. Turns out I’m rather consistent that cookie butter and chocolate don’t go together for me. It’s time for them to break up. But, still, it was worth trying and I got an excuse to make one of my favorite brownies again. 
1 cup (2 sticks) unsalted butter
5 ounces unsweetened chocolate
1 cup all-purpose flour
3 tablespoons Dutch-processed cocoa powder
¼ teaspoon baking powder
¼ teaspoon salt
4 large eggs
1 ½ cups granulated sugar
½ cup firmly packed light brown sugar
2 teaspoons vanilla extract
16 miniature peanut butter cups (or cookie butter cups)

  1. Position a rack in the center of the oven and preheat the oven to 325˚F. Line a 9-inch square pan with aluminum foil so that the foil extends 2 inches beyond 2 opposite sides of the pan. Lightly spray with nonstick cooking spray.
  2. Place the butter and chocolate in the top of a double boiler over simmering water and heat, stirring occasionally, until melted and smooth. Remove the pan from the heat and cool the chocolate mixture until tepid.
  3. Sift together the flour, cocoa powder, baking powder and salt into a medium bowl. Stir until blended.
  4. In the bowl of an electric mixer, using the whisk attachment, beat the eggs at medium speed until blended. Gradually beat in both sugars, mixing just until blended. Using a wooden spoon, stir in the chocolate mixture and vanilla extract. Stir in the flour mixture, mixing until blended.
  5. Scrape half of the brownie batter into the prepared pan and smooth the top. Arrange the peanut butter cups or cookie butter cups evenly over the batter, in four rows of four cups each. Press down lightly on each cup. Scrape the remaining batter over the cups and carefully spread it into an even layer, without moving the cups. Bake for 45 to 50 minutes, until a toothpick inserted into the center of the brownies comes out with a few moist crumbs clinging to it. Cool the brownies completely in the pan on a wire rack.
  6. Using the ends of the foil as handles, lift the brownies out of the pan. Cool completely before cutting into squares.

Thursday, April 16, 2015

Fluffy French Toast

Fluffy French Toast - made April 11, 2015, adapted from Black Jack Bakehouse
Remember my $8 loaf of brioche from Voyageur du Temps? After trying a piece (it was good), I was going to make bread pudding with the rest of it. Never got the bread pudding off the ground (seemed like too much effort at the time) so I went with the lower level of effort to use up 2 slices to try out this recipe for Fluffy French Toast.
The secret to the fluffy was supposed to come from adding flour to the milk-and-egg mixture according to the original recipe. I’m going to be honest, I don’t know if I could tell the difference. I’m not such a French toast gourmand that I could make the distinction. In fact, I don’t have French toast very often because when it comes to carb-y breakfast food, pancakes and waffles usually edge out French toast when I’m given the choice.
This was good but I think it needed more sugar. I already upped the sugar content to 2 tablespoons but against that much milk and that many eggs, that wasn’t enough. I should’ve added more. The syrup helped which is probably why you don’t want the custard to be too sweet but I’ve got a high tolerance for sugar so I think the French toast could’ve been sweeter. It’s all a matter of personal preference. But hey, the $8 bread was still good.
1/4 cup all-purpose flour
1 cup milk
3 eggs. slightly beaten
scant 1/8 teaspoon salt
1/2 teaspoon cinnamon
1 teaspoon vanilla
2 tablespoons sugar
7-8 thickly cut slices of bread (I used brioche)
  1. In a large bowl, add flour and slowly whisk in the milk. Add the eggs, salt, cinnamon, vanilla and sugar.
  2. Soak the bread slices in the mixture while heating a large frying pan or griddle, well greased with butter or cooking spray.
  3. When pan is hot, place soaked bread slices in center and cook slowly over medium-low heat. Cook until bottom is golden brown. Flip over and cook several minutes more until desired doneness. Serve hot with butter and/or maple syrup.

Monday, April 13, 2015

Classic Fudgy Brownies with Ferrero Rocher and Salted Caramel

Classic Fudgy Brownies with Ferrero Rocher - made April 5, 2015 from The Art & Soul of Baking by Cindy Mushet
The first half of the month following the end of the quarter is always the busiest time for my group at work. Think of it like tax season for tax accountants except it happens 4 times a year instead of the looming April 15 deadline once a year. The good thing is we know it’s coming and can prepare for it. The bad thing is no matter how much you prepare, there are still a lot of hours needed to get done what needs to get done.

What does not help when you’re working on Easter weekend is for the power to go out on Saturday and if I hadn’t thought about it before, that’s also when it hit home that when I don’t have power, I also don’t have wifi. Fortunately, I had downloaded the files I needed about 20 minutes before the power went out and I could work “offline” on my laptop until my laptop battery died. Gotta love technology. It also doesn’t help when the system on the office end crashes on Sunday and can’t be accessed. And you really, really need it to get your work done. Yeah, it was that kind of weekend.
Fortunately, by Sunday, my power was back on and when I couldn’t get into the system to work and our IT folks were working frantically to get it back up but didn’t have an ETA on when it would be fixed, I decided to channel my stressed state “backwards” into desserts. I needed to eat my emotions, so to speak. And they go down really well when you scarf them with fudgy brownies. In my heightened emotional state (OMG, I need to get into the system! I need to run my reports! My spreadsheets! I need the data!), I also got fancy. Plain ol’ brownies just won’t do during these moments. But bake some Ferrero Rochers into the brownies themselves then drizzle on the salted caramel before eating a piece and well, you have a winner.
Remember, any plain brownie can be gussied up with the add-in(s) of your choice. And there’s no work problem that can’t be solved with a brownie. That’s my mantra.
1 stick (4 ounces) unsalted butter, cut into 1/2-inch pieces
4 ounces semisweet or bittersweet chocolate, up to 64% cacao, finely chopped
2 ounces unsweetened chocolate, finely chopped
1 cup (7 ounces) sugar
2 large eggs
1 1/2 teaspoons vanilla extract
1/2 cup (2 1/2 ounces) unbleached all-purpose flour
pinch of salt
12 Ferrero Rochers, unwrapped
Salted caramel for drizzling, optional
  1. Preheat oven to 350 degrees F. Line an 8 x 8-inch baking pan with aluminum foil and lightly spray with nonstick cooking spray.
  2. Melt butter and chocolates in the top half of a double boiler set over hot water, stirring until smooth and blended.
  3. Remove from heat and whisk in sugar.
  4. Add eggs, one at a time, whisking until blended. Add vanilla and stir until combined.
  5. Add flour and salt, stirring until well blended.
  6. Pour into prepared pan and smooth. Arrange Ferrero Rochers evenly on top in 3 rows of 4. Bake for 35-40 minutes or until a toothpick inserted near the center comes out with moist crumbs, not raw batter. Remove from oven and let cool completely.
  7. Optional: Cut into squares with a Ferrero Rocher in the middle of each piece. Drizzle with salted caramel before serving.

Saturday, April 11, 2015

Classic Sugar Cookies sandwiched with cookie butter

Sugar Cookies - made dough April 4, 2015, recipe adapted from The Art and Soul of Baking by Cindy Mushet
By now, you know of my love for cookie butter. Trader Joe’s is fully aware of my slavish devotion as well. First they got me with their Speculoos cookies that are just like the Biscoff cookies that hooked me onto cookie butter in the first place. I had to put myself on a buy-only-once-every-6-months deal with the cookies. They were less successful hooking me in with their cookie butter ice cream. Which is just vanilla ice cream with cookie butter bits in them rather than honest-to-goodness cookie butter ice cream. No temptation there. But their smarty-pants product people, not satisfied with my enslavement to just that little jar of crack and a bi-annual purchase of Speculoos cookies, decided to do another product expansion. “Want a cookie, little girl?”
Or, to be more precise, want some cookie butter sandwiched between two crisp, buttery shortbread cookies so you’re never going to be little again? I happened upon these like a moth to a flame when I was wandering Trader Joe’s picking up snacks for a road trip to my sister’s. Like a homing pigeon coming to roost, my hand closed on the box almost involuntarily. Ah. Home. Fortunately I had the presence of mind (and waist) not to actually open the box until we were in the car on the road trip itself. I was driving so by necessity, I couldn’t huddle up with the box and polish off the entire contents by myself. My car mates tried it first, liked it, allotted me one and kept eating. When we got to our destination, said box was also shared with my sister and her fiancé. I think I only had two out of the box, one during the drive and the other that I managed to snag before they were all gone.
Not caring that they saved me from myself, I decided to make my own version because I wanted more. I’d already made cookie butter sandwich cookies before so it wasn’t a new concept. I had several tried and true butter and sugar cookies to choose from but I decided to try out this new recipe for “classic sugar cookies”. I’m not good with cutout sugar cookies because I don’t have the patience or inclination to roll out sugar cookie dough, cut out cookie shapes and, depending on the dough, watch the shapes bake out because the cookies spread. But I had something more simple in mind so I decided this would be a safe recipe to try. I scooped the dough into small dough balls, patted them into small, thick discs, rolled half of them in vanilla sugar and froze them all overnight.

I baked them off the next day; the cookies spread slightly but still retained a good thickness. For sandwich cookies, you don’t want each half to be too thick anyway or the cookie gets unwieldy to eat. This was just right. Let them cool then spread a generous amount of cookie butter on the bottom of one half before sandwiching with another half. I loved these cookies. Love. The sugar cookies were soft and chewy but not fragile and they made a perfect sandwich cookie. The vanilla flavor was perfect with the cookie butter, showcasing it rather than competing with it. I’m not going to lie – while the Trader Joe’s shortbread cookies were good, I liked mine better.
2 sticks (8 ounces) unsalted butter, cut into 1/2-inch pieces
3/4 cup (5 1/4 ounces) granulated sugar
2 large egg yolks
2 teaspoons pure vanilla extract
1 teaspoon vanilla bean paste, optional
2 1/4 cups (11 1/4 ounces) unbleached all-purpose flour
1/4 teaspoon salt
  1. Cream butter until smooth, 2 to 3 minutes. Add sugar and beat until blended, 1 to 2 minutes.
  2. Add egg yolks, vanilla and vanilla bean paste and beat just until blended. 
  3. Add flour and salt and beat just until combined
  4. Scoop into small dough balls and flatten slightly into thick, small discs. Roll half of the discs in granulated sugar.
  5. Chill discs in the refrigerator or freezer for several hours or overnight until firm.
  6. Preheat oven to 350 degrees F. Line baking sheets with parchment paper and space discs evenly.
  7. Bake 10-12 minutes or until edges are light golden brown and are no longer wet or shiny in the middle.
  8. Cool completely on wire racks. Sandwich with cookie butter or nutella as desired, optional.

Thursday, April 9, 2015

Apple Fritter Cake

Apple Fritter Cake - made March 29, 2015 from Nerdy Baker
I meant to make this cake awhile ago but it had a varied enough list of ingredients that it took awhile for me to have all the perishables together at the right time without one of them expiring before I could bake this. Meaning the sour cream and the milk of course. Not being much of a doughnut-type person, I don’t eat apple fritters that often but I like apple baked goods and this seemed like a good recipe to get close to an apple fritter without the commitment of actually frying one.
It’s a cake, it’s got apples, it’s got a brown sugar cinnamon streusel and a vanilla glaze – yup, pretty much all the elements that trigger my salivary glands. And if you take a critical look at the ingredients, there’s even somewhat of an attempt to be mildly less not-healthy for you because it doesn’t have as much butter as it could and any butterfat-type need has been replaced with applesauce. Just, um, ignore the full-fat sour cream, caramelized apples and so on.
Despite the different elements with caramelizing the apples, mixing the streusel, the cake itself and the vanilla glaze, this is pretty easy to make. I know, I know, I say that about almost everything I blog about and it’s easy if you’ve been baking for the many years that I have (can I have been baking for 34 years when I’m only “29”? ha). But it doesn’t take much to put this together. Work on the apples first since they need to cool before you layer them over the cake batter. While they’re cooling, mix the streusel together then the cake batter. Layer them as directed and bake. When the cake is in its final stages, make the glaze.
When I first made the glaze, I thought it was too runny and was tempted to add more powdered sugar to thicken it up. But I resisted because if this was really going to mimic an apple fritter, you only want a thin glaze-y coating over it. You actually do want to pour the (runny) glaze while the cake is still hot from the oven. Some of it melts into the cake so when it cools, it’s more of that opaque coating like you see on a yeasted doughnut or, heh, an apple fritter.
Taste-wise, I think this was just okay for me. Of course it was good lukewarm but when it had cooled, the taste was still good but I thought the texture was a bit dry. At first I thought I had just overbaked it and while that’s a (remote) possibility, I think I was reacting more to the less butter-more applesauce nature of the cake. It’s just not as rich as most of the other cakes I’ve made, despite the addition of the sour cream which should have granted more richness and moistness. Or who knows, maybe I really did overbake it. In any case, this goes in my “okay” column. But you know how my picky-taste-buds scale goes. When I brought the whole 9 x 13 cake into the office which turned into a two-layer stack of cake squares on a large round platter, the whole thing disappeared that morning. So what do I know?
Filling
1 heaping cup of sliced apple (cored and quartered then sliced)
1/3 cup sugar
1/4 teaspoon cinnamon
small pinch freshly grated nutmeg
2 tablespoons cornstarch
2 teaspoons water

Streusel
1/2 cup brown sugar
1/2 teaspoon cinnamon

Cake
1/3 cup butter
3/4 cup sugar
1/2 cup applesauce
1 teaspoon vanilla
2 eggs
2 1/4 cups flour
1 teaspoon baking powder
1 teaspoon baking soda
1 teaspoon salt
1 teaspoon cinnamon
1 cup sour cream

Glaze
2 cups powdered sugar
1 teaspoon vanilla
6 tablespoons milk
  1. For filling: Make your filling by combining apples, sugar, water, cinnamon and cornstarch in a small saucepan.  Cook on low heat for 5 to 7 minutes, stirring constantly until the sauce is thickened and the apples are a bit soft.  Set aside to cool.  
  2. In a small bowl, mix the brown sugar and cinnamon together until well combined and set aside.
  3. For Cake: Preheat oven to 350°.  Grease and flour a 9×13 baking dish.  Set aside.
  4. Cream butter and sugar until light and fluffy, about 3 minutes.  Add applesauce and vanilla and mix till combined.  Add the eggs, one at a time, beating well after each addition.
  5. Sift the dry ingredients together.  Add the dry ingredients to the batter in three parts alternating with the yogurt in two parts, beginning and ending with the dry ingredients.  Beat until just combined.
  6. Spoon half of the batter into the prepared pan.  Spoon the cooled apple mixture over the batter carefully and spread as evenly as possible.  Sprinkle 2/3 of brown sugar cinnamon mixture over apples and cover with the rest of the batter.  Sprinkle the rest of the brown sugar cinnamon mixture over the top.
  7. Bake for 45-55 minutes, until a toothpick inserted into the center of the cake comes out clean.
  8. For Glaze: While the cake is baking, make the glaze.  In a bowl, mix the powdered sugar, vanilla, and milk until the glaze is desired consistency.  When the cake comes out of the oven, pour evenly onto hot cake.  

Monday, April 6, 2015

Cinnamon Apple Pie Bread

Cinnamon Apple Pie Bread - made March 28, 2015 from Wishes N Dishes
If you’re thinking I’ve got a one-track mind when it comes to baking, you’d be right. If you’re thinking I have a Costo-sized pack of Granny Smith apples to use up, you’d also be correct.  Hence the repetition of similar desserts over the last couple of weeks. The Snickerdoodle Apple Bread kicked it off and I enjoyed that one so much I wanted to keep making it.

But since I have recipe ADD, I wanted to try something similar but different. Fortunately, I also can have a one-track mind when I’m pinning recipes so I also have a lot of similar recipes on my pinterest boards. This one was just waiting for me to pay attention to it so I did.

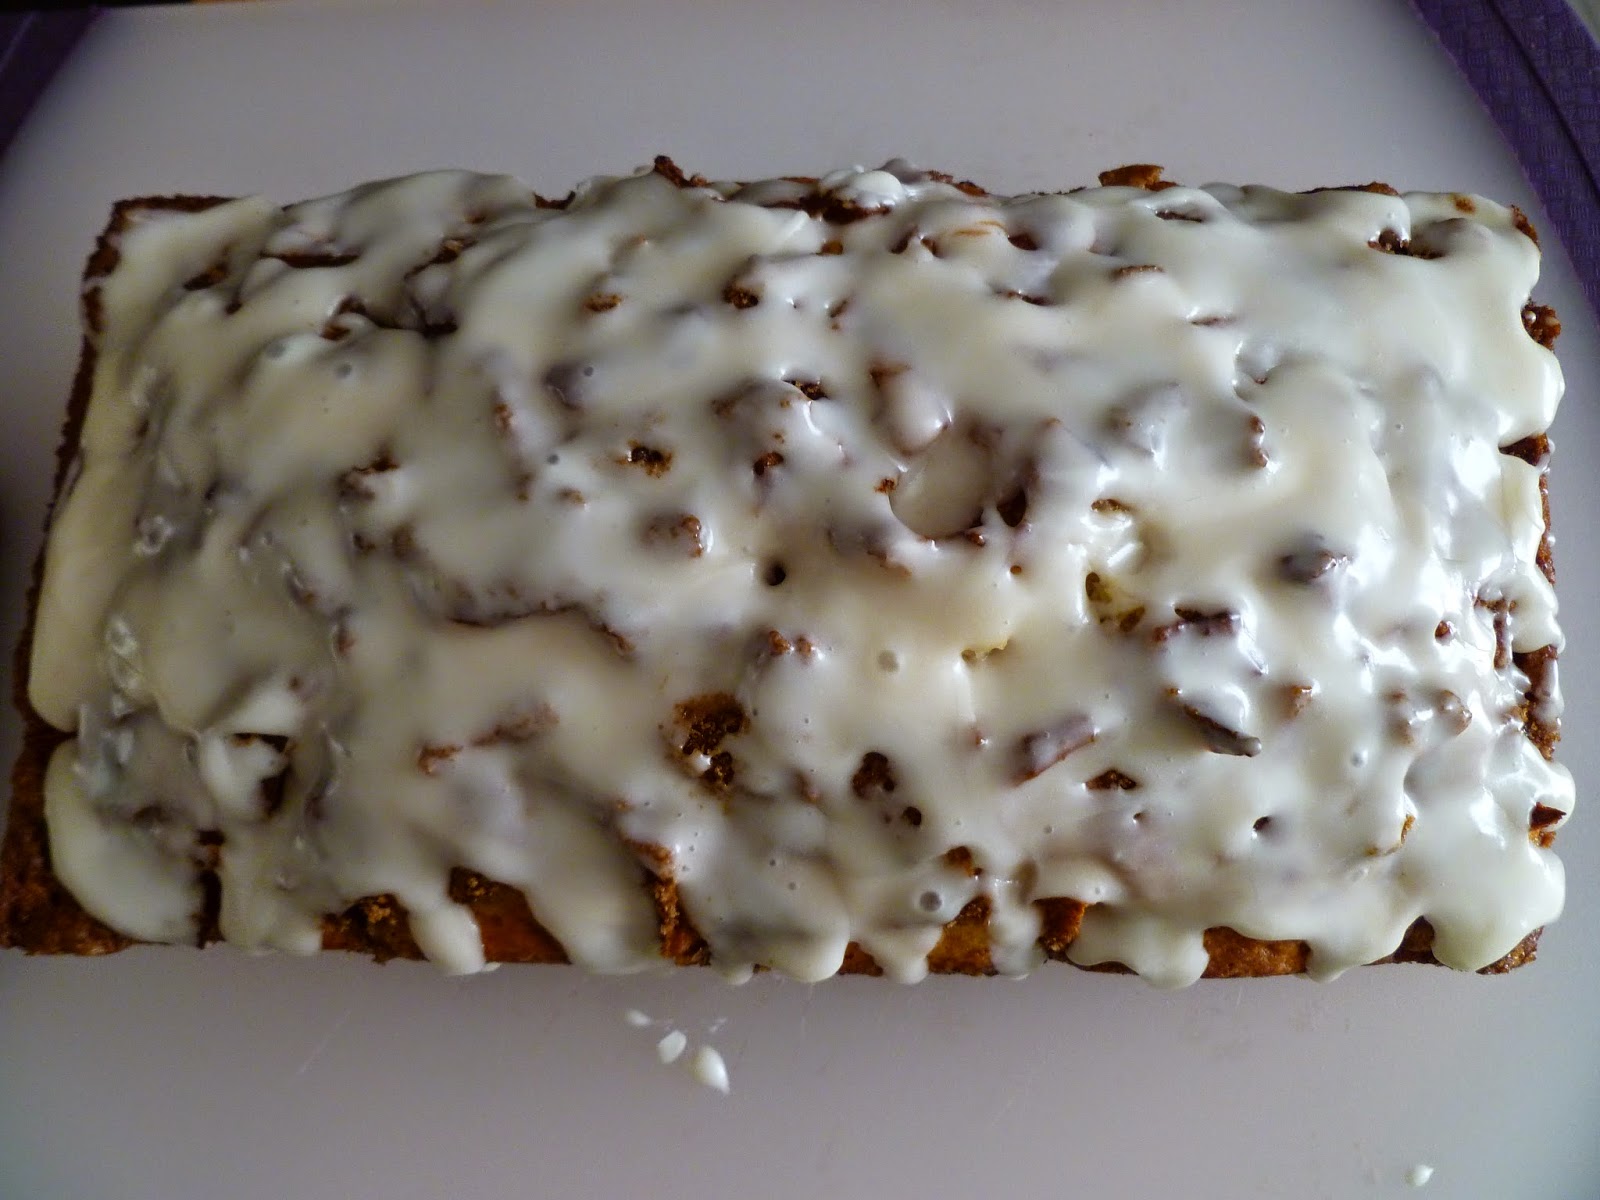
Like the Snickerdoodle Apple Bread, this is also a quick bread and has the same hallmarks of apples in the bread with some brown sugar cinnamon streusel tossed into the mix and on top of the bread. I took things one step farther and mixed a simple vanilla glaze to pour over it: a cup of confectioners’ sugar, a teaspoon of vanilla and just enough milk to make it the consistency you want. Then pour over the warm bread.

I thought this bread turned out fairly well and I’m glad I added the glaze on top to give it a little more moistness because the bread itself wasn’t as moist as the Snickerdoodle Apple Bread. It also didn’t have as much flavor so next time I would probably increase the cinnamon with the brown sugar as well as mix  ½ to 1 teaspoon of cinnamon into the batter.
⅓ cup light brown sugar (not packed)
1 teaspoon ground cinnamon
⅔ cup white sugar
½ cup butter, softened
2 eggs
1½ teaspoons vanilla extract
1½ cups all-purpose flour
1¾ teaspoons baking powder
½ cup milk
1 apple, peeled and chopped (I used Granny Smith)
  1. Preheat oven to 350 degrees. Grease and flour a 9 x 5-inch loaf pan. 
  2. Mix brown sugar and cinnamon together in a bowl and set aside. Beat white sugar and butter together in a bowl using an electric mixer until smooth and creamy. Beat in eggs, 1 at a time, until incorporated; add vanilla extract and stir until incorporated. 
  3. Combine flour and baking powder together in another bowl; stir into creamed butter mixture. 
  4. Mix milk into batter until smooth. Pour half the batter into the prepared loaf pan. Next add half the apples and half the brown sugar cinnamon mixture. Lightly pat/push apple mixture into batter. Pour the remaining batter over apple layer; top with remaining apples and add more brown sugar/cinnamon mixture. 
  5. Lightly pat/push apples into batter; swirl brown sugar mixture through apples using a finger or spoon. 
  6. Bake in the preheated oven until a toothpick inserted in the center of the loaf comes out clean, 30 to 40 minutes. Glaze if desired.