Saturday, July 5, 2014

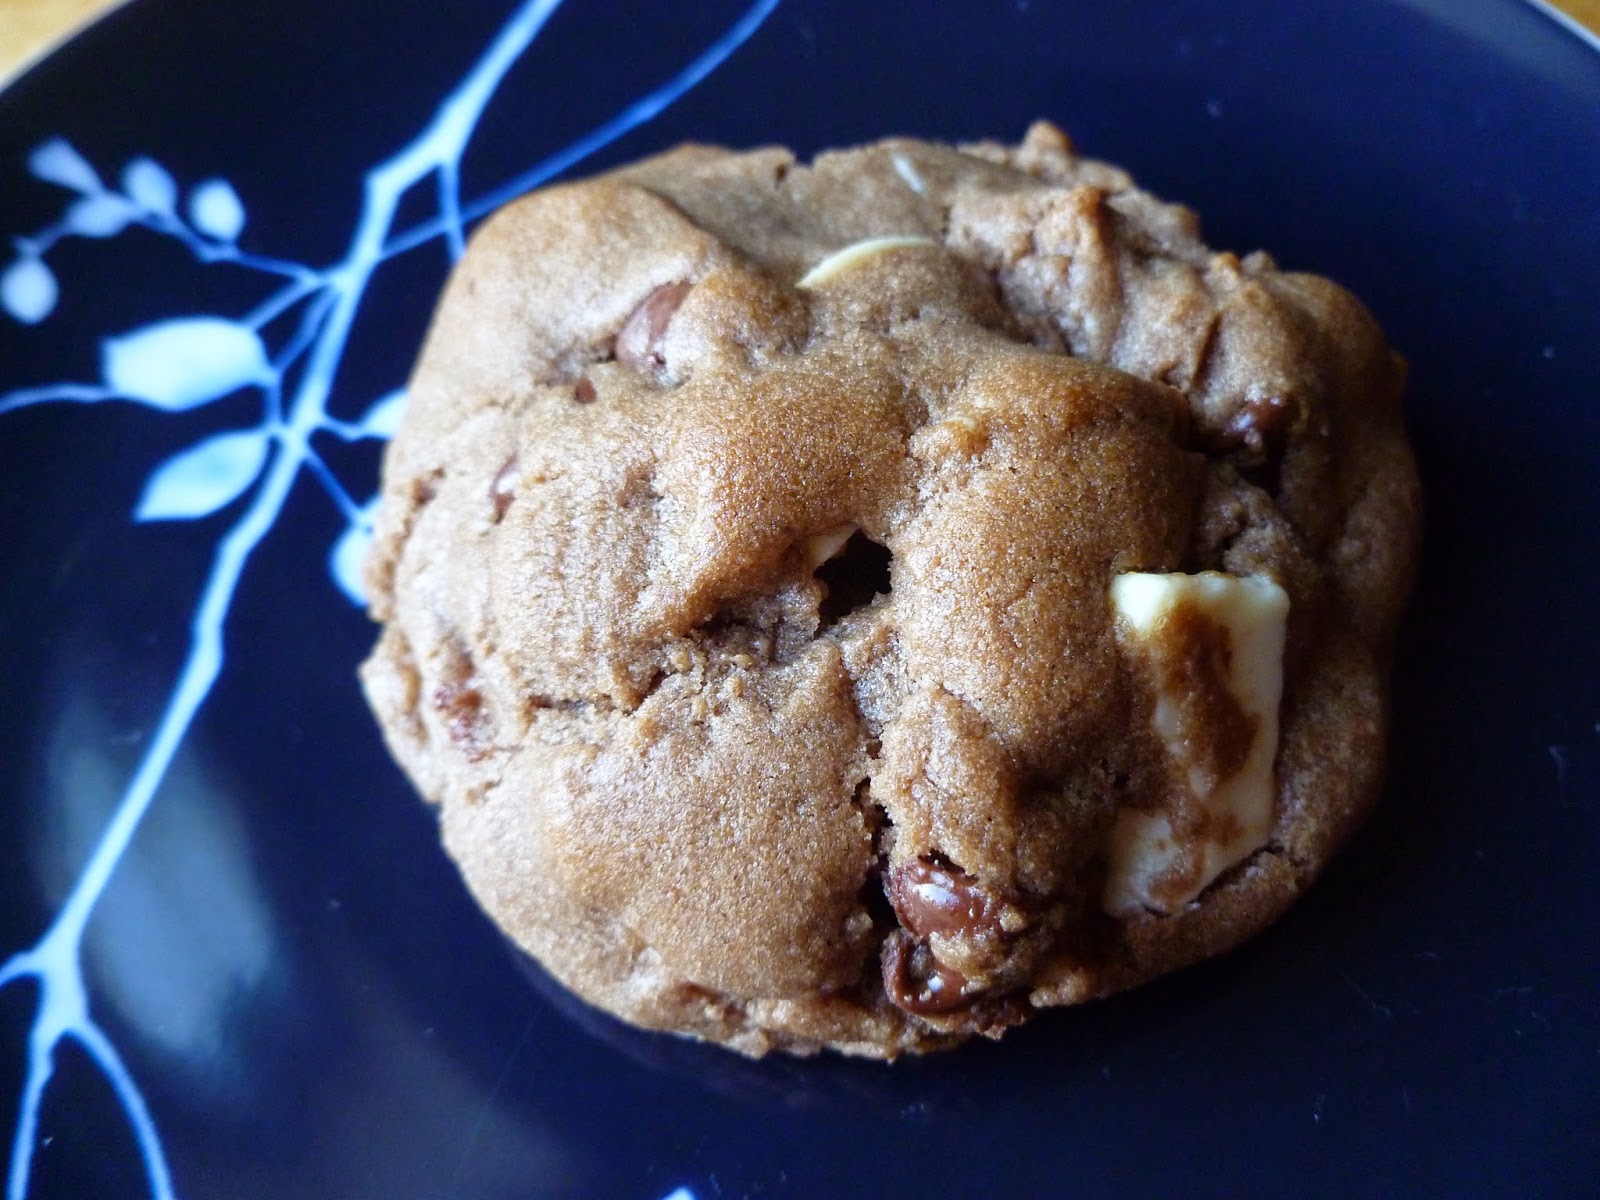
Nutella White Chocolate Chunk Cookies

Nutella White Chocolate Chunk Cookies - made dough June 22, 2014 from Averie Cooks
This was one of the cookies I made for my last week at work at my old job. I knew I didn't have a lot of time that week so I needed a cookie dough I could make ahead of time, freeze and just bake off at the last minute. Averie Cooks is a perfect blog for that kind of recipe. Her blog is full of amazing recipes and my favorites are her cookies because they're always thick, chubby and bursting with goodness. I've rarely had something not turn out from her blog so I figured this would be a safe bet since I couldn't afford any baking failures that last week.
My only comment is mine didn't turn out as dark as hers appeared to. I used the same amount of Nutella as recommended in the recipe but the dough still turned out milk chocolate-light. I was afraid of adding more in case it changed the composition of the cookie and I really wanted chubby, puffy cookies.
Which, as you can tell, I got. This is like the perfect size, texture and appearance in cookie to me. It wasn't super chocolaty or super Nutella-y though so if you want a stronger flavor, try substituting a tablespoon or two of dark cocoa and decreasing the flour by the same amount. Because cocoa powder is a drier ingredient and can suck out moisture, that gives you some leeway to add a bit more Nutella. I may try that next time.
The white chocolate chunks and the semisweet chocolate chips paired well together in this cookie as well. You definitely want to freeze this cookie dough and bake the cookies from frozen dough so plan ahead. This isn't the type of cookie you make because you have a craving that has to be satisfied immediately. But it's worth the wait.
1/2 cup unsalted butter, softened (1 stick)
heaping 1/3 cup Nutella (stir well before adding)
1/2 cup light brown sugar, packed
1/4 cup granulated sugar
1 large egg
2 teaspoons vanilla extract
1 3/4 cups all-purpose flour
2 teaspoons cornstarch
1 teaspoon baking soda
pinch salt, optional and to taste
1 cup white chocolate chips
1 cup semi-sweet chocolate chips 
  1. To the bowl of a stand mixer fitted with the paddle attachment, combine the butter, Nutella, sugars, egg, vanilla, and beat on medium-high speed until creamed and well combined, about 4 minutes
  2. Stop, scrape down the sides of the bowl, and add the flour, cornstarch, baking soda, optional salt, and beat on low speed until just combined, about 1 minute.
  3. Stop, scrape down the sides of the bowl, and add the white and chocolate chips, and beat on low speed until just combined, about 30 seconds.
  4. Using a large cookie scoop, 1/4-cup measure, or your hands, form approximately 11 equal-sized mounds of dough, roll into balls, and flatten slightly. Tip - Strategically place a few chocolate chips right on top of each mound of dough by taking chips from the underside and adding them on top.
  5. Place mounds on a large plate or tray, cover with plasticwrap, and refrigerate for at least 2 hours, up to 5 days. Do not bake with unchilled dough because cookies will bake thinner, flatter, and be more prone to spreading.
  6. Preheat oven to 350F, line a baking sheet with a Silpat or parchment paper. Place dough mounds on baking sheet, spaced at least 2 inches apart and bake for about 9 minutes, or until edges have set and tops are just set, even if slightly undercooked and glossy in the center; don't overbake. Cookies firm up as they cool. Allow cookies to cool on baking sheet for about 10 minutes before serving. 

Friday, July 4, 2014

Lofthouse Sugar Cookies

Lofthouse Sugar Cookies - made dough June 21, 2014 from Stella B's Kitchen
I've never heard of Lofthouse but from the prevalence of its recipe for sugar cookies on pinterest, I'm going to guess they have quite a devoted following as many people seem to want to duplicate their baked goods. Particularly their sugar cookies.
These are similar in appearance to the Knockoff Swig Sugar Cookies I've made earlier (I don't know what Swig is either or why people want to copy their sugar cookies). Their similarities are probably helped by the fact that they're both similar is size, color and pink frosting that I used.
But I will have to give the nod to Lofthouse over Swig because I liked these cookies more. They were sweeter but not too sweet, had more vanilla flavor, I liked the texture that was a perfect cross between chewy cookie and slightly dense cake. Plus the vanilla buttercream was much better than the sour cream frosting of the Swig knockoffs.
The dough for these was also easy to make and great to work with, not too soft or sticky but not hard or dry. Make the cookie dough balls into generous sizes, like the size of golf balls. Then flatten slightly into thick discs. They don't spread very much and will remain thick. Baking them as discs instead of as golf balls will ensure you have cookies of uniform thickness instead of mounded in the middle and spread thinner at the sides.
I tinted the frosting pink with a couple of drops of red food coloring (hey, I'm a girl) but you can omit the food coloring and use colored sprinkles instead to dress these up for any occasion. With 4th of July upon us, these lend themselves well to being patriotic cookies just with some red, white and blue sprinkles.
2 1/2 cups plus 2 tablespoons all purpose flour
1/4 cup plus 2 tablespoons cornstarch
3 teaspoons baking powder
1/2 teaspoon salt
1 cup butter, softened 
1 cup granulated sugar
2 large eggs
2 heaping tablespoons sour cream
1 teaspoon vanilla

Frosting
1/2 cup unsalted butter, softened
3 cups powdered sugar
up to 1/4 cup milk (skim is fine)
1 teaspoon vanilla
food coloring of choice
desired sprinkles
  1. Sift dry ingredients and set aside.  
  2. Beat butter and sugar until light and fluffy.  Add eggs one at a time.  Then add sour cream and vanilla.  Add flour mixture and mix until just combined.  Chill dough thoroughly, at least an hour.
  3. Preheat oven to 350 degrees.  On a lined baking sheet, roll balls of 2-3 Tbsp and place 2 inches apart.  Wetting fingers slightly, press balls to about 1/2 inch thick, molding to keep nice round edges.  
  4. Bake for 11-12 minutes until centers are no longer shiny.  Cool on pan for a few minutes.  Remove to cooling rack until completely cool before frosting.
  5. For the frosting, beat butter and vanilla.  Gradually beat in powdered sugar, 1 cup at a time.  Add a couple Tbsp of milk and beat again.  Continue to add milk until the desired spreading or piping consistency is reached.  Add food coloring.
  6. Pipe or frost cookies and top with sprinkles.  Allow to set open to air for several hours before storing in sealed container.  

Wednesday, July 2, 2014

Restaurant Review: King Egg Roll

King Egg Roll - lunch on June 16, 2014
Before I left my last job, I went out to lunch with one of my coworkers. We originally meant to go back to Honey Thai, her favorite place for Thai food, but we went on a Monday and we forgot that many small business restaurants, particularly Asian restaurants, are closed on Mondays. It's like their Sabbath.
Not to be deterred, we decided to try out King Egg Roll, which was nearby and on the way back to the office. Another coworker had mentioned it before and neither one of us had ever been there so it seemed like a good chance to try it out.
I had no idea what to expect but when we walked in, it felt like a Panda Express that served Chinese food entrees as well as dim sum. Like Panda, you could get rice or noodles then your choice of entrees. You could also order dim sum as a side order. The person behind the counter took your order and dished it out then you paid at the cash register at the end of the counter. The price points are also similar to Panda, under $10 for rice or noodles with 2 entrees.


Unlike Panda Express though, each order comes with a cup of egg drop soup which I thought tasted pretty good.
And true to its name, each order also comes with an egg roll. I wouldn't have ordered it otherwise since I knew it would be full of veggies and, even if I ate cooked vegetables, it always seemed contrary to have vegetables deep fried in an egg roll wrapper. Lumpia, I can handle. Deep fried vegetables? Nah.
I got the Orange Chicken to play along with the Panda vibe and the barbecue pork. The Orange Chicken was just okay; Panda's is better. But the barbecue pork was delicious, a little fatty but good flavor.
Steamed Pork Buns
My coworker also got an order of steamed pork buns which we split. That was good too. This is definitely not gourmet Chinese food but for a quick lunch, it's a decent alternative, especially if you don't mind simple and not fancy.

Tuesday, July 1, 2014

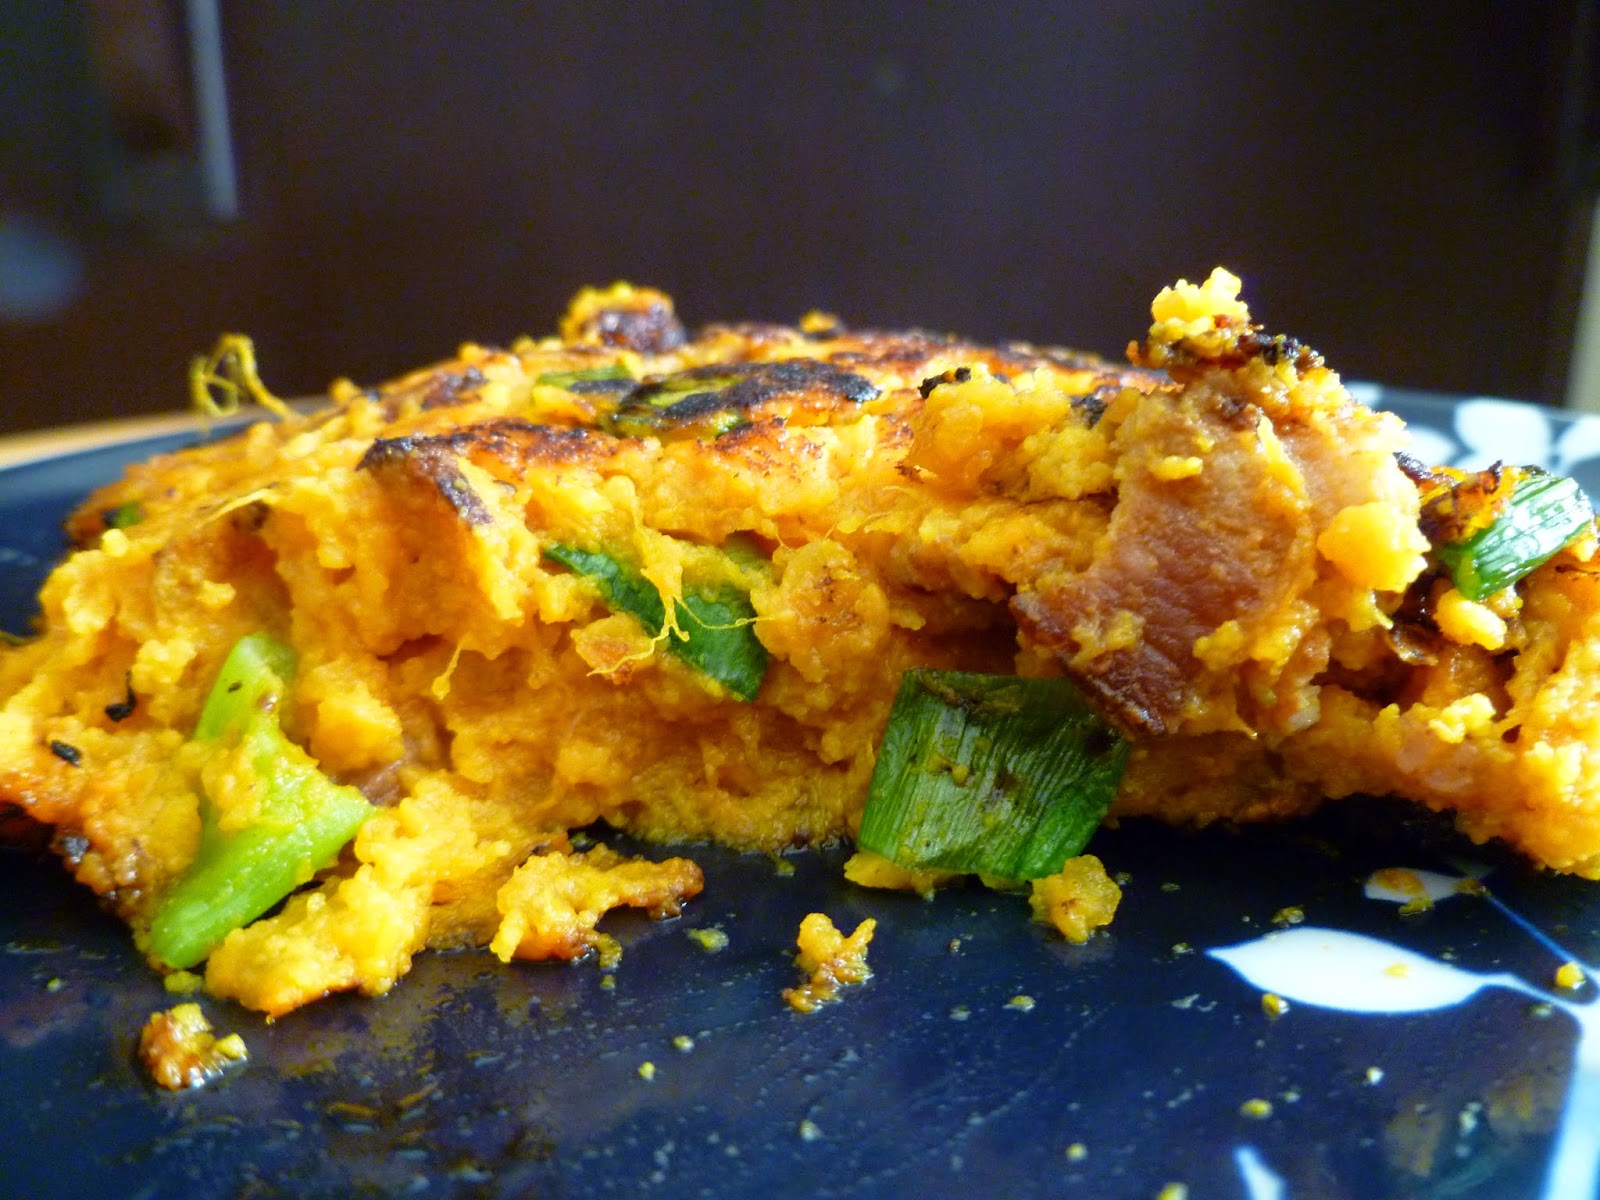
Sweet Potato Bacon Cakes

Sweet Potato Bacon Cakes - made June 21, 2014, modified from Paleo Leap
I love sweet potatoes. I haven't mastered how to make crisp sweet potato fries yet (mine come out too soft and never crisp enough unless I happened to burn them) but I thought this would be a good variation of a fried potato patty or something like a hash brown.
I'm not big on bacon but it was a nice addition to this for texture. The only issue I had with these is, once the egg was added in, the mixture was too soft and goopy to form into decent patties. It was also hard to turn these over and most of mine fell apart when I tried. I managed to get a couple of them to fry up whole but the others became more like hash than hash brown patties. Still, these were pretty tasty. Probably because I love sweet potatoes in almost any form. Next time I'm going to omit the egg and just try to fry them as mostly sweet potatoes, bacon and green onions and see if they hold up without anything to bind them other than the mashed sweet potatoes.
1 pound sweet potatoes, quartered
4 slices bacon, chopped (I used nitrite-free bacon from Trader Joe's)
3 green onions, sliced thinly
1 egg
sea salt and freshly ground black pepper
1 tablespoon butter (or use a paleo-friendly oil/fat if you want these to be paleo appropriate)
  1. Place the sweet potatoes in a large saucepan. Add cold water to cover and bring to a boil; lower the heat and let simmer until the potatoes are fork tender, about 5 to 8 minutes.
  2. Fry the bacon in a skillet over medium-high heat until crispy. Set aside.
  3. Mash the potatoes in a large bowl. Shred and add the cooked bacon as well as the green onions and egg. Season to taste with salt and pepper.
  4. Form 4-6 patties with the sweet potato mixture.
  5. In a large skillet placed over medium-high heat, melt butter. Fry the potato cakes until the outsides are golden and the insides are heated through, about 4 minutes per side.

Sunday, June 29, 2014

Chicken in Basil Cream Sauce

Chicken in Basil Cream Sauce - made June 18, 2014, modified from The Girl Who Ate Everything
Doesn't this look so nice and colorful with the sundried tomatoes and the basil? Such a nice summertime dish. Too bad I screwed it up. I like to think it wasn't my fault but of course it was. For one thing, I skipped the whole breading and frying of the chicken breasts. Instead, I repurposed a couple of chicken breasts from the Crockpot Beer Chicken. Since the sauce from that recipe was virtually tasteless, I decided to make a different sauce for the remaining chicken. Hey, they were organic, free range, pampered chickens; I wasn't going to let them go to waste. There was no point in frying breaded chicken for it so instead I just made the sauce and poured it over the already cooked chicken.
But something went wrong. The most likely culprit is I didn't have heavy cream. Technically I did but it had expired the day before. For a brief (mad) moment, I considered using it because, really, didn't they allow some kind of grace period with those use-by dates? What was a day? But in the end, sanity and fear of harming myself with dairy-gone-bad prevailed. So I substituted whole milk instead of using the heavy cream. That might've been a mistake. For some reason, instead of thickening, the sauce began to both clump and go runny. Oops. I can't explain why and I don't know enough about cooking to offer a plausible reason. I've got to think it takes some kind of talent to make a sauce that was both clumpy and runny - for you real cooks, bet you can't do that! I still ate it since it was already made and the flavor was there, just not the consistency of the sauce I would've liked. So if you want to make this, I'd suggest being a little more faithful to the recipe than I was. And hopefully it'll turn out for you. Add another one to my laughable forays into cooking.
1/2 cup milk
1/2 cup dried Italian bread crumbs
4 skinless, boneless chicken breasts, pounded thin with a meat mallet
3 tablespoons butter 
1 clove garlic (1/2 teaspoon minced)
1/2 cup chicken broth
1 cup heavy whipping cream
1/4 cup sun-dried tomatoes, chopped
1/2 cup grated Parmesan cheese
1/4 cup chopped fresh basil
1/8 teaspoon black pepper
  1. Place milk and bread crumbs in separate, shallow bowls. 
  2. In skillet, heat butter to medium heat. Dip chicken in milk, then coat with crumbs. Cook chicken in butter, on both sides, until juices run clear (about 10 minutes). Remove and keep warm.
  3. Add the garlic to the pan and cook for 30 seconds over medium heat. Add the chicken broth to the skillet. Bring to a boil over medium-high heat, and stir to loosen browned bits from pan. Stir in cream and sun-dried tomatoes; boil and stir for 1 minute. Reduce heat.
  4. Add Parmesan cheese, basil and pepper. Stir sauce and cook until heated through. Remember that for a thicker sauce all you have to do is cook it longer. 
  5. Serve chicken with sauce poured over the top.

Saturday, June 28, 2014

Last day at work, last week of treats

My last day of work was this past Thursday. For my last week, instead of bringing in a dessert on my usual Monday, I decided I would bring in something every day as one last hurrah for my coworkers. I told them they could get skinny after I leave. Until then, I was baking. They didn't seem to mind and, like squirrels stuffing away nuts for winter, the baked goods started to disappear faster than usual each day.

I was so busy and working longer hours than usual during my last two weeks that I was caught off guard in keeping my pantry and refrigerator stocked with baking staples. I didn't have time to make a Costco run but I did manage to eke out what I needed to just enough, running down to 1/2 stick of butter, 2 eggs and half a canister of flour by Wednesday night. Do you know how close to the edge that is for me???


Since I didn't want any baking failures for my last week - had to end on a good note, after all - I did a combination of "safe" new recipes to try and previously tested recipes. I'll post the new recipes later as I still have a backlog of other posts to put up.

On Wednesday, the day before my last day, my coworkers also threw a dessert party for me. How appropos was that? I didn't know ahead of time what they were planning (what dessert do you bring a baker?) but shortly beforehand, I discovered we were having ice cream sandwiches from Cream. Cream! First, I didn't even know Cream was mobile and could come to you. Second, I was fascinated by how they did it because, just like at any Cream store, the cookies were warm and they made the sandwich in your choice of cookies and ice cream flavors right in front of you when you ordered it.


The very nice crew from Cream
This mobile Cream crew brought a freezer container of ice cream, a warming oven with fresh cookies and all the accoutrements they needed to crank out their ice cream sandwiches. Best of all, no 30-45 minute wait as you typically experience at any of their store locations. What an awesome idea and a thoughtful one by my coworkers.
Mango Mousse Cake

Artfully decorated fruit tart
My summer intern also brought me a mango mousse cake from Moos Bakery while another coworker brought a fruit tart from a bakery in Oakland (she didn't mention which one). It was a really nice gathering and made it that much harder to leave the next day, knowing I was leaving behind a really good crew of people, many of whom had become my friends as well as my coworkers.
I also have to give props to the goodbye "card" our design team made for me. It was actually poster size and people wrote their greetings on it, wishing me well. Awwwww. And if my cup didn't already run over, a few of my coworker friends surprised me with some very thoughtful gifts throughout the week that were very "me".

Although I'm looking forward to my new job, new company and new challenges, all of this made it harder to leave than I expected. And maybe that's a good thing because it certainly validates that the last 3+ years were well spent and I have no regrets. Which is all I could ever ask for.

Friday, June 27, 2014

Bakery Review: Nothing Bundt Cakes

Nothing Bundt Cakes - multiple visits
I first heard of Nothing Bundt Cakes several years ago. One of my coworkers had a cousin who owned a franchise and our department admin ordered bundt cakes from there for an office party. I clearly remember she ordered a carrot cake and a red velvet cake. They came appropriately decorated (it was for a birthday celebration) and, being me, I had to try a slice of each. For research purposes, you understand.
I tried the carrot first and wasn't impressed. While it was everything I believed a carrot cake should be, meaning just carrots, no nuts, raisins or pineapple, it was a bit dry. Let me tell you, it's hard to make a dry carrot cake because it's typically an oil-based cake and those suckers are moist almost by definition. For an oil-based cake to become dry, you've either overbaked it or it's been refrigerated for too long. So my taste buds went, "Meh."
Then I tried a piece of the red velvet. Ahhhh. I take it back - now I'm impressed. It was moist, it was delicious and the texture was a perfect Bundt cake texture, fluffy yet dense enough to be a good Bundt cake but not too dense. All goodness. Bear in mind I make bundt cakes from scratch and, modesty aside, I think some of them have been pretty good. But I still also like the ones from Nothing Bundt Cakes. I've since had other flavors and other cakes from there, at first mostly from other birthday parties or get togethers although I've been known to indulge and get a bundtlette for my own personal consumption.
The red velvet has been a consistent favorite. The marble is good but more standard. Surprisingly I don't like the chocolate chocolate chip one as much. The texture is just as good as the red velvet but the one (or two) I've tried have tasted just ordinary without a good chocolate punch and it wasn't spectacular. As I always maintain, if I'm going to have empty calories, they should be spectacular empty calories. Otherwise I'm running on the treadmill and doing weightlifting for nothing. I still remain a non-fan of the carrot cake. Thinking I'd just tried one that was out of the norm, I gave it another chance at a later date and I still didn't think it was as moist as it should've been.

Slices of the full-size Red Velvet Bundt Cake
We're throwing my dad a birthday party later this year and for his birthday cake, I've been bringing my parents samples of different cakes from local bakeries for them to try and see which he likes best. I've brought a slice of red velvet and a slice of coconut pineapple from Susie Cakes and he enjoyed those but then I bought a couple of bundtlettes from Nothing Bundt Cakes for him to try. We tested out the red velvet and the lemon one week and the pecan praline and the marble the following week. Fortunately they sell those flavors in bundtlette size for more individual portions.
Red Velvet Bundtlette $3.99
They were all good but I ended up liking the lemon bundtlette the most for the best flavor and texture. Almost as much as I like the banana cake from Icing on the Cake. Uh-oh, I sense another Holy Grail search for a copycat recipe in an attempt to duplicate the lemon bundt cake from Nothing Bundt Cakes. Or I can just keep going back and buying myself a bundtlette when the mood strikes.
Lemon Bundtlette
While bundt cakes have that homey connotation as something you can make for yourself, I like certain flavors from Nothing Bundt Cake enough to definitely buy it rather than try to make it. I don't say that often about many baked goods but they're a great exception. If you're buying the full sizes for a party, they can be a bit expensive but are in line with mid to higher end bakeries. Oh, for the full-size Bundts, they tend to go a bit heavy handed (in my opinion) on the frosting but you can ask for less frosting when you order ahead of time.