Monday, February 3, 2014

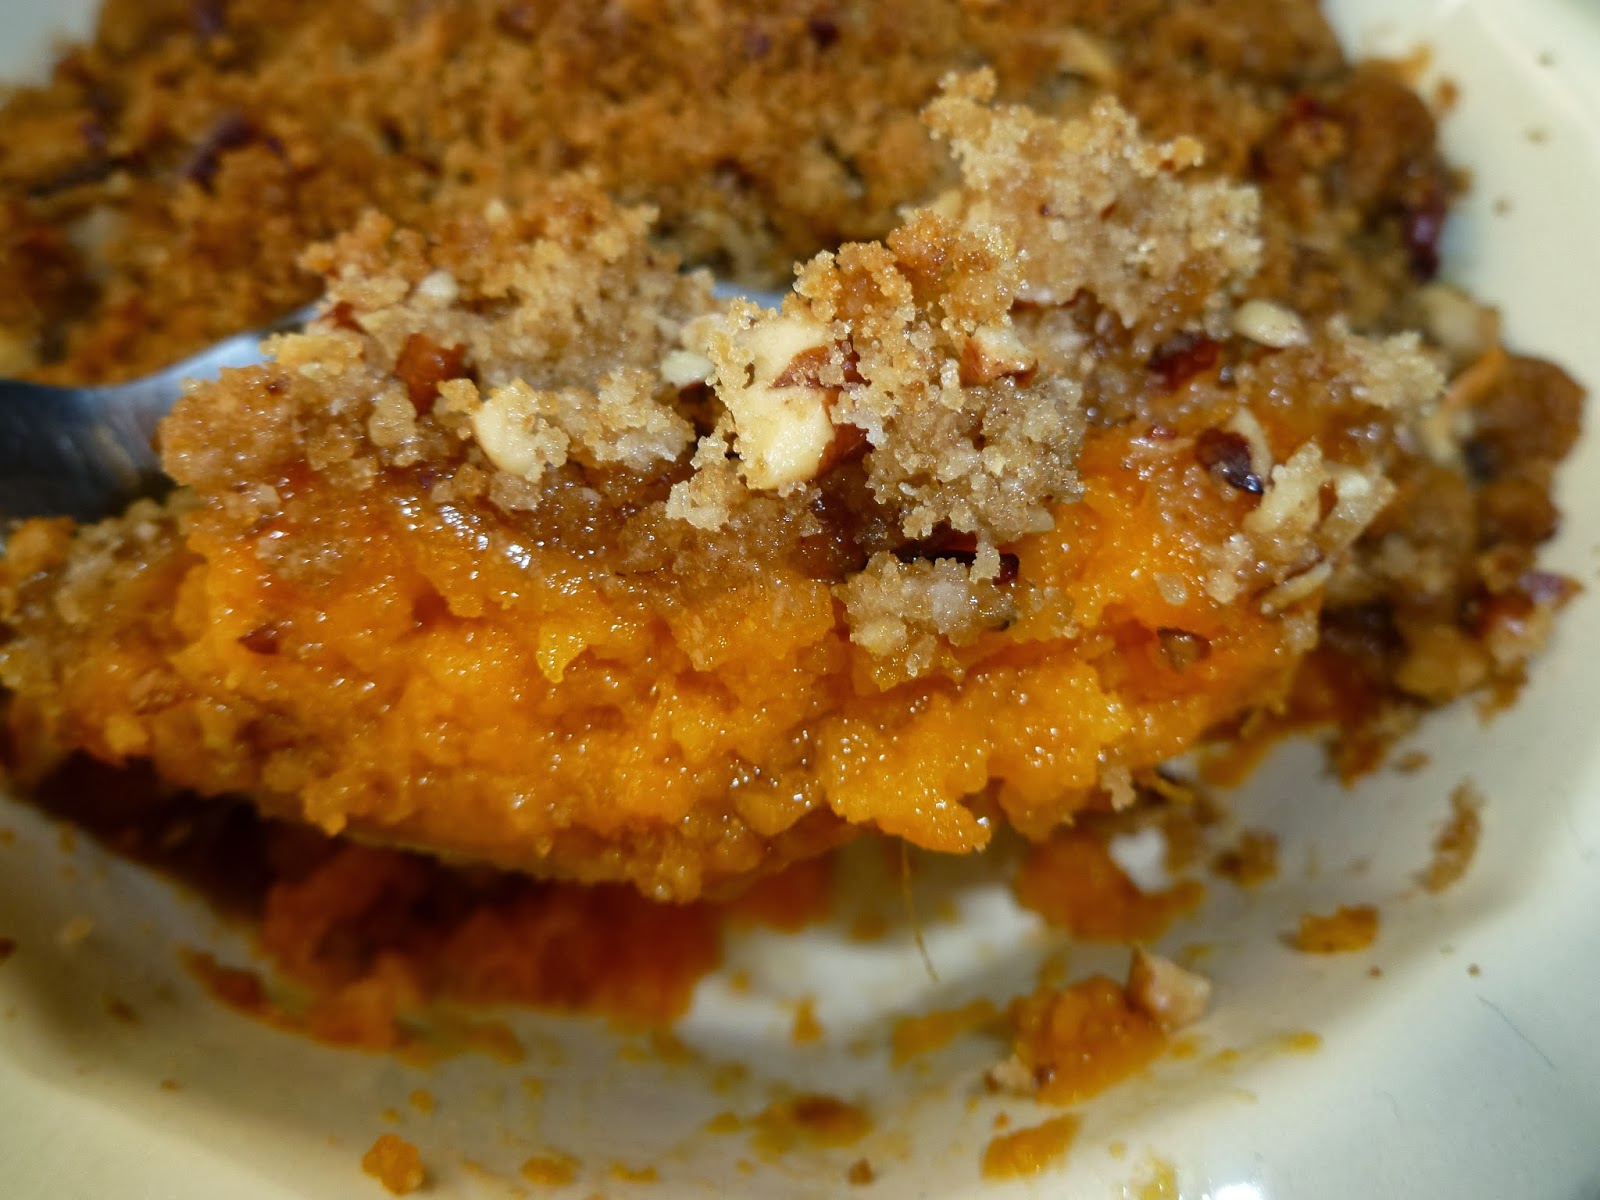
Ruth's Chris-style Sweet Potatoes

Ruth's Chris-style Sweet Potatoes - made January 24, 2014 from The Girl Who Ate Everything
I have been having a recently discovered love for sweet potatoes. I've tried them baked, boiled and fried and loved them all. I may never eat a white potato again. Even when it comes to fries, I'll go for sweet potato fries instead of their regular white potato counterpart. And sweet potatoes are better for you anyway. Not that I necessarily always, often or even sometimes base my eating choices on nutrition - this is just a happy coincidence.
One version I've always been conceptually against was the sweet potato pie. I think it's because when I first tried sweet potatoes, it was in pie form and it was like over-sugared, heavily spiced mush and my initial reaction was, "ew, who eats this stuff?" It ranked right down there with pumpkin pie and I dislike pumpkin pie intensely. It took me years to try sweet potatoes again and since I have, I've only had them the way I've made them, whether they're just boiled, baked or caramelized or pan fried. It was all good.
But every once in awhile, I pretend I'm open-minded about trying new foods and actually follow through. Such was the case in making this sweet potato pie. I've never been to a Ruth's Chris before since we don't have one near me but I've heard about it and most people seem to love their food so I was curious to try this recipe. I'm not going to lie - when I first looked it through, I couldn't help but wonder why anyone would take something as wholesomely good as a plain sweet potato and add all this "stuff" to it, thereby making it somewhat bad for you and negating all the good nutrition to be found in a sweet potato. But I forged ahead with it as I had three sweet potatoes to use up and I was able to get enough out of them to make half this recipe.

Turns out being open-minded was a good thing as I really enjoyed this pie. Specifically, I loved the topping. It's hard not to like crunchy streusel topping perfectly sweetened with brown sugar and with the added crunch and flavor of toasted pecans to contrast with the smoothness of the sweet potato filling. I'm not convinced plain mashed sweet potatoes wouldn't be better since I really couldn't taste much of a difference in adding the sugar, eggs and butter to the mashed sweet potatoes but I would definitely keep the topping. We're past Thanksgiving so perhaps it's not the season for sweet potato pie anymore but I'd consider making this for Thanksgiving dinner as a side dish or even a dessert - it's really good.
Crust (Topping)
1 cup brown sugar
1/3 cup flour
1 cup pecans, chopped
1/3 cup butter, melted

Sweet Potato mixture
3 cups cooked and mashed sweet potatoes (I peeled, sliced and boiled mine)
1 cup sugar
½ teaspoon salt
1 teaspoon vanilla
2 eggs, well beaten
1/2 cup (1 stick) butter, melted
splash of milk if needed
  1. Preheat oven to 375 degrees. Spray a medium-size casserole dish with nonstick spray.
  2. For the crust: Combine brown sugar, flour, nuts and butter in mixing bowl. Set aside.
  3. Combine sweet potatoes, sugar, salt, vanilla, eggs and butter in a large mixing bowl in the order listed. Beat thoroughly with a hand mixer for about 3-4 minutes to increase the fluffiness of the sweet potato mixture. Add a splash of milk if needed and mix.
  4. Pour mixture into the baking dish. Bake for 25 minutes. At this point, dish can be covered and refrigerated for a couple of days.
  5. Sprinkle the surface of the sweet potato mixture evenly with the crust mixture and return to oven for 10 minutes. Allow to set at least 30 minutes before serving.
  6. The brown sugar and pecan crust should be slightly browned and crunchy. Makes 12 servings.

Restaurant Review: Athena Grill

Athena Grill - lunch on January 23, 2014, 4-star rating on yelp
A coworker and I were trying to figure out where to go for lunch and she mentioned Athena Grill, this Greek place nearby. I'd heard of it before but had never been and of course my first thought was to try it "for blog material". Athena Grill is located in a randomly odd place in an industrial neighborhood of office parks and warehouses. It would either have to be a destination place because there's nothing else out there or the only lunch spot for people who work in the surrounding area or both.
It was actually fairly busy when we arrived just before noon. There's both indoor and outdoor seating. You go inside and place your order with the cashier. Then you're given a block with a number on it, you get your drink of choice from the drink fountain, find a table and one of the wait staff, searching the tables with the other block numbers, comes to find you and delivers your order a few minutes later.
The whole process was pretty efficient. They also come out with a basket of pita bread and French bread with hummus to each table. This is a good place to come to with a group of people if you don't want to worry about splitting the check since each person places and pays for their own order. As an aside, I found the people watching there rather funny as everyone so looked like they worked in high tech. As in, I kept thinking I recognized someone only to discover I didn't know them but I know people who looked like them. It's hard to explain unless you've worked in a certain industry for a number of years and you just know what the people in that industry look like. That's how I felt at Athena Grill and it tickled my odd sense of humor.
Pita and French Bread with hummus
Our orders arrived fairly quickly so this place is a good option for a quick lunch. My coworker got the lamb souvlaki wrap. I'm not well versed on Greek food so I couldn't tell you what it was like but I think she enjoyed it.
Lamb Souvlaki Wrap - $10.95
My own order probably wasn't very authentically Greek since I went with a pasta dish - namely layered ziti in a meat sauce and topped with a bechamel sauce that looks like a block of melted cheese at first glance but really was a thick layer of bechamel. I had thought about ordering a meatier entree to get something more Greek but I already had dinner plans at a burger place with friends that night so I went with pasta for something different.
Pastitsio - $12.95
That might not have been the best call I could've made. The pasta was decent but I did have to peel off some of that thick bechamel layer and the whole dish was rather bland. Now, remember, I have bland taste buds to start with so when I call something bland, it's really got to be bland. Not the yummiest entree I've ever eaten but, in fairness, there are probably other entrees I should've gotten that I would've enjoyed more so I'm not ready to write off Athena Grill just yet. I'll have to go back and try something else before I can really decide if I like the food or not.

Sunday, February 2, 2014

Brown Butter Caramel Mocha Cookies

Brown Butter Caramel Mocha Cookies - made dough January 24, 2014 from Kevin and Amanda
I'm going through a purge on my pinterest boards - either I make something I've pinned or I delete the pin because I've pinned it from so long ago and if I haven't made it by now, I likely never will. Fortunately, this recipe fell into the former category. I needed to put up some cookie dough so I could bake off cookies later on when I needed it and this was one of the recipes I decided to try.
It also had the added advantage of using up some espresso powder I've had for awhile that might lose its flavor if I kept hanging onto it for much longer. Plus I had a nearly-forgotten package of caramel bits that I tend to buy and hoard like I do with most other baking ingredients. But caramel bits aren't something you want to hoard for too long as they do eventually get too hard to use without melting them with milk or cream.
If you like coffee, espresso or mocha-flavored cookies, this is a good cookie to make. They don't spread too much, are chewy and give a different twist to a traditional chocolate chip cookie. The only cautionary note is not to overbake them, not only because overbaking will dry out the cookie but also because the caramel bits will get too hot and become hard and chewy when cooled to room temperature. That's always a factor when baking with caramel but even more so in a cookie. As it is, when you form the dough balls, make sure no caramel bits are exposed at the bottom edges of the cookie They'll leak out of the dough and make misshapen cookies. Plus, the melted then cooled caramel will be too hard to eat. When I had that happen with a few cookies, I simply trimmed off the melted parts while the cookies were still warm.
2 sticks (1 cup) salted butter
1 1/4 cups packed dark brown sugar
1/4 cup granulated sugar
1 large egg plus 1 egg yolk
1 tablespoon vanilla extract
2 1/4 cups all-purpose flour
2 tablespoon instant coffee granules
1 teaspoon baking soda
1/2 teaspoon salt
1 cup caramel bits
3/4 cup semisweet chocolate chunks
Coarse sea salt for sprinkling (optional)
  1. Preheat the oven to 350 degrees F. Melt the butter in a saucepan over medium heat. Once the butter starts to foam, begin whisking constantly. When the butter turns brown, fragrant, and you see little brown bits at the bottom of the pan, immediately remove from heat and and transfer to a large mixing bowl. Set aside to cool.
  2. Meanwhile, whisk together the flour, coffee, baking soda, and salt in a bowl and set aside.
  3. With an electric mixer, beat the butter and sugars until well combined, about 3-5 minutes. Add the egg, yolk, and vanilla until well combined. Add the dry ingredients and mix on low-speed just until combined. Add the caramels and chocolate chunks and stir until just combined.
  4. Use a medium (1.5-tablespoon) cookie scoop to place dough on a cookie sheet lined with parchment paper. Bake at 350 for 10 minutes until edges just start to turn golden brown. Sprinkle with sea salt if desired. Cool on a wire rack.

Saturday, February 1, 2014

Skinny Orange Chicken

Skinny Orange Chicken - made January 18, 2014 from Gimme Some Oven
I'm still on a roll with cooking more at home and since I was giving myself a break from crock pot cooking, I went with what is essentially a stir fry recipe that was equally easy: brown the chunks of chicken, pour the sauce over it and let simmer until thickened. Can't get much easier than that.
This is a skinny version of orange chicken because it isn't breaded or deep fried. Much as I love the breaded, deep-fried version, this is much easier to prepare. The orange sauce delivered the orange chicken flavor although it thickened into something a little more gelatinous than I would've liked. I would cut back on the cornstarch by a teaspoon or two next time. Otherwise, a nice simple dish easy to prepare even on a weeknight when you don't have a lot of time.
Chicken
2 pounds boneless, skinless chicken breasts, cut into bite-sized pieces (I used boneless, skinless chicken thighs)
salt and pepper
2 tablespoons olive oil

Orange Chicken Sauce
3 cloves garlic, minced
1/2 cup orange juice
1/2 cup honey (add more to sweeten, if desired)
1/3 cup soy sauce
1/4 cup rice wine vinegar
3 tablespoons cornstarch
1/2 teaspoon ground ginger
1/2 teaspoon white pepper
zest of one orange
pinch of crushed red pepper flakes

  1. Season chicken generously with salt and pepper.
  2. Heat oil in a large saute pan over medium-high heat. Add chicken and saute for about 4-6 minutes, stirring occasionally, until the chicken is browned and nearly cooked through.
  3. Combine all orange sauce ingredients. 
  4. Pour in the orange chicken sauce, and stir to combine. Let the sauce come to a boil, then boil for an additional minute or two until thickened. Remove from heat and serve immediately over quinoa or rice. Garnish with green onions, sesame seeds and additional orange zest.

Friday, January 31, 2014

Bakery Review: Kara's Cupcakes

Kara's Cupcakes - visited January 18, 2014
After we had lunch at Scott's Seafood, we trekked across the parking lot to get cupcakes from Kara's for dessert. Back in the day, before cupcakeries took off, Sprinkles was the first game in town, followed closely by Kara's Cupcakes. I had a love affair with Sprinkles to the point that my friend, Annie the Baker, asked me if I knew Candace Nelson, Sprinkles' founder. Annie preferred Kara's and she knew Kara as well. If anyone could have a spirited debate over cupcakes, it was me and Annie, lol.
I did my fair share of taste testing between the two and decided that while I liked Sprinkles better overall in terms of taste, texture and size of cupcakes, there were two flavors that I thought Kara did better than Candace: the banana with caramel filling and the chocolate. Sprinkles doesn't even have a banana caramel offering and Kara's chocolate cupcake had more chocolate flavor. Kara's Cupcakes are also smaller than Sprinkles and at $3.25 a cupcake, you can think that's bad for your wallet to get "less" cupcake than Sprinkles' $3.50 price point and good for your waistline that, by sheer size, Kara's Cupcakes are probably not the going rate of 550 calories a cupcakes like Sprinkles.
I haven't been to Kara's in a couple of years; it's one of those places where you know (or think you know) it as a known quantity and I'm usually more interested in trying out new places than going back to ones I'm already familiar with. Nevertheless, since I - ahem - just happened to there already and my cousin was getting cupcakes for her boys, I "had" to get a couple for myself.
Naturally I went with my favorite banana caramel. I could've gotten the chocolate but I was in a red velvet mood so I went for that as my second cupcake choice.
Since it was January, the cupcakes were decorated early in a Valentine's theme so most of the cupcakes were topped with hearts. Not that it mattered since I never eat the topping and usually only manage no more than half of the frosting.
One drawback to me about Kara's Cupcakes is they put too much frosting on top. I know that's the norm with bakery cupcakes and Sprinkles does it too but I don't love frosting so for me, it's always too much. Not a big deal though since I always scrape more than half of it off.
The banana caramel cupcake itself was as good as I remembered it. Love the banana taste of the cupcake itself and the caramel was flow-y and injected in the middle of the cupcake as the filling - all good. But what surprised me and what I didn't like was the frosting tasted a little off. Not "off" as in it had gone bad or anything but like they changed the recipe. It wasn't just the tang of cream cheese but like they added almond extract or some kind of extract that gave it an artificial taste. A bit disappointing even for a non-frosting person like me.
Sadly I was even more disappointed in the red velvet cupcake because that too tasted like there was almond extract in the cupcake itself. There was an artificial taste that I don't recall it ever having. Granted, it's been a couple of years since I've had Kara's Cupcakes but I have a pretty good memory when it comes to sweets and I know I thought much more positively of Kara's Cupcakes than this latest experience.
While the cupcakes aren't dry, they're not as moist as Sprinkles. Good news for people who think Sprinkles is "too greasy" but I love moistness in my cupcakes and cakes so these were just okay in texture. But what really killed me was the artificial tang in both cupcakes. I'm going to have to try a different flavor in the future and see if that holds true again or if I just visited this particular Kara's Cupcakes on an off day. I hope it's the latter because I really want to like her cupcakes again and be able to sing their praises.

Thursday, January 30, 2014

Cookies and Cream Cookies

Cookies and Cream Cookies - made dough January 17, 2014 from Notes from Nessa
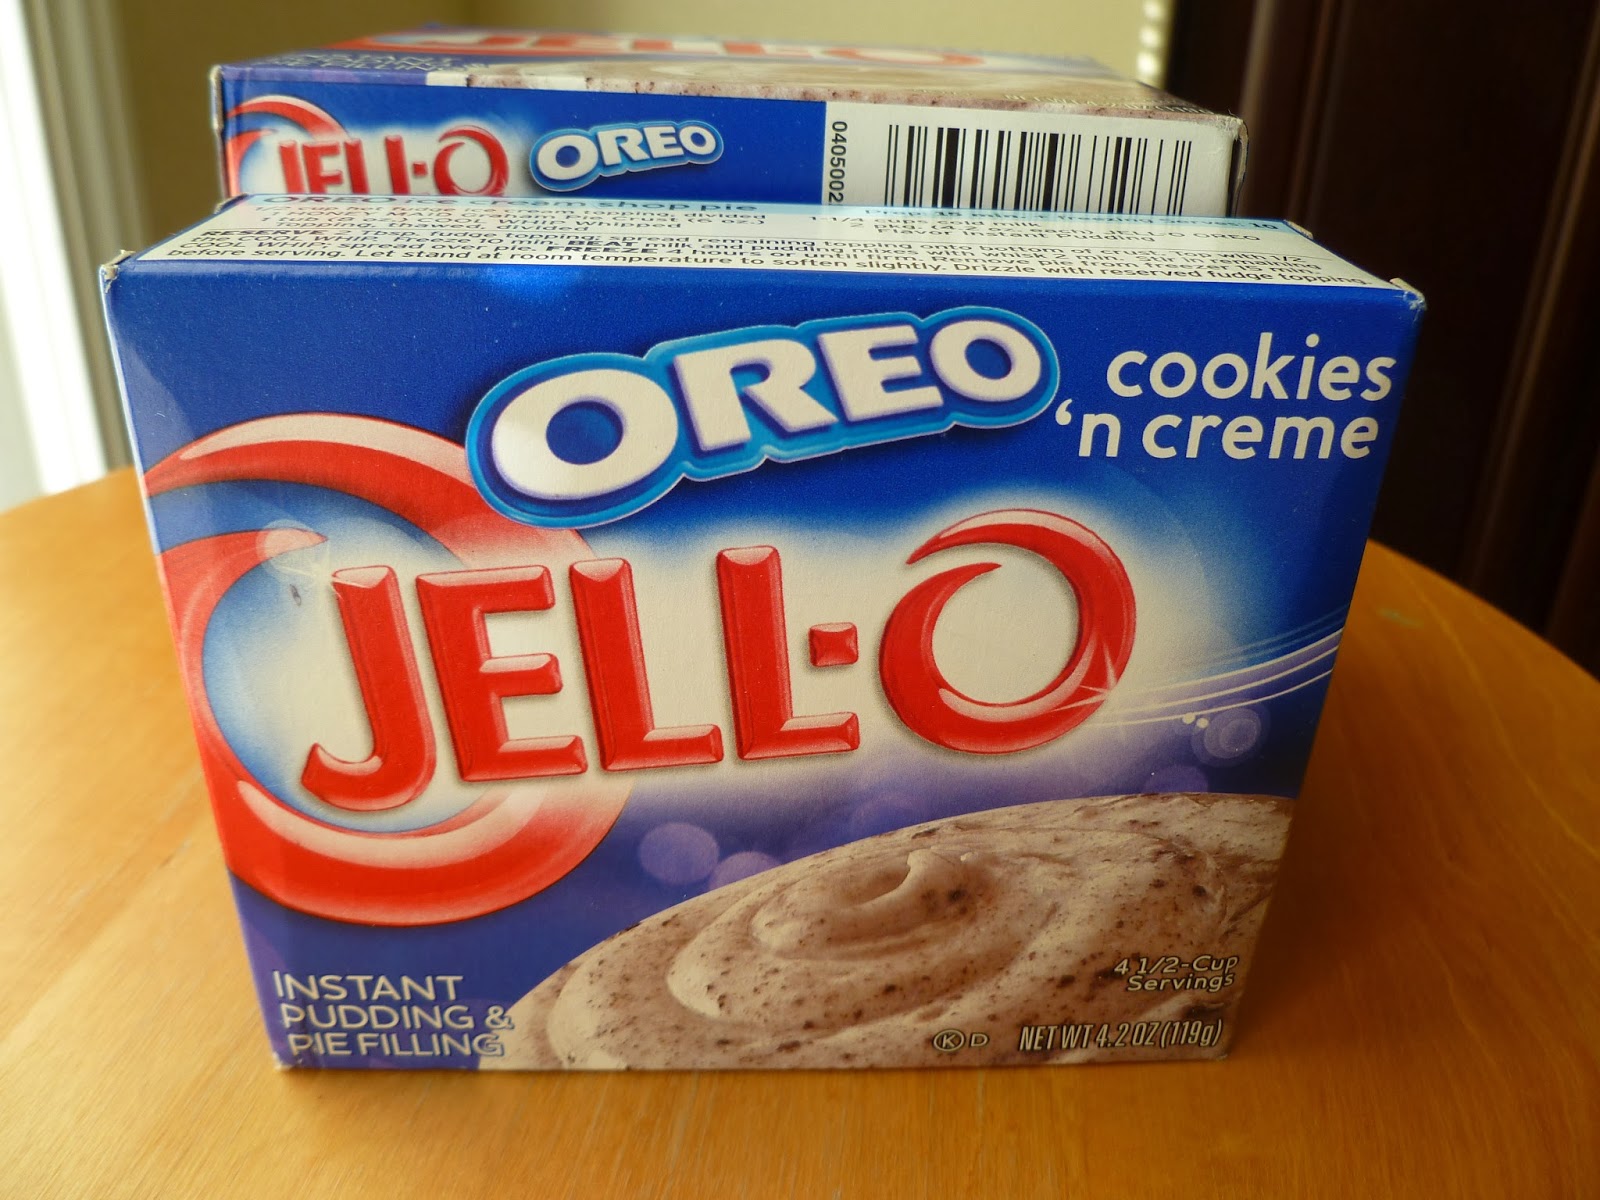
There are all kinds of cookies out there and nothing goes over the top like taking cookies and making more cookies out of them. That's what caught my eye about this recipe - you add chopped Oreos to the dough but even beyond that, the base includes Cookies and Creme pudding mix so it's like amped-up Oreos in a different form. I had the devil's own time finding the pudding mix because Target, Trader Joe's and Costco don't carry them and I don't shop anywhere else for packaged foods. So amazon to the rescue. They're pricier than a regular box of pudding mix but in the interest of recipe tasting, what the heck. And thank you amazon prime and 2-day shipping.
I was almost surprised by how much I liked these cookies. They didn't spread much when baked from frozen dough and on the convection setting of my oven; they stayed nice and chubby. But I also liked the flavor. They tasted like Oreos but with the soft, chewy texture of a good chocolate chip or butter cookie. I don't usually go for cookies n cream type of things, figuring I'd rather go straight to the source and eat an Oreo but now I can see why they're so popular. You get the same great taste but different textures.
1 cup butter, softened
1/2 cup packed brown sugar
1/2 cup white sugar
1 4.2-ounce package Cookies n'Creme pudding mix
2 eggs
1 teaspoon vanilla
2 1/4 cups flour
1 teaspoon salt
1 teaspoon baking soda
10 Oreos, chopped
1/2 cup white chocolate chips

  1. Preheat oven to 350 degrees (if baking right away).
  2. Cream together butter and sugars.
  3. Stir in pudding mix.
  4. Add eggs and vanilla.
  5. Add flour, baking soda and salt and stir to combine.
  6. Add chopped Oreos and white chocolate chips.
  7. Roll into balls and chill briefly if desired. When ready to bake, line baking sheets with parchment paper and space cookies evenly on sheet.
  8. Bake for 7-9 minutes or until middles no longer look raw.
  9. Cool completely on wire rack.


Wednesday, January 29, 2014

Skinny Popcorn Shrimp

Skinny Popcorn Shrimp - made January 17, 2014 from Gimme Some Oven
These may not look like shrimp at first glance but they really are. This is the panko-crusted skinny version of popcorn shrimp, not heavily breaded or deep-fried. They're very easy to make and do emerge with a nice crunch.
Mine look a little weird and dark because I didn't have cajun spice or bay seasoning so I used allspice instead. Might not have been the best choice as it didn't have much flavor or kick. It was just crunchy-coated shrimp. Still, if done properly, this makes for a fairly healthy snack or appetizer, especially if you're having a football-loving crowd over for a Super Bowl party.
1 cup Panko breadcrumbs
3 tablespoons grated Parmesan cheese
2 teaspoon Old Bay or other Cajun seasoning (I used allspice)
1/4 teaspoon salt
1/4 teaspoon black pepper
1 egg white, whisked
1 pound raw medium shrimp, peeled and deveined
cooking spray
lemon wedges and chopped fresh parsley, for garnish
  1. Preheat oven to 350 degrees F. Line a large baking sheet with parchment paper.
  2. In a medium bowl, whisk together Panko, Parmesan, Old Bay, salt and pepper until combined.
  3. Set up your dipping station with bowls of 1) shrimp, 2) egg white, and 3) breading. Working one at a time, dip a shrimp in the egg white until covered then transfer to the breadcrumb mixture and toss until combined. Place on the prepared baking sheet. Repeat with remaining shrimp then generously coat all of the shrimp with a layer of cooking spray (this helps the breading turn golden).
  4. Bake for 3 minutes, then flip the shrimp and bake for another 3 minutes or until cooked through and no longer translucent. Serve warm with garnishes and cocktail sauce for dipping, if desired.

Tuesday, January 28, 2014

Restaurant Review: Scott's Seafood

Scott's Seafood - lunch on January 18, 2014
For my uncle's belated birthday celebration, my cousin took us all out for lunch at Scott's Seafood a couple of weekends ago. I haven't been to Scott's in years, possibly not since business school and a recruiting function where you had to balance the fine art of schmoozing, making a good impression as a job-seeking student and nibbling on whatever was circulating the room at the time without spilling anything or in any way disgracing yourself.
Inside Scott's
Fortunately, this occasion was much more relaxed than that. The restaurant is sizable and there weren't that many people there for lunch so we had a good portion of the place to ourselves. Our table was already laid out with brunch menus when we arrived and our waiter was very attentive and provided great service. He was able to accommodate both my dad's order of angel hair pasta with prawns and my uncle's order of a 16-ounce steak even though neither were on the brunch menu but were on the regular dinner menu. It's the mark of a good restaurant that they can provide that kind of flexibility to their customers.
Calamari Appetizer
I can't speak to the calamari appetizer since I don't eat calamari but everyone else seemed to enjoy it. My mom and my aunt both got the salmon with the fingerling potatoes. Allow me a bit of ignorance as I hadn't realized before that "fingerling" potatoes were so....literal. I'm not entirely sure I found the presentation all that appetizing because when you first glance at the dish, the potatoes really do look like fingers. Stubby ones but fingers nonetheless. Color me a little turned off. Fortunately I think the taste of the dish was better than how it looked.
Salmon with Fingerling Potatoes
Angel Hair Pasta with Prawns
16-ounce steak
I was still channeling my inner Brit so I went with the fish n chips. But I think my standards for fish n chips went forever higher since my London trip. These were fine and I preferred the skinnier version of the fries here than the fat potato wedges I had in the UK but the fish strips were a bit more greasy than I would've liked. Not that I'm against grease or I wouldn't have ordered something deep fried but there's something unappetizing about seeing a pool of it underneath the fish when I lifted up each piece.
Fish and Chips
We didn't order dessert because my cousin's younger son wanted cupcakes so we planned to trek across the parking lot to Kara's Cupcakes (review forthcoming) but the restaurant was nice enough to bring out a complimentary dessert for my uncle once they learned it was a birthday celebration for him.
Complimentary birthday sundae
All in all, I don't know that I would rave about the food as being a cut above the rest but the service was spot on and very well done. The only other drawback about Scott's is they're located in a strip mall and parking can be difficult to find if you're there during peak hours.

Monday, January 27, 2014

Texas Sheet Cake - Happy National Chocolate Cake Day

Texas Sheet Cake - made January 24, 2014 from The Southern Lady Cooks
Here's another food holiday I can get behind and one I make an effort to acknowledge each year - January 27 is National Chocolate Cake Day! Is that the best day ever or what? Especially since it gave me the perfect excuse to try out this Texas Sheet Cake from The Southern Lady Cooks.
Texas Sheet Cake or Texas Fudge Cake is my favorite version of chocolate cake. It's easy to make, the taste and texture are sublime, the frosting is also easy to make and adds just the right touch of sweetness to the cake, says the person who normally doesn't like frosting. I never make it in an actual sheet pan because I don't want it too thin and instead always use my 9 x 13 pan to get the preferred thickness. The only cautionary note is if you do make it in the smaller pan, don't pour all of the frosting over it since the frosting amount is designed to cover a larger surface area. Instead, I spread only enough to make a thin layer and save the rest for another use.
I love this version of Texas Sheet Cake as much as the other versions I've tried. The texture is soft and moist and the chocolate flavor is superb. And as always, I'm enamored with how easy this is to make. For the frosting, because it's fairly liquid and you don't want to beat it too much, strain it once you've incorporated all of the powdered sugar - this will get rid of any lumps and give you a smooth-textured frosting. Use it immediately and it'll set as the cake itself cools.
2 cups all-purpose flour
2 cups sugar
1/2 teaspoon salt
1/2 teaspoon cinnamon
2 eggs
1 teaspoon vanilla extract
1/2 cup buttermilk
1 teaspoon baking soda
1 cup (2 sticks) butter
1/3 cup unsweetened cocoa powder
1 cup water
  1. Preheat oven to 350 degrees F. Line a 15" x 10" jelly roll pan or a 9" x 13" pan with foil and spray with nonstick cooking spray. Set aside.
  2. In a large mixing bowl, combine flour, sugar, salt and cinnamon. Mix well with a wire whisk.
  3. In a smaller bowl, combine eggs, vanilla extract, buttermilk and baking soda. Mix well with wire whisk. 
  4. In a pan on top of the stove, melt butter, add cocoa and water. Bring to a boil. Remove from stove and pour into flour mixture and mix until all dry ingredients are incorporated. 
  5. Add egg and milk mixture and continue mixing just until all ingredients are wet. Pour into prepared pan.
  6. Bake for 20-25 minutes, testing for doneness at 20 minutes. If baking in a 9 x 13" pan, it may take a little longer. (I baked in a 9 x 13" pan and it took 35 minutes.) Remove from oven and pour frosting over warm cake. 
Frosting
7 tablespoons milk
1/2 cup butter
1/4 cup unsweetened cocoa
3 1/2 cups powdered sugar
1 teaspoon vanilla extract
Toasted pecans or walnuts, optional
  1. Bring milk, butter and cocoa to a boil in a medium saucepan. Remove from heat and stir in powdered sugar, vanilla and nuts if using. Spread over warm cake immediately.

Sunday, January 26, 2014

Fudgy Chocolate Chunk Brownies

Fudgy Chocolate Chunk Brownies - made January 17, 2014 from Something Swanky
For one of my first baking forays in 2014, brownies seemed like an obvious choice to start off the new year. They're the backbone of my baking repertoire. And I was in the mood for one when I made these. My original intent was to try them out and send them in a care package to a friend on the East Coast. My friends in the Northeast have been frozen in their respective states with this whole polar vortex thing. Living in California where we headed into the 70s this January, I had some sympathy for their sub-zero temps. But the main reason I was going to make these brownies and care package them to the East Coast is my friend Kendra posted about baking brownies from a mix. Might as well wave a red flag in front of a charging bull. Really? From a mix? She tried explaining how, after a long, cold commute home, there was nothing easier than "ripping open the box". I was too busy cringing to pay any heed to her words.
So for fun, and my baking sanity, I decided to not only make these brownies and send them to her but to put together my own "brownie mix" with these ingredients. Obviously it isn't practical to send eggs, butter and vanilla extract through cross-country mail but I was going to package up the dry ingredients with separate packs for the sugar and the chocolate chips and write the instructions in bold words on each package so she'd know what to add and in what order to mix them all in. I still maintain baking brownies from scratch is just as easy as making from a mix (and tastes better). But....you notice how my verbage is "I intended to" and "I was going to"? Yep, I didn't do it. I really did mean to but I hadn't counted on these brownies not turning out the way I intended. Nothing to do with the original recipe but I had gotten creative and added chopped up Milky Way caramels to the batter. It seemed like a good idea in concept but in reality, the Milky Way caramels overheated in the brownie during baking and when they cooled, they'd all sunk to the bottom and the caramel came out hard and chewy. The brownie itself was okay but with the chewy-hard bits of caramel - not something worthy to go into a care package at all. Back to the drawing board. And I do intend to fulfill that brownie "mix" care package one day, just not with these.
1/2 cup butter, room temperature
1 cup granulated sugar
1 teaspoon vanilla extract
2 eggs
1/2 cup all-purpose flour
1/2 cup cocoa powder
1/4 teaspoon baking soda
1/4 teaspoon salt
2 cups chocolate chunks (I used Milky Way Caramels instead - bad idea)
  1. Preheat oven to 350 degrees F. Line a 9x9 baking dish with parchment paper.
  2. Beat together the butter, sugar, and vanilla in a stand mixer bowl. Add the eggs one at a time, mixing well between each addition.
  3. Stir together the flour, cocoa powder, and salt. Gradually add the dry ingredients to the butter mixture. Mix in the baking soda.
  4. Mix in the chocolate chunks with a wooden spoon or spatula.
  5. Once the batter forms (it will be thick), scrape it into the prepared dish and spread evenly.
  6. Bake for 25 minutes, until brownies begin to pull away from the side of the pan.