Monday, February 19, 2018

Chocolate Hazelnut Crunch Bars

Chocolate Hazelnut Crunch Bars - made February 10, 2018 from The Kitchn
Have you ever heard of feuilletine? Props if you have, even more if you know how to spell it correctly without googling it. Feuilletine is made of crushed crepes Dentelle. What are crepes Dentelle, you might ask? Think of them as really thin, crispy crepes crossed with really thin crispy sugar cones. In other words, delicious. Feuilletine look like broken bits of cornflakes but please try the real thing because they’re not cornflakes and so you’ll understand why I’m disproportionately thrilled that I finally found the name of these things that made up with crispy praline wafer layer in the Hazelnut Bliss cake from La Patisserie. I don’t think they’re the same as what was in my friend’s wedding cake long ago but they deliver an amazing crispy texture. Like a Ferrero Rocher but better. 
Feuilletine

Once I discovered the name of this ingredient that just makes a dessert, I had to look around for recipes that use it. Surprisingly, Pinterest didn’t yield the usual treasure trove of options I’d come to expect. On the contrary, use of feuilletine was not only somewhat limited but also seemed mostly from outside-the-US blogs and websites. Has it not caught on that widely in the United States? Must I now make it my mission to make sure everyone knows what they’re missing? Fine. Let’s start with this recipe.
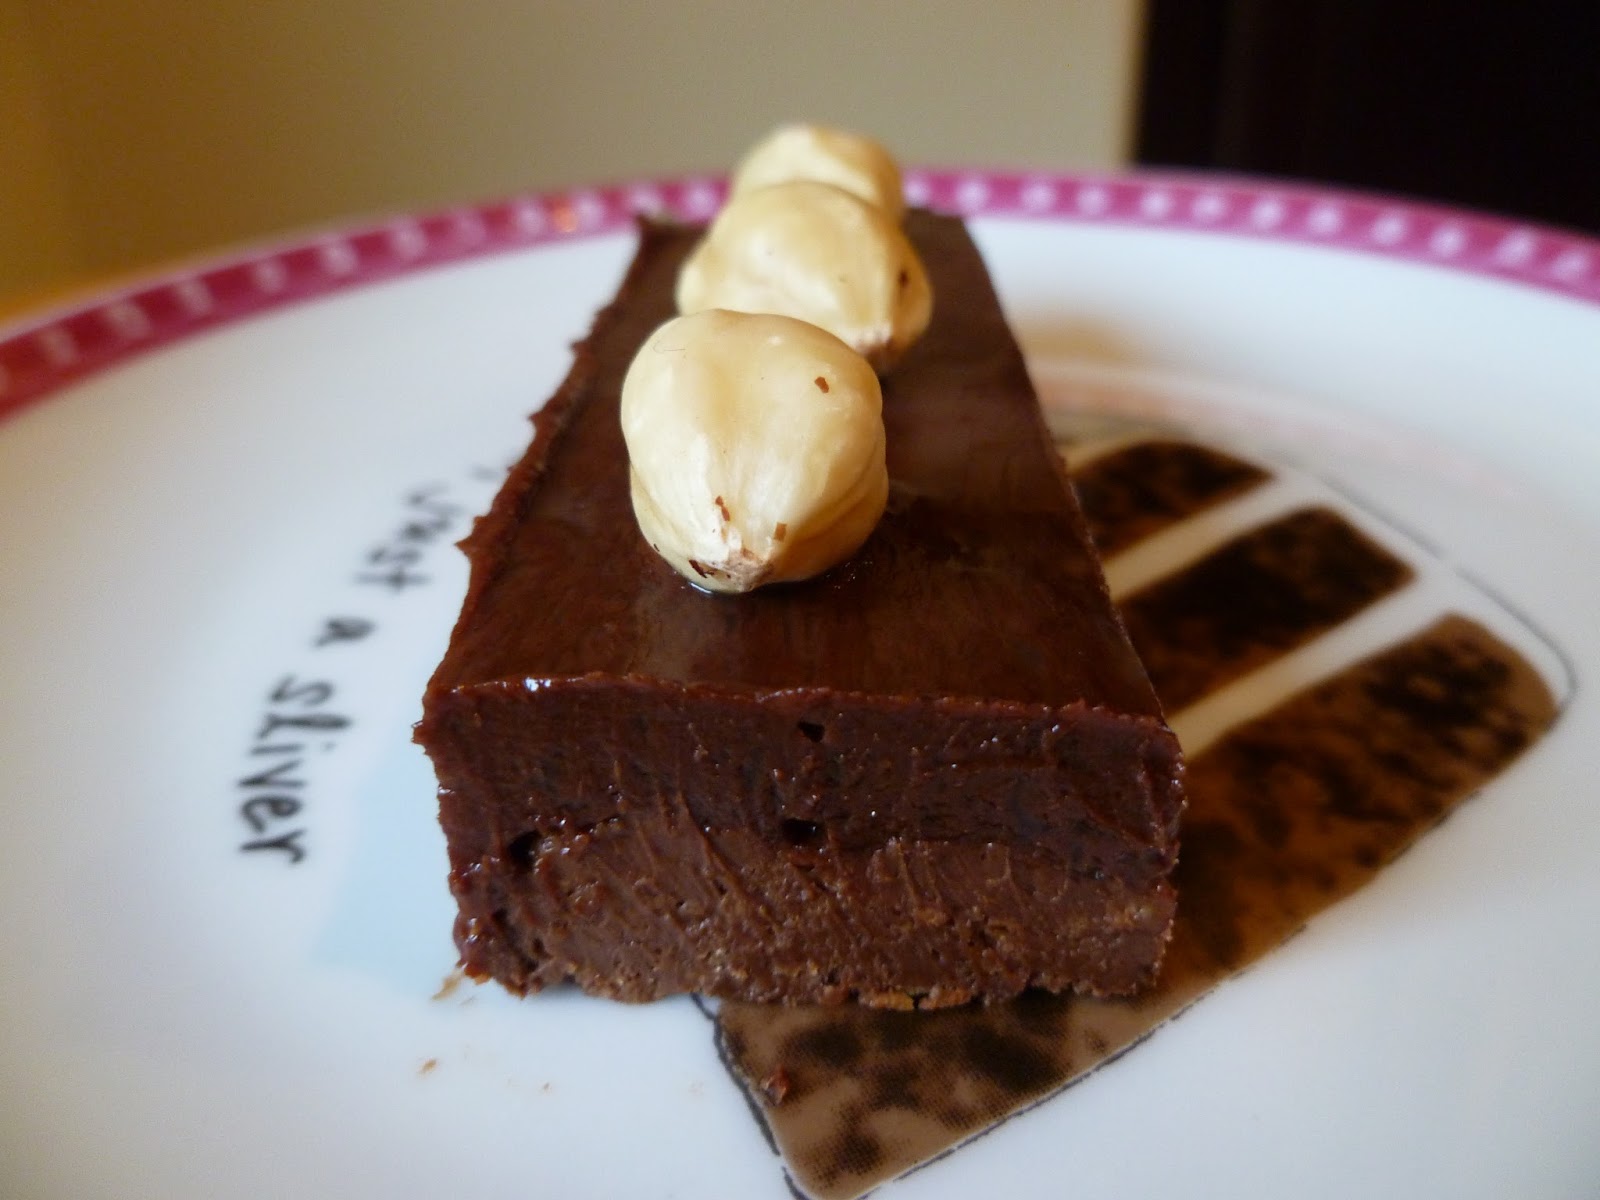
The bottom layer couldn’t be simpler. Melted chocolate, warm Nutella and feuilletine. What you will find amazing (or was that just me?) is that, similar to how I mix in rice krispies for my Nutella crunch topping, the feuilletine doesn’t get soggy but remains crisp. No lie. Then the ganache is also easy to make: chop the chocolate, heat the cream, pour over, whisk until melted, add the butter to also melt. Although I have to confess, I screwed up slightly somewhere. I think my ganache mixture might’ve been a little too hot when I added the butter because no matter how much I whisked the mixture, the butter separated out slightly. Which is a sign the mixture is too hot and the butter didn’t emulsify properly with the chocolate and cream. 
My sins were apparent when I chilled the bars to set and the slightly separated butter formed its own little pockets of solid butter sitting on top of the ganache. Eek. It isn’t the end of the world though. I scraped off the most obvious bits and tried to smooth out the top so my ganache sins weren’t readily apparent. Even with my doctoring, this still tasted really good. As in, my coworkers said “OMG, these are really good” and “get these away from me or else I’ll eat them all” good. 
If you can’t find feuilletine in your local store (I’ve never seen them, even in uppity high end food specialty shops), try amazon. I bought a small-ish container to try it out but I may need to re-order in larger quantities. My feuilletine obsession has begun.
Crust
6 ounces semisweet chocolate, melted
10 ounces (about 1 cup) Nutella
5 ounces (about 2 cups) paillete feuilletine

Filling
6 ounces semisweet chocolate, finely chopped
2 ounces bittersweet chocolate, finely chopped
8 ounces (1 cup) heavy cream
2 ounces (1/4 cup) unsalted butter, cut into small pieces, room temperature
  1. Line a 9 x 13 pan with parchment paper, allowing the parchment to hang over the long sides of the pan to act as handles.
  2. In a large bowl, combine melted chocolate and Nutella and stir until smooth. Fold in the feuilletine until combined. Transfer the mixture to the prepared pan. Use a sheet of wax paper to press the mixture into a smooth, even layer. Chill in refrigerator while making the filling.
  3. Filling: Place the chocolate chocolate in a heatproof bowl. Bring the cream to a simmer in a small saucepan over medium heat; pour hot cream over the chocolate. Let mixture sit for 2 minutes to melt chocolate. Add the butter pieces and whisk until ganache is very smooth.
  4. Pour the ganache over the crust and smooth with an offset spatula. Transfer to the refrigerator until set and firm, about 1-2 hours. Slice into bars and garnish with whole toasted hazelnuts if desired. Serve chilled.

Thursday, February 15, 2018

Bourbon Snickerdoodle Blondies

Bourbon Snickerdoodle Blondies - made January 28, 2018 and again on February 4, 2018, modified from Broma Bakery
I have a coworker who likes to drink and is a connoisseur of fine liquor. This is foreign territory for me since I don’t drink alcohol and have never cared for the taste. Plus we all know I like to eat my calories, not drink them, the occasional virgin strawberry daquiri notwithstanding. She also loves snickerdoodles so when I saw this recipe for bourbon snickerdoodle blondies, it seemed like the perfect ultimate dessert to make for her. She even supplied me with the bourbon. Which was good since I really didn’t want to buy a bottle just for 3 tablespoons to use in the recipe.
I myself like a good snickerdoodle blondie so I was hoping the alcohol would burn off and provide a decent undertone. My first inkling of trouble came when I practically passed out from the fumes of the bourbon when I added it to the batter. Uh oh. Okay, I’m either very sensitive to alcohol or a lot of burning off would need to happen before I eat this. I baked it for the recommended 30 minutes and the toothpick test showed a clean toothpick but I suspected it was still not done so I left it in for another 5 minutes. Only visions of dry snickerdoodle compelled me to take it out after 35 minutes as you know I’m paranoid about overbaking.
Turns out I needn’t have worried. Also turns out overbaked blondies were the least of my worries. First, the bourbon taste didn’t burn off and I could barely stomach the crumb of the taste test I had of this. Eek. I really don’t like alcohol. Second, the blondies were far from overdone and in fact, were quite underdone. Even the corners and the edges seemed barely baked. Plus there was a tinny taste to the blondies that I couldn’t fully attribute to the bourbon so it might’ve been the cream of tartar. I took some of the pieces to my coworker for her to try and I don’t think she liked them either, despite her love of whiskey.  I hate to say it but I think this is the worst thing I’ve ever made.
2nd attempt, sans bourbon

However, I blamed it on the bourbon and the underbaking so I tried making it again. I hate giving up on a recipe, especially one that seemed so promising. For the second attempt, I omitted the bourbon altogether and instead substituted 1 tablespoon of vanilla extract and 2 tablespoons of whole milk. I also decreased the cream of tartar by ½ teaspoon. To take care of the underbaking, I baked this for 45 minutes, a full 10 minutes more than the maximum time called for in the original recipe. The results were better, although still not as good as I would’ve liked. This time the taste was much better (to me) without the bourbon but the blondies still seemed too underbaked. Not as bad as my first attempt but if I make these again, I would likely make them for even longer.
1 cup unsalted butter, melted and cooled slightly
2 cups granulated sugar
2 eggs
3 tablespoons bourbon whiskey (can substitute 1 tablespoon vanilla extract and 2 tablespoons whole milk)
2 1/2 cups all-purpose flour
1 1/2 teaspoons cream of tartar (cut to 1 teaspoon)
1/2 teaspoon salt
4 tablespoons granulated sugar
4 teaspoons cinnamon
  1. Preheat oven to 350 degrees F. Line a 9 x 9 baking pan with foil and lightly spray with nonstick cooking spray.
  2. In the bowl of a standing mixer fitted with the paddle attachment, cream the melted butter and sugar on high speed for 30 seconds. Add in the eggs and bourbon; mix for another 30 seconds.
  3. In a separate bowl, combine flour, cream of tartar and salt. Fold dry ingredients into wet ingredients until just combined. Spread evenly into prepared baking pan.
  4. Mix together sugar and cinnamon and sprinkle evenly over top of bars. Bake for 30-35 minutes (in my oven, took at least 45 minutes) until a toothpick inserted near the center comes out mostly clean. Cool completely before cutting.

Sunday, February 11, 2018

"My Best" Chili

"My Best" Chili - made January 14, 2018 from Bakerita

I have really bland taste buds so I normally don't go for spicy food. I'm one of those people whose mouth goes on fire, my eyes water, my sinuses clear up, my tongue burns and I turn red if the food is too spicy. Okay, I'm exaggerating slightly. Very slightly. But I'm still not into spicy food.

So whenever I make chili, I use the normal chili powder (read: mild) from Penzey's. I made this chili and while the ingredient list might look a little long, it's actually pretty quick to put together. Mix up all the spices in a small bowl first then just dump it all in when it's time.
This turned out as chili should and was easy to make. But I have to admit, I'm used to chili being a little spicy which this was not. Next time I might branch out and go for a little more heat from the chili powder.

2 pounds lean ground beef
1 pound bulk Italian sausage, mild, casings removed
1/2 pound bacon
2 15-ounce cans kidney beans, drained
1 15-ounce pinto beans, drained
1 15-ounce can black beans, drained
2 28-ounce cans diced tomatoes with juice
1 6-ounce can tomato paste
1 large yellow onion, chopped
1 red bell pepper, chopped
2 cups beef stock
3 tablespoons chili powder
1 tablespoon Worcestershire sauce
1 tablespoon minced garlic
1 tablespoon dried oregano
2 teaspoons ground cumin
1 teaspoon dried basil
1 teaspoon salt
1 teaspoon ground black pepper
1 teaspoon paprika
  1. Heat a large stock pot over medium-high heat. Crumble the ground chuck and sausage into the hot pan and cook until evenly browned. Drain off excess grease.
  2. In a different pan, cook the bacon until crispy. Crumble and add to stock pot. Cook the chopped onion and pepper in the bacon drippings for about 5 minutes, or until onions are translucent. Add to the stock pot.
  3. To the stock pot, add in the drained beans, diced tomatoes, tomato paste and beef stock. Season with chili powder, Worcestershire sauce, garlic, oregano, cumin, basil, salt, pepper and paprika. Stir to blend, then cover and simmer over low heat for at least 2 hours, stirring occasionally.
  4. Add 2 hours, taste and adjust salt, pepper and chili powder if powder if necessary. The longer the chili simmers, the better it will taste.
  5. Remove from heat and serve, or refrigerate and serve the next day.

Saturday, February 3, 2018

Bakery Review: La Patisserie

La Patisserie - visited January 14, 2018
I've been giving myself a break from baking since the holidays. It's my once-a-year hiatus. Leading up to Christmas, I use up all the baking ingredients I'd been stockpiling and see the bottom of my pantry shelves. So January's larder is rather sparse since I don't replenish my supplies.
It's also a chance for me to eat a little healthier since I'm not taste testing new recipes on a weekly basis. But, it doesn't quite mean I give up sugar entirely. Similar to my perusal of Manresa Bread, I also decided to check out La Patisserie, again before church so I can pick up some baked goods to share later with my parents.

La Patisserie is the kind of bakery that has a lot of fancy-looking desserts in its display cases rather than racks of freshly baked loaves of bread. Which should probably be obvious from its name.

I like the feast for my eyes as I kept snapping pictures on my phone. Not sure how it all tasted though because to keep that kind of well-stocked look, you never know how long the goods have been in the display cases. I like to think they're fairly fresh but I've had bad experiences before where a scrumptious-looking cake turned out to be dry because it's been in the refrigerated cases for too long.

Fortunately, I didn't have that experience here, at least not with what I tried. I decided to try the bear claw, similar to my earlier quest for my coworker to find good bear claws.


I wanted to try a little of the round loaves of pastries, especially some delicious-looking strudel and danishes but alas, the lady behind the counter said they only sold them whole and not by the slice. Bummer.


Instead, in addition to the bear claw, I bought the Hazelnut Bliss. Based on the description, I wondered if the "chocolate praline wafer" would be that light, crunchy, airy texture I'd once had in my friend's wedding cake, which, many years and dozens of wedding cakes consumed at my friends' weddings later, I still remember to this day.

I had the bear claw as that day's breakfast. Sad to say, I was disappointed. I suspect, given the random few pastries in that basket, it was a day-old bear claw. It was dry, not flaky or buttery and not very tasty. The filling was sparse as well. I wouldn't get it again.


Fortunately, the Hazelnut Bliss more than made up for it. It was delicious. Not dry at all and the praline wafer layer was exactly the texture of my friend's well-remembered wedding cake. It was also similar to the layer in the plaisir sucre I enjoyed so much from Laduree. That was worth the trip.

With its praline wafer layer, chocolate cake, white cake and mousse layers, this cake was beautifully made and artfully presented. The whole thing was covered in hazelnut ganache but it was more like a firm fondant. It also wasn't too sweet, which meant, of course, that my parents liked it as well. Although La Patisserie has a lot of offerings, it's hard for me to imagine I'd like anything else better than this cake.

Friday, January 26, 2018

Bakery Review: Manresa Bread

Manresa Bread - visited January 7, 2018
One of the things I love to do - and don't do enough of - is travel. And only another foodie would understand that part of my travel plans are governed by what food my destination is known for, what famous bakeries or restaurants I can go visit while I'm there and, to be perfectly candid, sometimes I decide to go somewhere simply because of a well-renowned bakery or restaurant (usually a bakery, because, hello, it's me) at that location. Yes, my travel plans are governed by my taste buds, stomach and gluttony. What? That's also why I workout 6 days a week.
I even do some serious research. Meaning me and Google spend some time together while I plug in search terms like "top bakeries in the US" or "best cupcakes in (insert geographic area I've thought about visiting)". I go on a virtual gastronomic tour for extended periods of time. I compiled a list of places I wanted to try. Fortunately, it also occurred to me to research what's in my own backyard.
Which led me to stumble on Manresa Bread. You might have heard of David Kinch's Michelin 3-star Manresa restaurant. Yes, Manresa Bread is of that Manresa. I've never been to the restaurant (on my culinary bucket list) but I didn't see why I couldn't just pop on over to Manresa Bread as soon as I discovered its existence.

And pop on over I did, on an early Sunday morning on my way to church. I figured I couldn't finish off a load of bread during its peak freshness period but Manresa Bread offered a host of other choices to drool over.

I ended up getting the individual-sized Monkey Bread, kouign amann (my new favorite ever since I had one from Dominique Ansel Bakery in Soho), a pain au chocolat and a whole wheat cookie. Before your eyebrows raise at that plethora of riches, I did share with my parents after church. If I couldn't eat a whole load of bread, I certainly couldn't eat all that but I could try a little of each, right?

Although, true confessions, I did eat the pain au chocolat myself as my breakfast that morning. A pain au chocolat, if you're never had one, is made of croissant dough so it has the same flakiness, shaped as a rectangle and filled with a stick of chocolate. That would be the good chocolate, mind you.


Pain au Chocolat
Manresa's pain au chocolat was delicious. The main drawback was it was almost too flaky. As in totally messy to eat. I think I was half-covered in pastry flakes before I had made my way halfway through it. While the earmark of a good croissant/pain au chocolat is that flakiness, I think I prefer something just slightly less flaky, not just for less mess but I don't like pastry that's too airy. But that's me.

Monkey Bread
The triangle of monkey bread that I sampled was good as well, just a little heavier. I think it tastes better warm.
Kouign Amann

Inside the monkey bread
The kouign amann was, not surprisingly, my favorite. There's something about that caramelized crunchy outer crust that's just spectacular. Next time I'd probably skip the monkey bread, more because I'd already tried it, not that it wasn't good, but I'd double down on the kouign amann.
Inside the kouign amann
The whole wheat cookie was the surprise in that I ended up liking it more than I expected. I'm very, very spoiled when it comes to cookies since I have the luxury of usually eating them while they're still warm from the oven. Manresa's whole wheat cookie not only tasted good but I liked the texture. Not too heavy or dense but satisfyingly chewy.
Whole Wheat Cookies
Overall, Manresa Bread is a highly recommend and I'd go back again. As soon as I work out a lot more.