Monday, December 23, 2013

Bakery Review: Susie Cakes

Susie Cakes - visited December 7, 2013
The day I went to Penzey's, I parked my car further away and had to walk down the street to get there. I was innocently walking by looking for Penzey's storefront when I just happened to walk past this bakery named Susie Cakes. A bakery? Right in front of me? You can probably guess what happened next. Although I will say I did refrain from walking in right that minute and went to Penzey's first because I really was on a mission. But after I had my Penzey's experience, I did have to walk past Susie Cakes to get to my car so naturally I detoured inside.
My first reaction was, "OMG, why have I never heard of this bakery before and what took me so long to discover it?" Granted, it's not in my neighborhood and further away but it isn't like it's on Mars or anything. And we know I travel far and wide for baked goods. Susie Cakes is exactly the type of bakery I love. It's bright and spacious with lots of light, the better to see the baked goods on display.  Most stunning is the array of very tall, very mouthwatering layer cakes under high glass cake domes. Think 50s diner that screams homemade goodness. Sometimes you just know something is going to be good just by looking at it. Such is Susie Cakes.
It can probably go without saying that my biggest problem was choosing which form(s) of luscious, empty-but-I-don't-care calories I wanted to consume. Past experience says I shouldn't get more than 2 items. I can certainly eat more than 2 (oh boy, can I) but it would take me more than 2 days to consume a third item and that puts any baked goods past my freshness window. So I had to restrict myself to 2.  At least on that day. The red velvet cake looked amazing but I had just had red velvet so I told myself to get something else. There's only so much red dye #5 I should probably consume in a short timeframe. I almost got a slice of the towering coconut cake because of my love for coconut but the description by the cake stand said it had pineapple in it and that violated my coconut-only principles for coconut cake. Instead, I went with the German chocolate cake to provide both a coconut and chocolate fix and the 5" mini apple pie.
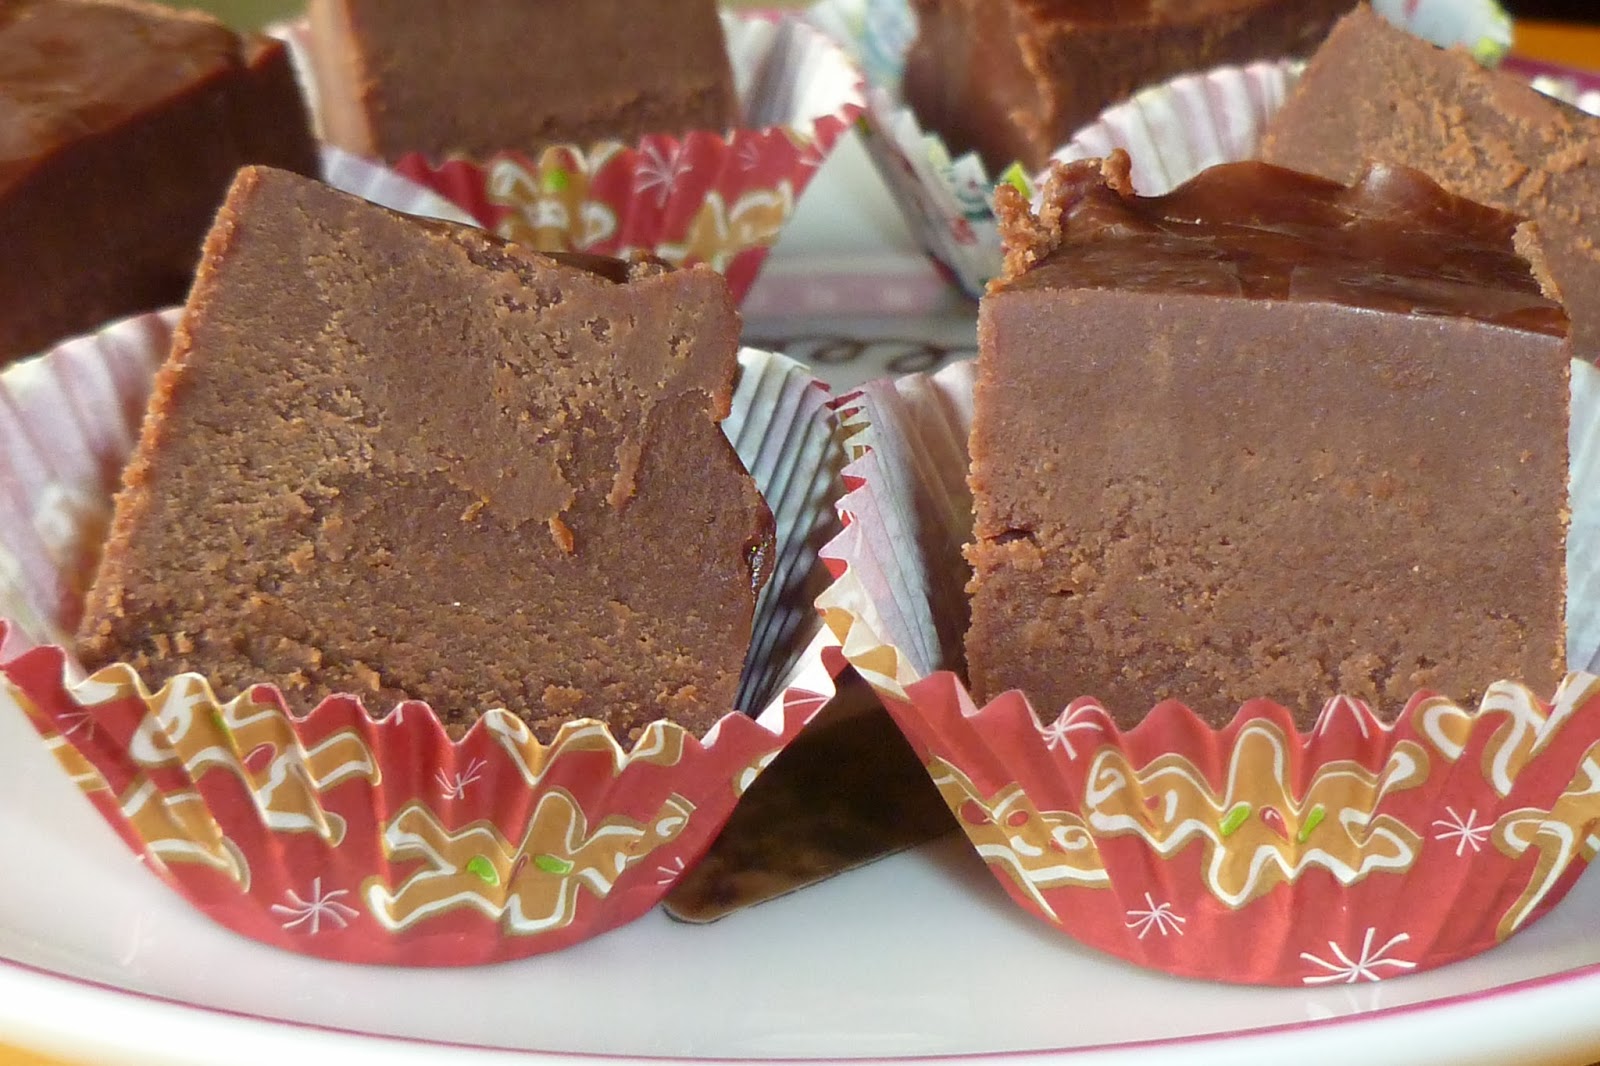
Slice of German Chocolate Cake - $5.50
I was quite impressed with the care that the nice man behind the counter took in packaging up my purchases. Each was individually boxed and the boxes were lined with parchment paper inside so you could easily lift out your item with damaging it or getting frosting or crumbs on yourself. It transferred easily to a plate, ready for that first forkful. Then I was even more impressed because the cake was freaking amazing. Four layers of chocolate goodness sandwiching coconut pecan frosting/filling. It was rich so I had to eat slowly but all the better to savor it, right? The cake was moist and had the perfect cakey but fudgy mouthfeel. It's the kind of cake you don't just eat but you experience. If you've ever had a stereotype of blue ribbon, prize-winning layer cakes in small town America at the country fair, that's the kind of homey goodness I would associate with Susie Cakes. Nothing fancy but just simple goodness. Truthfully, I prefer that over haute cuisine baked goods any day.
5" apple pie - $8.95
After a suitable period, i.e. enough time had passed to ingest a few bites of cake and let my blood sugar settle, I moved on to try the pie. I didn't think it could be better than the cake but I was wrong. First, it was just pure apples, something I had the bakery man confirm before I purchased it because apple pie should only contain apples. No nuts, no raisins, nothing but apples and pastry. Susie Cakes' pie exceeded all my expectations. The apples weren't too tart or too sweet, the crust was flaky and the top crumb topping was the best. Instead of just scattering crumbs on top, they squeezed them into streusel clumps which then baked with a nice crisp texture to contrast with the softness of the filling and flakiness of the crust. Genius.

The only drawback to Susie Cakes is they ain't cheap. Just those two items came to $14.45. For that amount I could've had lunch and a drink elsewhere instead of a mini pie and a cake slice. Or purchased a dozen items at Asian bakeries like Sheng Kee and Paris Baguette. But still, there's something to be said for the indulgence. I don't think I'd go that often, partly because of the distance and partly because even one cake slice is a big indulgence on the calorie meter as well as the wallet. But for an occasional treat, I'd definitely go back as well as recommend it to others. Just based on those two items I tried, this might even rival my favorite bakery, Icing on the Cake. And you know how I feel about them.

Sunday, December 22, 2013

Browned Butter Crinkles

Browned Butter Crinkles - made December 15, 2013 from Mmm....Cafe
This is one of those recipes where it had me at "browned butter" in the title. The cookies were easy to make and I formed them into thick discs before freezing them.  When I had my marathon holiday baking session, I just popped them into the oven to bake while I made the frosting. I'm not a big fan of frosted cookies but since that's what earned them the right to use browned butter in the title, I had to make the frosting.
But my secret confession is I hardly ever follow the exact measurements when it comes to frosting. I know that goes against the "science" part of baking where everything is supposed to be exact but when it comes to frosting, I'm a rebel. Since I'm not a frosting person and find most frostings too sweet and applied too thickly on baked goods, I tend to do my own thing.  Meaning I started with half the amount of powdered sugar the recipe called for, added the browned butter and vanilla then alternately mixed in powdered sugar and heavy cream until the frosting was the taste and consistency I wanted. I know I didn't want it too sweet because I wanted the browned butter flavor to come out and not be overpowered by the sugar.
For the most part, I think the tactic worked.  The recipe made too much frosting for the 2 dozen or so cookies I ended up with but that's probably because I didn't pile the frosting onto each cookie.  It set like a royal icing which was good because I could wrap each cookie individually in plastic wrap and stack them gently on top of one another in the treat bags and boxes I made up and didn't have to worry about the frosting smearing anything. Although the frosting worked decently well with the cookies, I also thought the cookies were good without the frosting. It's just a basic sugar cookie when it's "naked" but still good. Although I guess then they would just be called "crinkles" without the sexy brown butter appellation.
Cookies
2 sticks butter, softened 
1 cup sugar
pinch of salt
3 egg yolks
1 1/2 teaspoons baking soda
1 1/2 teaspoons vanilla extract
2 1/3 cups flour
sugar for rolling cookie dough balls in  
  1. Beat the butter and sugar together. Add the egg yolks and salt and mix well. Add the baking soda and vanilla extract then fold in the flour. Stir until combined.
  2. Form balls the size of walnuts and chill for 1 hour in the refrigerator. Roll each of the balls in sugar and press flat with the bottom of a glass and place on an ungreased cookie sheet lined with parchment paper.
  3. Bake at 350 degrees for 8-10 minutes until lightly golden. Remove from oven and let the cookies stand for 1 minute on the cookie sheet. Remove to a wire rack and cool completely, then frost with browned butter frosting. 
Browned Butter Frosting 
1 stick butter (4 ounces or 1/2 cup) 
1 teaspoon vanilla
4 cups powdered sugar
1/2 cup heavy cream or more for desired consistency
  1. In a small skillet, brown butter over medium heat until golden brown flecks appear. Butter will become a little foamy. Stir now and then to make the butter cooks evenly. Remove from heat and cool slightly. 
  2. Add butter, powdered sugar, vanilla and cream to a large bowl. Beat on medium high until a creamy texture to your liking forms. Spread onto cooled butter crinkles.

Saturday, December 21, 2013

Kahlua Fudge

Kahlua Fudge - made December 14, 2013, recipe adapted from La Phemme Phoodie
I don't want to jinx myself but it's possible that I might have, just maybe, broken my fudge curse. You know the one where I can't make homemade fudge from scratch to save my life without it turning out dry, crumbly and grainy, or, if I use marshmallow creme, that it isn't so sweet that even my sweet tooth trembles in trepidation.
Jez's fudge recipe helped by not failing on me. Then this recipe for Kahlua Fudge from La Phemme Phoodie gave my fudge ego a nice little boost by coming out creamy and actually tasting like it had kahlua in it.  But in a good way. I changed up a couple of things to stack the fudge odds in my favor.  First, I let it boil for only a scant 5 minutes. I think the other times I've made fudge and let it boil for the full amount of time in the recipe, it's always come out a little too firm.  This time I didn't overboil it and while a bit soft at room temperature, newly chilled, it was just right. Even soft at room temperature was still a good creamy consistency. Second, this time I used mini chocolate chips for the semisweet chips.  That helped them melt faster and made for a smoother texture without me madly stirring it trying to get the chips to melt and having the fudge set too soon. The milk chocolate chips were still the regular size so they took longer to melt but still melted okay without too much effort.
Once I spread this in the pan and smoothed the top, I layered plastic wrap directly over the top so it wouldn't form a skin and let it cool. For once I left out the nuts even though I prefer my fudge with toasted almonds. But I wanted to see what it would taste like simply flavored with Kahlua. Although I don't drink, I don't have any issues with liqueurs like Kahlua or Grand Marnier or Godiva chocolate liqueuer (c'mon, it's Godiva. And chocolate) for flavoring. The Kahlua paired nicely with the chocolate and I like the creamy consistency.  At last, I finally made fudge how it should be.
1 1/3 cups granulated sugar
1 7-ounce jar marshmallow creme
2/3 cup evaporated milk
1/4 cup salted butter
1/3 cup Kahlua
1/4 teaspoon salt
2 cups semisweet chocolate pieces
1 cup milk chocolate pieces
1 teaspoon vanilla
  1. Line an 8" square pan with foil.
  2. In a 3 1/2-quart saucepan, combine sugar, marshmallow creme, milk, butter, Kahlua and salt. Bring to a rapid boil, stirring constantly for 5 minutes. Remove from heat; add all chocolate. Stir until melted. Add vanilla. Turn into prepared pan and smooth top.
  3. Cool on wire rack for 30 minutes and then refrigerate until firm. Cut into small squares and serve.

Thursday, December 19, 2013

My first foray into Penzey's

Penzey's - visited December 14, 2013
Do you have a Penzey's in your area? I had only heard about them recently from friends who loved to go there. Then I discovered there's a local one not too near me but within driving distance. I always meant to go but since it's farther away, I never made it. I'd fallen out of the habit of shopping just to shop so I couldn't justify driving there just to see the place. When one of my coworkers discovered I had never been but she knew how much I love to bake, her first reaction was "you've got to go to Penzey's!" And to help me see the light of what I was missing, she was kind enough to give me a gift card to Penzey's. It isn't like I needed an incentive to go but it did give me purpose and justification to make the drive over (thanks, Michelle!).
Which I did and it was fun. Penzey's is a spice shop but that seems like such a modest oversimplification to describe the store. Every conceivable spice lines their shelves, neatly arranged in some flavor palette that probably makes sense to most cooks. Spices, extracts and "powder" products commonly used in baking like cinnamon, nutmeg, pumpkin pie spice, apple pie spice, cloves, dried lemon peel, cocoa, and vanilla extract are neatly displayed in an area meant to emulate a kitchen. Spices for barbecues like jerk rub are in one section, other seasoning spices line up next to them.  If you're an avid cook, Penzey's is akin to FAO Schwarz for kids. I can see chefs and gourmands alike spending hours at Penzey's much like I geek out at the library or Williams Sonoma. I know so little about cooking that I can't even do justice to a description of Penzey's so if you have one near you, I'd say it's definitely worth a field trip.

I did appreciate all the baking spices though and stocked up on my favorite Vietnamese cinnamon as well as unsweetened Dutch process cocoa powder and lemon extract. Their prices were pretty reasonable, especially since I don't believe in buying spices in large containers. Spices are at their most flavorful when they're fresh and by the time you go through a bottle, it'll have lost some of its initial punch. It's better to buy spices in small containers and replenish them as needed. Says the person who has geriatric garlic powder in the spice drawer..... But hey, at least my cinnamon is used up and purchased fresh regularly.  Nothing but the best for my snickerdoodles.
Oh and if you're still shopping for Christmas gifts, if you have any cooks on your gift list and/or anyone who's gluten-free, dairy-free, vegan or has other dietary requirements and the usual food baskets won't do, spices are a great gift. Anyone who cooks at home can always use them and you can have fun picking which ones you think they'd like best.

Wednesday, December 18, 2013

A Different Kind of Lemon Doodles

Lemon Doodles - made December 14, 2013 from Chef in Training
Add this to the "I have a lot of lemons and more on the way to use up" list of recipes I was experimenting with since my initial lemon harvest (I plucked 4 more off my lemon tree this past weekend).  I had made a cookie called Lemon Doodles before but it was different from this one. This was more like a lemon sugar cookie or a lemon version of a snickerdoodle but with lemon zest instead of cinnamon to go with the sugar for the coating.  But what really pulled me towards this recipe is you use browned butter.  I've declared my love for browned butter many times already.  But browned butter paired with fresh lemon zest?  We might be talking a whole 'nother level of deliciousness.
And we would be talking sense because this made for a good flavor combination.  The lemon does tend to take over the flavor profile of the cookie but a discerning palate can still taste the browned butter. If you're the type to snitch cookie dough, you might have to pace yourself not to eat it all before any of it is baked. I don't eat cookie dough but this was one of those doughs where I could just stick my nose in the mixing bowl, inhale, and be happy.
The edges are crunchy and the middles are chewy. It really is like a lemon snickerdoodle but without the cinnamon. And as with snickerdoodles, don't overbake these.  They don't spread much so they'll stay puffy but to get that chewy texture, they need to be slightly underbaked.  I deviated from the directions and baked them at a lower temperature but for longer than the 7 minutes specified in the recipe.  At 7 minutes, the cookies were raw little dough balls just barely beginning to brown and still at the "I'm melting" stage rather than baked.
The main reason I didn't bake them at such a high temperature as the original directions said is I know 425 degrees is too hot in my oven and the cookies would likely burn on the outside while still remaining raw inside, especially with the sugar coating which is what aids in faster browning. Feel free to experiment what works best in your oven but keep an eye on these if you're going to play around with oven temps.
1 cup butter
1 cup granulated sugar
zest of 2 lemons
1/2 cup dark brown sugar, firmly packed
3 cups all-purpose flour
1 teaspoon baking soda
1/2 teaspoon salt
3 eggs
1 teaspoon vanilla extract

Coating
1/2 cup granulated sugar
zest of 3 lemons
  1. To make coating for cookie dough: Mash zest and sugar together with a fork to create lemon sugar.
  2. To make cookies: Start by browning butter. Melt 1 1/2 sticks of butter in a skillet over medium heat, stir continually until butter starts to foam and is light golden brown. Immediately remove from heat and add remaining 1/2 stick of butter to pan and set aside to cool.
  3. Line baking sheets with parchment paper and preheat oven to 425 degrees. (I baked mine at 375 degrees.)
  4. In the bowl of a stand mixer, combine sugar and lemon zest and mix on low speed until well combined.
  5. Add brown sugar, flour, baking soda, and salt. Mix dry ingredients together on lowest speed just until combined.
  6. Add cooled butter, eggs, and vanilla and mix again just until combined.
  7. Scoop out two tablespoons of dough and form into a ball. Roll balls in lemon sugar mixture to coat and place on cookie sheet. Flatten the cookie dough balls slightly by using the back of a measuring cup.
  8. Bake for about 7 minutes and let cool (I baked mine for 10-12 minutes). They are best slightly underdone. When they come out of the oven, the middle should fall in just a little and the cookie should crackle as it settles.

Tuesday, December 17, 2013

Peanut Butter Brookies

Peanut Butter Brookies - made December 13, 2013 from Shugary Sweets
When you have a lot of baked holiday gifts to give away, 9 x 13 cakes and brownies are a lifesaver, both because they're easy to make and because they can go a long way in a lot of gifts. I needed exactly that so it was a good time to test out Peanut Butter Brookies. "Brookies" are a combination of "brownie" and "cookie" in case you haven't come across that nomenclature before. "Crownies" are the cookie/brownie cutesy word combo.  Regardless of what you call it, the aim is to make the best of both worlds.
Chocolate and peanut butter are always a good flavor combination and usually how I like to eat anything with peanut butter: partnered with chocolate. I didn't have peanut butter chips in my pantry (about the only thing not in there) but I did have the last of the mini peanut butter cups from Halloween to clear out so that's what I used instead.  Plus they look cuter. Yes, I'm a girl and I like cuteness, even in baked goods.
In reading the recipe, I was fine with the brownie layer as it seemed like a standard brownie. I was a little more skeptical about the peanut butter layer because I have a prejudice against shortening but I know that's also a common ingredient in peanut butter cookies. So I went with it. Sometimes suspending skepticism is a good thing because these turned out deliciously. It actually worked to have the shortening in the peanut butter layer because that's what helped give it a little crisp-ness (not crispy but elements of a crisp texture) in part of the peanut butter layer. The brownie layer was wonderfully fudgy and the peanut butter layer offered both a flavor and texture complement that enhanced both layers. All in all, a good offering for the peanut butter chocolate lovers on your gift list.
Brownie layer
1 cup granulated sugar
3/4 cup all-purpose flour
3 large eggs
1/2 cup unsalted butter, melted
2 cups semi-sweet chocolate morsels

Peanut butter cookie layer
1/2 cup butter flavored Crisco
2 tablespoons unsalted butter, softened
2 tablespoons milk
1 tablespoon vanilla extract
1/4 cup granulated sugar
1 cup light brown sugar
3/4 cup creamy peanut butter
1 large egg
1 3/4 cups all-purpose flour
1 teaspoon salt
2 teaspoons baking powder
1 cup peanut butter morsels
8oz bag Reese's mini peanut butter cups
  1. For the brownie layer, melt chocolate chips with 1/2 cup butter for 1 1/2 minutes in microwave safe glass bowl. Stir until smooth. Add sugar, flour and eggs and combine completely.
  2. Pour into a 13x9 baking dish lined with parchment paper.
  3. For the cookie dough, beat shortening with 2 tablespoons butter. Beat in milk, vanilla, sugars, peanut butter and egg. Add flour, salt and baking powder. Fold in peanut butter morsels and Reese's mini PB cups.
  4. Drop cookie dough onto brownie batter layer. Smooth evenly.
  5. Bake in a 375 degree oven for 35-40 minutes. Remove and cool completely. Refrigerate and cut into bars.

Monday, December 16, 2013

Bakery Review: Smith Island Baking Company

Smith Island Baking Company - December 13, 2013
I meant to get this post up earlier but ironically, I've been so busy with baking over the weekend that I haven't had time to write up much of what I'm doing. Although I also didn't get this cake until last Friday so I couldn't have written it up before then anyway :).
Are you still shopping for Christmas gifts?  The thought of going to the mall making you break out in hives yet you still need to solve your gift conundrum?  Don't know what to get for someone who has everything and doesn't want more "stuff"? Need to send a gift to far-away friends and/or relatives but shudder at the thought of lining up at the post office to mail something? In those situations, I always give food, notably food gifts I can order online and have shipped directly to my recipients.
Enter the Smith Island Baking Company. I saw an article online that listed the top 10 food gifts to give and their coconut cake was one of them. Coconut? My ears, ears and taste buds all stood to attention. I always send my former college roommate, Caroline, a foodie gift for Christmas and her birthday.  She's better than I am in sourcing online places to order from but this time I felt this would be an inspired gift. I had never heard of the Smith Island Baking Company but after going to their website and reading about their story (I highly recommend anyone interested in small businesses to go check it out), I had to try it, not only as a gift for Caroline but yup, I had to get one for me too.
Perfectly packaged for shipping and arriving intact
In a pure moment of serendipidity, for the first time, I also heard of Foodydirect.  They're a local company based in Menlo Park, CA and while I was "out shopping" on Cyber Monday, I discovered Foodydirect and, more importantly, their $10 off coupon for first-time customers.  And most relevant of all, the Smith Island Baking Company was one of their foodie partners I could order from. A match made in culinary heaven.  Foodydirect is currently running a promotion and you can get $15 off your first purchase if you use this referral link (Note: I'm not associated with Foodydirect or the Smith Island Baking Company - I just like to eat....)
Not too much frosting - yay
I placed the order for Caroline to arrive the first week of December but scheduled mine to arrive last Friday. I knew I wouldn't - and shouldn't - eat the whole cake by myself so I scheduled it to arrive when I was making up all my baked goods holiday gifts so I could include slices of the cake with my gifts. Some may call it cheating but I call it still fitting into my clothes by Christmas. I believe in sharing the calories.
The "normal" size piece which actually turned out to be a lot of cake
As you can tell from the pictures above, the cake came very well packaged. The outer box was wedged in amidst dry ice packs inside a styrofoam shipping container, it sat on a cardboard circle, the coconut-dusted frosted sides were wrapped with cardboard all around it and the whole thing was encased in sealed plastic. Not a shred of coconut was allowed to move. Their website says the cakes are frozen as soon as they're assembled then shipped UPS 2nd Day Air when ordered to ensure freshness on arrival. I must admit to their truth in advertising as when the cake arrived on my doorstep, it was still pretty cold and firm to slice. It's actually best to slice it when it's still in that state because with this many layers, it's easy to get more misshapen if you cut it when it's completely thawed.
The Smith Island Baking Company bakes each of those thin layers you see above individually.  So it isn't like they bake one tall round cake and slice it into layers using the dental floss method. They bake every single layer separately then assemble it with frosting and coconut. That kind of effort and attention to detail is almost mind-boggling even to a baker like me but I must say, it was worth every bit of work because this cake was amazing. I loved the taste, the softness of the texture, the mouthfeel, and the chewiness of the coconut. There isn't too much frosting which is usually my issue with cakes; it didn't need a lot because there were so many layers than a very thin frosting layer between each cake layer was perfect. The only drawback - and yes, I know this is a First World problem - is with this many layers, it's hard to slice a thin slice without crumbling or smushing the cake.  Yet if you cut a "normal" slice, there are also so many layers that it actually makes for a lot of cake.  My eyes were bigger than my stomach (although, er, my stomach is feeling like it's catching up quite nicely) and I cut a "normal" piece.  It took me all afternoon over 4 sittings to finish it. It was delicious but even I have a sugar stopping point. I ended up slicing the cake and giving the rest away so I could share the deliciousness with family and friends. I'm so glad I discovered this bakery and am giving myself 6 months before I plunge back in and order their original yellow cake with fudge frosting. Just to see what that's like of course.