Thursday, December 3, 2015

Nutella Fudge Brownies

Nutella Fudge Brownies - made November 25, 2015 from Life, Love and Sugar
I buy Nutella at Costco. Which means that jumbo-sized two-pack. But because I don’t eat Nutella straight out of the jar or eat it at all except in baked goods, if I’m not baking with it often enough, it can get close to its expiration date. Such was the case when I realized I had one jar expiring in November and one in December. It’s unthinkable to throw away Nutella so I knew I had to hurry up and use it.

A quick search on pinterest brought up this recipe – a fudge brownie bottom layer blanketed with a layer of Nutella fudge. Nutella heaven, right? Well, sort of. The brownie came out as well as expected – nice, fudgy, chocolaty, moist. You don’t want too thick of a layer when you’re going to have two layers. The Nutella fudge had a good texture but not a very strong Nutella taste. I think it got overwhelmed by the chocolate so it lost the flavor that makes it Nutella.


This was still a good brownie and its looks can’t be beat but I also have a similar non-Nutella, pure chocolate brownie recipe, Essence of Chocolate Squares, that delivers the same look with a more pure flavor punch sans Nutella.
Brownie
3/4 cup unsalted butter, melted
1 cup sugar
1 teaspoon vanilla extract
2 eggs
3/4 cup flour
6 tablespoons cocoa
1/4 teaspoon baking powder
1/4 teaspoon salt

Fudge
1 14-ounce can sweetened condensed milk
2 tablespoons unsalted butter, room temperature
1 1/2 cups chocolate chips
1 cup Nutella

Topping
6 ounces chocolate chips
1 tablespoon shortening
  1. Preheat oven to 350 degrees F. Line a 9" x 9" baking pan with foil and lightly spray with nonstick cooking spray.
  2. Combine melted butter, sugar and vanilla extract in medium bowl. Whisk in eggs.
  3. Combine flour cocoa, baking powder and salt in separate bowl and whisk until combined.
  4. Add dry ingredients into egg mixture and stir until combined.
  5. Pour batter into pan and bake 18-20 minutes or until a toothpick inserted near the center comes out with moist crumbs.
  6. Once the brownies have cooled, make the fudge: combine sweetened condensed milk, butter, chocolate chips and Nutella in the top half of a double boiler set over hot water. 
  7. Stir until melted and smooth. Pour over cooled brownie layer and smooth top. Place in refrigerator until set.
  8. Melt chocolate chips and shortening over the top half of a double boiler set over hot water. Whisk until melted and smooth. Pour in an even layer over the chilled brownies after the Nutella fudge has set. Let cool and set. Cut into squares and serve.

Tuesday, December 1, 2015

Japanese Hot Cakes

Japanese Hot Cakes - made November 21, 2015 from Tara's Multicultural Table
Do you know how hard it is to botch a simple pancake recipe? Considering it’s a quick mixing of liquid and dry ingredients and pouring it into a skillet or griddle then flipping over, pancakes should be foolproof, right? Ha. Meet the fool.
It was my own fault and probably not the recipe’s. Because I was so obsessed with getting a golden brown pancake rather than a dark brown or veiny-looking dark brown pancake that I took the pancakes off too soon before they were fully cooked. They appeared to be done on the outside (sort of) although the batter turned out to be so thick that I knew they couldn’t possibly have been fully cooked yet when I took them off. Their golden brown color was what I was trying to achieve but alas, when I cut into it, it was obvious the insides were still more raw than cooked.

Back to the frying pan they went after I had taken the obligatory pictures. If you like light and fluffy pancakes, this may not be the recipe to use. These had some chew to them, more like a cake than a pancake. The taste was good, almost like a vanilla cake, but this is the kind of pancake where you’d probably just eat one, rather than a stack of them because they’re filling. The stack was just for posterity.
2 large eggs
3/4 cup plus 1 1/2 tablespoons milk
1 teaspoon vanilla extract
1 2/3 cups all-purpose flour
1 3/4 teaspoons baking powder
3 tablespoons plus 1 teaspoon granulated sugar
  1. In a medium bowl, use a mixer to beat together eggs, milk and vanilla until foamy.
  2. In another medium bowl, whisk together flour, baking powder and sugar. Fold into the liquid ingredients until just incorporated. Do not overmix. Allow to rest until slightly thickened, about 15 minutes.
  3. Place a large skillet over medium low heat and lightly grease with butter or nonstick cooking spray. Once heated, pour 1/4 cup of the batter into prepared skillet. Once golden on bottom and bubbles begin to form on top, flip to the other side. Continue to cook until golden. Repeat with remaining batter. Serve immediately, topped with butter and/or maple syrup.


Sunday, November 29, 2015

Thanksgiving 2015 Meal 2

Thanksgiving, November 26, 2015
As Thanksgiving weekend draws to a close, I hope all of you who celebrate it had a good one. We got back yesterday from spending a few days at my sister's where we had our second Thanksgiving meal of the year.
This one was a combination of American and Filipino food. There was the traditional turkey, complete with stuffing and mashed potatoes. My sister got a fresh turkey and I have to say, although I'm not a fan of turkey, this was probably one of the best I've had. Much more flavorful and moist. One of the reasons I don't care for turkey is it's often dry, no matter how well it's been cooked. Not this one; it was moist and tasted pretty good.
Pancit Bihon
Lechon
The Filipino side was represented by the lechon (roast pork) and a traditional version of Pancit, a Filipino noodle dish, similar to Chinese chow mein but with "bihon" or rice noodles. My sister softened them in water and steamed them with soy sauce. That was pretty tasty too.
Mashed Potatoes

Cranberries
Green beans
It was snowy at my sister's and had stormed the day before we arrived. Thankfully, the snow limited itself to just enough flurries to cover the ground but not enough to stop us from getting around.
View from my sister's backyard
And of course, my sister's dogs joined us in the festivities. Apologies the picture is a bit blurry but it's hard to get them in the same shot, much less to get them to look or stand still. That's Dougie, her Newfoundland on the left and Sammy, a chocolate lab/Keyshawn mix on the right. Both were very well behaved and always fun to spend some time with.

Thursday, November 26, 2015

Thanksgiving 2015 Meal 1

Celebrated early - November 22, 2015
Accompaniments to Palabok
I was fortunate enough to enjoy an early Thanksgiving meal with family earlier this week. We were celebrating my nieces' birthday as well as having our own Thanksgiving with them before they scattered to other family members and the families of their respective boyfriends.
Palabok sauce
At my nieces' request, my mom made Pancit Palabok - a Filipino noodle dish, similar to spaghetti only that it has (rice stick) noodles and a sauce. Palabok also had add-ons such as toasted garlic, hard-boiled eggs, shrimp, green onions and ground up pork rinds. Being the plain eater I am, yup, you guessed it, I only add the sauce, shrimp and eggs.
Rice stick noodles for the palabok
Lumpia is always a family staple. The picture only shows a few but that's because we kept eating them faster than my niece could fry them, ha.
Lumpia
My mom also makes the best ribs. Seriously, fall-off-the-bone tender with a delicious barbecue sauce. I'd get the recipe from her but let's face it, I wouldn't be able to make them like she does so I'm not even going to try.
Barbecue Ribs
Broccoli salad which my nieces loved but, and let's not kid ourselves, as a non-veggie girl, I left this one alone.
Broccoli Salad
Dessert was both my traditional apple cobbler plus I made another attempt at banana cake (not picture, future post to follow).
Apple Cobbler

Another excellent Thanksgiving meal and much to be grateful for. Happy Thanksgiving!

Wednesday, November 25, 2015

Chewy Oatmeal Chocolate Chip Cookies

Chewy Oatmeal Chocolate Chip Cookies - made dough November 14, 2015, recipe adapted from Being Spiffy
The holidays are coming up fast and I’m inevitably getting pulled back into the kitchen. I haven’t even really been gearing up for my usual baking so this isn’t even the start of my holiday baking. I’m still debating how much of my “usual” I’m actually going to do now that I’ve gotten out of the habit of baking during every moment of my spare time.
But I am getting requests, namely from my nieces as they head for their holiday gatherings. One of my nieces is more of a cook and she doesn’t bake while the other one is the baker and doesn’t cook. But they each asked me for cookie dough to bring down to their respective gatherings and I was happy to oblige. For my niece who’s the cook, she wanted oatmeal chocolate chip cookies for her boyfriend’s family. Actually, we had to compromise since she wanted the traditional oatmeal raisin cookies and we know how I feel about raisins. Not that it should’ve mattered to me since all I had to do was make the dough and I wasn’t going to be the one eating them, raisins or not. But still. You know, because raisins.
I have bags upon bags of chocolate chips (thanks, Costco) so I had to make oatmeal chocolate chip cookie dough. I don’t have a go-to recipe for oatmeal cookies so pinterest was once again my friend. I went with this recipe based on the picture alone and because it met my criteria for oatmeal cookies: more oatmeal than flour and it had more brown sugar than granulated so I knew it would provide the right caramelized/brown sugar overtone I look for in a good oatmeal cookie.
I baked a taste test cookie in my little convection toaster oven and it turned out fairly well. I think I took it out a minute too soon and ate it at slightly warm temps when I would’ve been better off baking it a trifle longer and waiting until it was almost fully cooled. Despite that, this was still a good cookie if you like oatmeal chocolate chip cookies. Not sure I’ll remember it in a month as it doesn’t stand out to my jaded taste buds but it was still good. And my niece liked it too.
1 cup butter
3/4 cup light brown sugar
1/4 cup granulated sugar
1 small package Jell-O instant vanilla pudding mix
2 eggs
1 teaspoon vanilla
1 teaspoon baking soda
1/2 teaspoon salt
1 1/4 cups flour
3 cups oatmeal, old-fashioned or quick
1 cup chocolate chips
  1. In stand mixer, cream together butter and sugars. Add Jell-O and mix until combined. 
  2. With mixer still running, add eggs, one at a time.  Add vanilla.
  3. Pour in dry ingredients and blend until no streaks of flour remain. 
  4. Add oatmeal and chocolate chips, stirring in by hand or using the lowest setting on the mixer. 
  5. Using a cookie scoop, portion dough into golf-ball size balls. Cover and chill or freeze for several hours or overnight. 
  6. Preheat oven to 350 degrees. Line baking sheets with parchment paper. Space frozen cookie dough balls evenly on baking sheets. Bake for 10-12 minutes or until edges just start to brown and middles no longer look raw or shiny.

Monday, November 23, 2015

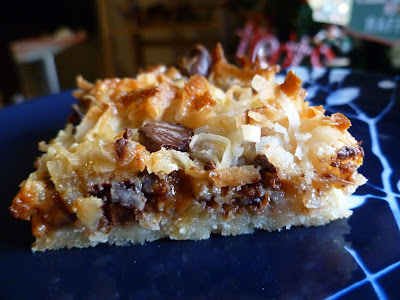
Samoa Cookie Bars

Samoa Cookie Bars - made November 15, 2015, adapted from Crazy for Crust
Before I became such a cookie snob, I actually did at one time eat Samoa cookies from the Girl Scouts. During that time period when my nieces were little and were selling them for their troop. I like the flavor combination of shortbread, caramel, chocolate and coconut but as for the cookies themselves….well, cookie snob here.
But my snobbery is turned to advantage when it means I make my own version from scratch. I got this one from Crazy for Crust and it’s a simple, straightforward recipe. It’s a combination of a samoa bar cookie and a magic cookie bar. The magic cookie part being the coconut, chocolate chips and sweetened condensed milk and the samoa part being the shortbread crust and the caramel bits as well. 
The only thing I changed is I went with only 1 ¼ cups of flour rather than 1 1/2, mostly because at 1 ¼ cups, the dough was still crumbly and even though it stuck together when I squeezed handfuls of it, I was afraid adding another ¼ cup would make it too dry. But there was still enough crust mixture to make a credible bottom layer. It was more like loose crumbs than actual dough but that just makes it easier to spread evenly in the pan and pat down. The crust does come together in baking so don’t worry if it doesn’t go down as a fully combined bottom layer.
The caramel bits were a nice touch although be warned that once they’re baked and cooled, they do become really chewy caramel. If you have dessert consumers who don’t have strong teeth or jaws, you might be better off melting the caramel with a little milk and making that the layer directly on top of the shortbread crust then covering that with coconut and chocolate chips before pouring the sweetened condensed milk on top. The only thing I would do differently next time is I think I would bake the bottom crust a little longer than 10 minutes. At 10 minutes, they were still rather pale-anemic looking and not even the edges were lightly browned. Subsequently, I ended up baking the whole thing a little longer after I’d added the rest of the ingredients because I wanted to make sure the bottom crust was done. But that meant the caramel baked longer as well, hence the chewiness after it had cooled. So I think it’s better to bake the crust an extra few minutes then cut a few minutes off the baking time for the second baking.
I thought this was a good homemade version of the Samoa cookie; it’s easy to make and serve and honestly, my snobby taste buds say they taste better than the GS Samoas.
1/2 cup unsalted butter, softened
1 1/4 to 1 1/2 cups all purpose flour (adjust based on feel of the dough)
1/2 cup sugar
Pinch of salt
2 cups chocolate chips
1 cup sweetened shredded coconut
3/4 cup Kraft caramel bits
1 can (14 ounces) regular sweetened condensed milk
  1. Line a 9x13” pan with foil and spray with cooking spray. Preheat oven to 350°F. 
  2. Beat butter in a stand mixer until smooth. Mix in flour, sugar, and salt. Beat until the mixture is crumbly. It’s done mixing when you can press it together between your fingers and it sticks together. 
  3. Press into the bottom of the prepared pan. Bake for 10 minutes. 
  4. Remove hot crust from the oven and sprinkle with chocolate chips, coconut, and caramels.
  5. Pour sweetened condensed milk evenly over the top. Bake for 25-30 minutes until golden around the edges. Cool completely before cutting. 

Saturday, November 21, 2015

Vanilla Cinnamon Buttermilk Pancakes

Vanilla Cinnamon Buttermilk Pancakes - made November 15, 2015 from The Chunky Chef
I confess, I’m not discerning when it comes to pancake recipes. I like a good pancake as much as the next person but I’m not super picky about them. As long as they’re light and fluffy and have good flavor, that is. So I’m fairly agnostic when it comes to trying out pancake recipes. I typically only make them on weekends because that’s when I wake up and realize I don’t have any food in the house because I mostly eat at work or out with friends.

Fortunately, though, I have enough baking stock that I usually have the ingredients needed for most pancake recipes so it’s only a matter of minutes to find a new recipe and whisk it together.  This time around, as someone recommended on my last pancake post, I also tried not overheating my frying pan so I can get that smooth golden look for each pancake. Turns out how hot my pan was or wasn’t didn’t matter when it came to creating or not creating the vein-y looks in my pancakes. What mattered more was how the butter melted in the pan before I poured the batter over it. Same if I tried nonstick cooking spray.
Ultimately, the one way for me to get that smooth golden look all over the entire pancake was not to spray the pan or melt butter into it. Fortunately I had a nonstick frying pan so the results weren’t too disastrous and the pancake didn’t stick but it also didn’t flip over as gracefully as I might’ve wished. Regardless, once I was done obsessing about how to make it look a certain way, I was able to eat a couple. They were good. I don’t think they’d necessarily stand out in my mind as a go-to pancake recipe but only because I’m not that snobby about my pancakes. They’re good, they helped use up some buttermilk and they were easy to make. That’s all I ask of weekend food.
2 cups flour
3 tablespoons granulated sugar
1 1/2 teaspoons baking powder
1 teaspoon baking soda
1/4 teaspoon salt
1/2 teaspoon cinnamon
2 cups buttermilk
1 1/2 teaspoons vanilla
1 egg
4 tablespoons butter, melted and cooled
  1. Combine dry ingredients together in one bowl.
  2. Whisk together buttermilk, vanilla, egg and melted butter.
  3. Pour into dry ingredients and mix lightly with fork only until barely combined.
  4. Heat frying pan or griddle. Pour batter into rounds. Cook on one side until bubbles form all over. Flip over and cook until both sides are golden brown. Serve warm.

Thursday, November 19, 2015

Smashburger

Smashburger - dinner on October 31, 2015
I’d heard about Smashburger from other foodies so like any good foodie lemming, I wanted to try it for myself. Much as I like burgers, I only like certain places for burgers, namely the ones that let me build my own. Because I’m such a picky eater. As in, a good burger to me is the burger and the bun. I add a slice of cheese if I want to get really crazy. Do not put condiments on my burger or I’ll never eat it. No pickles, no onions, no tomatoes either. Nothing but meat and bread. I’m okay with leaf lettuce as long as it’s not chopped like coleslaw.
You can imagine the inner eye rolls I probably get whenever I order a burger off the menu and ask for it “plain”. So I’m always pleased to find a place where I can build my own burger and don’t feel like I have to defend my plain choices. Plain eaters, rejoice, because Smashburger is such a place. They have pre-built burgers you can order but, similar to the Counter, they also let you pick and choose what you want on your burger. Or in my case, ensure they leave off what I don’t want.
For this inaugural visit, I went with the brioche bun, a 1/3-lb burger, a slice of cheese, a slice of leaf lettuce and a fried egg. That’s walking on the wild side for me. But it had everything I liked and nothing I didn’t like. Consequently, I enjoyed my burger a lot. It’s just the right size if you’re hungry, not too big or too small, and the burger was tasty. Not thin like a fast food burger but not so thick that you couldn’t eat it without feeling like a pig.
Smashburger also offers sweet potato fries which naturally I had to get. I always like sweet potato fries better than regular fries. Unfortunately, their sweet potato fries weren’t as good as their burger though. They weren’t quite cooked to mealy perfection and needed a couple more minutes in the deep fryer. They were still good but could’ve been better.
Still, this is a good place to go to for burgers and quite reasonably priced. I walked out with a burger and fries for just over $10.

Monday, November 16, 2015

Thanksgiving (non-traditional) desserts

These desserts are part of our Thanksgiving tradition but they’re each a spinoff from what might be most people’s traditional dessert bounty. If you’re already planning ahead to what you want to serve next week and are looking for something a little different, you might want to give these a try.

Instead of pecan pie, I make butter pecan tartlets – easier to consume and serve and, after a full turkey meal, much better portion control than a piece of pie without sacrificing the good elements of a pecan pie.

I’ve never liked pumpkin pie but that’s no reason not to have a pumpkin-based dessert like this Pumpkin Upside Down Cake with caramelized pecans and cranberries.


I’ve nothing against apple pie but when there’s a lot of baking going on and I don’t want to deal with the intricacies of pie crust, I go with apple crumble bars made as apple cobbler and it’s always the biggest hit at the post-dinner table.

If you can’t bear to have dessert that excludes chocolate, this Black & White Pudding Cake is super easy to make, served warm, is decadent and goes beautifully with vanilla ice cream. In fact, the ice cream might be mandatory.