Friday, November 14, 2014

La Honda Winery: "Iron Chef" competition

La Honda Winery - "Iron Chef" competition/team offsite on November 7, 2014
We had a team offsite earlier this month where several of our internal groups banded together to go to La Honda Winery. When I hear "winery", I think of lush vineyards bursting with ripening grapes in Napa Valley and dark, cavernous rooms filled with gigantic barrels and lined with pristine wine bottles. I didn't expect a "winery" to be a freeway exit away tucked in what looked like a warehouse district bordering residential housing nearby. But that's what La Honda Winery was and where it was.
They don't grow anything there, of course, since they're surrounded by asphalt but they cultivate small vineyard estates down the peninsula to the Santa Cruz mountains. As near as I can tell, they do small batch wine-making at La Honda and, more importantly for us, they provide a venue for corporate offsites like ours.
For our offsite, we contracted with a culinary company that provided 5 chefs to help each of the 5 teams that we were divided into for an "Iron Chef" competition. We each had a station, there were about 8-9 people on each team and our challenge ingredient was Rice Krispies. Yup, we had to use rice krispies in everything we made, whether they be main dishes, side dishes or desserts. There was a "pantry" of ingredients we could use and the proteins available were salmon, steak and tofu. What we made was up to each team and we had an hour to produce our culinary creations. There was a judge who would rate us on our food (creativity and taste), presentation, and willingness to help other teams.
There were 9 people on my team and, more importantly, several of them knew how to cook. As in real cooking of savory dishes, not just the desserts that I do. People always assume that just because I can bake, I must also know how to cook. Hahahaha! No, and if you've ever tried my cooking, you'd laugh too. But thankfully, it turns out my coworkers have some hidden talents. Given them a cooking station, a knife, some rice krispies and an hour, and look at what they came up with.
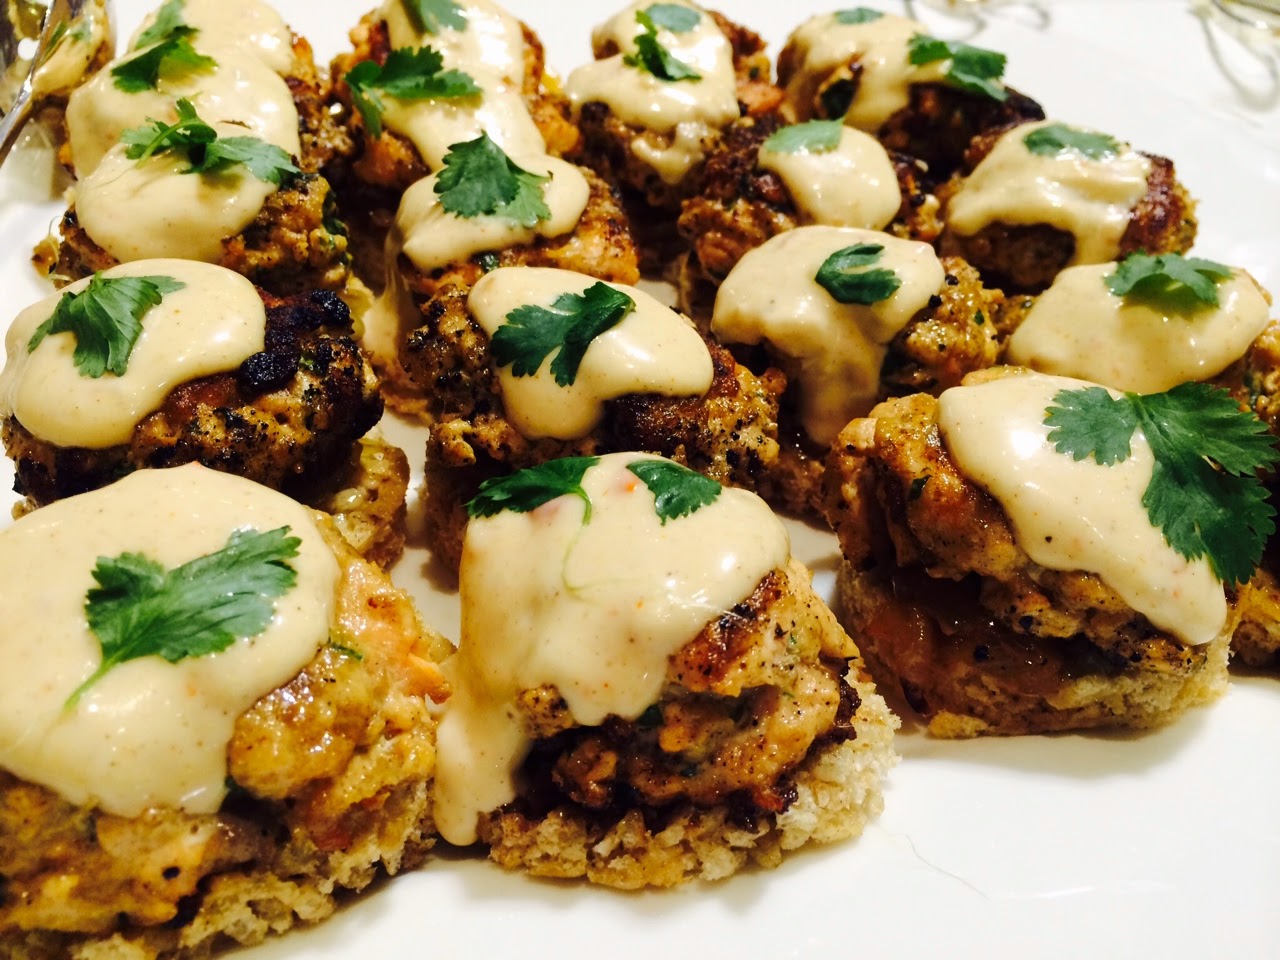
Below is my team's masterpiece creation: "panko" (meaning rice krispies) crusted soy-glazed salmon (super delicious), roasted brussel sprouts sprinkled with rice krispies and rosemary garlic (and rice krispies) mashed potatoes. Amazing, right?
Also submitted as part of our entry were "twin fries". Twin fries because both of their makers had twins themselves plus it was food their sets of twins would eat.
"Twin" fries
I had to pull my weight so I and a fellow teammate who served as my sous chef covered dessert. The dessert I thought I could easily make with the challenge ingredient were my Nutella Crunch Brownies. Totally obvi, right? Except, to my dismay, it turns out the pantry did not extend to having nutella. Or unsweetened chocolate. Or even peanut butter. Eek. I had a hard time getting over that (how could you not stock nutella???) But the minutes were ticking away so I decided to just roll with the nutella-lacking punches and make the crunch topping with just chocolate chips, butter and rice krispies. For the brownie base, because only chocolate chips were available, I went with this brownie recipe and skipped the Snickers add-ins since they didn't have the candy either.
Krispie Crunch Brownies
It was a half success - the crunch topping turned out to be more dollops of topping rather than a layer since the lack of nutella meant there was less topping and it was nowhere near as creamy or spreadable. But the crunch part held and the brownie base turned out decently. My coworkers liked it although I knew it could be better (remember I'm far harder on myself and what I make than other people are) and our chef guide asked me for the recipe afterwards :).
I have to say I was extremely impressed by the dishes from all the teams, not just my own. Although I'm not going to lie, I was partial to my team's submissions - ahem, all 5 entries submitted in the competition, thank you.

Mashed Potatoes
I wasn't taking notes when each team was presenting their dishes and giving them deliciously grandiose names and descriptions so I will just have to let the pictures speak for themselves. There was so much food I couldn't try all of the dishes and had to content myself with taking a small portion from at least half of them. And yes, there were rice krispies in one form or another in every single offering.


Stuffed Mushrooms

Salmon Cakes


Tofu

Potatoes au Gratin


Seriously, I didn't know I was working with such a talented group of people. And especially my team because when the judging was completed, we won! The judge had nice things to say about the entries from all of the teams and rightly so. Her comments about our entries included praise about its "restaurant quality presentation"; we made one team member responsible for presentation and he held up his end with aplomb. It was a really fun few hours away from work and probably one of the best offsites I've gone to. Not sure how they'll top this one at the next offsite but I'm looking forward to it already.

Thursday, November 13, 2014

Overnight Chocolate Chip Cookies

Overnight Chocolate Chip Cookies - made dough November 1, 2014 from Chocolate, Chocolate and More
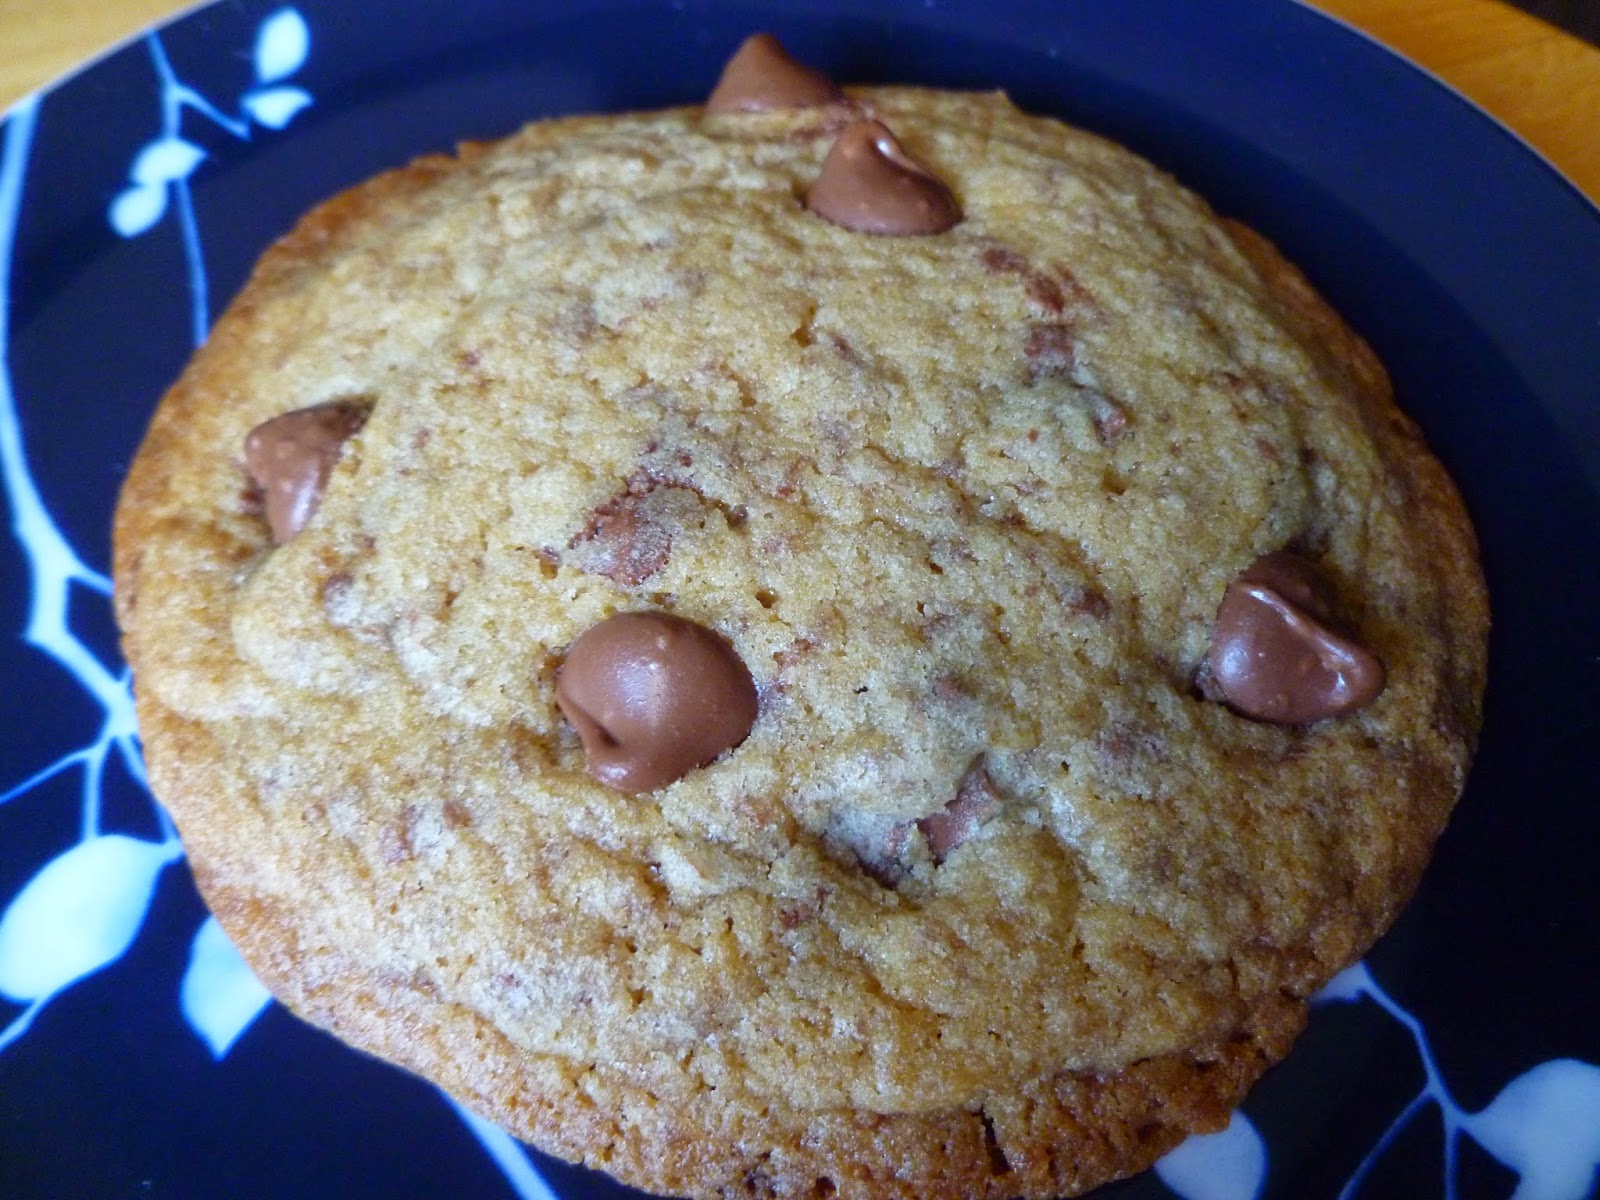
Baked until "done"
Previously, I had experimented with a chocolate chip cookie recipe and its chilling and freezing times. With that recipe, I chilled half the batter in the refrigerator overnight before baking and the other half I frozen immediately after making the dough then also baked it off the next day. With this recipe, I experimented with baking times. It does call for chilling overnight and I did that dutifully although once the 24-hour chilling period was over, I did hustle the dough balls into a freezer bag and put them in my freezer to wait for when I needed them. Like for tomorrow because I'm meeting my friend, Chocolate Chip Cookie Todd, for lunch and I had to have chocolate chip cookies for his cookie bag.
Underbaked just right
It's no secret I prefer underbaked chocolate chip cookies. They're chewy and just have a better texture to me. It's how I've always baked my cookies for years. But I thought I'd try baking until "done" to see if I was missing anything. I've captioned each cookie as to whether it was the fully baked or underbaked one. As you can tell, there's very little different between the two on the outside. That's likely due to the recipe itself - this is just how the cookies turn out on the outside.
Underbaked just right
On the inside is where the difference is the most obvious. With the properly underbaked one, you can see a more dense and moist texture. The outer edges look more fully baked and a little cakey but the middle is definitely more on the chewy side than the cakey end.
Underbaked, chewy not cakey
Underbaked just right
When baked until done, you can see the cakey texture of the inside of the cookie. This will also dry out sooner as the cookie ages and stales since it doesn't have as much moisture as the underbaked one. In terms of taste, they tasted similar since they're from the exact same dough after all. But since a cookie is about both the taste and the texture for me, the underbaked one proves I've been (under)baking chocolate chip cookies properly all this time. I simply prefer the moist, chewy texture of a good underbaked chocolate chip cookie. By the way, unlike with the other experiment where the chilled-overnight cookie tasted better than the freeze immediately cookie, I really couldn't tell a discernible difference in taste with these. They were just good chocolate chip cookies.
Baked a couple of minutes more than it should have
Baked until done - cakey rather than chewy
1 cup butter, softened
1 cup brown sugar
1/2 cup granulated sugar
2 teaspoons vanilla extract
2 eggs
2 1/2 cups all-purpose flour
1 teaspoon baking powder
1 teaspoon salt
2 cups chocolate chips
  1. Cream butter in a large mixing bowl. Add sugars and mix for 5 minutes until creamy. Add in eggs and vanilla and mix well.
  2. In a separate bowl, mix together flour, baking powder and salt. Add flour mixture to butter mixture slowly, making sure to scrape down the sides of the bowl.Fold in chocolate chips. 
  3. Portion into golf-ball-sized dough balls and store dough in an airtight container for 24 hours in the refrigerator. After the 24-hour period, you can freeze the dough or else bake the cookies.
  4. When ready to bake, preheat oven to 350 degrees. Place cookie dough balls on a parchment-paper-lined baking sheet about 2 inches apart. Bake for 8-10 minutes. 
  5. Let cookies cool on baking sheet for 1-2 minutes before removing to rack to cool completely.

Tuesday, November 11, 2014

Caramel Apple Crisp Bites

Caramel Apple Crisp Bites - made November 1, 2014, adapted from Princess Pinky Girl
Last weekend heralded the start of November, my favorite month with my favorite holiday: Thanksgiving. And it's also when I start thinking about what desserts I want to make for our Thanksgiving meal. There'll be 15 of us this year which is neither the smallest or largest family gathering we've had but still a good number. Normally I do my standbys of Pumpkin Upside Cake with Caramelized Pecans and Cranberries, Butter Pecan Tarts, Banana Butterscotch Cupcakes and Lemon Bars.
But this year I wanted to do something different and started exploring new recipes. I normally don't bake pies but I love apple pie and thought I'd try this recipe for individual-size apple crisp cups. They looked so pretty on Princess Pinky Girl's blog and I thought, "yeah, I could make those for Thanksgiving." Ha. I was only half right. I really could make those but apparently I didn't specify to the baking gods that I wanted mine to look as good as hers.
Things were good at first. The graham crackers crusts were easy to make and I made them in my mini cheesecake pan with the removable bottoms so there'd be no issue with getting them out of the pan. But I decided to get a little creative with the apple filling (you just went "uh-oh", didn't you?). I had caramelized apples before and I knew what I liked so what could go wrong? Yeah, never ask that question if you don't actually want it to be answered. Because I'll tell you what went wrong. First, I shouldn't have used Granny Smith apples. They're great in pies and crisps because they're tart and can offset a lot of the sweetness. But unfortunately they also soften and wilt faster than other apples and don't look pretty. Ask me how I know. Yup, my second mistake was cooking them too long. Instead of baking them as the original directions specified, I decided I could better control the cooking if I sauteed and caramelized them in my cast iron skillet. Well.....it seemed like a good idea at the time.
It might have actually worked if I had only sauteed them for a few minutes. But I didn't want them to be crunchy so I keep cooking them. And they went from pretty to overcooked, limp and cooked down in a flash. Oops. I spooned them into the graham cracker cups and they looked so-not-pretty that I decided to make a streusel topping for them. Then they'd be more like a crisp but at least I could hide their appearance, right? Uh, that might've been mistake #3. I made up the streusel recipe and I think I had too much flour and not enough butter because instead of the streusel lumps I envisioned dropping over the limp apple filling, it was more like powdery streusel dust. Eeep.
I baked them anyway because at a certain point, there's just no stopping a train wreck. When I took them out of the oven, they were beyond not-pretty so instead of a caramel sauce, I drizzled the leftover sauce from caramelizing the apples over the streusel. Have you followed me so far? I made the streusel to hide the overcooked apples and I drizzled "caramel sauce" over the streusel to hide the streusel. In appearance, these are unfortunately not going to make it to the Thanksgiving table because I need something a little more cute! However, taste-wise, the main reason I left my recipe modifications as is below, is these were actually pretty tasty. A bit ironic but at least it wasn't a total failure. And it reaffirms why I'd rather focus on how something tastes than how it looks. If you do want to make these for public appearance, I advise learning from my mistakes: use a firmer apple, don't overcook them, and either skip the streusel or cut back on the flour.
Crust
2 cups graham cracker crumbs
12 tablespoons butter, melted
1/2 cup powdered sugar

Filling
2 cups peeled, cored and finely chopped apples
2 tablespoons butter
1/4 cup sugar
1/3 cup brown sugar
1 tablespoon cornstarch
1/2 teaspoon cinnamon

Crumble topping
1/4 cup butter, chilled
1/4 cup flour (or less)
1/2 cup dark brown sugar
1/2 teaspoon cinnamon

caramel topping, homemade or storebought, optional
  1. Preheat oven to 350 degrees.
  2. Grease mini muffin pans with nonstick cooking spray.
  3. Melt butter. In a medium-size bowl, mix graham cracker crumbs, powdered sugar and butter with a spoon.
  4. Evenly distribute mixture among the 24 mini muffin cups. Press along the bottom and sides to make a "cup".  Bake for 5 minutes and let cool; keep in muffin tins.
  5. Mix apples, granulated sugar, brown sugar, flour, cinnamon and nutmeg in a bowl.
  6. Bake in a baking dish for 15 minutes at 375 degrees F until apples are slightly softened or "stir fry" in a cast iron skillet for several minutes; avoid overcooking the apples.
  7. Scoop a teaspoon or so of the apple mixture and spoon into the graham cracker crust cups.
  8. Combine crumble topping ingredients and squeeze into large clumps to sprinkle over the apples in each cup.
  9. Bake for 5-8 minutes at 350 degrees F or until streusel is golden brown (if using).
  10. Let cool completely. Use a knife to loosen from the pan and remove. Drizzle with caramel topping (or leftover caramel sauce from the apples) and serve.

Sunday, November 9, 2014

Chef Dominique Ansel & Gluten-free Chocolate Pecan Cookies

November 4, 2014
At work, we regularly have guest speakers come and do a talk or a Q&A session with employees. It'll be announced on an internal company page with the date, time and a conference room location and it's first come, first served. I was thrilled to hear Chef Dominique Ansel, the inventor of the cro-nut, was coming for a visit. Although I'd tried a cro-nut (croissant + doughnut) before and decided it was good but not really my thing, I still have to appreciate the genius behind the invention and thought it would be fun to see the genius inventor in person. I've only tried a cronut from Paris Baguette and not at his actual bakery in New York. My niece, who had studied in New York over the summer, told me afterwards that she had gone to his bakery and tried the real cronut. Lucky duck,
Past experience at these guest speaker events has taught me that if I really wanted to see the guest in person, I had to be there right when the doors open as once the conference room is full, they don't allow any more people in due to fire safety regulations. Fortunately, I had just gotten out of a meeting when they were opening the doors so I was able to get there on time and snag a seat. Even more fortunately, I was able to sit in a seat that later turned out to be one of 10 marked ones that received a free copy of his newly released baking book, Dominique Ansel, The Secret Recipes. How cool is that?
The only thing more cool was Chef Dominique himself. In the Q&A session, he came across as a very humble person who really cared about doing and baking what's right for his customers. He was down to earth and matter of fact and I enjoyed his talk. You could tell he enjoys what he does, works hard and is great at it. He was also nice enough to take some pictures and autograph his book afterwards so I was lucky enough to both get his signature on my new baking book and to get a selfie with him - which he insisted on taking which was good since I suck at taking selfies.
To honor his visit, our onsite sweet shop baked his Chocolate Pecan Cookies just for that day. I "had" to get one, of course, just to try it, you understand *wink*. Theirs didn't look like his in the book but it was pretty good. It's also gluten-free for anyone who prefers no flour. From the outside appearance, I thought it might be dry and we know I can't abide a dry cookie. But I was pleasantly surprised to find it moist inside. I'm also not a fan of nuts in my cookies so I may try making this without it. Probably heresy, I know, but shhh, don't tell Chef Dominique.
Oh, one last thing as I've been reading through his baking book: you can really tell he cares about the readers being able to make his creations as close to how he makes it as possible. The directions and the amounts of ingredients are very, very precise (a food scale will be your friend for these). He mentioned in his talk that he tried to make it so anyone with a regular kitchen as opposed to a bakery commercial kitchen can make what he does and it shows. I've slightly truncated the directions to his cookie recipe below, mostly to save myself some typing but if you want the full version, I recommend getting his book. The care he takes in his baked creations comes through very clearly. As someone who owns a couple hundred baking books and has visited countless bakeries with a full appreciation of desserts, I'm struck by that level of caring. Because that's what it is - caring.
2 cups dark chocolate chips (60% cocoa or greater)
3 tablespoons + 1/2 teaspoon (45 grams) unsalted butter
1 cup + 2 tablespoons + 2 teaspoons (250 grams) granulated sugar
1/4 cup (42 grams) cornstarch
3/4 teaspoon baking powder
1/2 teaspoon kosher salt
3 large eggs, lightly beaten
1/4 cup (55 grams) pecans, coarsely chopped
  1. Melt 1 1/2 cups (340 grams) of the chocolate chips in a double boiler. Stir until melted smooth.
  2. Melt butter in the microwave and mix into the melted chocolate with a spatula. Keep warm over the hot water.
  3. Combine the sugar, cornstarch, baking powder and salt in a large bowl. Add the eggs and whisk until fully blended and the mixture resembles pancake batter. 
  4. Slowly whisk in the melted chocolate-butter mixture.
  5. Gently fold in the remaining 1/2 cup chocolate chips and the pecans with the spatula.
  6. Transfer the dough to a shallow baking dish. Cover with plastic wrap pressed directly onto the surface of the batter, to prevent a skin from forming. Refrigerate overnight to rest.
  7. When ready to bake, preheat oven to 375 degrees (350 degrees if on convection setting). Line a baking sheet with parchment paper.
  8. Roll the dough into balls and place them on the sheet pan at least 2 inches apart from one another. Press gently on the top of each ball with the palm of your hand to make a thick disk.
  9. Bake on the center rack for 4 minutes. Rotate the pan 180 degrees and bake for about 4 minutes more. When the cookies are just begining to crack on top but the dough is set on the edge and has a soft spot about the size of a quarter in the center, remove from the oven.
  10. Let the cookies cool on the pan for 5 to 7 minutes, to further set.
  11. Remove the cookies from the pan and set aside. Reline the cooled pan with clean parchment paper and continue with the remaining dough.

Saturday, November 8, 2014

Cookie Butter Sandwich Cookies

Cookie Butter Sandwich Cookies - made dough November 1, 2014, recipe adapted from A Passion for Baking by Marcy Goldman
I'm still on my one-track mind with cookie butter in case you can't tell with the third recipe in a row I've blogged about with it. I’ve had this recipe in my “to be made” file for so long, it was created in an older version of Word than I use today if that gives you any indication. Long on baking intentions, short on execution. But I finally got to it, mostly because I’m still on my cookie butter kick and wanted to make a real shortbread sandwich cookie this time instead of just glazing them.
The original recipe called for making these butter sugar cookies as industrial size and sandwiching them with jam. I don’t believe in big sandwich cookies (too much commitment) and I certainly don’t believe in jam (too sweet and I don’t like the texture or taste) so I adjusted this to suit my taste prejudices. I made the cookie rounds a bit small, around 2 inches in diameter instead of 3. I could’ve used a cookie cutter to ensure even sizes but if you’re like me and lazy about rolling out dough, chilling it, cutting it, rolling it out again, etc, the handshaping method works almost just as well, especially as this dough is easy to work with – not too sticky or dry. And if some of the cookie rounds don’t turn out exactly the same size or not quite perfectly round, your tasters won’t care after the first bite. Heck, they may not even care at all and you just saved yourself some work.
One thing you can do to even the odds to be ever in your favor is to use a cookie scoop so that at least you’re starting with the same amount of dough each time. What you end up with as you shape the rounds is up to you. Don’t make them too thick; remember you’re eating two of them with some scrumptious cookie butter in the middle.
The tricky thing about baking this type of butter sugar cookie is you don’t want to overbake them (they’ll be crunchy and/or dry) but you don’t want to underbake them too much either as they’ll have a heavy, possibly greasy texture. I bake them until I can see a slight golden brown around the edges and the middles don’t look like shiny raw dough. Please do not bake these until they’re golden brown all over. Not unless you’re trying to make Nilla Wafers. These don’t spread very much so they stay in almost the same shape and thickness as you bake them. Wait until they’re completely cooled before sandwiching them with cookie butter. These are more of a butter sugar cookie than a true shortbread but they still have a good vanilla and butter flavor to complement the cookie butter filling.
1 cup butter, softened
1 ½ cups sugar
1 large egg
2 teaspoons pure vanilla extract
3 cups all-purpose flour
½ teaspoon baking powder
½ teaspoon salt
1 to 2 tablespoons whipping cream
Egg yolk and a bit of water, before baking, optional

Cookie butter for filling
  1. Preheat oven to 350 degrees F. Stack two baking sheets together and line top sheet with parchment paper.
  2. In a mixer or food processor, cream butter and sugar into a pasty mixture. Add egg and vanilla and blend well.
  3. Fold in flour, baking powder, and salt to make a stiff dough, drizzling in cream as dough comes together. Cover and let rest 10 minutes.
  4. On a lightly floured work surface, roll out dough to ¾” thickness. Cut into 1 or 2-inch rounds (I prefer smaller for cookie sandwiches). Place cookies on prepared baking sheets and brush each with some egg yolk glaze (I skipped this part).
  5. Bake until done, about 15-20 minutes, and cookies begin to brown around edges and are golden brown all over. Let cool on baking sheets.
  6. For each sandwich, smear cookie butter on the bottom of one cookie and then top with another cookie.

Thursday, November 6, 2014

Cooke Butter-Glazed Shortbread Cookies

Cookie Butter Shortbread Sandwich Cookies  - made dough October 25, 2014, recipe adapted from Baking with Melissa
Much as I love shortbread, I’m honest enough to admit that it’s mostly butter with some sugar and flour clinging to it. Really good shortbread makes this obvious but it also makes you not care about that. I try to only have shortbread in moderation which means making them small. Which is what I did with this recipe. What I love about making shortbread cookies is the ingredients list is usually short and simple and it gives me a chance to use vanilla bean paste so I can see those little flecks of vanilla bean scrapings in the pale shortbread dough and subsequent cookies.
When I made these, I thought I would bake them “as is” and have cute little shortbread cookies, similar to the picture in the original blog where I found the recipe. Then I got hit with the inspiration to make them as shortbread sandwiches with cookie butter filling. I’ve been having a re-discovered love affair with cookie butter again and looking for any excuse to eat it that didn’t involve my sticking a spoon inside the jar and licking it.
The plain, unglazed version
First I tried the shortbread cookie “plain” and thought it was good. Then I spread some cookie butter on one and thought it was excellent. By itself, you can taste the buttery goodness of the shortbread. With the cookie butter, the shortbread moves from being the star to Best Supporting Actor. Which is still pretty good. The only thing that didn’t make this ideal for a cookie sandwich is the cookie dough balls don’t spread so they remained rounded cookies. Which is fine – and even cute - if you’re serving them plain so they’re like little butter buttons but if you’re sandwiching them, the thickness of two chubby rounded cookies, no matter how small, is still a slightly thicker cookie than you’d normally probably want to bite into. By the time I had the idea of making cookie butter shortbread sandwiches, I had already portioned out the dough and frozen them so it was too late to try and flatten them before baking unless I wanted to thaw the dough first. Which I didn’t. So, instead of making cookie sandwiches with them, I melted some cookie butter for 10 seconds in the microwave (no longer than 10 seconds) and dipped the rounded tops of the cookies to glaze them with cookie butter instead. Voila, problem solved.
2 cups butter, softened
1 cup granulated sugar
2 teaspoons vanilla extract 4 cups all-purpose flour
Biscoff spread or Speculoos cookie butter
  1. Cream butter and sugar until fluffy. 
  2. Stir in vanilla; add flour and mix well.
  3. Scoop cookies with a small cookie scoop and form into small, thick discs. Freeze overnight. 
  4. When ready to bake, preheat oven to 350 degrees F. 
  5. Bake for 10-12 minutes depending on the size of the cookie. 
  6. Let cookies cool completely then spread a thin (or thick) layer of cookie butter on half of the cookies and sandwich with the rest of the cookies.