Thursday, October 23, 2014

Banana Cupcakes with Cinnamon Cream Cheese Frosting

Banana Cupcakes with Cinnamon Cream Cheese Frosting - made October 11, 2014 from Lil Luna
I was still so enamored of my new large star decorating tip and what it looks like when you pipe frosting with it that I made another cupcake recipe. Serendipitously, I also had bananas (over)ripening on the counter that were at the near-perfect stage of being used in baked goods. I'd like to tell you I planned that far ahead but in reality, I had bought a bunch one weekend then forgot them on the counter.
But I remembered them in time to use in this recipe. It's a fairly straightforward, standard cupcake recipe. It wasn't as soft and fluffy as I had hoped but I wonder if that's because I baked them a little too long or a bit too short. Cupcakes are not my realm of expertise so I regularly miss the mark. If you don't bake them long enough, they can be dense. If you bake them too long, they're dry. These weren't quite dry but they weren't Sprinkles-moist as I had wanted.
The taste was good though and I like the pairing with the cinnamon cream cheese frosting. Since I'm not a super fan of cream cheese, the cinnamon not only adds more flavor but mutes the tang of the cream cheese. And really, I just wanted to play with piping frosting with the decorating tip.
4 large eggs
1/2 cup butter, softened
1 1/2 cups mashed bananas (from 3-4 mashed bananas)
1/2 teaspoon vanilla
1 1/2 cups cake flour (all-purpose flour can also be substituted)
3/4 cup sugar
2 teaspoons baking powder
1/2 teaspoon baking soda
1/4 teaspoon salt
1 teaspoon cinnamon

Frosting
6 tablespoons butter, softened
4 ounces of cream cheese, softened
2 cups powdered sugar (more as needed)
1/2 teaspoon vanilla
1 1/2 teaspoons cinnamon
  1. Preheat the oven to 350. Prepare two muffin tins by lining with paper liners.
  2. Separate the eggs and beat the egg whites until stiff peaks form, then set aside.
  3. In a large bowl or the bowl of a stand mixer, beat the butter until light and fluffy. Add the mashed bananas, egg yolks, and vanilla, and mix until smooth. Gently fold in 1/3 of the egg white mixture.
  4. In a medium bowl, whisk together the flour, sugar, baking powder, baking soda, salt, and cinnamon. Gently fold the dry ingredients into the wet ingredients until just combined. Gently fold in remaining egg whites.
  5. Fill paper baking cups half full and bake 11-15 minutes, or until a toothpick inserted in the center comes out clean. Remove and let cool completely.
  6. To make the frosting, beat together the butter and cream cheese until light and fluffy. Add the powdered sugar slowly and beat until light and fluffy. Beat in the vanilla and cinnamon.
  7. If necessary, add more powdered sugar until the frosting is firm enough to hold its shape but still light and fluffy. Frost the cooled cupcakes.

Tuesday, October 21, 2014

Pumpkin n Cream Pound Cake with Brown Butter Glaze

Pumpkin n Cream Pound Cake with Brown Butter Glaze - made October 12, 2014, recipe modified from The Baker Chick
Okay, I'm back with the pumpkin again. Still no rain at the time I made this but we're supposed to get some soon. I hope. So I must keep up with the baking rain dance and bake with fall flavors. Plus I needed an easy Bundt cake to make for work last week.
I adapted this from The Baker Chick; I made her pumpkin Bundt cake but I added my own element with the pastry cream as a "tunnel" in the middle. I'd like to tell you it was because I love to experiment and make up my own recipes but unfortunately, while that's sometimes true, I just don't have that kind of time these days. Instead, I needed milk for another recipe, ended up having to buy a quart instead of a pint like I normally do because all that was available was a quart. So I had too much milk. When I have too much milk on hand, I either make pancakes, bread pudding or pastry cream. I didn't feel like pancakes and I didn't have any challah in the house so pastry cream it was. I love pastry cream, too much so. Or at least I love the recipe I make of it which was one of my best takeaways from culinary school. I could spoon up pastry cream like pudding. Then regret it later when my pants and skirts didn't fit anymore. So I rarely make pastry cream.
But since I "had" to make it this time, I decided to stuff it inside this pumpkin bundt cake. That turned out to be a good call as the vanilla pastry cream paired very well with the pumpkin flavor, the texture of the cake and the brown butter glaze. The glaze turned out thicker and more like a frosting than a glaze but if you want it thinner, simply add more milk. Either way, it was delicious. I even ate a normal-sized piece instead of a taste test sliver because it was so good. Even if it still didn't bring on the rain.
2 1/4 cups all-purpose flour
2 teaspoons baking powder
1 teaspoon baking soda
2 1/2 teaspoons cinnamon
1/2 teaspoon nutmeg
1/4 teaspoon ginger
1/4 teaspoon cloves
1/2 teaspoon salt
1 1/4 cups canned solid-pack pumpkin
3/4 cup well-shaken buttermilk
1 teaspoon vanilla
1 1/2 sticks (3/4 cup) unsalted butter, softened
3/4 cup granulated sugar
1/2 cup light or dark brown sugar
3 large eggs

Filling
1/2 recipe of Pastry Cream

Brown Butter Glaze
1 stick of butter, browned
2 cups of powdered sugar, sifted
2 teaspoons vanilla extract
2-4 tablespoons milk
  1. Preheat oven to 350 degrees F. Spray a 10 inch bundt cake pan  with nonstick cooking spray and dust with flour, set aside.
  2. In a medium-sized bowl, whisk together the flour, spices, baking soda, baking powder and salt.
  3. In another bowl, whisk together the pumpkin, buttermilk and vanilla.
  4. In the bowl of a stand mixer fitted with a paddle attachment, cream the butter and sugars together until light and fluffy, about 3 minutes. Add the eggs one at a time until well combined.
  5. Alternate adding the flour and pumpkin mixtures, mixing on low speed, starting and ending with the flour mixture. Don't overmix.
  6. Spoon 2/3 of the batter into prepared pan then add the pastry cream in a ring on top of it. Cover with remaining batter and smooth top with the back of a spoon. Bake for 45-55 minutes, or until a toothpick inserted comes out clean. (Try to avoid testing the middle where the pastry cream is. Instead, insert the toothpick along the sides as well as close to the inner tube opening.) Invert and cool for at least 30 minutes on a wire rack before icing.
For the glaze:
  1. Pour the browned butter into a bowl and whisk in the 2 cups sifted powdered sugar and vanilla, stirring until smooth. Add the milk, a tablespoon at a time until the desired consistency is achieved.
  2. Drizzle over the cake and serve warm, at room temperature or even cold from the fridge. 

Monday, October 20, 2014

Food Trucks: Off the Grid

Off the Grid - dinner on October 8, 2014
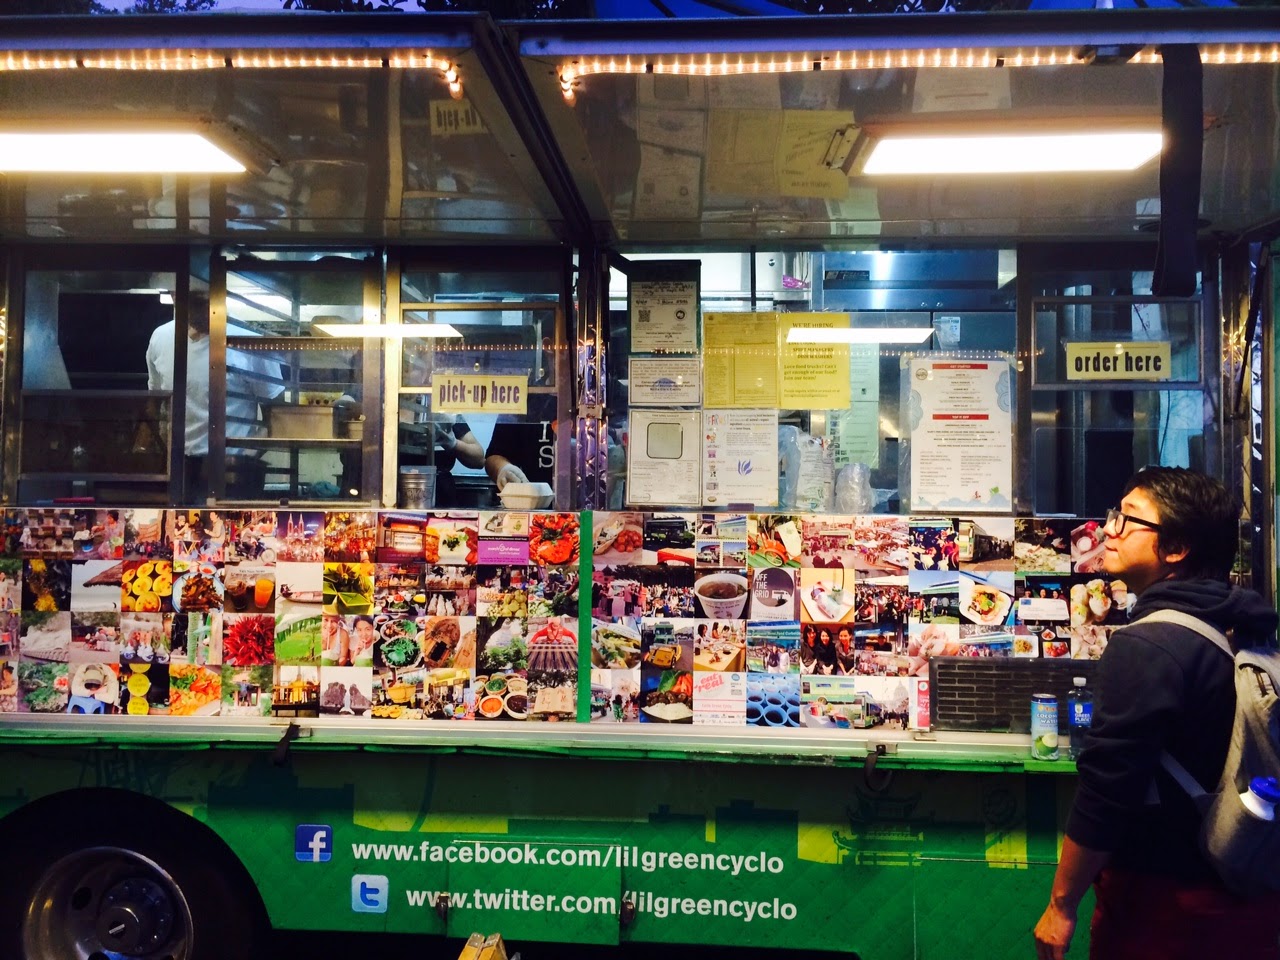
I mentioned in a previous post that I am not a regular patron of food trucks, mostly because they don't really cross my path when I'm contemplating places to go for dinner. I decided to change that when I heard about Off the Grid which comes every Wednesday night to the Menlo Park Caltrain station. Since it was near enough to work to enable me to get there in half an hour (thanks, commute traffic) and my friend Jenny could catch Caltrain on her way home from work and just take a detour in Menlo Park, we decided to meet up one Wednesday to check it out.
There was a fleet of about a dozen or so food trucks when I arrived. One area was set aside for tables and chairs where people could sit and there was even someone singing to entertain people while they dined. There were a ton of kids so I assume this was a popular weekly eating spot for families.
It was fun to poke around and check out the offerings of the different food trucks. I had a heck of a time deciding between the lobster roll from the Lobsta truck, chicken tikka masala open-faced on garlic naan from the Indian food truck, lemongrass pork with garlic noodles from the Vietnamese truck, or chicken and waffles from the Waffle Amore truck. Talk about your first world problems, right?


The BBQ Brisket truck Jenny got her dinner from
In the end, I went with the lemongrass grilled pork and garlic noodles from the Vietnamese food truck. Most of the offerings from all of the food trucks were in the $10-$12 price points, some a little more, some a little less. Mine came to $11 which I thought was reasonable for a dinner I had to eat perched on a parking lot curb. Hey, it's all an adventure. If I was more budget conscious, I could've gotten away with a $5-6 dinner and gone all protein or all carbs with one or the other instead of both.
The dish was tasty but I have to admit, a bit too salty for me. I do have bland taste buds though so others might find it better than I did. The portions were pretty generous so I couldn't finish the whole thing, especially because of the salt factor.
Lemongrass Pork and Garlic Noodles
To counter the salt, of course, I had to get some sugar. Since I skipped the chicken and waffles from Waffle Amore in favor of the pork and garlic noodles, I had an excuse to go back to the waffle truck and try out one of their waffles for dessert. In a stroke of luck, we approached the waffle truck at 7:30 which turned out to be when they start making their liege waffles available for ordering. Liege waffles have a caramelized outside and they're just plain delicious. The Sweet Tooth Fairy was looking out for me in getting me in front of that waffle truck at the right time. Each waffle was $5 and comes with 1 free topping. Additional toppings are $1 each. I lived high and went with the nutella and banana atop a liege waffle.
At first Jenny and I were going to split a waffle because we were both full from our respective dinners but after seeing a person ahead of us get their order, we decided the waffles weren't that big so we each got our own. Hence why Jenny and I are good friends. She went with a Woman's Best Friend waffle (truly, that was the name of the waffle) that had fresh strawberries, whipped cream and chocolate sauce drizzled on top.
Liege waffle topped with nutella and banana
My waffle was delicious and you can't go wrong with a banana-nutella combo. If I were making this at home, the only thing I would do differently would be to caramelize the bananas first in brown sugar and butter but my taste buds are decadent like that. Having fresh bananas on top of the liege waffle almost made me feel virtuous but even I can't lie to myself that much. The portion was the right size if you're not too full from dinner. I was but I'm conveniently ignoring that since I ate my entire waffle.
"Woman's Best Friend" waffle - with strawberries, whipped cream and chocolate sauce
It was a fun experience and Jenny and I both agreed we'd go back again to try the other food trucks. Some of them had long lines at the time we went which made us want to try them even more next time so we could see what made them so popular. I wouldn't call any of it gourmet food but still, it's a nice casual way to dine and support some local small businesses at the same time.

Sunday, October 19, 2014

Fudgy Frosted Brownies and Cal vs UCLA

Fudgy Frosted Brownies - made October 17, 2014, recipe modified slightly from Sally's Baking Addiction
Memorial Stadium, an hour before the game - the stands filled up considerably by kickoff
I've got a backlog of recipes to put up but haven't had time to write them up yet. But I'm leapfrogging this one to post nearly real-time while it's fresh in my memory. One of my nieces, my sister and her boyfriend flew in this weekend so they, my parents, my other niece and I could all get together to watch the Cal vs UCLA football game at Memorial Stadium in Berkeley. My out-of-town niece goes to UCLA and the other to Berkeley so we had a little intra-family rivalry going on. I myself graduated from Cal so I knew who I was rooting for but figured even if they lost (which they did! *sad face*), at least we had one person in the family who would be happy that UCLA won.
At Halftime - there was still hope for Cal
The Bear and the Bruin
I always bake for my nieces whenever I have a chance to see them but last week was particularly all about the long hours as I had some big deliverables due at work so I didn't really have time to bake during the week. I had made up some cookie doughs last weekend so those would be easy enough to bake off at the last minute but I also wanted to do a brownie. Unfortunately I ended up working later than I had expected on Friday night so by the time I got home the night before the game, I almost decided against baking and had to fight the temptation to just collapse on my couch. But even when I'm tired, I'm still stubborn so I made myself get it done.

Fortunately, brownies are my specialty and I could probably make them in my sleep. Plus this recipe from Sally's Baking Addiction was simple enough to put together quickly and easily. I baked off the brownies the (late) night before and frosted them the next morning. The only thing I changed was I baked them in an 8 x 8 pan instead of the 9 x 9 pan that her original recipe called for. I'm glad I made them in the smaller pan as they had the right thickness, even with the frosting.

Normally I don't frost brownies but I wanted a little extra decadence so I did this time. The frosting was rich but I actually liked it (I know, right?). At least in the half-piece I ate as a taste test. True to their advertising, these did come out fudgy. Of course, bear (get it? GO BEARS!) in mind, it's not as much about the recipe as it is about the quality of ingredients (code for "use good chocolate") and underbaking the brownies slightly. The best fudgy brownie recipe in the world won't turn out well if you use inferior chocolate and overbake them.
I asked my nieces whether this batch of brownies should be winner take all or serve as a consolation prize for the loser. But since, between the two of them, one was going to be a winner and they learned all about sharing in kindergarten, that meant it didn't matter and they (and their friends) could partake of rich, fudgy, frosted brownies. Even though Cal lost. Sigh.
1/2 cup (115g) butter (salted or unsalted, your choice)
8 ounces (228g) coarsely chopped good quality semi-sweet chocolate - I used Valrhona
3/4 cup (150g) granulated sugar
1/4 cup (50g) light brown sugar
3 large eggs
1 teaspoon vanilla extract
1/2 cup + 2 tablespoons (80g) all-purpose flour
2 tablespoons (11g) unsweetened cocoa powder
1/4 teaspoon salt
1 cup (180g) semi-sweet chocolate chips

Milk Chocolate Frosting
1 3/4 cups (210 g) confectioners' sugar
1/4 cup (22 g) unsweetened cocoa powder
1/2 cup (115 g) unsalted butter, softened
2 tablespoons heavy cream or half and half
1 teaspoon vanilla
salt to taste
  1. Adjust the oven rack to the lower third position and preheat oven to 350F degrees. Line the bottom and sides of a 8 x 8 inch square baking pan* with aluminum foil and lightly spray with nonstick cooking spray. Set aside.
  2. Melt the butter and chopped chocolate in a medium saucepan on medium heat, stirring constantly, about 5 minutes. Remove from the heat, pour into a large mixing bowl, and allow to slightly cool for 10 minutes.
  3. Whisk the granulated and brown sugars into the cooled chocolate/butter mixture. Add the eggs, one at a time, whisking until smooth after each addition. Whisk in the vanilla. Gently fold in the flour, cocoa powder, and salt. Once combined, fold in the chocolate chips.
  4. Pour batter into the prepared baking pan and bake for 35-36 minutes or until the brownies begin to pull away from the edges of the pan. A toothpick inserted in the center should come out with only a few moist crumbs when the brownies are done. 
  5. Allow the brownies to cool completely in the pan set on a wire rack. Once cooled, lift the foil out of the pan using the overhang on the sides and cut into squares.  
  6. Frosting: sift together the confectioners' sugar and cocoa powder to assure there are no lumps. Set aside. With a handheld or stand mixer fitted with a paddle attachment, beat the butter on medium speed until creamy - about 2 minutes. Gradually add the sifted sugar/cocoa powder alternately with the heavy cream and vanilla. Beat on low speed after each addition. Once all added, beat on high speed until creamy and combined for at least 2 minutes. Add a pinch of salt if frosting is too sweet. Frost the brownies before or after cutting into squares, whichever you prefer.

Saturday, October 18, 2014

Mini Red Velvet Cheesecakes

Mini Red Velvet Cheesecakes - made October 11, 2014 from Sally's Baking Addiction
We're getting into that time of year where my baking experiments start taking a holiday slant. Notice the recent pumpkin desserts? Besides trying a baking rain dance for my drought-stricken state (come on, rain, start moving in), I'm also testing out potential new recipes for Thanksgiving. This one, we're leap frogging to Christmas.
This was so pretty on Sally's Baking Addiction that I wanted to try it out myself and see if it would be a contender on my holiday dessert party menu. I loved the contrast of the pale creamy cheesecake against the holiday red of the red velvet even though I'm not a cheesecake fan. Mine didn't turn out as pretty as hers though. And I even baked mine in bonafide mini cheesecake pans instead of muffin pans. Since I don't like cheesecake and don't make it, I'm not well versed on baking them properly. I probably overbaked these from a looks perspective (you don't want brown spots or cracks in your cheesecakes) although thankfully, from a taste perspective, they were fine.
A couple of baking notes: the red velvet cookie batter made enough for 2 dozen mini cheesecakes in the pans I used and were even enough to make a thicker red velvet layer than I think I was supposed to have. They puffed up during baking and at first didn't leave much room for the cheesecake topping. Don't bake the red velvet layer longer than the first 8 minutes the recipe calls for. They may be too dry in the time you need to bake the cheesecake topping for. In the first baking, the red velvet layer puffed up but then collapsed in the time it took me to fill all of the cavities. So the inside had a sunken cheesecake middle when you cut it open. If you care mostly about taste, that's not a big deal as you can't tell from the outside, only when you bite into it and by then, would you really care?
This is probably the closest I'll get to making a cheesecake - as a thin layer on top of something else. It's a good bite-sized dessert option for a holiday party. Bonus for me that I'm not likely to overeat it. One was fine for me to taste it. I gave the rest away.
1 and 1/2 cups + 1 tablespoon (198g) all-purpose flour
1/4 cup (32g) unsweetened cocoa powder
1 teaspoon baking soda
1/4 teaspoon salt
1/2 cup (115g) unsalted butter, softened to room temperature
3/4 cup (150g) light or dark brown sugar
1/4 cup (50g) granulated sugar
1 egg, at room temperature
1 tablespoon (15ml) milk
2 teaspoons vanilla extract
1 tablespoon red food coloring (liquid or gel)

Cheesecake layer
12 ounces (336g) full-fat cream cheese, softened to room temperature 
2 Tablespoons (30g) yogurt or sour cream 
1/3 cup (67g) granulated sugar 
1 large egg, at room temperature 
1 teaspoon vanilla extract 
1/2 cup (90g) mini semi-sweet chocolate chips


  1. Preheat oven to 350F degrees. Line two 12-count muffin pans with cupcake liners. Set aside.
  2. Make the red velvet cookie layer: toss the flour, cocoa powder, baking soda, and salt together in a large bowl. Set aside.
  3. Using a handheld or stand mixer with a paddle attachment, beat the butter on high speed until creamy, about 1 minute. Scrape down the sides and the bottom of the bowl as needed. Switch the mixer to medium speed and beat in the brown sugar and granulated sugar until combined. Beat in the egg, milk, and vanilla extract, scraping down the sides and bottom of the bowl as needed. Once mixed, add the food coloring and beat until combined. Turn the mixer off and pour the dry ingredients into the wet ingredients. Turn the mixer on low and slowly beat until a very soft dough is formed. Beat in more food coloring if you'd like the dough to be redder. The dough will be sticky.
  4. Press 1 scant tablespoon of cookie dough into the bottom of each cupcake liner. Bake each batch for 8 minutes to pre-bake the crust before layering the cheesecake on top.
  5. Make the cheesecake layer: using a handheld or stand mixer with a paddle attachment, beat the cream cheese on medium-high until completely smooth. Add the yogurt and sugar, beating on high until combined. Add the egg and vanilla and beat on medium until combined. Try not to overbeat, which will cause cheesecake cracks. Gently fold in the chocolate chips. Dollop 1 Tablespoon of cheesecake batter on top of the pre-baked cookie, spreading it to make sure it completely covers the cookie.
  6. Return the mini cheesecakes to the oven and continue to bake for about 20 more minutes, making sure the tops of the cheesecake does not get too brown. The cups are done in the oven when the cheesecake topping no longer jiggles when you shake the pan. Cover the cups with aluminum foil if the tops are getting too brown too soon. Allow to cool for 30 minutes on the counter, then in the refrigerator to set for another 1.5 hours.
  7. Cookie cups stay fresh covered at room temperature for 12-24 hours, and then must be refrigerated after that for up to 3 more days.

Thursday, October 16, 2014

Loaded Pumpkin Caramel Blondies

Loaded Pumpkin Caramel Blondies - made October 6, 2014 from Taste and Tell

It's still Indian summer where I live when I made these and I keep yearning for colder weather and rain. So I keep baking with fall flavors. It's like my version of a baking rain dance. If I make enough stuff with apples or pumpkin, maybe autumn will actually arrive. We can only hope.
I'm not even a super huge fan of pumpkin but I like it well enough and even though it's available year round, I tend to bake with it mostly around this time of year. Although caramel I'm down with at any time. So pumpkin caramel blondies seemed like a perfect dessert to make for work last week.

Sadly, I could not take a good picture of these to save my life. Which is truly sad as these were pretty good and the pictures don't do them justice. They were moist thanks to both the pumpkin and the caramel and both flavors marry well. I actually would suggest not adding the semisweet chocolate chips if you want to stick to a more pure pumpkin and caramel combination. The semisweet chocolate does provide a contrast if that's your thing but I think I would prefer the blondie without it.
Either way, these make for a good fall dessert. Bonus that they're easy to make too. It's best to wait until they're completely cool before you cut them and serve or they won't cut very cleanly and they'll be a bit too gooey.
2 1/2 cups flour
2 teaspoons cinnamon
1/2 teaspoon baking soda
1/4 teaspoon salt
1/4 teaspoon nutmeg
dash of cloves
1 cup butter, melted
1 cup brown sugar
1/2 cup granulated sugar
1 egg, lightly beaten
1 teaspoon vanilla
1 15-ounce can pumpkin puree
1 cup Pumpkin Spice Hershey kisses, roughly chopped (about 28)
1/2 cup white chocolate chips
1/2 cup semisweet chocolate chips
1/2 cup toffee pieces
1 11-ounce bag caramels, unwrapped
1/3 cup evaporated milk (I used whole milk)
  1. Preheat the oven to 350°F. Line a 9x13-inch baking dish with parchment paper or spray with non-stick cooking spray.
  2. In a bowl, combine the flour, cinnamon, baking soda, salt, nutmeg and cloves. In another bowl, combine the butter, brown sugar and granulated sugar. Stir in the egg and vanilla, then add in the pumpkin. Add in the dry ingredients and stir just until combined. Add in the chopped Hershey’s Kisses, white chocolate chips, semi-sweet chocolate chips and toffee pieces.
  3. Pour about 2/3 of the mixture into the prepared pan. The mixture will be fairly thick – use a spatula to spread the mixture to the edges. Bake in the preheated oven for 10 minutes.
  4. While the blondies are baking, combine the caramels and evaporated milk in a small saucepan over medium heat. Cook, stirring often, until the caramels are melted and the mixture is smooth.
  5. After the blondies have baked for 10 minutes, remove and carefully pour the caramel over the top. Take the remaining dough and drop by spoonfuls over the top of the caramel. Return the pan to the oven and let bake an additional 30 minutes, or until cooked through.
  6. Let cool completely before slicing and serving.

Tuesday, October 14, 2014

Cookie Butter Cupcakes

Cookie Butter Cupcakes - made October 4, 2014, recipe adapted from The Baker Chick
Awhile back, my local Target used to carry Biscoff cookies. If you're not familiar with Biscoff, they're to cookie butter what peanuts are to peanut butter. And ever since I had that delicious cookie butter cupcake from Fairy Cakes, I've been wanting to recreate something similar. Surprisingly, there weren't that many recipes for cookie butter cupcakes on pinterest. But I did find this one that used cookie butter as a filling and Biscoff cookies as a garnish.
Unfortunately, when I went to Target to buy some Biscoff cookies, it appeared they no longer carried them. Not that they were temporarily sold out but completely no longer available. Seriously? They carry 93 different kinds of Oreos but not even an inch of shelf space for Biscoff cookies? Total letdown. Fortunately, I had to go to Trader Joe's the same day and what should catch my roving, sugar-seeking eye than Speculoos cookies?? Speculoos and Biscoff have become synonymous in my vocabulary. Biscoff spread is just a tad smoother and less stiff than Speculoos cookie butter but I can confirm Speculoos cookies are just as delicious as Biscoff cookies. You're welcome.
So I was sufficiently equipped to make this cupcake recipe. But I have to confess up front that I made an error when reading the directions. Which means I thought the directions were wrong because they list cookie butter as an ingredient but skipped any step about adding cookie butter to the batter. So I did it myself. Of course as soon as I had added the cookie butter into the batter, I realized the original recipe meant the cookie butter was just for the filling after the cupcakes were baked, not for adding into the batter itself. Oops.
But I decided to go with it. C'mon on, it's cookie butter - how bad could the cupcakes turn out? I did make one more modification and added 1/2 teaspoon of baking soda as well. The batter has buttermilk in it and if you don't add baking soda to anything with buttermilk, there'll be nothing to neutralize the acid in the buttermilk and it'll have a tang to whatever you bake. Plus, with a heavy ingredient like cookie butter in the batter, I wanted a little more chemical leavening to prevent the cupcakes from being too dense.
Turns out my tinkering turned out pretty well.  The cupcakes had a nice fluffy texture. The cookie butter flavor wasn't too pronounced but still had a nice presence in the cupcake. Which was helped along by the cookie butter frosting. The frosting I made wasn't quite as good as the one from Fairy Cakes but it was still pretty decent. Which is code for I ate it but not every speck of it like I did with the Fairy Cakes one. Unless a frosting is super spectacular, I tend to eat less than half whatever was on the cupcake.
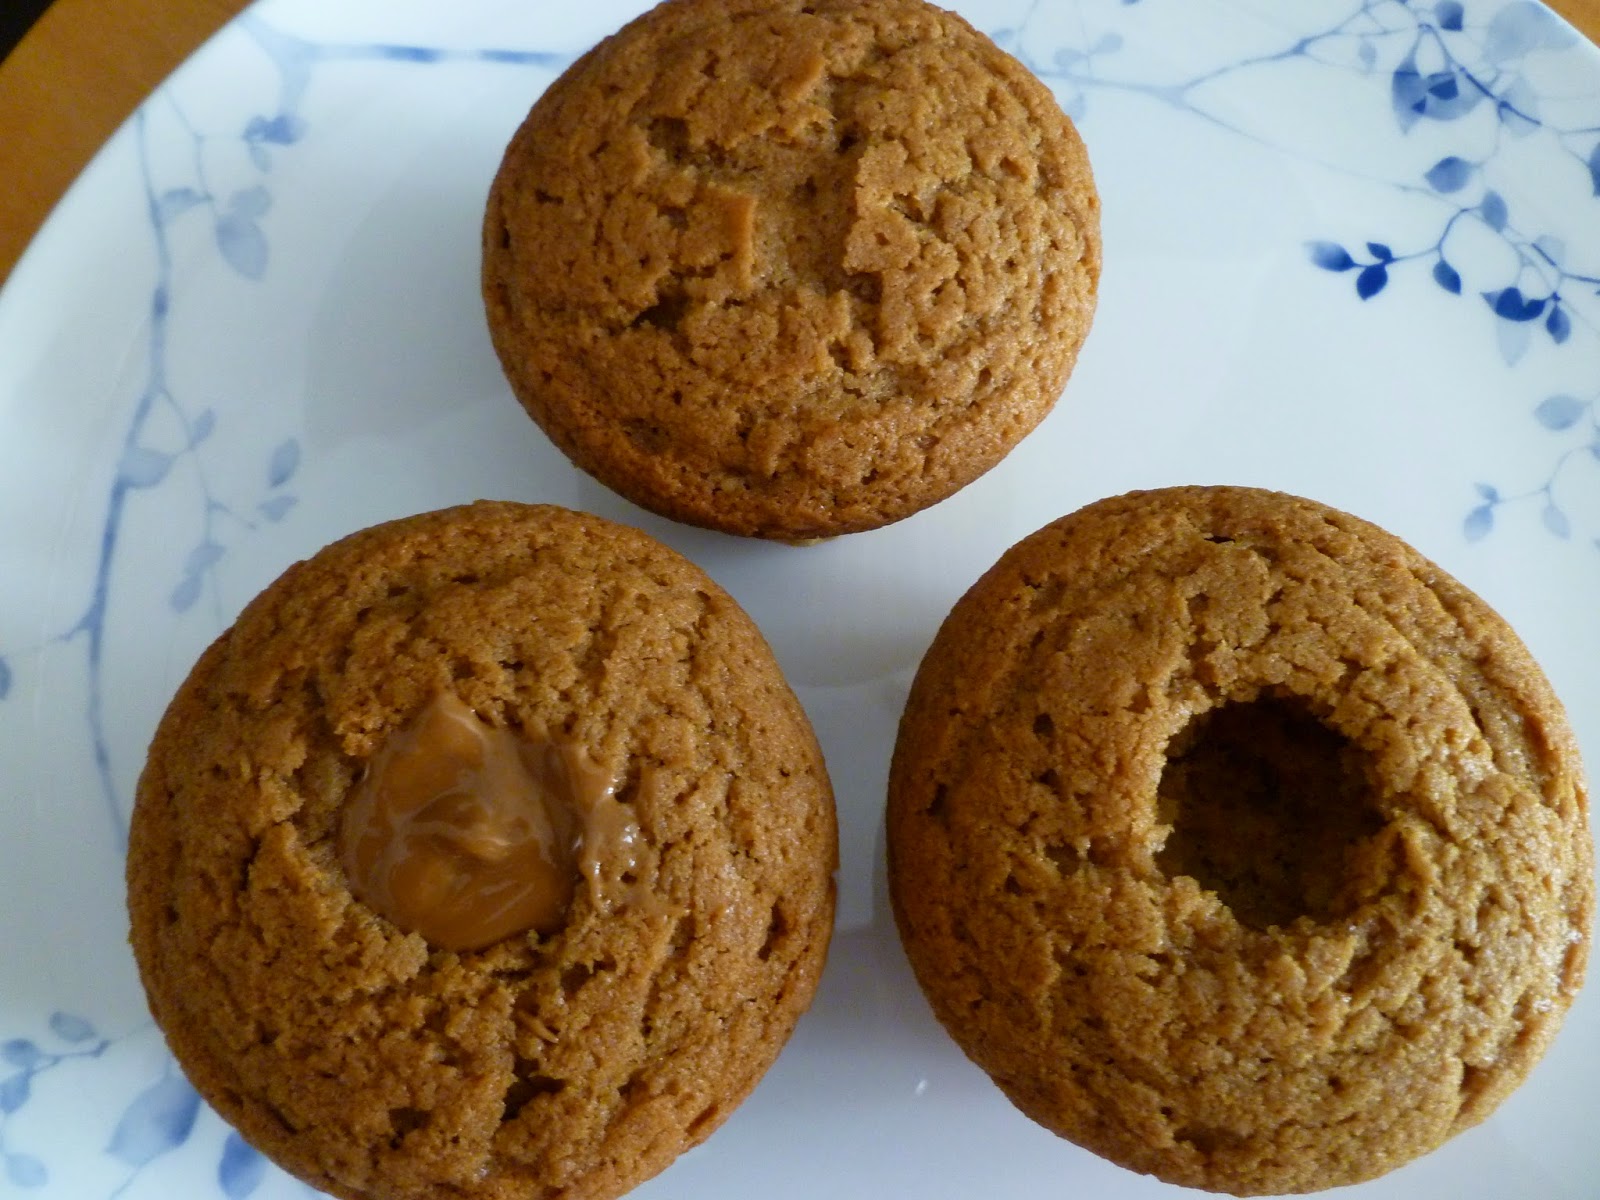
I cored the middle of these and filled the centers with Speculoos cookie butter then piped the frosting around it. I bought a large star tip to pipe with that was big enough to make those nice big swirls like you see on bakery cupcakes. I want one even bigger but not sure if they make it or where to get it. For now, this one will do.
The Speculoos cookie garnish is also a nice touch with these cupcakes but I would advise not adding them until the last minute or they might lose their crunch sitting in the frosting and exposed to air for too long. You want them to remain crisp to provide a good texture contrast between the fluffy cupcake and the smooth, sweet frosting. There's also half a cookie at the bottom of each cupcake but I didn't think that added anything spectacular to the cupcake since it softened in baking but was still more dense than the cupcake itself. Next time I'm going to make these the way they're supposed to be made without the cookie butter in the batter and without the cookie on the bottom. I want to see if they turn out closer to Fairy Cakes. I'm on a mission now.
1 1/2 cups all-purpose flour
3/4 teaspoon baking powder
1/2 teaspoon baking soda
a large pinch of salt
6 tablespoons of unsalted butter, room temperature
1/2 cup brown sugar
1/4 cup sugar
2 large eggs
1 tablespoon pure vanilla extract
1/2 cup plus 2 tablespoons buttermilk
12 speculoos cookies broken in half
3/4 cup cookie butter

Frosting
1 stick of unsalted butter
1/4 cup cookie butter
1-2 cups powdered sugar
splash of milk
Speculoos cookies for garnish
  1. Preheat oven to 350F.
  2. Line cupcake pans with liners and place half a cookie into each one, set aside.
  3. In a medium bowl, whisk together flour, baking powder, and salt.
  4. In a large mixing bowl, cream the butter and sugars until light and fluffy. Add eggs, one at a time, beating well after each addition, mix in vanilla. Add cookie butter.
  5. Add flour mixture and buttermilk alternately, beginning and ending with flour. Scrape down the bowl- don't over mix the batter.
  6. Divide batter evenly among liners, filling each about three-quarters full. Bake until tops spring back when touched, about 20 minutes. Transfer to a wire rack; let cool for 5 minutes and then remove from pan. Let cupcakes cool completely.
  7. Use a paring knife to core a small little but out of each cupcake and fill with a small dollop of cookie butter.
For Frosting:
  1. Cream together the butter and cookie butter. Add the powdered sugar one cup at a time until thick. Add a small splash of milk and mix on high until smooth and creamy.
  2. Spread or pipe onto the cooled and filled cupcakes and top with speculoos cookies if desired.


Instructions

Sunday, October 12, 2014

Peanut Butter Fudge Cake

Peanut Butter Fudge Cake - made October 3, 2014, recipe adapted from The Spiffy Cookie
I made this to bring to my friends' Bryan and Cheryl's birthday party for their one-year-old daughter. That would be the aforementioned Lemon Bar Bryan but I may have to rename him Peanut Butter Bryan as it turns out that's one of his favorite flavors. Cheryl, on the other hand, is probably my kindred spirit since she's a chocoholic. To pander to them both, I found this peanut butter fudge cake recipe from The Spiffy Cookie to combine both worlds in one cake.
I modified the recipe directions though as the original recipe called for adding eggs to the melted butter and cocoa mixture. I was concerned that would risk the eggs cooking from the heat before they could be incorporated into the rest of the liquid mixture. Then you'd end up with bits of scrambled eggs in your cake. Instead, I changed it so that you beat the eggs into the dry ingredients then temper the hot liquid into it gradually until they're just combined. No scrambled eggs that way.
I think this cake was decent. I confess I'm not entirely sure because I didn't eat a whole piece. I ate something akin to a sliver to make sure it was okay before I gave it away. The texture of the cake itself was nice and fudgy. The peanut butter layer that melted into the top of the warm cake then was covered by the fudge icing makes this a great peanut butter and chocolate combination. If you're a big peanut butter lover, be generous with that layer as it will get sandwiched between the two chocolates. You can also sprinkle chopped up peanut butter cups on top of the frosting for some extra punch.
2 cups all-purpose flour
2 cups granulated sugar
1 teaspoon baking soda
2 large eggs, lightly beaten
1 cup unsalted butter
1/4 cup unsweetened cocoa powder
1 cup water
1/2 cup buttermilk
1 teaspoon vanilla extract
16 ounces or 1 1/2 cups creamy peanut butter

Icing
1/2 cup unsalted butter
1/3 cup buttermilk
1/4 cup unsweetened cocoa powder
16 ounces confectioners' sugar, sifted
1 teaspoon vanilla extract
  1. Preheat oven to 350°. Grease and flour a 9” x 13” baking pan.
  2. Whisk together flour, sugar, and baking soda in a large bowl. Beat in eggs. Set aside. 
  3. Place butter in a medium saucepan. Melt over medium heat. Stir in cocoa powder. Then, stir in water and buttermilk. Continue cooking over medium heat, stirring constantly, until the mixture boils. 
  4. Remove the mixture from the heat and temper into the flour-sugar-egg mixture. Stir until smooth. Stir in vanilla. 
  5. Transfer batter to prepared pan and spread evenly. Bake 20 to 25 minutes, or until a pick inserted into the center of the cake comes out clean. 
  6. Cool in pan on wire rack for 10 minutes. Then, spread the peanut butter over the cake. Allow to cool completely. 
  7. To make the icing, place the sifted confectioners’ sugar in a large bowl. Set aside. Combine butter, buttermilk, and cocoa in a small saucepan. Cook over medium heat, stirring constantly, until the mixture begins to boil. Remove from heat and pour over confectioners’ sugar. Stir until smooth. Stir in vanilla. 
  8.  Spread icing over peanut butter. The cake can be served immediately or can sit at room temperature to allow the icing to set.