Monday, November 19, 2012

Lemon Melting Moments

Lemon Melting Moments - made November 10, 2012 from Itty Bitty Kitchen

My mom's lemon tree is literally spilling over with lots of juicy lemons so I need to ratchet up the lemon baked goods.  Loved the picture of these on pinterest so I made these as a pre-holiday baking experiment in case I want to serve it at Thanksgiving or my dessert parties.  As always with sandwich cookies, you want to make them small since you or your guests will be eating two cookies as one.  The dough was easy to make and great to work with, not too dry or sticky.  I portioned into small balls, flattened each with a fork and froze them first.  They don't spread when they're baked and I wanted them chubby so I didn't flatten them too thin.

I liked these cookies.  They were crisp but not hard and the crisp wasn't the snap of a shortbread or dry but just good chewing.  The lemon filling complemented the butter cookie nicely but note that you may need to let it set a bit before you use it to sandwich the cookies.  The filling is more like a glaze when you first mix it but unless you want it really sweet, refrain from adding more powdered sugar until it firms up.  Then it should be okay to use as filling.  If you're serving a "high tea" this holiday season, these would be good to have with your tea.

14 tablespoons unsalted butter, room temperature
1/4 teaspoon salt
1/2 cup confectioners sugar
1 1/2 cups all-purpose flour
1/2 cup cornstarch
1 teaspoon vanilla extract
zest of one lemon
Filling:
1 cup confectioners sugar
4 tablespoons unsalted butter, room temperature
juice of one lemon
  1. Preheat oven to 325 degrees F.
  2. In a large bowl cream the butter, salt and sugar until light and fluffy on a medium setting, roughly 3 minutes. Reduce the speed to low and  incorporate the vanilla and lemon zest, scraping down the sides as you go. Sift the flour and cornstarch into the mixture and beat on low speed until just combined.
  3. Take small portions of the mixture and roll into balls, continue until you have 24-30. If you want them to be as even as possible, roll out the mixture until it forms a log then use a clean knife to section into 30 pieces.
  4. Place them on a baking tray lined with wax paper, gently press on each piece with a fork until it has left an imprint. You can also press on them gently with your fingers, if you do not wish to leave an imprint. (You can also chill the dough at this point, if so, don't preheat the oven until you're ready to bake.)
  5. Bake for 20 minutes. Let them cool completely.
  6. For the filling beat the sugar, butter and lemon juice on a medium setting until incorporated. Use the back of a spoon, or a knife to ice one side of the cookie then sandwich them together. Try to find two which are similar sizes.

Saturday, November 17, 2012

Red Velvet Oreo Brownies

Red Velvet Oreo Brownies - made November 10, 2012, recipe adapted from Newly-weds blog

One of my nieces, Lauren, was going to be in town for her college's dragon boat race last weekend.  I don't get to see her as often as my other niece, Shyla, so, like any good aunt, I baked up a storm for both of them.  One of the recipes I baked was this one, adapted from Newly-weds' blog.  I only had one 1-ounce bottle of red food coloring so I went with half of the original recipe's amount which I think still made it plenty red.  (And now I have to stock up on red food coloring before I make red velvet anything this holiday season.)  I also decided to throw in some Oreos for no other reason than I had some on hand that I, er, happened to open one day.  And everyone knows an opened package of Oreos will lose their crispness even if stored airtight so it's best to eat use them soon after opening.

Oh, and funny story with this brownie - I was making it while Shyla was staying with me and we were baking these the night before we were going to see Lauren.  Shyla was helping me which mostly involved my putting the batter together while she did her homework but I did promise her she could "lick the bowl".  I'm not a batter bowl licker myself so I did what I normally do once the batter was made: I used a spatula to scrape the batter into the pan, automatically getting every bit I could so as not to waste any.  Then I called Shyla over to give her the bowl.  You should've seen her face fall when she saw how "clean" the bowl was and how she "could see the silver" of the bowl.  LOL!  I had to redeem myself and give her the spatula without scraping every last bit of batter from it.  I was unfavorably compared to her roommate who also bakes but has the foresight to give her bowls and mixing spoons still laden with dough or batter.  Oops.

Once it was baked (no batter for me), I really liked the texture of this brownie - it was fudgy and moist without being mushy.  Taste-wise, it wasn't sweet (that's code for my parents liked this one).  I would've liked the chocolate flavor to be a bit more pronounced though. I used Droste cocoa but I think it would've been better with a darker cocoa like Pernigotti.  The Oreos worked well to give it a bit of a crunch and I think adding chocolate chips instead or in addition would also punch up the chocolaty-ness of the brownie.
The winning team for the women's finals - yep, my niece is in here

Although probably the best news is my niece competed in 4 of the 5 dragon boat races and her team won the women's finals.  Rock on.

1 cup  unsalted butter, at room temperature
1 1/2 cups granulated sugar
1 1/2 cups brown sugar
4 large eggs, at room temperature
2 oz red food coloring (I used only 1 ounce)
4 teaspoons pure vanilla extract
2 1/2 cups all-purpose flour
6 tablespoons unsweetened cocoa powder
1/2 teaspoon salt
1 cup Oreos, chopped
  1. Preheat the oven to 350 degrees F.  Line a 9 X 13 baking pan with foil and spray lightly with nonstick cooking spray.
  2. In the bowl of a stand mixer fitted with the paddle attachment, beat together the butter and sugar on medium speed until light and fluffy, about 2 minutes.  Add eggs one at a time, mixing well after each addition, then stir in food coloring (if not using food coloring add 4 tablespoons of water or milk) and vanilla, mix until the color is fully incorporated. 
  3. Mix flour, cocoa and salt in a separate bowl.  Slowly add in the flour mixture being very careful not to over mix. The batter will be thick.
  4. Remove the bowl from the mixer and stir up the batter with a rubber spatula once or twice just to ensure all of the flour has incorporated from the sides of the bowl and there isn’t anything stuck on the bottom of the bowl.  You’ll want one uniformly colored (red) batter.  Add Oreo chunks.
  5. Pour the batter into the prepared pan and bake for 30-40 minutes. 35 minutes for a thin crust on top and gooey underneath.  Set aside to cool, cut into bars and serve.
Linked to Something Swanky


Thursday, November 15, 2012

Snickers-stuffed Peanut Butter Cookies

Snickers-Stuffed Peanut Butter Cookies - made November 6, 2012, recipe adapted from Lovin' From the Oven

I'm finally catching up on all the stuff I've cooked and baked over the past several weeks and am a little more "real time".  Well, this is from a week and a half ago so maybe not but I'm getting there.  We're smack in the middle of my holiday prep season.  I have one more weekend before Thanksgiving to get all my decorating done.  I'm probably about 75% of the way there then I can focus almost exclusively on baking.  Every night this week after work, I've been checking off my to-do list one by one, either decorating or wrapping gifts or trying out just one more new recipe or making cookie dough of a tried and true recipe to put in the freezer for later.  And believe it or not, I'm really enjoying myself.  This is my season.

I'm trying to focus on little bite-sized desserts as I've got 2 dessert buffets to put together, one for Thanksgiving and one for a dessert party that I'm hosting at the end of the month.  And for both, I need mini desserts so people can sample a little of everything without OD'ing (too much) on sugar.  I found this recipe for peanut butter cookies from Lovin' From the Oven and decided to give it a little extra twist by wrapping the peanut butter cookie dough around half of a bite-sized Snickers bar (yes, I've still got leftover Halloween candy) and baking them in mini muffin tins.  Hence the Snickers-stuffed peanut butter cookie cup was born.


Taste-wise, hello, these were awesome.  It's ironic that about the only time I actually eat Halloween candy is when I bake it in something.  I can pass up a plain ol' Snickers without blinking but wrap a cookie around it?  I'm so there.  You can probably use almost any peanut butter cookie recipe to make these but I recommend one that uses all butter (no shortening) because you want a soft cookie rather than a crisp one to complement the Snickers stuffing.  I did modify the original recipe because I didn't have medium-sized eggs and only had extra-large eggs so I used only 1 extra-large egg instead of 2 medium-sized eggs.  The only issue with making these as cookie cups is they are a bit fragile so getting them out of the muffin tins was a little problematic - if you're careful, they won't necessarily break apart but they might get a little misshapen coming out of the tins.  You can also forego baking them in the mini muffin tins and instead bake "straight" as cookies.  I tried that and that also worked pretty well.  Just make sure the peanut butter cookie dough covers the Snickers completely.  Not sure if I'll serve these at Thanksgiving or my dessert party given their fragility but I certainly enjoyed the experiment.


1/2 cup butter
3/4 cup peanut butter
1 1/2 teaspoons vanilla extract
1/2 cup brown sugar
1/2 cup white sugar
pinch of salt
1/2 teaspoon baking powder
1 extra-large egg
1 1/2 cups all-purpose flour
extra sugar for rolling
Snickers chunks (as many as you have dough for)
  1. Beat together the butter, peanut butter, and vanilla extract. Mix in both sugars, salt, and baking powder.
  2. Beat in the egg. Gradually mix in the flour, half at a time.  Take a tablespoon of dough and wrap around a Snickers piece.  Freeze or refrigerate dough balls until firm.
  3. When ready to bake, preheat oven to 350 degrees.  Roll the balls in the sugar. Place evenly apart on a baking sheet lined with parchment paper. Bake for 12-13 minutes. Let cookies cool on the cookie sheet after taking them out for about 8 minutes before removing them with a spatula. Cool completely before storing.

What's cooking, love?  Cast Party Wednesday

Wednesday, November 14, 2012

Red Velvet Chocolate Chip Cookies

Red Velvet Chocolate Chip Cookies - made dough October 28, 2012 from Baking Serendipity

I've had good success with red velvet cookie recipes (sometimes more so than with red velvet cake recipes) and I'm doing experimental, preliminary baking before my holiday baking season kicks into full gear so this was a perfect recipe to try from Baking Serendipity.  Red Velvet Anything is always a color-appropriate dessert offering for Christmas and Valentine's Day.  Like I always do, I make the dough before I need it, scoop into dough balls and freeze them in ziploc freezer bags until I need to bake them.  That's one of the best time-saving tips I can give anyone who does a lot of baking for the holidays or at any other time.  I will actually be stocking my freezer very shortly in the coming weeks as I have dessert for a couple dozen people to prepare and that's just for Thanksgiving.  After that, the real baking begins in earnest (as I try not to freak out with all that's ahead).

Chocolate Chip Cookie ornament
But, back to this cookie.  This is one of the few cookies where I would advocate it's better to eat at room temperature or just only very slightly lukewarm.  It's fudgy and if you eat it when it's too warm, it'll be more liquid fudge than fudgy cookies.  I know some of you will wonder "what's wrong with that?"  Nothing but I prefer a dense fudgy cookie when I make cookies :).  And wonder of wonders, even my not-really-into-sweets-or-chocolate parents liked this cookie!  Normally I don't make them chocolate stuff but I had overdone the baking and giving away part and when I was seeing them a couple of Sundays ago, I only had 4 of these cookie dough balls left so I baked them for their weekly goodie bag.  And they liked them.  Wow.

1/2 cup butter
1/2 cup sugar
1/2 cup brown sugar
1 egg
1 teaspoon vanilla
1 teaspoon red food coloring
1 1/2 cups flour
1 tsp baking soda
1/4 teaspoon salt
1/3 cup cocoa powder
1/2 cup semi-sweet chocolate chips
  1. Cream butter and sugars. Add egg and vanilla, mixing well. Beat in food coloring.
  2. Stir in flour, baking soda, salt and cocoa powder until just combined. Fold in chocolate chips.
  3. Drop by rounded teaspoon onto an ungreased cookie sheet and bake in a preheated 375 degree oven for 10-12 minutes. Let cool slightly before transferring to wire racks.
  Chef In Training Inside BruCrew Life

Monday, November 12, 2012

Honey Lime Shrimp

Honey Lime Shrimp - made October 28, 2012 from The Dough Will Rise Again

Are you in the throes of planning your Thanksgiving menu?  Trying  to achieve a balance between the traditional menu of turkey and all the fixings with family or guests "tired" of the same meal?  Got any pescatarians (those who generally eat a vegetarian diet and also eat seafood but not beef, pork, poultry or other animal meats) coming to dinner or people who just don't like turkey?  If so, this could be a good option to add to the Thanksgiving table.  It has the added benefit of taking an hour or less to prepare and most of that is the marinating time.  What's even better than how fast this is to make is it tastes great.  I've never had the honey and lime combination before but it's perfect.  The citrus of the lime complements the honey really well; this isn't too tart or too sweet.  I paired it with brown rice for a relatively healthy and low cal meal but it could easily go with rice stuffing or bread stuffing so you don't really need to add an additional side to go with it.
The traditional Thanksgiving turkey
 1/2 pound large shrimp, peeled and deveined
1/4 cup olive oil
2 tablespoons honey
juice of one small lime, or half a large lime (2-3 tablespoons)
zest of one small lime, or half a large lime
2 cloves garlic, smashed
1/2 tsp kosher salt
1/4 tsp black pepper
1/4 tsp red pepper flakes
  1. In a large ziploc bag, combine all the marinade ingredients. When everything is well-combined, add the shrimp, squeeze as much air as possible out of the bag, and close it up. Place it in the fridge.
  2. Let the shrimp marinate for 30-60 minutes, flipping the bag around once or twice during that time, so that all the shrimp stay evenly covered in the marinade.
  3. When you’re ready to cook, take the shrimp out of the fridge and let them sit at room temperature for about 10 minutes. Heat a large skillet over medium-high heat; there is no need to add any oil or butter to the pan, as the marinade has enough oil in it to keep the shrimp from sticking to the pan. (If you would prefer to use the grill for these, you can thread them onto skewers and toss them on the grill at this point.)
  4. Add your shrimp to the pan in a single layer, making sure they are not too crowded; you can always cook them in more than one batch. Let them cook on one side for about a minute, until they curl up and start to turn pink. Flip them over, and cook for another 30 seconds or so, until the shrimp are opaque. Remove from the pan, and serve immediately.
    HungryLittleGirl

Sunday, November 11, 2012

Pad Thai

Pad Thai - made October 28, 2012 from Brownies for Dinner

I love Pad Thai.  When my nieces visit me, we get takeout from my favorite Thai restaurant and our decision making always considers whether we should get one order of pad thai or two.  I found this recipe on pinterest (of course) and it looked pretty easy so I gave it a go.  This didn't quite taste like the pad thai from my favorite Thai restaurant but I still liked it.  The lime juice and soy sauce make a good flavor combination with the cilantro and I love how easy it was to make.  My favorite, though, turned out to be the noodles.  I'd never cooked pad thai noodles before but I actually found brown rice pad thai noodles in the Asian aisle at Target.  Turns out I liked them much better than wheat-based noodles.  I may use these noodles from now on, even in non-pad thai recipes.  If you're gluten-free, these are a great substitute.  If you leave out the eggs, this can also be vegan-friendly.
Chinese food takeout box - closest thing I have to represent Thai take out :)
Oh, and I discovered this tip on pinterest and it actually works.  When you buy green onions and chop off the green part of the stalk, leave the white part with the bulb and the roots and immerse in water.  Within a few days, the green stalks will grow again and you'll have more green onions to use.  Perhaps real cooks already knew this but I didn't.  I've tried it and it actually works.  Now my issue is the green onions are growing too fast and I'm not cooking enough to use them - a good problem to have.

8 ounces dried, wide and flat rice noodles
2 tablespoons brown sugar
2 tablespoons fresh lime juice, plus wedges for serving
3 tablespoons soy sauce
1 squirt (about 1/8 teaspoon) Sriracha (optional)
2 teaspoons vegetable oil
3 scallions (green onions), white and green parts, separated and thinly sliced
1 garlic clove, minced
2 large eggs, light beaten (optional)
1/2 cup fresh cilantro
1/4 cup chopped roasted, salted peanuts
  1. Soak noodles according to package instructions. Drain.
  2. In a small bowl, whisk together brown sugar, lime juice, soy sauce, and Sriracha.
  3. In a large nonstick skillet, heat oil over medium-high heat.
  4. Add scallion whites and garlic and cook, stirring constantly, until fragrant (about 30 seconds). Add eggs and cook, scraping skillet with spatula until eggs are almost set (about 30 seconds). Transfer eggs to a plate.
  5. Add noodles, scallion greens, and sauce to skillet. Cook, tossing constantly, until noodles are soft (about 1 minute). Add egg mixture and toss to coat, breaking eggs up gently.
  6. Serve noodles with lime wedges, topped with cilantro and peanuts.

Saturday, November 10, 2012

Lemon Pound Cake

Lemon Pound Cake - made October 27, 2012, recipe adapted from Plain Chicken
This didn't come cleanly out of the bundt pan, hence why the top is half missing
I loved the picture of this on Plain Chicken's blog.  It looked so fluffy and you can tell just from her picture that it's going to have a great texture.  Mine didn't come out quite so fluffy as I think I took it out a little too soon.  The toothpick came out clean when I tested it but with a cake with this much butter and shortening, it doesn't hurt to bake it a few extra minutes to make sure it's properly baked.  Underbaking makes for a heavy, sometimes greasy texture.  Fortunately I didn't underbake it by much.  This is a really good lemon butter pound cake.  I increased the amount of lemon zest from Plain Chicken's original recipe just because I like the lemon flavor to really come out.  This is best served lukewarm or, if you have it the following day, warm it up 10-15 seconds in the microwave and just savor the goodness.
A lemon ornament for a lemon cake
Another gift idea for any bakers on your gift giving list: a Bundt pan, a high heat spatula, an oven mitt and a basket or gift bag of fresh lemons from your local farmers market or your own lemon tree, if you have one, along with a recipe of your favorite lemon cake.  Or one of those uppity cake mixes from Williams Sonoma or Crate & Barrel (usually a Barefoot Contessa or a Bouchon brand) along with a whisk and a round cake pan.  Bonus if you shop locally-made products and can find a bakery in your area that sells its own mixes.

I don't have a bundt cake slice ornament so this will have to do
A close up of the texture
3 cups all-purpose flour
1 Tbsp baking powder
3/4 tsp salt
3 cups sugar
1 cup unsalted butter, room temperature
1/2 cup shortening, room temperature
5 large eggs
1 cup whole milk
6 Tbsp lemon juice
Zest from 2 lemons
  1. Preheat oven to 350 degrees F
  2. Lightly spray one large Bundt pan with nonstick cooking spray.
  3. Sift flour, baking powder and salt into medium bowl.  Set aside.
  4. Using an electric mixer, cream together butter, shortening and sugar.  Add eggs one at a time, beating until well blended after each one.
  5. Add dry ingredients in three additions to butter mixture alternately with milk, beginning and ending with flour mixture. Beat at low speed just until blended after each addition. Mix in lemon juice and zest.
  6. Pour batter into prepared pan.  Bake cake until tester inserted into center comes out clean, about 55 minutes.  Cool cake in pan for 15 minutes.  Turn cake out onto a rack and cool completely.

Linked to Sweet Treats & Swanky Stuff Saturday

Thursday, November 8, 2012

Creamy Scallop Fettuccine

Creamy Scallop Fettuccine - made October 27, 2012 from Fitness Magazine

Another found-it-on-pinterest dinner recipe.  I used whole wheat spaghetti instead of fettuccine because that's what I had handy in the pantry.  I think I overcooked my scallops though in my quest to get them nicely browned as they turned out a bit chewy.  This recipe made for a nice creamy sauce although I don't really know how to describe the flavor.  It isn't tomato-based or an alfredo sauce but the milk and cheese helps make it creamy.  It was good but I used whole milk instead of low-fat so I think that helped with the creaminess but also made it a tad rich and a little filling.  Oh and I don't like peas so I substituted a can of whole kernel corn instead.

8 ounces  whole-wheat fettuccine
1 pound large dry sea scallops
1/4 teaspoon salt, divided
1 tablespoon extra-virgin olive oil
1 8-ounce bottle  clam juice
1 cup low-fat milk (I used whole milk)
3 tablespoons all-purpose flour
1/4 teaspoon ground white pepper
3 cups frozen peas, thawed (I used whole kernel corn)
3/4 cup finely shredded Romano cheese , divided
1/3 cup chopped fresh chives
1/2 teaspoon freshly grated lemon zest
1 teaspoon lemon juice

1. Bring a large pot of water to a boil. Cook fettuccine until just tender, 8 to 10 minutes or according to package instructions. Drain.
2. Meanwhile, pat scallops dry and sprinkle with 1/8 teaspoon salt. Heat oil in a large nonstick skillet over medium-high heat. Add the scallops and cook until golden brown, 2 to 3 minutes per side. Transfer to a plate.
3. Add clam juice to the pan. Whisk milk, flour, white pepper and the remaining 1/8 teaspoon salt in a medium bowl until smooth. Whisk the milk mixture into the clam juice. Bring the mixture to a simmer, stirring constantly. Continue stirring until thickened, 1 to 2 minutes. Return the scallops and any accumulated juices to the pan along with peas and return to a simmer. Stir in the fettuccine, 1/2 cup Romano cheese, chives, lemon zest and juice until combined. Serve with the remaining cheese sprinkled on top.

Cast Party Wednesday  HungryLittleGirl

Wednesday, November 7, 2012

Peanut Butter & Chocolate Oatmeal Bars

Peanut Butter & Chocolate Oatmeal Bars - made October 26, 2012, recipe adapted from What's Cooking, Love?

My boss was in town the week I made these and I knew he was a peanut butter fan so I was looking around for peanut butter recipes (no, I'm not sucking up - really).  We had a team dinner one of the nights he was here and, as is tradition, I bake for the team when we go out.  It gives me a chance to try out new recipes so I can't claim to be entirely altruistic since I'm using them as guinea pigs for my experiments (no one's complained yet, at least not to my face). 
This has nothing to do with Peanut Butter & Oatmeal Bars but I just like this ornament :)
This is one of those versatile bar cookies you can do a lot with.  I added chocolate chips and peanut butter chips to the top layer to dress it up a little.  You can also sprinkle chopped up peanut butter cups on top as well or toasted peanuts or anything else in keeping with the peanut butter chocolate flavor combination.  What I liked best about these is the top oatmeal layer baked enough to add a little crunch to the bar and paired well with the smooth creaminess of the chocolate layer.

1 cup butter, softened
1 1/2 cups packed brown sugar
2 cups old-fashioned oats
2 cups flour
1 teaspoon baking soda
1 teaspoon vanilla
8 ounces semi-sweet chocolate (can also use unsweetened chocolate)
3/4 cup creamy peanut butter
1/2 cup chocolate chips
1/2 cup peanut butter chips

1.  Preheat the oven to 350 degrees.
2.  Beat the butter and brown sugar in a large bowl with a mixer until the mixture is combined.  In a separate bowl combine the oats, flour and baking soda then add that mixture into the butter and brown sugar mixture. 
3.  Press 3 cups of the mixture into the bottom of a 13x9 inch greased pan.
4.  Microwave the chocolate for 45 seconds, and then in 10 second increments until melted.  Stir in the peanut butter.  Carefully spread the chocolate and peanut butter over the crust.  Then sprinkle with the remaining oat mixture and the chocolate and peanut butter chips.
5.  Bake for 22-25 minutes or until the edges are golden brown.  

What's cooking, love?

Tuesday, November 6, 2012

Buttermilk Pancakes

Buttermilk Pancakes - made sometime in October 2012 from Chef in Training

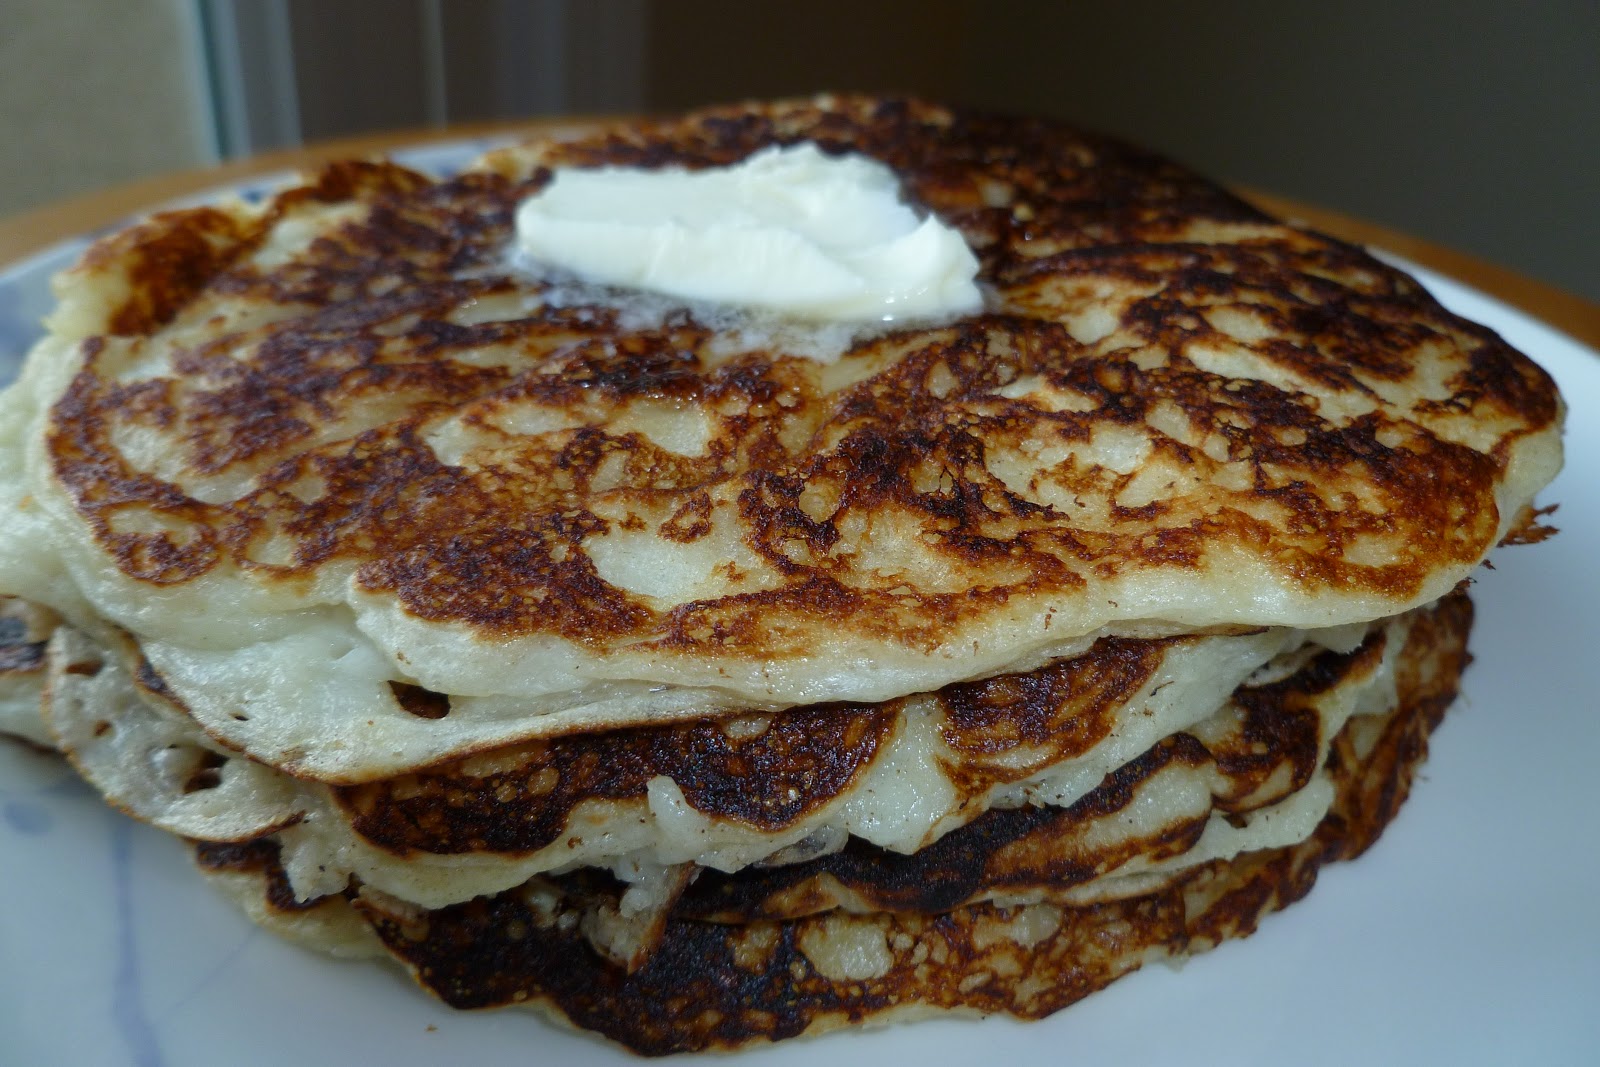
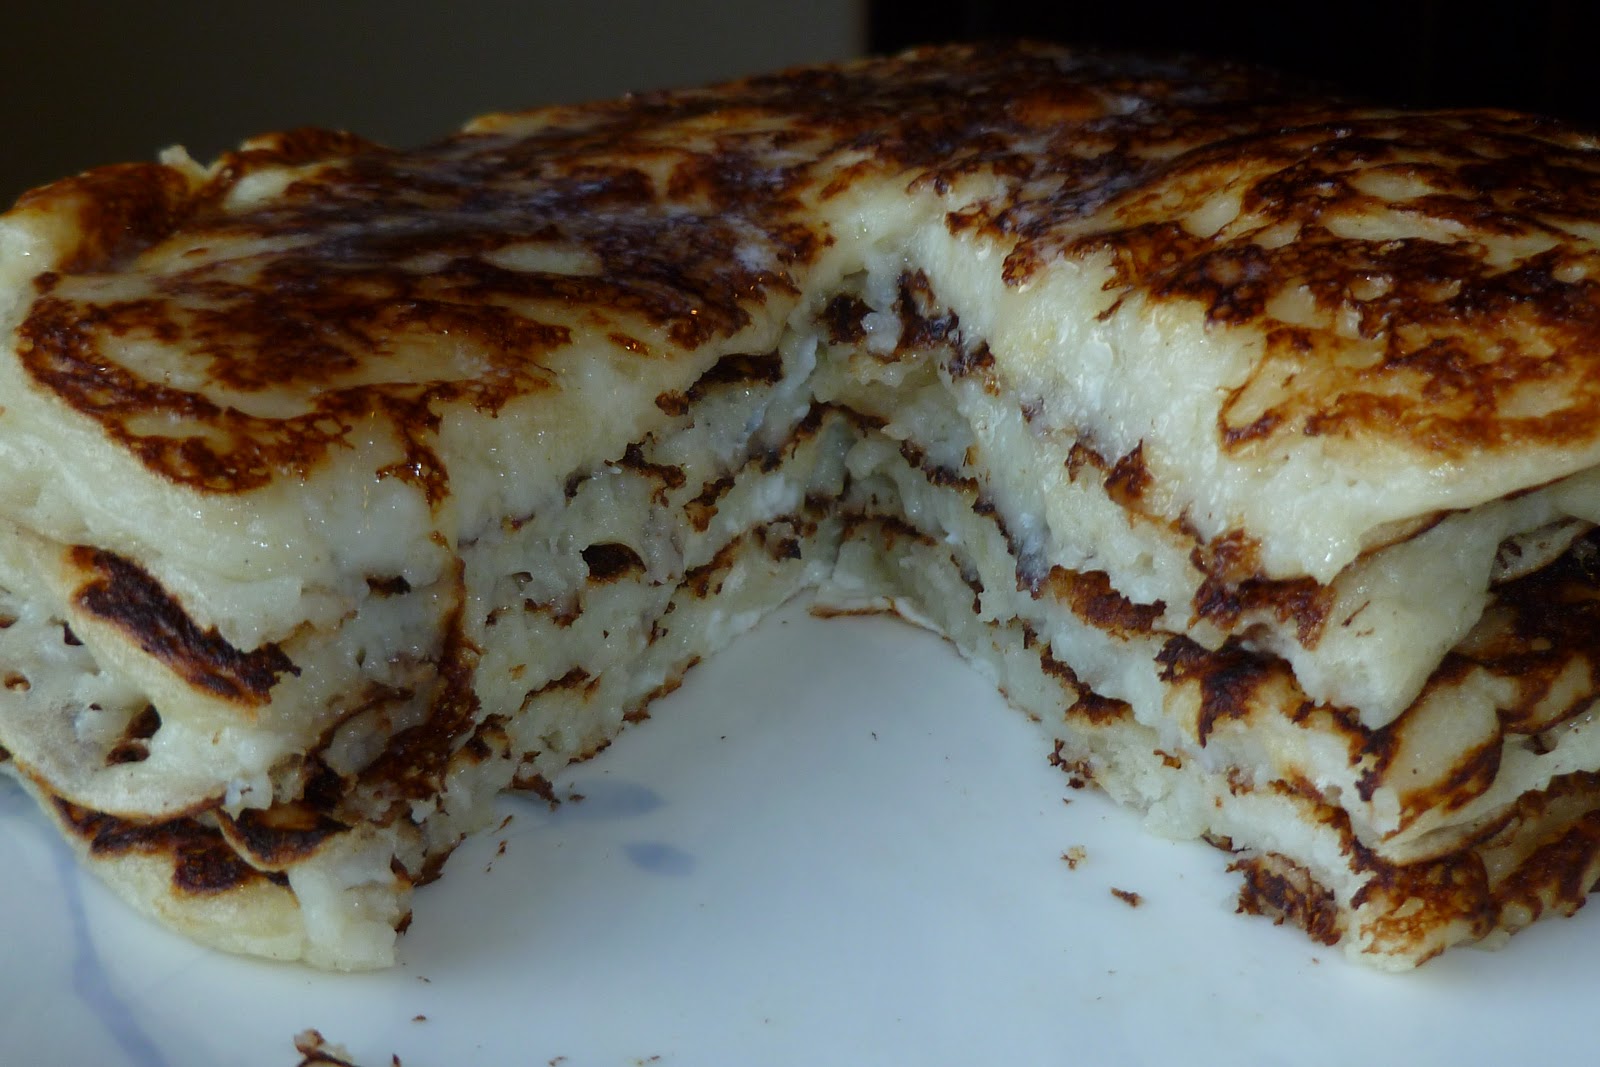
I have such a backlog of posts, this one got buried.  I made this a few weeks ago on one of those days when I came home from work, didn't feel like eating anything I had in the fridge and decided breakfast sounded good for dinner.  Make sure you click on the recipe title to see the original blog post from Chef in Training because the picture of her pancakes was what drew me in to try this recipe.  Mine didn't come out quite as picturesque, although really, it's hard to make bad pancakes.  The batter on this was quite liquidy so the pancakes came out soft.  Or I didn't cook them long enough.  They still tasted pretty good though.  I did skip the buttermilk syrup out of expediency and because I wanted to use the last of my maple syrup.  But maybe next time.

One of my favorite ornaments from last year - these pancakes have no calories
 And since I have the holidays on the brain, I will intersperse my posts with gift giving suggestions to go with the recipes because I love the holidays and I love food.  Most of the people I give gifts to typically have all the "stuff" they need so I try not to give non-consumables unless I know it's something they want, need and can really use.  Otherwise, it's foodstuffs.  I like putting together themed gifts of consumables.  For instance, for a pancake theme, buy a pancake mix, a bottle of maple syrup, and a pancake turner.  You can package up your gift in a basket or gift bag, tied with a pancake ornament like this one and/or do a bunch of creative add-ons: a gift card to IHOP or a local pancake place, locally made jams or jellies (farmers' markets are great sources for these), include a pancake cookbook or print out your favorite pancake recipes onto cute recipe cards. 

Strawberry Waffle ornament
 With some creative substitutions, you can also put together the same kind of gift with a waffle theme and up the ante by including a waffle maker if your recipient doesn't already have one.

2 cups flour
2 teaspoons baking powder
1 teaspoon baking soda
1/2 teaspoon salt
3 tablespoons sugar
2 eggs
3 cups buttermilk
4 tablespoons melted butter

Sift flour, baking powder, baking soda, salt and sugar.  Add eggs, buttermilk and melted butter.  Stir with a fork until just combined.  Cook in a greased skillet or pan until bubbles form on one side then flip over and cook all the way through.  Serve warm.

BUTTERMILK SYRUP
1/2 cup butter
3/4 cup sugar
1/2 cup buttermilk
1 teaspoon baking soda
1 teaspoon vanilla

Combine butter, sugar and buttermilk in a medium saucepan.  Cook on medium heat until dissolved then add baking soda and vanilla.  Stir until smooth and use immediately.