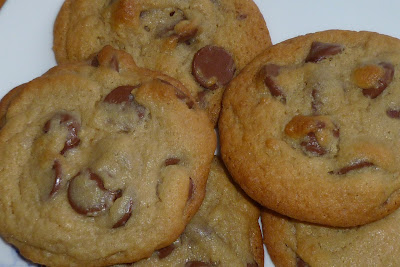
Thursday, October 25, 2012

Cilantro Lime Shrimp

Cilantro Lime Shrimp - made October 17, 2012 from Skinny Taste

This is a very, very simple recipe.  So simple, you almost don't even need a recipe for it.  For once I had all the ingredients although I didn't use them in quite the same quantities.  You know I had to go off the beaten path somehow.  But I had to use up the cilantro I'd bought earlier for another recipe and I had a pack of limes as well that I had bought for a recipe I now can't find and don't remember.  Plus the last remaining cloves from the bulb of garlic I'd bought.  Wow, that almost never happens that I have all the ingredients on hand.  I did skimp on the olive oil though so my shrimp came out looking a little dry.  But it was still good.  I would advise playing with the amounts of ingredients you use and make it to your taste.  I like the lime-cilantro combination but I don't think I used enough lime juice so I ended up with more cilantro flavor.

2 tsp olive oil
2 lb shrimp, shelled and deveined
6 cloves garlic, crushed
1/3 cup chopped fresh cilantro
1 lime
salt and pepper
  1. Heat a large frying pan on medium-high heat. Add oil to the pan, when hot add shrimp. 
  2. Season with salt and pepper. When the shrimp is cooked on one side, about 2 minutes, turn over and add garlic. 
  3. Sauté another minute or two until shrimp is cooked, careful not to overcook. Remove from heat. Squeeze lime all over shrimp and toss with cilantro. Serve hot.

Wednesday, October 24, 2012

Dulce de Leche Brownies

Dulce de Leche Brownies - made October 17, 2012 from David Lebovitz

If you click on the recipe title and go to the link on David Lebovitz's site, you'll see his picture of his brownies are much cleaner and neater than mine.  I was short on time to get these cut and packaged up before I went to bed so I took this picture when the brownies had barely cooled - the dulce de leche didn't set and made for messy knife cuts.  While not pretty, it's still dulce de leche and I have a high level of forgiveness on that measure. The only thing I did differently from the original instructions was I dropped dollops of dulce de leche over the bottom layer of brownie batter then covered it completely with the rest of the batter rather than letting some of the dulce de leche peek through the top layer.

I baked these for some friends I was meeting for dinner the next night.  I think they tasted good.  The only reason I'm not sure is I forgot to eat a taste test piece and wrapped everything up to give away.  I did sample a crumb or two from the knife cuts and those were fine.  If you want something a little neater looking, chill the brownies for a couple of hours before cutting.


8 tablespoons (115g) salted or unsalted butter, cut into pieces
6 ounces (170g) bittersweet or semisweet chocolate, finely chopped
1/4 cup (25g) unsweetened Dutch-process cocoa powder
3 large eggs
1 cup (200g) sugar
1 teaspoon vanilla extract
1 cup (140g) flour
1 cup dulce de leche
  1. Preheat the oven to 350 degrees (175 C).
  2. Line a 8-inch (20 cm) square pan with a long sheet of aluminum foil that covers the bottom and reaches up the sides. If it doesn’t reach all the way up and over all four sides, cross another sheet of foil over it, making a large cross with edges that overhang the sides. Grease the bottom and sides of the foil with a bit of butter or non-stick spray.
  3. Melt the butter in a medium saucepan. Add the chocolate pieces and stir constantly over very low heat until the chocolate is melted. Remove from heat and whisk in the cocoa powder until smooth. Add in the eggs one at a time, then stir in the sugar, vanilla, then the flour.
  4. Scrape half of the batter into the prepared pan.
  5. Drop one-third of the Dulce de Leche, evenly spaced, over the brownie batter, then drag a knife through to swirl it slightly. Spread the remaining brownie batter over, then drop spoonfuls of the remaining dulce de leche in dollops over the top of the brownie batter. Use a knife to swirl the dulce de leche slightly.
  6. Bake for 35 to 45 minutes. The brownies are done when the center feels just-slightly firm. Remove from the oven and cool completely.
Linked to Sweet Treats Thursday

Cast Party Wednesday   What's cooking, love? HungryLittleGirl

Cream Cheese Cookies

Cream Cheese Cookies - made dough October 15, 2012 from Cookies for Kids' Cancer Best Bake Sale Cookbook by Gretchen Holt-Witt
(ETA: weird, I could've sworn I posted this last night but it doesn't look like it took - trying again this morning)
When I'm pressed for time after work (should I bake? should I workout?  Both? Either choice is better than cleaning), I tend to make cookie dough.  It's usually quick to put together and I (almost) always freeze cookie dough before I bake it so I don't have to fit in baking time on the same night.  It's even faster when I make the dough into cookie logs like I did with this dough.

If you like butter cookies with the snap and texture of Shirley Corriher's recipe (which is one of my favorite butter cookies) but want something with a little more tang, this recipe for Cream Cheese Cookies is a good alternative.  It's got the same amount of butter but a slightly different mouthfeel to it.  The tang from the cream cheese is subtle but it does cut the richness of the butter flavor, at least to me.  It looks modestly plain but is one of those cookies where it's easy to eat more than one.  Don't underbake these or you won't get the snappy texture.  Bake until the edges are golden brown and the middles look dry, not wet.

2 sticks (1/2 pound) unsalted butter, at room temperature
4 ounces cream cheese, at room temperature
1 cup granulated sugar
1 large egg yolk, at room temperature
1 teaspoon vanilla extract
2 ½ cups all-purpose flour
¾ teaspoon kosher salt

1.     Preheat the oven to 325°F. 
2.     Place the butter, cream cheese, and sugar in the bowl of a mixer fitted with a paddle and beat until smooth and creamy.  Add the egg yolk and vanilla, beating well between additions.  Scrape down the sides of the bowl, add the remaining ingredients and beat until everything is well incorporated. Scrape down the sides of the bowl and beat again.
3.     Drop large teaspoons of dough onto a parchment-paper-lined cookie sheet about 2 inches apart and bake until the edges are just beginning to brown, 14 to 16 minutes.  Let cool on the sheet. Transfer to a wire rack and repeat with remaining dough (use cooled cookie sheets for a fresh batch).

Monday, October 22, 2012

Orange Creamsicle Cookies

Orange Creamsicle Cookies - made October 14, 2012 from The Girl Who Ate Everything

One of my nieces was visiting me a couple of weekends ago and, as is our tradition, we get some takeout Thai food for dinner (or sometimes it's cheesesteaks), bake and watch a movie.  Both of us had had a bit of a long day so we wanted something easy to bake.  I'm a fan of orange cookies and just happened to have 2 oranges on hand so this recipe fit the bill.  The dough can be put together in very little time, was easy to work with (not too soft or sticky, not too dry) and, per my niece, the cookie dough was "bomb" (that's a good thing).  The baked cookie version was also the ultimate - that's my 50s(?) reference to Gidget slang....even though I'm not that old.  The orange flavor was pronounced and the white chocolate chips complemented it perfectly.  I also loved the texture and the fact  that the cookie didn't spread very much.  Another great recipe I'm happy to have found on pinterest.

2 1/2 cups all purpose flour
3/4 teaspoon baking soda
1/2 teaspoon salt
1 cup (2 sticks) butter, softened
1/2 cup sugar
1/2 firmly packed brown sugar
1 large egg
1 teaspoon vanilla extract
2 tablespoons orange zest (the zest of 2 oranges)
2 cups white chocolate chips
  1. In a small bowl, combine flour, baking soda, and salt; set aside.
  2. In a large bowl, cream butter and sugars until light and creamy. Beat in egg and vanilla until smooth. Gradually add flour mixture until combined. Stir in orange zest and white chocolate chips.
  3. Scoop into dough balls and freeze or chill for several hours.  Place evenly spaced apart on cookie sheets lined with parchment paper.  Bake in preheated 375 degree oven for 8 - 10 minutes or until golden brown around edges and the middles no longer look shiny or raw. Cool for several minutes on cookie sheets before transferring to rack to cool completely. Store in airtight container. 

Sunday, October 21, 2012

Rolo "Crownies"

Rolo "Crownies" - made October 12, 2012, recipes adapted from Chocolate Chip Salted Caramel Cookie Bars from Two Peas and Their Pod and One Bowl Chocolate Chunk Brownies from Picky Palate

This is my version of a Rolo-stuffed chocolate chip cookie/fudge brownie combo: a chocolate chip cookie base with a Rolo perched atop it covered in brownie batter and baked to gooey goodness.  "Crownie" is cookie + brownie.  My other option was to call them "Brookies" or brownies + cookies but that seemed a little too cutesy.  Plus I liked how the rolo looks like a pseudo crown when you slice into it.

You can use just about any chocolate chip cookie recipe and brownie recipe for this.  It's best to use a chocolate chip cookie recipe that's more chewy than cakey and a brownie recipe that's more fudgy/chewy than cakey.  Otherwise, the sky's the limit.

I also baked a dozen versions with a generous dollop of nutella in the middle.  I didn't get to try the finished product of that version so I'm not sure how it turned out but I assume it was good.

Chocolate Chip Cookie layer
2 1/8 cups all-purpose flour
1/2 teaspoon salt
1/2 teaspoon baking soda
12 tablespoons butter, melted and cooled to room temperature
1 cup light brown sugar
1/2 cup granulated sugar
1 large egg
1 large egg yolk
2 teaspoons vanilla extract
2 cups chocolate chips

Brownies
1 stick/8 tablespoons unsalted softened butter
1 1/2 cups semi-sweet chocolate chips
1 cup all-purpose all purpose flour
1/4 teaspoon salt
1/2 cup granulated sugar
1/2 cup packed light brown sugar
2 large eggs plus 1 egg yolk
2 tablespoons vegetable oil
  1. Preheat oven to 325 degrees F. Lightly spray mini muffin tins with nonstick cooking spray.
  2. Make the chocolate chip cookie dough: in a medium bowl, whisk together flour, salt, and baking soda. Set aside.
  3. In the bowl of a stand mixer, mix the melted butter and sugars together until combined. Add the egg, egg yolk, and vanilla extract and mix until smooth. Slowly add the dry ingredients and mix on low, just until combined. Stir in the chocolate chips.  
  4. Pat a tablespoon (or so) of cookie dough into the bottom of the mini muffin tins, lining bottom completely and going halfway up the sides.  Place a Rolo caramel candy in the center of each cavity.
  5. Make the brownie batter: melt butter and chocolate chips together in the top half of a double boiler set over hot water.  Stir until smooth. Add flour, salt and sugars. Mix a few times then add egg yolks and oil. Mix until well combined.
  6. Pour enough batter to cover each Rolo/chocolate chip cookie cup until 2/3 full in the mini muffin tin and Rolo is covered completely. Bake for 20-25 minutes or until toothpick inserted near the side of the brownie (avoid the Rolo) comes out clean or with a few moist crumbs.
Chef In Training

Saturday, October 20, 2012

Pumpkin Biscoff Bar Cookies

Pumpkin Biscoff Cookies - made October 13, 2012 from Cooking to Perfection

If you notice I've been blogging more than usual lately, you'd be correct.  That's partly because I had some occasions where I needed/wanted to bring baked goods so I took advantage of having a captive audience (psst, guinea pigs) consume the treats to try out some different recipes.  And partly because we're entering the holiday season where I normally don't try out a lot of new recipes and instead stick to the tried-and-true ones so I need to do my experiments now rather than later.

This is another recipe I found on pinterest and I took some liberties with it.  Instead of making drop cookies out of it, the batter seemed a bit too soft for cookies and I was pressed for time so I made most of it into bar cookies.  I couldn't taste the biscoff flavor that much as the pumpkin tended to overwhelm it and I'm not sure baking this as bar cookies was the best choice.  The texture wasn't dry but it wasn't quite cakey and it wasn't quite cookie.  I'm not sure what to make of it.  So I did what any decent baker would do and I frosted it with cream cheese frosting.  While I'm not normally a frosting person, it did make these a bit better to me.  I kept the original directions for cookies below but if you want to make as a bar cookie, pour into a foil-lined 9 x 9 or 10 x 10 pan (depending on how thick you want the bars to be - I made mine in a 9 x 9 pan) and bake until a toothpick inserted near the center comes out with a few moist crumbs and inserted at the corner comes out clean.  Mine took about 30-35 minutes but every oven is different so I prefer the toothpick test.

P.S. I did reserve the last of the batter and baked them as drop cookies.  Texture-wise, I think these are better as drop cookies than as bar cookies.

1/2 cup unsalted butter, room temperature
1/2 cup cookie butter spread (Biscoff or Speculoos Cookie Butter)
1/2 cup granulated sugar
1/2 cup packed light brown sugar
1 egg
1 tsp vanilla extract
1 cup pumpkin
1 1/2 tsp cinnamon
1 1/2 tsp pumpkin pie spice
2 cups all purpose flour
1 tsp baking soda
1/2 tsp salt
1 1/2 cups semi-sweet chocolate chips
  1. Preheat oven to 350 degrees. Line a cookie sheet with parchment paper.
  2. Add butter, biscoff spread, and sugars to a bowl. Using a stand mixer or hand held mixer, cream ingredients for 1-2 minutes or until light and fluffy. Add egg and vanilla. Beat until ingredients are well incorporated. Add pumpkin and blend. Scrape down sides of bowl and make sure all ingredients are well incorporated.
  3. In a separate bowl, sift together dry ingredients. Add dry ingredients to pumpkin mixture and mix until just combined, careful not to over mix.
  4.  Drop large tablespoon size dough onto prepared cookie sheet. Bake for 10-11 minutes, or until cookies are set (they should not brown). Cool on cookie sheet for 5 minutes before removing to a wire rack and cooling completely.

Friday, October 19, 2012

Chocolate Cola Cake

Chocolate Cola Cake - made October 12, 2012 from mayflaum.com

There are some things you just know are going to be good based on the picture alone.  Click on the recipe title to take you to the original blog I got  this recipe from and you'll see what I mean.  That picture alone hooked me into trying the recipe.  I had made the Root Beer Bundt Cake from the Baked book before so I somewhat knew what to expect from a cola-type cake.  This one was along the same principles of using soda plus cocoa powder for the chocolate flavor.  It wasn't as dark a chocolate flavor as the Root Beer Bundt Cake but it had a nice touch of cinnamon similar to Diane's Chocolate Sheet Cake which I also like.

If you need a simple, crowd-pleaser cake to make when you don't have much time, this is a good go-to recipe.

One tip on the glaze: a lot of recipes like the one below call for sifting the powdered sugar to get out the lumps before you add to the liquid.  I find that more time consuming and still doesn't eliminate all the lumps after you combine the sugar and liquid (even sifted confectioners' sugar can clump when added to liquid). Instead, I strain the completed glaze after I mix it together for a smooth mixture.  Straining is more efficient and doesn't lead to overbeating the glaze which could happen if you were trying to beat out the lumps.  However, putting glaze through a strainer only works for this type of frosting that's fairly liquid and sets after cooling.  It wouldn't work as well for more traditional (thicker) frosting and that's where you may want to strain the powdered sugar first before using as it's not likely to clump if you're using a lesser amount of liquid ingredients that's typically called for in a thicker frosting like buttercream or cream cheese. 

2 cups flour
2 cups sugar
1/2 tsp salt
1 teaspoon baking soda
1/2 teaspoon cinnamon
1 cup butter
1/4 cup unsweetened cocoa powder
1 cup coca-cola
1/2 cup buttermilk
2 eggs
1 teaspoon vanilla extract
  1. Preheat oven to 350 degrees F.  Line a 9 x 13 pan with aluminum foil and spray lightly with nonstick cooking spray.
  2. Mix together flour, sugar, salt, baking soda and cinnamon.
  3. In a saucepan over medium high heat, add butter, cocoa powder, coca-cola, and buttermilk.  Stir constantly until it boils.
  4. Remove from heat and add to the flour mixture; whisk until combined.
  5. Add eggs and vanilla extract.
  6. Mix until just combined, pour into prepared pan and bake it for about 30 minutes or until a toothpick inserted near the center comes out with a few moist crumbs.
  7. Prepare glaze about 5-10 minutes before cake is done.  Pour warm glaze over hot cake and let cool.
Glaze
1/2 cup butter
1/4 cup unsweetened cocoa powder
1/2 cup coca cola
4 cups confectioners' sugar
1 cup chopped pecans, toasted (optional)
  1. Combine butter, cocoa powder and coca-cola in medium saucepan and stir to boiling.  Once mixture boils, remove and slowly stir in confectioners’ sugar until smooth. Then add in pecans, if using, and stir.  If your frosting has lumps, strain before using.
Also linked to Sweet Treats Thursday
What's cooking, love?

Wednesday, October 17, 2012

Spicy Cashew Chicken

Spicy Cashew Chicken - made October 11, 2012 from Momma Chelle

You're probably going to see me post a few more chicken dishes because I bought the Costco pack of chicken breasts.  Which means there's enough to last awhile and I'll be cooking with and eating chicken until I start clucking.

Stir fries are the easiest thing to do and ranks right up there with slow cooker recipes so easy that even *I* can make them without too much mishap.  The key to stir fry recipes is having your mise en place.  Cut up the chicken, let it soak in the sherry/soy sauce while you mix up the sauce ingredients.  Heat up your oil, start frying and the rest comes together very quickly.  I'm happy to say I actually followed the directions and used all the prescribed ingredients to a T.  That hardly ever happens.  This was a good, basic stir fry and perfect to make after a workday and you need something on the dinner table quickly.

4 chicken breast halves, diced
1 tablespoon sherry
2 tablespoons soy sauce
¼ cup oil
1/2-1 teaspoons red pepper flakes

3 green onions, sliced diagonally
2 cloves garlic, minced

1/2 cup cashews, unsalted
toasted sesame seeds

Sauce
4 tbsp soy sauce
1 1/2 tbsp cornstarch
4 tsp sugar
2 tsp white vinegar
  1. Combine 1 tablespoon soy sauce with the cooking sherry* in medium sized bowl. Cut chicken into bite-sized pieces, put chicken pieces in soy/sherry mixture. Let sit while you prepare the other ingredients.
  2. In a small bowl, whisk 4 tablespoons soy sauce, 1 1/2 tbsp corn starch, 4 tsp sugar, and 2 tsp vinegar. Set aside. Slice the green onions, and measure out the red pepper flakes and minced garlic. 
  3. Drain chicken in strainer to get the marinade off as much a possible. Heat oil in a wok over high heat.  Add red pepper flakes to oil,stir a couple times. Add chicken all at once, let sit for a minute or two till golden,then turn chicken. Add garlic to chicken. Cook chicken till golden on all sides and cooked through.  Add cashews. 
  4. Move wok off hot stove and immediately pour in sauce while constantly turning chicken over to cover everything in sauce. Sauce should thicken quite a bit, if you want it thicker put it back on medium heat for about 5-10 seconds, and stir. Sprinkle toasted sesame seeds and add sliced green onions. Serve over rice.
  Cast Party Wednesday  

Tuesday, October 16, 2012

Vanilla Pudding Chocolate Chip Cookies

Vanilla Pudding Chocolate Chip Cookies - made dough October 9, 2012, recipe adapted from Sunday Baker

I've made chocolate chip cookies with vanilla pudding mix in them before and the hallmark of that kind of cookie is it makes a soft texture.  It's typically not as buttery as a more traditional Toll House cookie but it doesn't spread much, is a bit more cakey and generally still pretty good.  Don't overbake these or they'll just be dry little cakes.  Bake only until the edges are golden brown and the middles are just barely past shiny and not raw-looking.  They'll sink in the middle and will be moist.  These are best eaten the day they're baked when they're at their freshest.  When they start to stale, they'll easily taste more dry.

2 1/4 cups all-purpose flour
1 teaspoon baking soda
3/4 cup butter (1 1/2 sticks), softened
3/4 cup brown sugar, packed
1/4 cup white sugar
1 (3.4 oz) package instant vanilla pudding
2 eggs, room temp
1 teaspoon vanilla extract
2 cups chocolate chips
  1. Preheat oven to 350 degrees. 
  2. Stir together flour and baking soda in separate bowl and set aside.
  3. In a large bowl, cream butter, brown and white sugar. Beat in pudding mix until well blended. Stir in the eggs and vanilla. 
  4. When smooth, slowly add in the flour mixture. This can take a little while, but make sure it's well incorporated into mix.  Do not overmix.  Stir in chocolate chips.
  5. Bake for 10-12 minutes or until edges are lightly brown and the middles are no longer shiny or raw-looking.  Do not overbake.
Chef In Training 

Monday, October 15, 2012

Candy Corn M&M Macadamia Nut Cookies

Candy Corn M&M Macadamia Nut Cookies - made dough October 7, 2012 from Something Swanky

I have a confession to make - I made these cookies last year but they failed on me so I never blogged about them.  This breaks my rule of blogging whatever experiment I try, whether they turn out or not.  My only excuse was I was baking a lot of other things at the time that I'd rather blog about, I don't like failure, and the failure was more my fault than the recipe's.  I first discovered it on Something Swanky's blog last year.  Her blog is so amazing and the recipes always look mouthwatering.  I've tried a few and they have always turned out.  So I was in denial that this one didn't.  The failure part was all mine though because instead of using Candy Corn M&Ms, I used actual candy corn.  Just so you know, when you bake actual candy corn in a cookie, it spreads, the dye color melts all over the cookie and when the now-deformed candy corn cools, it hardens into a sticky, chewy, nasty mess.  It was just wrong.  Epic fail.

First, let's acknowledge the fact that I don't like candy corn.  I like how it looks and I like the orange and yellow colors for fall.  But I don't like that overly sweet, processed sugar taste or texture. I bought some for this recipe and I wish I hadn't.  I really did go looking for the Candy Corn M&Ms but at the time I was looking, it was close to Halloween and either my local stores didn't carry it or they were sold out.  In other words, if Target didn't have any, I wasn't able to buy them.  This year, I saw the packages of Candy Corn M&Ms at Target early on so I invested in a package just for this recipe and to see if I could redeem myself.  Because I wasn't going to try that candy corn debacle again.

The main reason I'm trying this recipe again is because the cookie part (i.e. all the parts without the candy corn) was really, really good.  So I'm back it again, this time with the proper add ins.  This is one of the rare times I'll acknowledge shortening works in a cookie recipe, partly because the recipe also contains butter for flavor and partly because the shortening helps prevent spread and gives the cooled cookie a crunch that's normally missing from an all-butter cookie.  This was pretty good with the proper M&M Candy Corn add-ins and it also pairs well with the white chocolate chips and macadamia nuts.

1/4 cup shortening
1/4 cup butter
3/4 cup granulated sugar
1 egg
1 teaspoon of vanilla
1 1/4 cup all-purpose flour
1/2 teaspoon baking soda
1/2 teaspoon salt
1 cup macadamia nuts, roughly chopped
3/4 cup Candy Corn M&Ms
1/4 cup white chocolate chips
  1. Using a paddle attachment in a stand mixer, cream together the shortening, butter, and sugar. Add egg and vanilla.
  2. Add the flour, baking soda, and salt. Mix until smooth dough forms. Do not overbeat.
  3. Using a wooden spoon or spatula, mix in the macadamia nuts, M&Ms, and white chocolate chips.
  4. Scoop by the tablespoon, and bake at 375º for 9 minutes. Let cool on cookie sheet. (Note: I always form the cookie dough into dough balls and chill or freeze them a minimum of several hours or overnight before baking.)