Thursday, March 15, 2012

Oreo-Topped Chocolate Fudge Cake

Marcel's First Birthday Chocolate High and Fluffy on Top Cake - made March 12, 2012 from Death by Chocolate Cakes by Marcel Desaulnier (book #201)


I was meeting some friends from my old company for lunch and needed something to bring them that was easy to make after I got home from work.  Normally I don't make frosted cakes during the week because of the cooling and frosting time needed and I was late getting home from work and the gym that night.  But putting the cake batter together was easy enough as was the frosting.  And there's nothing simpler to make than a sheet cake.  I did improvise though and added the chopped Oreos as garnish for the frosting.  Otherwise the cake would've looked a bit plain.  Plus it depleted the package of Oreos I had on hand which meant less I would be eating and negating of all my exercise, haha.

Overall, I thought the chocolate cake was pretty good.  It had a good texture, not as dense as a pound cake but not as light as a chiffon cake.  I took it out of the oven almost the literal second between the toothpick test showing raw batter and then coming out almost clean.  I can't abide dry, overbaked cakes.  Use a dark cocoa to get good chocolate flavor.  For the unsweetened baking chocolate I used Scharffenberger.  If you go with the Oreo garnish, add the Oreos at the last minute before serving so they'll stay crisp.  Otherwise they'll soften.

5 ounces unsalted butter, cut into ½-ounce pieces, softened
2 ½ cups all-purpose flour
½ cup unsweetened cocoa powder
1 teaspoon baking powder
1 teaspoon baking soda
1 teaspoon salt
1 ½ cups granulated sugar
3 large eggs
3 ounces unsweetened baking chocolate, coarsely chopped and melted
1 cup whole milk
½ cup hot water
1 teaspoon pure vanilla extract

Very Fluffy Vanilla Frosting
4 cups (1 pound) confectioners’ sugar
½ pound unsalted butter, cut into ½-ounce pieces
3 tablespoons whole milk
1 tablespoon pure vanilla extract

1.     Preheat the oven to 350˚F.  Line a 9 x 13-inch baking pan with foil and lightly coat with nonstick cooking spray.  Set aside.
2.     Sift together flour, cocoa powder, baking powder, baking soda, and salt.
3.     Place the granulated sugar and butter in the bowl of an electric mixer fitted with a paddle.  Mix on low speed for 1 minute; then beat on medium for 3 minutes until soft.  Scrape down sides of the bowl and paddle and then beat on medium for an additional 2 minutes until very soft.  Scrape down sides of the bowl.  Add 3 eggs, one at a time, beating on medium for 10 seconds after each addition, and scraping down the sides of the bowl once all the eggs have been incorporated.
4.     Add the melted chocolate and mix on medium for 15 seconds.  On low speed, gradually add half of the sifted dry ingredients; mix until incorporated, about 30 seconds.  Gradually add ½ cup of the milk and mix on low to incorporate, about 15 seconds.  With mixer on low, gradually add remaining sifted dry ingredients and mix for 30 seconds.  Gradually add the remaining ½ cup of milk and mix on low for 15 seconds.
5.     Slowly add ½ cup hot water and mix on low to combine, about 30 seconds, scraping sides of bowl.  Add 1 teaspoon vanilla extract and mix on medium for 15 seconds.  Remove the bowl from the mixer and use a rubber spatula to finish mixing the ingredients until thoroughly combined.  Transfer the cake batter to the prepared pan, using a rubber spatula to spread it evenly.
6.     Bake on the center rack in the preheated oven until a toothpick inserted in the center of each cake comes out clean, about 40 minutes.  Remove the cake from the oven and cool in the pan for 15 minutes at room temperature.  Invert the cake onto a baking sheet.  Refrigerate the cake until needed.
7.     Frosting: Sift the confectioners’ sugar onto a large piece of wax paper.  Set aside.  Place butter in the bowl of an electric mixer fitted with a paddle.  Mix on low speed for 1 minute then increase speed to medium-high and beat for 2 minutes, until soft.  Beat on medium for 2 more minutes until softer.  Add the sifted confectioners’ sugar and mix on the lowest speed to combine, about 1 minute.  Add milk and vanilla extract and mix on low speed for 15 seconds until mixture appears moist.  Beat on medium-high for 2 minutes.  Continue beating until desired state of “fluffiness” is reached.
8.     Frost cake and sprinkle with chopped Oreos if desired.

Wednesday, March 14, 2012

Orange Cake a la Dorie Greenspan

Orange Cake - made March 10, 2012, recipe adapted from Paris Sweets by Dorie Greenspan (book #200)


(The 200-book mark - woo hoo!  The end is in sight.  I keep saying that but it's really true.  Maybe less than a dozen more cookbooks to go???)

My mom liked the Orange Bundt Cake I made a couple of weeks ago from the Susan G. Purdy recipe and wanted me to make it again.  But I have a hard time making the same recipe twice when I wanted to try other new recipes so I pseudo-compromised and went with this recipe from another Dorie Greenspan book.  This one came out more like a pound cake and she pronounced it "not as fluffy" as the one she liked.  Sigh.  So I may have to make her the other one again after all.  But this was still a good cake if you're looking for an orange pound cake for upcoming springtime picnics.

2 ¼ cups (250 grams) cake flour, sifted
¾ teaspoon baking powder
¼ teaspoon salt
1 2/3 cups sugar
Grated zest from 2 oranges
5 large eggs, room temperature
1/3 cup sour cream
1/3 cup heavy cream (or use 2/3 cup crème fraiche and omit sour cream & heavy cream)
2 tablespoons Grand Marnier (or 1 tablespoon vanilla extract)
7 ½ tablespoons unsalted butter, melted and cooled

1.     Center a rack in the oven and preheat the oven to 350⁰F. Butter and flour a Bundt pan.
2.     Sift the flour, baking powder and salt together.
3.     Toss the sugar and orange zest together in a large bowl and rub together with your fingers until the sugar is moist and aromatic. Whisk in the eggs, beating until the mixture is pale and foamy, then whisk in the sour cream, heavy cream and vanilla extract.  Gently stir in the flour mixture by hand with a large spatula.  Fold in the cooled, melted butter until batter is smooth.
4.     Immediately spoon the batter into the pan and place in preheated oven.  Bake for 40-45 minutes or until a toothpick inserted near the center comes out clean or with a crumb or two (but not moist batter or clumps of crumbs).  Remove the cake from the oven and allow it to cool for 10 minutes in the pan.  Then invert onto a plate and let cool completely.
5.     Glaze with 1 cup powdered sugar, orange zest from 1 orange and enough orange juice to make a spreadable consistency.

Monday, March 12, 2012

Chocolate Pancakes

Venezuelan Chocolate Pancakes - made March 9, 2012, recipe adapted from Adventures with Chocolate by Paul A. Young (book #199)

I got this book as a Christmas gift from a friend.......in case you wondered why I'm adding a recently released cookbook to my baking challenge when I'm not supposed to be buying new cookbooks anymore.  She was smart enough to pick out a new book to increase the chances that I don't have it already.  Ha, that's thoughtful gift giving.  Notice how I'm rounding the corner to the 200 mark?  That's right, I'm almost done with this challenge.  I have a handful of cookbooks left to bake from and the end is in sight.  Until my next challenge, which I'm already thinking about.  But first things first.

The premise of this book is exactly what the title says: "adventures".  You won't find common ordinary ingredients or even typical recipes in this book.  One of the recipes I don't have in abundance, surprisingly, is for chocolate pancakes.  Not many even had chocolate waffles, which I discovered when I went searching.  So I had to try this chocolate pancake recipe.  The adventurous part of this recipe isn't the chocolate but the buckwheat flour.  I've never cooked or baked with buckwheat before so I wasn't sure what to expect.  It sounded healthier and I thought it would be a more nutrient-rich version of baking with whole wheat flour.  That may be the case but sad to say, buckwheat must be an acquired taste.  And after testing it out with this recipe, which called for buckwheat flour or spelt, I have no intention of acquiring that taste.  Erk.  The texture was fluffy but I couldn't get past the taste of the buckwheat.  As in, I literally couldn't eat more than 2 bites.  Yikes.  So I scrapped the rest of the batter.  I hate to waste food but I also don't believe in consuming calories that aren't worth it.

Yet, I was reluctant to abandon the recipe if my only objection was the buckwheat flavor.  What if I made it with whole wheat flour instead?  So that's what I did and the results were much more to my liking.  It's not an extremely chocolaty pancake but it was light and fluffy.  Don't overcook these as they do burn easily.  If you want to go into chocolate overload, melt some bittersweet chocolate and whisk into warm maple syrup with a pinch of sea salt then use as syrup.  That was part of the original recipe in the book but I opted to use plain syrup for these as I had them in the morning and even I couldn't face that much chocolate so early.

1 ounce unsweetened chocolate, melted, slightly warm
1 1/3 cups whole wheat flour
1 large egg
1/3 cup plus 1 tablespoon light brown sugar
1 cup plus 3 tablespoons milk
2 teaspoons baking soda
1 teaspoon vanilla extract

1.    Whisk dry ingredients together.
2.    Combine egg, milk and vanilla.  Pour over dry ingredients and whisk lightly.  Add melted chocolate and whisk smooth.  Let the batter rest for 30 minutes.
3.    Heat griddle and grease with butter.  Pour ¼ cup portions of the batter into the hot griddle and cook over medium heat until bubbles form on the surface.  Turn over carefully and cook for another 1-2  minutes.  Serve warm.

Saturday, March 10, 2012

Homemade Samoas

My version of Samoas - made March 9, 2012


It's that time of year again - you know, when little girls look at you as you exit Target or the grocery store, greet you with a sweet smile that's a mix of earnestness and shrewd sizing up of you as a potential customer while their parents benignly look on, appearing affable but with a glint of steel as "the look" is plainly in their eyes: "you're going to buy cookies from my kid, aren't you?"  That's right, it's Girl Scout cookie time.  Not only that, but Monday, March 12 marks the 100th anniversary of the Girl Scouts Associations - Happy Anniversary, GSA!

Except.......

I have supported (and eaten) my share of Girl Scout cookies through the years, notably when my nieces were that cookie-pushing, er, cookie-selling, age plus for my friends' kids who are the GS age and they've done the same chant "would you like to buy some Girl Scout cookies?"  Are you really supposed to say "no"?  Well, I will confess I have said "no".  I know, I know, I'm made of stone.  But honestly, I'm one of the few people in the known universe who doesn't really like the taste of Girl Scout cookies. I mean, hello, I bake my own cookies.  And yeah, I include Thin Mints in the me-no-likey category.  I realize that invites a flurry of "are you crazy? what's wrong with you?" type of comments but I stand fast.  I like mint.  I like (milk) chocolate.  I don't like them together.  I don't eat chocolate immediately after brushing my teeth either for the same no-mint-and-chocolate-combo reason.  It's just wrong.  So I assuage my guilt-ridden conscience by donating directly to the local Girl Scout troops; rather than them making 25 cents from every box I buy, I donate what I would've paid for the box(es) of cookies to the local troops so they can have their pizza party or ice cream party at the end of selling season.  Or if I really can't withstand "the look" from adorable Girl Scouts and (maybe not as adorable but certainly more desperate) parents alike, I buy a few boxes and ship them to our troops overseas.  Presumably, Thin Mints, Tagalongs and Do-Si-Do's give them a taste of home so it's a win-win all around.

Now, back in the day when I used to eat Girl Scout cookies, Samoas were conceptually one of the two cookies I would actually eat (Trefoils being the other one).  Shortbread, chocolate, caramel and coconut - a no-fail combination in my book.  I have nothing against Samoas and applaud GSA for the concept.  A concept which I had to make as a homemade version of my own. I made it as a bar cookie version as no way was I going to take the time and trouble to make them as wreath-like cutouts.  Bar cookies were easier: bake the bottom layer of shortbread first, cover with a layer of honest-to-goodness fudge, a layer of caramel and top with sprinklings of toasted coconut. 

I cobbled this recipe together from a few different sources.  Bake the shortbread layer first since that's the bottom layer.  Let it cool slightly, just enough not to melt the fudge but you don't want it completely cool or the fudge layer won't adhere to it. Once you make the fudge, spread it evenly over the cooled shortbread.  Let it cool to room temperature then spread the caramel layer over it.  Before the caramel sets, sprinkle with toasted coconut.  Let cool completely then cut into small squares.  Then go exercise because this is a lot of calories.  But worth every bite.


Shortbread Layer
I used the shortbread recipe from the Twix Brownie Bars - click on the link to take you there

Fudge Layer

1 pound semisweet chocolate, chopped fine
2 ounces unsweetened chocolate, chopped fine
½ teaspoon baking soda
1/8 teaspoon salt
1 (14-ounce) can sweetened condensed milk
1 tablespoon vanilla extract

1.     Line an 8 x 8-inch square pan with foil and spray lightly with nonstick cooking spray.
2.     Toss chocolates, baking soda, and salt in medium heatproof bowl until baking soda is evenly distributed.  Stir in sweetened condensed milk and vanilla.  Set bowl over 4-quart saucepan containing 2 cups simmering water.  Stir with rubber spatula until chocolate is almost fully melted and few small pieces remain, 2 to 4 minutes.
3.     Remove from heat and continue to stir until chocolate is fully melted and mixture is smooth, about 2 minutes.  Transfer fudge to prepared pan and spread in even layer with spatula.  Let cool to room temperature.

Caramel Layer
11 ounce bag Kraft caramel bits (I buy mine from Target, in the baking aisle)
2 tablespoons heavy cream

Melt caramels and heavy cream in a heavy saucepan set over low heat, stirring, until smooth and blended together.  Let cool slightly, stirring so it doesn't "set" in the pan.  Pour in an even layer over the cooled fudge, smoothing the top.  Garnish with cooled, toasted coconut on top before caramel layer sets.


Button

Thursday, March 8, 2012

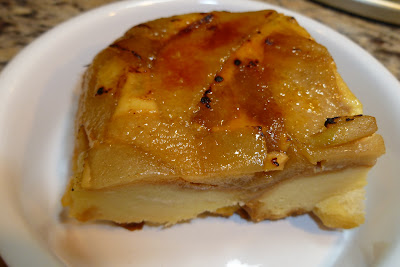
Caramelized Apple Bread Pudding

Apple Bread Pudding - made March 3, 2012, recipe adapted from Baking From My Home to Yours by Dorie Greenspan


I love Dorie Greenspan's cookbooks.  They're not only easy to follow but almost every recipe I've tried from them has turned out pretty well.  If you're a novice baker, this is a good book to have (click on the amazon link or book title above to read more about it).  I've never made a bread pudding before but for my first attempt, I knew I could play it safe and try a recipe from Dorie's cookbook and increase my chances of success.  After my half-failure with the Black & White Creme Brulee, I needed to stack the baking odds in my favor.

I haven't brushed up on my food history but I'm going to assume bread pudding was invented to make stale bread edible again and repurpose it back into good food, just like banana bread came into being because I'm sure some enterprising person was sick of all the overripe bananas they couldn't eat fast enough and had to do something with blackened bananas.  I never had bread pudding until a few years ago because it just didn't look that appetizing and I'm not normally a custard person anyway (except for creme brulee).  Fortunately, the first bread pudding I ever tried was very well made and I ended up loving it.  It's like French toast on steroids but better.

I've seen various recipes say the more stale the bread, the better, since it'll be soaked in a cream and egg mixture before being baked.  So I bought a loaf of challah from Trader Joe's last week and prepared to let it sit on my counter until it got stale (and hopefully before it got moldy).  That was the plan, anyway.  But I forgot the part where I love challah.  We made it in culinary school and it was the best.bread.ever.  So you can imagine my leaving that challah alone long enough for it to get stale wasn't really working out.  Fortunately, Dorie's recipe had a tip about how to "stale" the bread in the oven so after I'd eaten a quarter of the loaf already, I figured I'd better take the shortcut version or my bread pudding was going to miss its headline ingredient.  In my defense, that quarter of a loaf was consumed over the course of a week, usually after I had come from a run at the gym, so I had some resistance.  Still, I didn't like the challah's chances of survival to genuine staleness.

Since I had less bread than the recipe called for, I decided to make only a half recipe of the custard.  Ever try getting half an egg yolk and half an egg?  Yeah, it ain't easy.  I eyeballed the halfsies and mixed up the rest of the ingredients.  To shortcut time, I made the bread pudding mixture first to give it enough time to soak then I caramelized the apples.  I only had Granny Smiths on hand and those soften really quickly when cooked so it wasn't the best type of apple to use for this.  Next time I think Fujis would be better.

The trick to making anything custard-y with such a high proportion of eggs and cream is it must be cooked or baked slowly at a lower temp.  That will ensure the mixture will thicken and set with a more creamy consistency.  Too fast or too hot, and your mixture will break, the eggs will curdle and you'll end up with a grainy product.  I've made failed at enough custards to speak from personal experience.  Dorie's method alleviates the risk of graininess by having you bake the bread pudding in a water bath.  And it worked.  I layered the caramelized apples on the bottom then transferred the soaked bread mixture over it and baked in the water bath.  Overall, it was pretty good.  I do think, however, I should've had more custard mixture to soak the bread in.  Parts of it were like bread pudding and parts of it, mostly around the edges, were more like French toast.  Still tasted good and the apples were a nice touch.  However, they didn't caramelize like I had envisioned so I ended up bruleeing the top for a little crunch and color.  Next time I would make the full custard recipe and stop snitching bits of the challah before I made the bread pudding so I could have enough bread for a full recipe.


For the Caramelized Apples
3 medium apples, peeled and cored (Fujis or Galas work well)
3 tablespoons unsalted butter
3 tablespoons sugar

12 ounces egg bread, such as challah or brioche, preferably stale, sliced ½ inch thick

3 cups whole milk
1 cup heavy cream
3 large eggs
5 large egg yolks
¾ cup sugar
1 teaspoon pure vanilla extract

1.    Butter a 9 x 13 inch baking pan (preferably Pyrex or other glass or ceramic pan), dust the inside with sugar and tap out the excess.  Line a larger roasting pan with a double thickness of paper towels.
2.    To caramelize the apples: Cut each apple in half from top to bottom, cut each half lengthwise into 6 to 8 slices and then cut each slice in half crosswise.
3.    Put a large skillet over medium-high heat, add the butter and, when it melts, sprinkle over the sugar.  Cook the butter and sugar for a minute or so to caramelize but not burn.  Toss in the apple slices and cook, carefully turning the apples once or twice, until they are tender but not soft, 3 to 5 minutes.  Transfer the apples and buttery liquid to a plate.
4.    If your bread is not stale, spread it out on a baking sheet and bake at 350⁰F for 10 minutes to “stale” it. Cut bread into chunks and set aside.
5.    Bring the milk and cream just to a boil. 
6.    Whisk together the eggs, egg yolks and ¾ cup sugar. Still whisking, slowly drizzle in a quarter of the hot milk mixture to temper the egg mixture.  Whisking all the while, slowly pour in the rest of the milk mixture.  Add the vanilla and whisk to blend.  Pour the custard over the bread and press the bread gently with the back of a spoon to help it absorb the liquid.  Let bread soak in the mixture for about 30 minutes, pressing occasionally with the back of a spoon.
7.    Center a rack in the oven and preheat the oven to 325⁰F. 
8.    Put the baking pan into a slightly larger roasting pan and fill the roasting pan with hot water.  Place the caramelized apples in an even layer on the bottom and gently place the soaked bread over the apples, covering them completely.  Pour any remaining liquid over the bread. 
9.    Bake the bread pudding for about 1 hour and 25 minutes or until a thin knife inserted deep in the center comes out clean.  Transfer the baking pan to a rack and cool for at least 20 minutes before serving.


Featured on Cast Party Wednesday

Tuesday, March 6, 2012

Black and White Creme Brulee

Black and White Creme Brulee - made February 27, 2012, chocolate mousse from Essence of Chocolate by John Scharffenberger and Robert Steinberg and creme brulee from Elegantly Easy Creme Brulee by Debbie Puente (book #198)
Still some "wet sugar" as it wasn't completely cool yet when I took the pic
We have a restaurant chain in my area called Piatti's.  I hardly ever go there but once, long ago, I remember having this dessert that was a two-layer creme brulee and chocolate mousse.  I've only had it once and it was years ago but you can imagine how much I liked that dessert since I still remember it to this day.  Sadly, the last time I went to Piatti's (also years ago), they no longer offered it.  I distinctly remember the chocolate mousse layer was on the bottom and the creme brulee layer was on top because part of the reason I enjoyed the dessert so much was the contrast of textures and temperatures: the crunchy yet warm caramelized top of the creme brulee juxtaposed against the chilly creaminess of the mousse and the vanilla custard.  When I once described this dessert to someone, they thought I must've remembered the order of the layers wrong, that the creme brulee custard was on the bottom and the chocolate mousse was on top.  Because how could you get the chilled mousse on the bottom when you had to bake the creme brulee custard on top?  The dessert was served in individual-sized ramekins and they were clearly made together.  But I absolutely knew the creme brulee was the top layer because it wasn't the mousse that was caramelized on top but the creme brulee.

The answer was obvious when I saw the recipe from Elegantly Easy Creme Brulee.  Traditional creme brulee is baked in ramekins, chilled then sugar is caramelized on top via broiler or handheld torch.  But this recipe calls for cooking the custard over a stovetop then chilling it once it was cooked, spreading it in whatever dessert dish you wanted it served in, then caramelizing the top.  Ha, problem solved.  I took the chocolate mousse recipe from Essence of Chocolate for what is essentially the same dessert I had in mind but I used the Elegantly Easy Creme Brulee recipe for the creme brulee so I could switch the order of the layers.

This endeavor started out easily enough.  The mousse was very easy to make.  Use the good chocolate (I used Valrhona).  I only let the chocolate-butter mixture cool for about 5 minutes before adding it to the yolks and it was fine.  Just keep whisking as you combine the two mixtures so they'll blend together smoothly.  Once I had the mousse, I spread it in 4 traditional creme brulee ramekins which are shallow and wide so you maximize the surface area of the bruleed top.  I covered each ramekin in plastic wrap and put them in the refrigerator to chill while I made the vanilla custard.  You want to give the mousse a head start in chilling since it'll be your base.

At first the vanilla custard was easy.  It's similar to making pastry cream or any other custard.  Heat the cream, let the vanilla bean (if using) steep in the hot cream to infuse the flavor into the cream.  Whisk the yolks, temper with the hot cream, put the cream mixture back to heat and cook gently until the mixture thickens.  Couldn't be simpler!  Except, I was trying to be true to the directions that called for cooking the mixture over the stove top for THIRTY minutes.  Boy, that was a mistake. And I wondered if it was a typo in the book. After less than 5 minutes, the mixture had thickened properly and I thought it should come off.  But I was still trying to follow the directions so I kept it on the heat.  Ugh.  Sure enough, the mixture "broke" and instead of a beautifully creamy mixture, I ended up with something that looked like really bad, grainy scrambled eggs.  I couldn't even salvage it by adding more cream to coax it back to life.  I had to scrap the whole thing and start over.  This time, I ignored the directions and went with my instincts.  The custard mixture thickened properly after less than 5 minutes so I took it off the heat, strained into a bowl, covered the custard directly with plastic wrap (to prevent a skin) and put it in the fridge to cool it from the initial heat.  Once the custard was no longer hot but wasn't chilled (I didn't time it exactly but I did a 35-minute workout while it was in the fridge so it was at least that long), I spread it over the chocolate mousse in the ramekins, covered them again, and put them to chill overnight.

Hmm, I would like to say the 2nd attempt worked.  But while it was better than the first attempt, it still wasn't quite right.  I think I undercooked it but then the texture was still slightly grainy which means it had gotten too hot or overcooked and was on its way to becoming scrambled eggs again if I hadn't taken it off the heat.  And when I bruleed the top after chilling for 24 hours, the custard nearly melted.  It definitely wasn't the smooth, creamy-firm texture of a good creme brulee.  More like a soft pudding.  I've made creme brulee successfully using the oven/water bath method but I don't think the stovetop method was a success.  I wonder if I just cooked it too fast or over too high a heat and 30 minutes MIGHT have been okay if my stove had been on the lowest possible setting.  But I didn't have it in me to make a third attempt, plus I'd run out of eggs and heavy cream by then so I gave up.  The only consolation was the mousse was good.  So if you want to try this recipe, you might find another creme brulee recipe or else bake the traditional way and pour over the mousse layer before it sets.  It might look a little jacked but it'll probably have better texture!


Chocolate Mousse from Essence of Chocolate
2 ½ ounces 70% bittersweet chocolate, coarsely chopped
4 tablespoons (2 ounces) unsalted butter, cut into chunks
2 large eggs, separated, at room temperature
2 tablespoons sugar
1/8 teaspoon cream of tartar

1. For the mousse: melt the chocolate and butter in the top of a double boiler set over gently simmering water, stirring occasionally until smooth. Remove from the heat and let sit in a warm spot until tepid or barely warm. (If the chocolate is too hot when added to the yolks, the yolks could curdle; if chocolate is too cool, flakes of chocolate may form in the yolks.)
2. The mousse is best made with a whisk or with a hand mixer; a stand mixer may not be able to whisk such a small quantity. In a medium bowl, whisk the egg yolks with 1 tablespoon of the sugar until a slowly dissolving ribbon forms when the whisk is lifted. Fold in the tepid chocolate. In a medium bowl, using a clean dry whisk or beaters, beat the egg whites with the cream of tartar until soft peaks form. Add the remaining 1 tablespoon sugar and continue beating until barely stiff peaks form. Gently fold half of the whites into the chocolate mixture, then fold in the remaining whites.
3. Spoon the chocolate mousse into lightly buttered ramekins, smoothing the top with a small offset spatula. Wipe the rim of the dish with a damp towel to remove any chocolate. Cover with plastic wrap and refrigerate for at least 6 hours, or preferably, overnight.
4. Make the creme brulee following the directions below.
5. When ready to serve, spoon the chilled custard over the chilled layer of chocolate mousse in the individual ramekins and smooth the tops into an even layer. Sprinkle about 2 teaspoons of sugar over each custard and caramelize.6. To caramelize the brulee: sprinkle the sugar in an even layer over the top of the mousse. If using a torch, work from one end of the dish to the other. Adjust the level of the torch as necessary to regulate the heat, moving the flame over the surface to caramelize the sugar. If using a broiler, place a rack on the highest level and preheat the broiler. Broil until the sugar is melted and caramelized, about 2 minutes. Watch carefully, and move or turn the dish as necessary for even caramelization.  Let caramelized sugar set for 1 minute then serve immediately.
 
Classic Crème Brulee, Stirred Method
Source: Elegantly Easy Crème Brulee by Debbie Puente

8 egg yolks
1/3 cup granulated sugar
2 cups heavy cream
1 teaspoon pure vanilla extract or 1 whole vanilla bean, split in half lengthwise
¼ cup granulated sugar (for the caramelized tops)

1. In a large bowl, whisk together egg yolks and sugar until the sugar has dissolved and the mixture is thick and pale yellow. Set aside. Using a double boiler, bring the cream to a gentle simmer; do not boil. If using a vanilla bean, split in half, lengthwise, scrape the seeds from the inside with the dull edge of a knife and place seeds in cream.  Turn off stove, place vanilla bean skin in the hot cream and let steep for a minimum of 15 minutes.  Remove the cream from heat, and slowly pour into egg mixture. (If using vanilla extract, add here.)
2. Pour mixture into top of double boiler; the water should be simmering, not boiling. Cook, stirring frequently, until the custard is thick enough to coat the back of a wooden spoon, about 30 minutes (try cooking over very, very low heat). Remove from heat and strain into a large, clean bowl. The custard will thicken as it cools. Chill completely, at least 6 hours.
Serves 6 to 8

Sunday, March 4, 2012

Orange Bundt Cake

Orange Bundt Cake - made February 26, 2012 from Let Them Eat Cake by Susan G. Purdy (book #197)


If you're ever looked at all the recipes I've posted, you'll realize I'm not much for nonfat/lowfat baking (really?? ha).  I believe it's better to have a small portion of the good stuff, full-fat, massive calories and all, than a lot more of the semi-it's-supposedly-better-for-you low-fat, low-calorie stuff.  I would rather exercise portion control and literally exercise than dismay my taste buds with something that's not low enough in calories or fat to make up for the taste or texture deficiencies of a frankenfood.  There are some low-calorie foods I genuinely like and prefer to the full-calorie-bomb version but not often.

In baking, there are all sorts of ways to "cheat" and skip the fatty, high-calorie ingredients.  Applesauce has been used as a substitute for butter, for example. (Not usually by me, mind you, but other people do so.)  Egg whites are often used but  the poor yolks are deemed high in fat so they're left out.  There's also low-fat buttermilk, low-fat cream cheese, and low-fat sour cream to replace their fully-fat brethren.  I generally am leery of those kinds of substitutions.  Like I said, 9 times out of 10, you might save 1/3 of the calories of the real thing but oftentimes, the taste and/or texture is also 67% or less (many times less) so it's not worth it to me.  I'd rather eat 2/3 of a serving of the real thing than all of a 1/3-less-calories portion of something else.

So it's probably baffling that I even own this baking book since it's all about recipes that "taste like the real thing" but with a fraction less fat and calories.  Huh.  I must've gotten it either a) on sale or b) when I was "dieting".  But, true to my word, I am making a recipe from it as part of my baking challenge.  I did not cheat and substitute back in any of the "good" ingredients.  I faithfully used the applesauce and nonfat sour cream.  The canola oil isn't particularly low calorie but it is canola and there's only 1/3 cup of it.  Surprisingly, I thought this cake came out really well.  It's lighter than a pound cake and only slightly more dense than a chiffon cake.  Plus the orange flavor was really good.  The only mistake I made is I had to ice it while it was just a trifle too warm as I was taking it to my parents' and I couldn't wait any longer to pour the icing on because I had to leave for church and take the cake with me.  So the icing kind of melted/puddled around the cake rather than staying on top of it.  Other than that, it exceeded my expectations as a "low-cal" cake.  I still advocate portion control though since even low-cal things add up if you have too much of them :).


2 ¼ cups sifted cake flour
1 1/8 teaspoons baking powder
¼ teaspoon baking soda
¾ teaspoon salt
3 large egg whites, at room temperature
1 ¼ cups granulated sugar, divided
1/3 cup canola oil
1 large egg
1/3 cup nonfat sour cream
1/3 cup unsweetened applesauce
1 tablespoon vanilla extract
1 teaspoon orange extract
2 tablespoons packed grated orange zest
½ cup fresh orange juice

Orange Icing Glaze
1 ½ cups sifted confectioners’ sugar
1 teaspoon grated orange zest
3 tablespoons fresh orange juice
2 teaspoons fresh lemon juice (I didn't have lemons so I used all orange juice)

1.   Position a rack in the center of the oven and preheat the oven to 350⁰F.  Generously coat one Bundt pan or two loaf pans with cooking spray, then dust with flour; tap out excess flour.
2.   In a medium-sized bowl, whisk together the flour, baking powder, baking soda and salt; set aside.
3.   In a large, grease-free bowl with the electric mixer on medium speed, whip the egg whites until foamy.  Gradually add ¼ cup of the sugar, whipping until the whites are stiff but not dry.  Remove the bowl from the mixer, shake the beaters into the bowl, then return the beaters to the mixer without washing them.  Set the whites aside.
4.   Using the same beaters with another bowl, combine and beat together the oil, the remaining 1 cup of sugar, the whole egg, sour cream, applesauce, vanilla and orange extracts, grated orange zest, and orange juice.  Gradually beat in the flour mixture in several additions.  Scrape down the bowl and beaters.  Fold in the whipped whites.
5.   Turn the batter into the prepared pan(s).  Bake for the Bundt for 40 to 45 minutes, the loaf pans for 30 to 35 minutes, until the cake is golden brown and springy to the touch; there will be a shallow crack down the middle and a cake tester inserted in the center will come out dry.  Cool the cake(s) in the pan(s) on a wire rack for about 10 minutes, then remove cake(s) from pan(s) and cool completely on the rack.  Before serving, spread with icing glaze.
6.   To make the icing glaze: Whisk together confectioners’ sugar, orange zest, orange juice, and lemon juice.  Adjust for consistency and flavor, adding more liquid or sugar as needed.  Glaze should be runny, like heavy cream.

Thursday, March 1, 2012

Chocolate Oatmeal Caramel Cookies

Chocolate Oatmeal Caramel Cookies - made February 25, 2012, recipe adapted from Cook's Country Chocolate Desserts 2011


Trying to catch up on blog posts from last weekend's baking.  It's been a busy week at work but we're coming up on Friday and that's always a good thing.

I've been looking for a good oatmeal cookie recipe.  The ones I like best for flavor are closer to a chocolate chip cookie but I wanted something with the satisfying chewiness of an oatmeal cookie.  I think I found it in this recipe.  You not only grind oatmeal to add like flour to the dough (remember the $250 Neiman Marcus cookie fable?) but you also add oatmeal as is to the dough, hence it qualifies for oatmeal cookie status.  And you melt chocolate before adding to the dough to make a subtly flavored chocolate oatmeal cookie.  Genius.  For added chewiness, I also took the liberty of adding some caramel bits to the dough, similar to the Milk Chocolate Caramel Cookies recipe from Milk & Cookies.  Turned out to also be a brilliant idea.  Just make sure you embed the caramel bits into the dough.  A little peeking through is okay but if they're stuck on the outside of the dough, they'll "run" when you bake them and spread into a puddle so you may end up with a misshapen cookie.

What made this cookie a winner beside great flavor is the texture.  Cooled to just barely lukewarm, the edges are crisp and the middle is nice and gooey.  Even when it's fully cooled to room temperature, it's satisfyingly chewy.  Remember not to overbake it.


1 ¾ cups (5 ¼ ounces) old-fashioned rolled oats
1 cup (5 ounces) all-purpose flour
¾ teaspoon baking powder
½ teaspoon baking soda
10 tablespoons unsalted butter, softened
1 cup packed (7 ounces) light brown sugar
1 large egg
1 teaspoon vanilla extract
3 ounces milk chocolate, melted and cooled
1 cup (6 ounces) semisweet chocolate chips
1 cup caramel bits

1. Adjust oven racks to upper-middle and lower-middle positions and heat oven to 350°F. Line 2 baking sheets with parchment paper. Place 1 cup oats in food processor or blender and process until well ground, about 30 seconds. Transfer to large bowl and stir in flour, baking powder, baking soda and salt.
2. Using stand mixer fitted with paddle, beat butter and brown sugar together on medium high speed until well blended and lumps are gone, about 1 minute. Scrape down sides of bowl. Add egg and vanilla and beat until light and fluffy, about 30 seconds. Add melted chocolate and beat until incorporated, about 20 seconds. Add flour mixture and beat on low speed until just incorporated, about 15 seconds. Add remaining ¾ cup oats, chocolate chips, and caramel bits and beat on low speed until evenly distributed, about 10 seconds.
3. Working with 2 tablespoons of dough at a time, roll into balls and space 2 inches apart on baking sheets. Bake, rotating pans halfway through baking, until cookies are cracked on top but look moist within cracks, 14 to 18 minutes. Let cookies cool on baking sheets for 5 minutes, transfer to wire rack and let cool completely before serving.  Alternatively, you can make the cookie into dough balls, place in freezer bags and freeze; bake when cookie fix is needed.


Cast Party Wednesday


Tuesday, February 28, 2012

Crispy (Oven) Fried Chicken

Crispy (Oven) Fried Chicken - made February 24, 2012 from rummaging in my freezer, fridge and pantry


Every once in awhile, I like to throw in a post on "real food" just to confuse people.  "But this is a baking blog" you might say.  Well, yeah, but there are occasions where I actually cook.  Just to break up the monotony of take out or microwaving meals.  This is a super simple recipe that I made up, mostly inspired by the fact that I wanted to use up the last of my buttermilk and since the panko crumbs on the banana fritters were so good, I thought they'd be good on oven-fried chicken too.  Many versions of this use crushed cornflakes but I didn't have cornflakes and I did have panko crumbs left over so it was a no-brainer to substitute.  It also had the added advantage that I didn't have to crush cornflakes into crumbs since panko crumbs are already..... well, crumbs.

Because it's cooking, I felt free to not measure like I do with baking so you'll have to bear with the loosy-goosy directions.  Thanks to the panko crumbs, these had a crispy coating without the mess and calories of frying.

Combine for the initial coating (makes enough for at least 4-6 pieces of chicken)

1 cup bread flour (you can also use all-purpose flour, I just used bread flour because I had some)
1 teaspoon salt
1 teaspoon black pepper
1/2 teaspoon ground ginger
1 teaspoon all-spice
1/2 teaspoon garlic powder
(feel free to substitute in any other spices - I just used these because they were what I had)
Roll chicken pieces in flour mixture until evenly coated.  Dip in 1 cup of buttermilk in a shallow bowl.  In another shallow bowl, roll to coat in panko crumbs (use as much as needed to cover chicken completely). Place in shallow baking pan and bake in a 350 degree oven until done and outside is golden brown and crisp (30-40 minutes).

Monday, February 27, 2012

Dulce de Leche Snickers Brownies

Dulce de Leche Snickers Brownies - made February 25, 2012, original recipe (Fudgy Brownies) adapted from The Essence of Chocolate by John Scharffenberger and Robert Steinberg (book #196)


Sick of brownie recipes yet?  If you are, skip this post.  But if you do, you're going to miss out.  I love dulce de leche and I like Snickers.  I don't know why I've never put them together in a brownie before when I think I've made just about every combination I like already.  But I have rectified that oversight with this brownie.  I did modify the recipe slightly and my changes are reflected below.  I took these pictures when the brownie was just barely cool so they look a bit gooey.  They did firm up when they cooled to a nice chewy consistency.  I used Valrhona 90% dark chocolate so these were a walk on the dark side.  You can make them a little less dark by using a 60-70% semisweet chocolate but since I was adding dulce de leche, I went with the darker chocolate to offset the sweetness.

The dulce de leche wasn't as pronounced as I would've liked but I think that's because I couldn't use as much as I had intended because there wasn't much batter, even for an 8-inch pan.  I think this concept would work better with a larger brownie recipe.  But hey, the Snickers rocked.


6 tablespoons unsalted butter, cut into cubes
7.5 ounces 70% bittersweet chocolate, coarsely chopped
¾ cup plus 2 tablespoons granulated sugar
¼ teaspoon salt
2 large eggs
1/2 cup all-purpose flour
Dulce de leche, in dollops, to taste
½ cup – 1 cup Snickers, chopped, to taste

1. Position a rack in the lower third of the oven and preheat the oven to 325°F. Line an 8 x 8 x 2” baking pan with foil and lightly spray with nonstick cooking spray.
2. Melt the butter and chocolate together in the top half of a double boiler over gently simmering water and stir until melted and smooth. Remove from heat.
3. With a large rubber spatula or wooden spoon, beat the sugar and salt into the chocolate mixture. Beat in the eggs one at a time. Add the flour and mix vigorously until the batter is very glossy and pulls away from the sides of the bowl.
4. Spread half the batter into the prepared pan. Drop dollops of dulce de leche randomly over batter and cover with remaining half of the batter. Bake for 30 – 35 minutes or until a toothpick inserted near the center comes out with moist crumbs. 5 minutes before brownies are done, sprinkle remaining chopped Snickers over the top and let soften over the brownie in the heat of the oven.
5. Remove from oven and let cool. Remove the brownies from the pan and let cool completely before cutting into 2-inch squares.