Tuesday, February 24, 2015

Bakery Review: Happy Endings Bakeshop

Happy Endings Bakeshop - ordered February 6, 2015
There’s nothing I like better than finding a local, small business to support, especially one that provides sweets. I was looking for a desserts business where I could order online and have them ship my order to a friend directly for her birthday, all without my needing to take a second job to pay for shipping. I posted what I was looking for in a foodie group I belong to at work and someone recommended their friend’s business, Happy Endings Bakeshop.
It turned out to be a fabulous recommendation with just what I was looking for. I checked out Happy Endings’ website and was hooked on the Treat of the Month subscription. Treat of the Month is just that: a shipment of treats for $15 a month. The monthly treat is at the discretion of the Happy Endings Bakeshop owner, April, and the $15 includes shipping. Sold. I normally like to have some kind of control over what I order since I have picky taste buds and didn’t want to roll the dice on whether I’d like that month’s treat but I had to remind myself this wasn’t for me but for my friend and she was a wider range of tastes.

But I did want to try out Happy Endings for myself before I bought my friend a subscription just to make sure it was going to be good. I bought a 1-month “subscription” for myself for February and immediately got a system confirmation from Happy Endings and later a follow up email from April letting me know that the Treat of the Month would be mailed out on February 17. I had ordered earlier in the month so I had a week and a half wait. The night before the treats were supposed to be shipped out, I had to change the address I needed the package mailed to as I had just had a large package stolen from my front door and didn’t want anymore packages going to my house. April was quick to respond and very accommodating on my request to change the shipping address on my order. As always, that’s what I love about dealing with a small business: personal and caring response from the owner.

I got my package a couple of days later, allowing for an extra day delay because it had to go through our shipping department’s timeline and process. This month’s treat were 3 different flavors of “Let’s Kiss and Make Up Cookies”. From Happy Endings Bakeshop’s Facebook page, the descriptions are:
1)      Peanut Butter: PB cookie with Chocolate Truffle Hershey's Kiss, dark chocolate drizzle, and topped with powdered peanut butter. 
2)      Red Velvet: Red velvet cookie with Hershey's Hugs, white and dark chocolate drizzle, and topped with a red crystal-white chocolate-raspberry sugar mixture. 
3)      Mexican Hot Chocolate: Spicy Mexican Hot Chocolate cookie with Caramel Hershey's Kiss, white chocolate drizzle, and topped with cinnamon sugar and a dash of cayenne pepper. 
Red Velvet
You might want to read those descriptions again and let your mouth water accordingly. Even beyond the goodness of the actual cookies – and yes, they were delicious – the packaging was really cute as you can tell from the pictures. There were 6 cookies in the package, 2 of each kind and each individually packaged and stickered. You might think $15 for 6 cookies is expensive and if you were going to make 6 cookies yourself, it wouldn't cost you $15. But when you factor in the careful packaging and shipping cost, this is rather reasonable. It’s meant to be a “treat”, not a full-on dessert course so I feel like I got my money’s worth. 
Mexican Hot Chocolate
As soon as I sampled the Red Velvet cookie, I emailed April a thank you and promptly ordered a 3-month subscription for my friend. Hers will start with the March treat of the month and I have a feeling I’ll be stalking Happy Endings Bakeshop’s Facebook page to see what it’ll be and tempt myself into ordering my own subscription.
Peanut Butter
 

Sunday, February 22, 2015

Coconut Sheet Cake

Coconut Sheet Cake - made February 16, 2015, recipe adapted from Chef in Training
I love coconut, I love coconut, I love coconut. If you don’t, you can skip this post but know that you’re missing out. I also love sheet cakes because they’re so easy to make and so hard to get wrong. Even though every single time I don’t actually bake it in a sheet pan but in a 9 x 13 pan to make for a thicker cake. It’s not even a super thick cake so I always think baking in a sheet pan would make it really, really thin. Remember, thin is the goal for my body, not my cakes.
The easy part is you just mix the ingredients together, spread in the pan and bake. While it’s baking, you make the frosting then spread it over the hot cake once it’s out of the oven. Easy. No messing about with cooling layers of cake, trying to get the consistency of the frosting right or anything else remotely fussy. Mix cake, bake, mix frosting, pour, cool, eat.
Best part is at the end of all that easy, you have a delicious cake. I loved this cake. If I had to have a coconut equivalent of the Texas Fudge Cake and the Texas Vanilla Cake that I love, this would be it. Love.
2 cups + 2 tablespoons flour
2 cups sugar
1/2 cup butter
1 cup water
1/2 cup shortening
1/2 cup buttermilk
1/2 teaspoon baking soda
2 eggs
2 teaspoons vanilla extract
1/4 cup shredded coconut

Frosting
1/2 cup butter
6 tablespoons milk
16 ounces confectioners' sugar
1 teaspoon vanilla extract
sweetened shredded coconut for garnish
  1. Preheat oven to 400 degrees F. Line a 9 x 13 pan with foil and lightly spray with nonstick cooking spray.
  2. In a large mixing bowl, whisk together flour and sugar; set aside.
  3. In medium saucepan, combine butter, water and shortening. Bring to a boil then add to flour mixture and stir to combine.
  4. Add buttermilk, baking soda, eggs and vanilla, mixing after each addition. Stir in coconut.
  5. Pour into prepared pan and bake for 20-30 minutes or until a toothpick inserted near the center comes out clean.
  6. Make the frosting: bring butter and milk to a boil, stir in confectioners' sugar and vanilla extract, whisking until smooth and combined.
  7. When cake is done, remove from oven and poke holes in hot cake with a fork. Pour frosting evenly over the top.
  8. Sprinkle top with shredded coconut.

Friday, February 20, 2015

Red Velvet Brownies from Extreme Brownies

Red Velvet Brownies - made February 13, 2015 from Extreme Brownies by Connie Weiss
No, I’m not tired of baking (or eating) brownies and yes, I’m still playing with my new brownie baking book, Extreme Brownies by Connie Weiss. Seriously, I’ve come to expect only great recipes from this book and so far it hasn’t let me down. I think what I like so much about it is it makes exactly the kind of brownies I like: thick, fudgy, delicious. All the bells and whistles added to each brownie, whether it’s frosting, chopped up candy, chocolate chips, nuts and everything else, are fine but the underlying base brownie is also consistently delicious.

Although I already have a good red velvet brownie recipe, let’s not pretend that would stop me from trying another one. It’s always good to keep an open mind when it comes to new recipes and you’ll be glad of that flexibility when you try out this recipe. True to all its predecessors, this too was delicious with good chocolate flavor so it wasn’t simply a brownie colored red. 
My only issue with it is once it had cooled, brownie flakes came off the top when I tried to frost it. Ever try using a pale cream cheese frosting on a dark red brownie that flakes? Yeah, it doesn’t look so good. The flakes clung to the frosting and lifted themselves right off the brownie to mingle within the frosting, serving the dual task of soiling the smooth frosting and not letting it adhere properly to the top of the brownie while more flakes tried to cling to it when I tried spreading the frosting. Erk. 

Everyone knows when you see “crumbs” throughout a frosting, that isn’t a “I meant to do that” move but a “I can’t seem to frost” statement. I was making these for a church potluck on Valentine’s weekend and while I’m sure everyone would turn the other cheek (and eye), my baking pride was not letting me show up with ugly brownies. Out came the red colored sanding sugar and I sprinkled it liberally over each piece. For the most part it did the trick and the brownies were presentable once more. And still delicious.
2 1/4 sticks (10 ounces) unsalted butter, cut into 1-tablespoon slices
3 1/3 cups (1 pound, 4 ounces) milk chocolate chips
5 large eggs
1/2 cup plus 2 tablespoons (4.4 ounces) granulated sugar
1 1/4 packed cups (10 ounces) light brown sugar
1 teaspoon salt
1 1/4 teaspoon vanilla extract
2 tablespoons (1 ounce) red food color
2 cups (9 ounces) bleached all-purpose flour
1 teaspoon baking powder
3 tablespoons unsweetened cocoa powder

Cream Cheese Frosting
3 ounces cream cheese, room temperature
5 tablespoons (2.5 ounces) unsalted butter, room temperature
1/8 teaspoon salt
1 teaspoon pure vanilla extract
1 3/4 cups (7 ounces) confectioners' sugar
  1. Preheat oven to 350 degrees F. Line a 9 x 13 pan with foil and lightly spray with nonstick cooking spray.
  2. Over the top half of a double boiler set over hot water, melt the butter and chocolate chips, whisking until smooth and completely melted. Cool slightly.
  3. Using a large whisk, lightly beat the eggs in a large mixing bowl. Add granulated and brown sugars and beat into eggs until just incorporated. Whisk in the melted chocolate mixture until just combined. Add the vanilla extract and red food color.
  4. Sift together the flour, baking powder and cocoa powder and add to the batter, stirring until just combined. Pour into prepared pan and smooth with a spatula. Bake for 40 minutes, until a toothpick inserted near the center comes out with moist crumbs. Cool completely before frosting.
  5. To make the frosting: place the cream cheese, butter and salt in a mixing bowl. Beat together with an electric mixer until well combined. Add the vanilla and beat until just combined. Add the confectioners' sugar and beat, starting on low and increasing to high, until well combined and smooth. Dollop the brownies over the cooled brownie slab and spread evenly with a small metal spatula.


Wednesday, February 18, 2015

Cupcake Review: Casey's Cupcakes

Casey's Cupcakes - Pop Up Shop February 12, 2015
Another pop-up shop vendor in the week leading up to Valentine’s Day. I’m always thrilled (yes, that’s the right word, I’m ruled by my sweet tooth) whenever we have a vendor for sweets and desserts. Especially thrilling when they’re a Cupcake Wars winner since I watch the show religiously.  Unfortunately I can’t remember the episode when Casey’s Cupcakes were on so either it was before I’d started watching the show (possible) or I just don’t remember the episode (probable). 

I tend to remember the cupcakeries on the show who are local to me so I could seek them out to try. Casey’s is from Southern CA so there’s no reason they would stick in my mind since it was unlikely I’d ever sample their cupcakes as they don’t ship. So it was great that they came to me. Well, not just me but you know what I’m sayin’.

What’s immediately obvious when you see a Casey’s Cupcakes display is that they’re all about the pink. Like, really pink. I thought it was cute but I’m a girl who likes pink. Not sure how guys or girls who don't like pink would feel about it. Then again, if you mostly care about the taste of the cupcakes, all that pink shouldn’t put you off. Because if it did, you’d be missing out.

Casey’s only had a limited number of flavors they offered in our pop up shop. Because they’re located in Southern California, they were doing a special run of cupcakes that they were making up here for our shop and by necessity, that precluded offering their full range of flavors. Which was okay by me since it wasn’t like I could eat more than one two cupcakes. This way, I got to sample 2 flavors: the red velvet and the chocolate. Each cupcake is normally $3.50 each so that’s on par with most cupcakeries.

I preordered my 2 cupcakes and picked it up when the pop up shop opened. I have to give super-duper props to Casey's for their classy packaging. Each cupcake is boxed in a specially made box that, when upright and closed, has custom-made "flaps" that come in to hold the cupcake in place. So it's not like they simply put a cupcake in a box and let it slide around in the empty space. The box itself is designed to hold the cupcake in place in the center of the box. Rather clever, I must say. 

I tried the red velvet cupcake first the same day I picked up my order. It was a good size, closer to Sprinkles than Kara's. My ultimate favorite red velvet cupcake is still Sprinkles but Casey's was also delicious. Good chocolate flavor, good texture. It wasn't dry but it wasn't as buttery-moist as Sprinkles. My friend Karen thinks Sprinkles is "greasy" (gasp on the blasphemy) so I think she'd probably prefer Casey's as it didn't have that you-say-greasy-I-say-buttery texture. The cream cheese frosting wasn't too tangy so that was a point in their favor as well. I'm not particularly a fan of coating red velvet cupcakes with red velvet crumbs as that seems more for looks than taste or texture so that was probably the only drawback to the cupcake. Otherwise, it was tasty.

In the interests of portion control, I did wait until the next day and had another workout under my belt before I sampled the chocolate cupcake. By definition, it wasn't as fresh as the red velvet since it was literally a day old but it still held up pretty well. Not quite as good as the red velvet to my mind but still a decent chocolate cupcake that probably would've been better had I eaten it the same day I bought it. It was a little more over the top with the chocolate since the chocolate frosting atop the chocolate cake was also liberally covered with chocolate curls. If you need a chocolate fix, this will meet your needs.
Overall, I'd give Casey's Cupcakes a favorable rating. I don't know that I'd go out of my way to seek them out if I was in Southern California (I have a high bar for cupcakes and there are so many cupcakeries out there) but if you get a chance to try one, I'd recommend it.

Monday, February 16, 2015

Butter Cupcakes dressed for Mardi Gras

Butter Cupcakes - made February 16, 2015 from Cupcakes by Elinor Klivans
Tomorrow is Fat Tuesday or Mardi Gras - traditionally the last gasp of partying, frivolity, drunken revelry and gluttony before Ash Wednesday ushers in Lent. At least it is if you celebrate or observe these traditions. Technically I don't but ever since I'd visited New Orleans, I have marginally more awareness of Mardi Gras.
I say marginally because I actually didn't realize until last night that tomorrow was Mardi Gras. Ha. I'd barely been aware of Valentine's Day then Mardi Gras comes along 3 days later.
No problem - we just switch over from red and pink to purple, green and gold (er, yellow). Traditional Mardi Gras dessert is King Cake but I didn't have time for that. There's probably no such thing as Mardi Gras cupcakes either so I'm calling these what they are: butter cupcakes who dressed up for Mardi Gras in the requisite colors. Thank goodness for colored sugars.
These are nice, simple, straightforward butter vanilla cupcakes under their gaudy colors. I liked the texture and the vanilla flavor so you can make these any time of the year. I made up my own frosting since the original recipe called for chocolate frosting but the colored sugars stand out more against a vanilla frosting so that's what I made. Laissez les bon temps rouler.
Cupcakes
1 ¼ cups cake flour
1 teaspoon baking powder
1/8 teaspoon salt
½ cup (1 stick) unsalted butter, at room temperature
1 cup sugar
2 large eggs
1 teaspoon vanilla extract
½ cup whole milk

Frosting
1 stick unsalted butter, softened
2 cups confectioners' sugar
1 teaspoon vanilla
1-2 tablespoons whole milk, more or less depending on desired consistency

1.     Make the cupcakes: Position a rack in the middle of the oven.  Preheat the oven to 350˚F.  Line 12 muffin tin cups with paper cupcake liners.
2.     Sift the cake flour, baking powder and salt into a medium bowl and set aside.  In a large bowl, using an electric mixer on medium speed, beat the butter and sugar until smoothly blended and creamy, about 2 minutes.  Stop the mixer and scrape the sides of the bowl as needed during mixing.  Add the eggs, one at a time, mixing until each is blended into the batter.  Add the vanilla and beat for 2 more minutes.  On low speed, add the flour mixture in 3 additions and the milk in 2 additions, beginning and ending with the flour mixture and mixing just until the flour is incorporated and the batter looks smooth.
3.     Fill each paper liner with ¼ cup of the batter, to about ½ inch below the top of the liner.  Bake just until the tops feel firm and a toothpick inserted in the center comes out clean, about 22 minutes.  Cool the cupcakes for 10 minutes in the pan on a wire rack.
4.     Carefully place the wire rack on top of the cupcakes in their pan.  Protecting your hands with pot holders and holding the pan and rack together, invert them to release the cupcakes onto the wire rack.  Turn the cupcakes top side up to cool completely.

Frosting: Cream butter until smooth. Add confectioners' sugar and beat until combined. Add vanilla and enough milk to achieve desired consistency. Beat until smooth. Frost cooled cupcakes and sprinkle with colored sugars for decoration if desired.

Sunday, February 15, 2015

Restaurant Review: Von's Chicken

Von's Chicken - dinner on February 6, 2015, 4 stars on yelp
I’d never heard of Von’s Chicken before but when my friend Jenny suggested it as a place to meet for dinner last week and included an article that raved about them, I was sold. Yeah, it doesn’t take much. Von’s reminds me of Bon Chon Chicken. It’s set up like a cross between a fast food place and a casual restaurant. There were people ordering and picking up take out and others who opted for dine in. A server takes your order at your table but it looks like you can also order (presumably for takeout) at the counter. It took a little longer than I expected for our food to come out but I think I was comparing it (unfairly) to a place like Popeye’s or KFC where the chicken is already made and waiting to be served. Not so at Von’s as it appears they make it to order so it's similar to a sit-down restaurant in that regard.
At Von’s, similar to Bon Chon, you can order a combination of how many pieces and what kind as well as how you want it cooked. For this first visit, we kept it simple: a half order of crispy fried chicken (not to be confused with crunchy fried chicken) as a combination of drumsticks and wings plus we split an order of sweet potato fries.
The sweet potato fries came out first, hot and crisp. You know I’m a sucker for sweet potato fries so no complaints there. Our chicken came out a bit later and the half order was larger than I expected. For one person, it’s easily 2-3 meals. It came with a light glaze (you can order it mild or hot, I went with mild) that was a little sweet and a little spicy. I’m not normally a saucy/glaze-y person but this was hardly any glaze and was pretty tasty. I wouldn’t have minded more glaze. True to advertising, the crunchy chicken was nicely crunchy. In fact, I’m not so sure I’ll ever eat Popeye’s or KFC again if I can have Von’s Chicken instead. Never mind that I rarely eat fast food anyway so I’m not giving up much but this was pretty good fried chicken.
The price point is a bit higher than fast food and some casual restaurants: a half order of drumsticks and wings was $10.99 and the sweet potato fries at $4.99 came as a modest portion. Still, if you’re in the mood for deep fried food and a simple no-frills meal, this is a good option.

Saturday, February 14, 2015

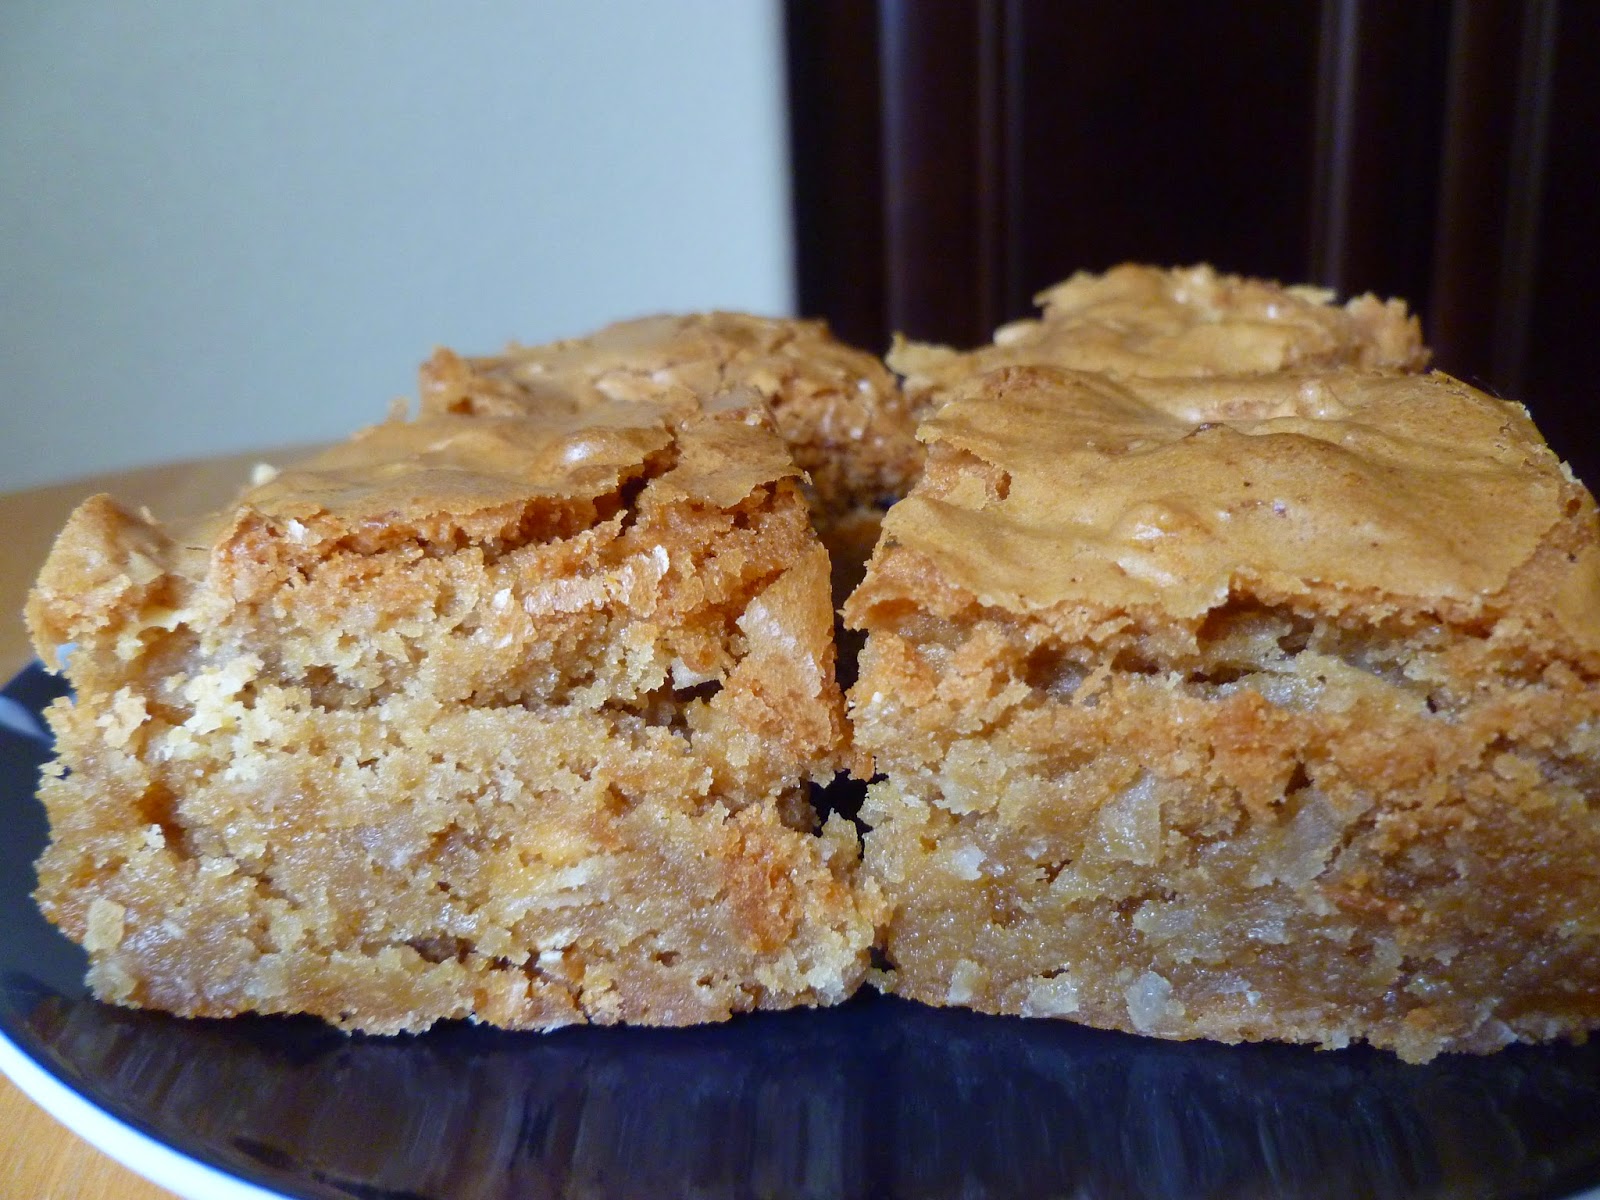
Coconut White Chocolate Butterscotch Blondies

Coconut White Chocolate Butterscotch Blondies - made February 7, 2015, adapted from Extreme Brownies by Connie Weiss (originally titled Bombin' Blondies)
Back with my one-track mind on trying out more brownie recipes from Extreme Brownies by Connie Weiss. I did make an effort to mix it up a little by going with a blondie recipe this time. Which then I had to modify to suit my tastes. I stuck to the main structure of the blondie’s foundations but instead of semisweet chocolate chips, I substituted white chocolate chips. And, because it pairs so well with anything brown sugar, I added butterscotch chips. The coconut I kept as is. Oh and I left off the chocolate drizzle. 
I don’t make blondies that often but when I do, I try to keep it purist. If the whole point of a blondie is to make a non-chocolate dessert, I don’t add (semisweet) chocolate chips or a chocolate drizzle. Otherwise I’d just make a regular chocolate fudge brownie.

In any case, my modifications worked pretty well. I loved the texture and brown sugar taste of the blondie bar itself. The coconut gives it additional texture and chewy moistness and the white chocolate and butterscotch chips complemented the blondie perfectly. Another fantastic recipe from Connie – this book is turning out to be a great investment and I’ve only made 4 recipes from it so far. Thumbing through it again for #5. Stay tuned.

3 sticks (12 ounces) unsalted butter, cut into tablespoons
2 1/2 cups plus 2 tablespoons (1 pound 5 ounces) light brown sugar, firmly packed
3 large eggs, cold
1 tablespoon plus 1/4 teaspoon vanilla extract
3 1/3 cups plus 2 tablespoons (15.5 ounces) bleached all-purpose flour
1 teaspoon salt
1 3/4 teaspoons baking powder
3/4 cup (3 ounces) shredded sweetened coconut
3/4 cup butterscotch chips
1 cup white chocolate chips
  1. Preheat oven to 350 degrees F. Line a 9 x 13 pan with foil and lightly spray with nonstick cooking spray.
  2. Place butter and brown sugar in a heavy 2-quart saucepan. Cook over the lowest setting until the sugar and butter dissolve, whisking to combine. Don't let the butter get too hot or it'll separate. Pour the sugar mixture into a large mixing bowl. Let cool for several minutes. 
  3. Whisk the eggs into the butter mixture, one at a time, whisking quickly after each addition. Stir in the vanilla extract; scrape down the sides of the bowl.
  4. Place the flour, salt and baking powder in a small mixing bowl; whisk together to combine. Add in thirds to the batter, stirring each addition until just combined. Do not overmix.
  5. Add the coconut, butterscotch chips and white chocolate chips into the batter and pour batter evenly into prepared pan, smoothing the top with a small metal spatula. Bake at 350 degrees for 20 minutes then lower the heat to 325 degrees and bake for an additional 18 minutes, until a toothpick inserted near the center comes out clean. Let cool completely before cutting and serving.