Friday, January 14, 2022

Giant Chocolate Chip Cookies with Caramelized Cocoa Nibs

Giant Chocolate Chip Cookies with Caramelized Cocoa Nibs - made dough January 6, 2022, modified from Sugar Spun Run 
1 cup unsalted butter, melted and cooled
1 cup brown sugar, firmly packed
3/4 cup granulated sugar
1 large egg, room temperature
1 large egg yolk, room temperature
1 1/2 teaspoons vanilla extract
2 3/4 cups all-purpose flour
1 tablespoon cornstarch
1/2 teaspoon baking soda
1/2 teaspoon baking powder
3/4 teaspoon salt
1 1/2 cups chocolate chips, mini and regular size
1/2 cup caramelized cocoa nibs (I ordered mine from chefshop.com)
  1. Combine melted butter, brown sugar and granulated sugar in a large bowl. Whisk until smooth and well combined. Add egg, egg yolk and vanilla extract; stir until combined.
  2. In a separate bowl, whisk together flour, cornstarch, baking soda, baking powder and salt.
  3. Add to butter mixture in two additions, stirring after each addition until combined. Fold in chocolate chips and caramelized cocoa nibs. 
  4. Portion into large dough balls (I got 11 cookies out of this dough). Cover with plastic wrap and chill or freeze for at least an hour or overnight.
  5. When ready to bake, preheat oven to 350 degrees F. Line baking sheets with parchment paper and evenly space dough balls. Bake 14 - 16 minutes or until edges have set and middles no longer look raw. Remove from oven and let rest on baking sheets for 5 minutes before transferring to wire rack to cool completely.
I was hunting through my pantry for espresso powder as I could've sworn I had some left and I wanted to use it in a recipe for a coffee-based cookie. But of course I didn't have any. But I did find these caramelized cocoa nibs that I must've bought awhile ago and forgot about. Not the first time that's happened, believe you me.
So I decided to add them to this recipe for giant chocolate chip cookies. Cocoa nibs add a little crunch to baked goods but unlike nuts which steam and soften during baking, cocoa nibs retain their crunch. Plus they add a dark cocoa flavor to the cookie. I'm more of a milk chocolate person myself but since I wasn't the one eating 12 giant cookies (yes, these went into military care packages), I thought I could send them to people who probably didn't have my fanatic sweet tooth. Plus chocolate chip cookies....

This dough came together beautifully. Not too dry or too sticky and it was easy to form into giant dough balls. I bought a huge cookie scoop from the Le Creuset last year. It was criminally expensive for a cookie scoop (let's face it, I could go the cheap way and just use two spoons), even for an outlet, but I'd been wanting that size cookie scoop for years. I'm glad I bought it as it enables me to make evenly-size huge cookie dough balls. Which I then flattened slightly to thick discs as I wanted an even bake for a uniformly shaped cookie. 


Besides the cocoa nibs, I also added regular semisweet chocolate chips and mini chocolate chips. When making giant cookies, if you want a more even distribution of chocolate and just more chocolate in a chocolate chip cookie, the best way to ensure that is (conversely) to use smaller chocolate chips. They're easier to disperse in large cookies and you get more even distribution of chocolate.

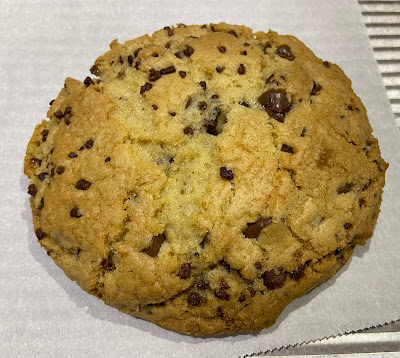
This recipe actually made 11 giant cookies and 1 medium-ish-sized one. I had the medium-sized one as the taste test cookie. I had to bake it separately from its gigantic brethren or else the little cookie would've baked too much before the big ones were done.


Just above and below is the taste test cookie. You can see it doesn't spread too much and bakes up to a good thickness.
I don't believe I overbaked this cookie but I also didn't underbake it as much as I normally would have. So it might be baked "just right" for people who don't like underbaked cookies. Flavor-wise, this was also pretty good. The edges had a nice crunch to them. The middle wasn't as chewy as I normally prefer my cookies, probably because I baked it a minute or so more than I normally would. Still a good cookie though and the cacao nibs worked well.


Wednesday, January 12, 2022

Stamped Cookies #18 - Maple Sugar Cookies

Stamped Cookies #18: Maple Sugar Cookies - made January 2, 2022, modified from Liv for Cake 
3 cups all-purpose flour
1/2 teaspoon salt
1 cup unsalted butter, room temperature
1/2 cup granulated sugar
1/2 cup brown sugar, packed
1 large egg yolk
1/2 cup pure maple syrup
  1. In a medium bowl, whisk together flour and salt; set aside. In the bowl of a stand mixer fitted with the paddle attachment, cream together butter, granulated sugar and brown sugar until well combined, light and fluffy, 2-3 minutes on medium speed. Scrape down sides and bottom of bowl to keep mixture even textured.
  2. Add egg yolk and beat on low speed until combined. Add maple syrup and beat on low until combined.
  3. Add dry ingredients in two additions, mixing on low speed until just combined and dough comes together. Divide dough in half and form each half into a thick disc. Cover in plastic wrap and chill for 30-45 minutes.
  4. Tear off a large piece of parchment paper and lay out on your work space. Lightly flour. Tear off a second, equally large piece of parchment paper. Leaving one dough disc in the refrigerator while you work on the first one, unwrap chilled dough and place in the middle of the lightly floured parchment. Cover with second piece of parchment and, using a plain rolling pin, roll out to an even 1/3" thickness. Flour sparingly, if needed, to keep the dough from sticking.
  5. Remove top piece of parchment and lightly flour dough. Roll out with your embossed rolling pin. Cut into desired shapes. Take remaining dough scraps and roll into golf-ball-size dough balls. Roll in granulated sugar, coating completely then use cookie stamps to stamp out designs. 
  6. Repeat with second dough disc. Cover and chill or freeze embossed, stamped and cut out cookies for several hours or overnight.
  7. When ready to bake, preheat oven to 325 degrees (I baked at 375). Line baking sheets with parchment paper and evenly space cookies. Bake for 10-12 minutes or until edges are light golden brown. Remove from oven and let cool on baking sheets for several minutes before transferring to wire racks to cool completely.
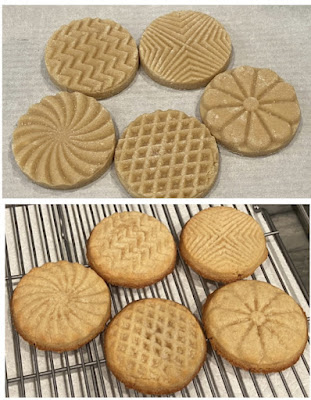
Make sure you click on the post title to go to the original blog post and see Liv for Cakes pictures. Her stamped cookies turned out more defined than mine although I used the same ingredients and followed the recipe with the 2 exceptions of I froze them longer than an hour (I actually had the stamped cookies in the freezer for several days before I baked them) and I baked at a higher temperature.


I'm wondering if that's where I went wrong, by baking at 375 degrees instead of 325 like the recipe said to. Intuitively I've always baked at a higher temp so the outside and the impressions would set more quickly before spreading and potentially losing the impressions.
Also because I baked at a higher temperature, my cookies browned more than hers did, which makes sense. I'll have to try the lower temp next time and see if that works better.

Fortunately I will be making these again as they were delicious. The maple flavor comes across well but not overwhelmingly so. Please use good-quality maple syrup (I used the one from Trader Joe's) as your cookies will be flavored by the syrup you use. I know that's stating the obvious but I'm a fanatic about high quality ingredients so I will state the obvious.


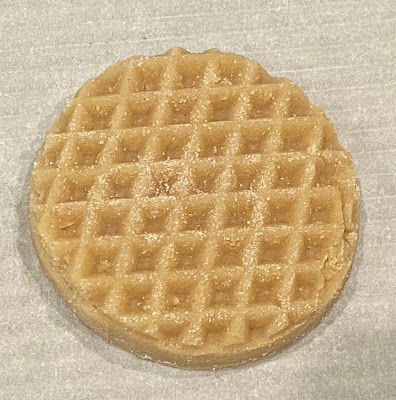
I like to do close ups of the inside so you can see the texture. This was both crisp (at the edges) and pleasingly chewy in the middle. That's my kind of cookie.


Monday, January 10, 2022

Triple Chocolate Brownies (Fat Witch Brownies)

Triple Chocolate Brownies - made December 28, 2021, modified from Fat Witch Brownies by Patricia Helding
8 tablespoons (1 stick) unsalted butter
1/3 cup bittersweet chocolate chips
1/2 cup milk chocolate chips, divided
3 large eggs
1 cup granulated sugar
1/2 teaspoon vanilla extract
3/4 cup unbleached all-purpose flour
1/4 teaspoon salt
1/3 cup white chocolate chips
  1. Preheat oven to 350 degrees F. Line an 8 x 8-inch baking pan with foil and lightly spray with nonstick cooking spray.
  2. In the top half of a double boiler set over hot water, melt butter, bittersweet chocolate chips and 1/4 cup milk chocolate chips. Whisk until completely melted and smooth. Cool slightly.
  3. In a mixing bowl, beat together eggs, sugar and vanilla until combined. Add melted butter-chocolate mixture and mix to combine.
  4. Add flour and salt, mixing until combined and batter is glossy. Fold in 1/4 cup milk chocolate chips and white chocolate chips. Pour batter into prepared pan and smooth top.
  5. Bake 30-35 minutes or until toothpick inserted near the center comes out with a few moist crumbs, not raw batter. Cool completely before cutting and serving.
For 2022, I'm going to focus more on using my baking books, some of which I've had for years and barely used, others of which I've used and found good recipes from. I typically get sidetracked by recipes I find on pinterest but this year, I'm focusing on using more of what I already have.
This recipe comes from Fat Witch Brownies. I got this recipe book shortly after I discovered Fat Witch Brownies and a) bought their brownies on a trip to New York City and b) ordered from them online and got their brownies that way. But that was literally years ago and after trying out a few brownie recipes, I haven't opened this book since. For the record, the ones I've tried already are the original Fat Witch Brownies, Cakey Brownies, Cocoa Brownies, Caramel Witches, Lemon Bars and Butterscotch Flip. But it looks like I haven't made a thing from it since 2013. 
All the recipes in this book are for brownies and bar cookies meant to be made in a 9-inch baking pan. That makes the brownies too thin in my opinion so I made these in an 8-inch pan which made for the right amount of thickness (to me). 
These were pretty good but to my jaded brownie taste buds, they're more sweet than chocolaty. I prefer a richer, darker chocolate brownie rather than a sweet one. If I made these again, I'd swap out the milk chocolate that gets melted into the batter for unsweetened chocolate and see if that would sufficiently ramp up the chocolate factor.


Saturday, January 8, 2022

Cream Cheese Cookies

Cream Cheese Cookies - made dough December 27, 2021 from Preppy Kitchen
1/2 cup unsalted butter, room temperature
4 ounces cream cheese, softened
1 cup granulated sugar
1 large egg, room temperature
2 teaspoons vanilla extract (I used 1 teaspoon vanilla bean paste and 1 teaspoon vanilla extract)
1 3/4 cups (210 grams) all-purpose flour (my measurement weighed 234 grams)
1/2 teaspoon baking powder
1/2 teaspoon salt
  1. In the bowl of a stand mixer fitted with the paddle attachment, cream butter and cream cheese together until combined and smooth. Add granulated sugar and beat until combined. Add egg and vanilla extract and beat until combined.
  2. In a separate bowl, whisk together flour, baking powder and salt. Add to butter-cream cheese mixture on low speed in two separate additions, mixing just until combined. Scrape down sides and bottom of bowl to keep dough even-textured.
  3. Cover and chill for 30 minutes. Portion into golf-ball-size dough balls, cover and chill or freeze another 2 hours or overnight.
  4. When ready to bake, preheat oven to 375 degrees F. Line baking sheets with parchment paper and evenly space dough balls. Bake for 9-11 minutes or until edges are set and middles no longer look raw. Let rest on baking sheets for several minutes then transfer cookies to wire rack to cool completely.
Whenever you see me using the same ingredient in a fairly short amount of time, you know I went to Costco and am trying to use it up before it expires. I did the Cream Cheese Brownies from Maida Heatter and now I bring you Cream Cheese Cookies from Preppy Kitchen.
The hardest part (and it's not hard at all) is making sure you bring your butter and cream cheese to room temperature then beat them together well enough for them to combine without lumps. It's "hard" in my kitchen, mostly because it's winter, it's snowing outside and I like to keep my house on the cool side. So "room temperature" may not be all that warm in my house.
So, yes, I noticed a few small-ish cream cheese lumps in the cookie dough as I portioned it out. It wasn't the end of the world though as, unlike butter, cream cheese doesn't leak out and spread when it's baked. And once these cookies baked, I couldn't find the cream cheese lumps anymore. 
These have a great, chewy-dense-cakey texture. I tried to zero in on the inside so you can see what it's like. Even if you're not a fan of cream cheese, these aren't cheesecake-level cream cheese-y. Instead they have a very slight tang but the butter flavor still comes through. Overall, a nice, simple but good cookie.

Thursday, January 6, 2022

Crumbl Copycat - Churro Cookies

Crumbl Copycat Churro Cookies - made dough December 17, 2021 from You Bring Dessert 
Churro Cookies
1 cup butter, softened
1 cup brown sugar, packed
1/2 cup granulated sugar
2 eggs
2 teaspoons vanilla
3 cups all-purpose flour
1 tablespoon cornstarch
1 teaspoon cinnamon
1/2 teaspoon salt
3/4 teaspoon baking soda
3/4 teaspoon baking powder

Cinnamon Sugar cookie dusting
1/4 cup granulated sugar
1/4 cup brown sugar, packed
1 teaspoon cinnamon

Cinnamon Buttercream Frosting
1/2 cup butter, softened
1/2 cup shortening
1 1/2 teaspoons vanilla
1/4 teaspoon ssalt
1 pound powdered sugar
1/4 cup water
1/2 cup brown sugar
1 teaspoon cinnamon
  1. In the bowl of a stand mixer fitted with the paddle attachment, cream butter, brown sugar and granulated sugar until well combined and creamy.
  2. Add eggs and vanilla; beat until combined.
  3. In a separate bowl, whisk together flour, cornstarch, cinnamon, baking soda and baking powder. Add to butter mixture in two additions, mixing briefly after each addition until just combined.
  4. Cinnamon sugar dusting: combine the brown sugar, granulated sugar and cinnamon in a separate bowl.
  5. Roll dough into golf-ball-size dough balls and flatten slightly into thick discs. Cover, chill or freeze for an hour (not necessary but recommended). 
  6. When ready to bake, preheat oven to 375 degrees F. Line baking sheets with parchment paper.
  7. Roll chilled dough discs in cinnamon sugar dusting, coating completely. Evenly space on baking sheets. Bake 10-12 minutes or until edges are set and middles no longer look raw. Cool until barely lukewarm before frosting.
  8. Cinnamon Buttercream Frosting: In the bowl of a stand mixer fitted with the paddle attachment, cream butter and shortening until combined and no lumps remain. Add vanilla and salt, mixing until combined.
  9. Gradually add powdered sugar and water, beating until desired consistency and smooth. Add brown sugar and cinnamon, mixing until well incorporated.
  10. Top cookies with frosting. Sprinkle with a little cinnamon sugar on top for additional crunch.
Last December, I had to go to the Bay Area for an in-person work offsite. As always, I take every chance to stop at a Crumbl on my drive. It is on the way, after all. Coming and going. Convenient, right? 
I'm glad I did as this particular week, one of their flavors was a churro cookie. I have to say, it was probably one of the best cookies I've ever eaten. It was frosted and while I don't normally like frosting, it complemented the cookie perfectly. The cookie was warm but not so warm that it melted the frosting. Instead, the lukewarm cookie combined with the cool frosting was amazing. The edges of the cookie were crisp and the middle was the kind of cakey-cookie texture that I liked. Plus, hello, great flavor.

So of course, as soon as I got back home, I searched for copycat recipes on pinterest. I found this one from You Bring Dessert. It's very similar to a snickerdoodle recipe except without the cream of tartar and the cinnamon sugar coating has the addition of brown sugar in it.

As you can tell, I didn't make the frosting. I only wanted the taste test cookie and the rest of the cookies, unfrosted, were going in military and US-domestic friends care packages. Frosting would never hold up in a 2-4 week mailing time so I never frost the cookies I send and I didn't want it to be messy for the domestic care packages either. Plus I didn't need even a half recipe of frosting for the taste test cookie. So I guess I can't claim I made this as a real copycat. I did include the frosting recipe for anyone who wants to try it. 
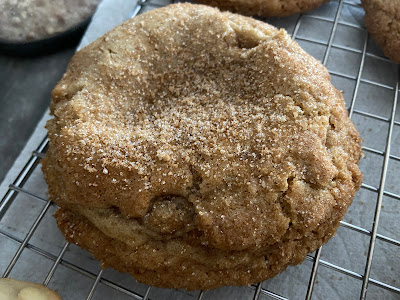
Overall, this was a great cookie. Not sure I can say it was a true copycat but, like most of the Crumbl copycats I've tried, they still make delicious cookies.


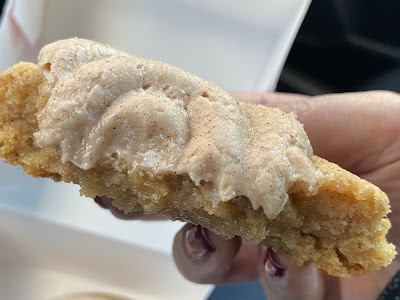
Pictures of the actual Crumbl churro cookie - look at that texture. Delicious and amazing.