Wednesday, November 19, 2014

Biscoff Blondie Brownies

Biscoff Blondie Brownies - made November 8, 2014 from Yummy Crumble
It's been over a week since I've uttered the words "cookie butter" on my blog. Allow me to rectify that dry spell. Biscoff, Speculoos, cookie butter - a rose by any other name has the same amount of calories and is equally addicting. "Little jar of crack" as one of my friends called it. Very observant of her.
I drooled over the pics of these on Yummy Crumble's blog which is usually my signal that I need to make the recipe myself. And they are quite drool-worthy even though I don't usually like to pair cookie butter with chocolate. They complement each other well enough but I like recipes where the cookie butter is the diva and not part of an ensemble cast; chocolate does not yield the spotlight easily, the little attention-getter. Still, these are nothing to sneeze at. They're wonderfully moist and have good flavor(s).
The only thing I would change for next time is I wouldn't use all Pernigotti cocoa for the brownie. A cup of high quality dark cocoa in a brownie makes for a very dark chocolate brownie. I should have "cut" the Pernigotti with the blandness of Hershey's so it's less of a dark chocolate and more of a semisweet. Then the cookie butter would've paired better with it.
One note: if you freeze these after baking like I did, the cookie butter drizzled on top will turn a lighter funny color like it's got freezer burn. Don't worry; if you let it come to room temperature before you serve it or give it away, it'll regain its normal color and be just fine. The taste won't be affected either way. It's still cookie butter in all its glory.
Brownie layer
1/2 cup butter, melted
1 cup sugar
1 cup unsweetened cocoa powder, sifted if lumpy
1/4 teaspoon salt
1/2 teaspoon vanilla
2 eggs
1/2 cup flour

Blondie layer
3 tablespoons coconut oil
3/4 cup brown sugar
1/4 cup Biscoff spread or Speculoos cookie butter
1 large egg
1/2 teaspoon vanilla extract
1 cup all-purpose flour
1/2 teaspoon baking powder
1/4 teaspoon salt
1/4 to 1/2 cup semisweet chocolate chips

1/4 cup semisweet chocolate, melted, for drizzling
1/4 cup Biscoff or Speculoos, melted, for drizzling
  1. Preheat oven to 350 degrees F. Line an 8 x 8" baking pan with aluminum foil and lightly spray with nonstick cooking spray.
  2. For the brownie batter cream the butter and sugar in a large mixing bowl. Mix in cocoa powder and salt. Mix in eggs and vanilla until incorporated. Mix in flour until fully incorporated. The batter will be very thick. Spread on bottom of pan.
  3. For the blondie batter: in a small saucepan over medium-high heat melt the coconut oil, brown sugar and biscoff and stir until smooth. Remove from heat and set aside to cool. 
  4. In a small mixing bowl combine flour, baking powder, and salt. Pour biscoff mixture in another bowl and mix in egg and vanilla extract until just blended. Add dry ingredients. Fold in chocolate chips. Batter will be very thick. Spread on top of brownie batter.
  5. Bake for 25-30 minutes.
  6. Once baked and cooled, drizzle melted chocolate then melted biscoff on top.

Tuesday, November 18, 2014

Restaurant Review: La Bodeguita del Medio

La Bodeguita del Medio - dinner on November 7, 2014
My friend Lisa and I met for dinner at a new-to-us Cuban restaurant near where I work. She gets a dinner out without her husband and kids and I have an excuse not to work late on a Friday night - win-win for both of us. Plus neither of us had ever been to La Bodeguita del Medio before and it's always fun to try a new place.
The restaurant was filling up quickly but fortunately we had reservations and were seated as soon as we arrived. It probably helped we were both a little late *cough*. Blame traffic.
In any case, we opted to try out two dishes and share them: Arroz Con Pollo and Tierra y Mar (or surf 'n turf if you want the English translation).  Tierra y Mar was marinated skirt steak, coconut-crusted shrimp , sofrito mashed potatoes and asparagus with avocado-cilantro pesto. Yes, it was as good as it sounded. The only drawback is the price point was a bit high at $26. The restaurant isn't really all that swanky, the serving wasn't super huge and there were only 3 shrimp on it. Still, it was tasty.
Tierra y Mar
The Arroz con Pollo was good as well: Cuban-style braised chicken, platanos maduros (plantains) and yellow rice. It was all under a sauce so you couldn't tell what was chicken and what was plantain until you sliced into it. At $18.50, it was cheaper than the Tierra y Mar and had a more generous serving although taste-wise, I think I liked the skirt steak and shrimp a tad bit better.
Arroz con Pollo
Lisa and I have been friends since junior high and one of the keys to maintaining a multiple-decades-long friendship is having a meeting of the minds when it comes to dessert. Meaning since there were two of us, of course we needed to order two desserts that we would both share. Is that friendship or what?
Bread Pudding with chocolate chips and sultanas in rum sauce
The special of the night that our server told us about was a bread pudding with chocolate chips and sultanas topped with vanilla bean gelato and accompanied by a rum sauce. I don't care for rum but we figured it would be okay in a bread pudding. Gads, were we wrong. The rum sauce was so strong it might as well have been straight rum. We didn't want the candle to be too close to it in case it went up in flames and we ended up with flambeed bread pudding. So we just ate the gelato and parts of the top half of the bread pudding, being careful not to touch the rum sauce at the bottom - neither one of us wanted to get drunk off the sauce (seriously, it was that strong).
Havana Bananas
Fortunately, our second dessert of caramelized bananas turned out much, much better and we polished that off with no problem. See, that's why it's good to order two desserts; one must always have a backup. When our server came to clear our table and asked about our meal, Lisa casually mentioned the rum in the bread pudding was really strong. It wasn't a complaint, just feedback for the kitchen. But our kindly server told us when he later brought our bill that he had taken the bread pudding off. We were taken aback as we hadn't expected that but thanked him. I don't believe in complaining about food or service to try and get something for free, no matter how bad it was but when it does happen, I end up increasing the tip to cover the price of the freebie. Even though technically we got it for free, at least we put the price of the bread pudding into the pocket of our server as a tip. Another win-win. And it was really nice of our server and the restaurant to make that kind of gesture. That alone would bring me back.

Sunday, November 16, 2014

Pumpkin Praline Bread Pudding

Pumpkin Praline Bread Pudding - made November 15, 2014 from Flavor Mosaic
Still experimenting with what to make for Thanksgiving this year. I'm blogging this out of order and leapfrogging it ahead of the other things I made earlier in case anyone else wants to try it for their own Thanksgiving celebration.
I hesitate to make bread pudding as part of a big holiday meal. It's rather substantial and heavy as a dessert and when you add it to a buffet-style offering, it's almost guaranteed to have your guests undo a notch in their belts. Still, Thanksgiving only comes once a year and is a time to express gratitude for bounty. Plus, there's always stretchy pants.
I went with a pumpkin version of bread pudding as a stand-in for pumpkin pie. No one in my immediate family likes pumpkin pie, including me, so we either skip a pumpkin dessert or I come up with an alternative. Pumpkin Praline Bread Pudding is this year's alternative. The custard is rather thick and doesn't absorb into the bread easily so I would suggest planning ahead so that you give the bread time to soak up the custard, at least an hour or two. The nice thing about bread pudding is you can make it the day before and serve it room temperature or warmed up slightly. This helps with time management in the rush of Thanksgiving cooking on the big day itself.
This is a very good bread pudding. The pumpkin flavor is present but not overwhelmingly so and pairs well with caramel. The caramel and pecans is what gives this a little extra, worth-pigging-out factor and why I changed my mind (as of now) about having it as part of our Thanksgiving spread. It's really, really good with the homemade caramel or praline sauce. Make the sauce at the last minute though as the butter separates when the caramel cools. I would suggest having the warm caramel next to the bread pudding and letting your guests pour it over their portion themselves. Chopped toasted pecans next to the caramel would let them add the finishing touches themselves. And since bread pudding is so heavy, you might want to cut these into small pieces.
1 (1-pound) loaf of day-old bread, torn into small pieces (French, Italian or Challah)
1 cup heavy cream
1 cup half and half
1 15-ounce can pumpkin puree
1 1/2 cups granulated sugar
3 tablespoons melted butter
4 eggs
2 teaspoons vanilla
1 tablespoon pumpkin pie spice

Praline Sauce
1 cup unsalted butter
1 cup heavy cream
1 cup brown sugar
1/2 cup chopped pecans toasted
  1. Spray a 9 x 13 baking pan with cooking spray and place torn pieces of bread in the dish.
  2. In a large bowl, whisk together the heavy cream, half and half, pumpkin, sugar, melted butter, eggs, vanilla and pumpkin pie spice.
  3. Slowly pour the batter over the bread pieces in the baking dish, covering them completely. Let stand for at least 1-2 hours.
  4. When ready to bake, preheat oven to 350 degrees F. Bake for approximately 1 hour and let cool to lukewarm or room temperature.
  5. Right before serving, make the praline sauce: in a heavy saucepan over medium-low heat, stir together the butter, heavy cream and brown sugar; bring to a boil. Reduce heat to low, and stir pecans into the cream mixture. (Alternatively, you can leave the pecans out of the sauce and serve it separately to maintain their crunch.) Simmer until the sauce thickens, about 5 minutes; pour over bread pudding to serve.

Saturday, November 15, 2014

Peanut Butter Cup Chocolate Chip Cookies

Peanut Butter Cup Chocolate Chip Cookies - made dough November 1, 2014 from Wall Flour Girl
When I was in Trader Joe's awhile ago, I came across these mini peanut butter cups. I thought Reese's had cornered the market on peanut butter cups but apparently Trader Joe's came up with a mini version they sell in a pack akin to chocolate chips. I myself am not an eater of peanut butter cups but these mini ones were so cute I decided I had to put them in a cookie. Sometimes that's how I end up deciding what to make - I find an ingredient I want to use and choose a recipe accordingly.
Fortunately I usually have at least a couple of peanut butter cookie recipes to try on my pinterest board. As with chocolate chip cookies and oatmeal cookies, I like to try out different recipes. With peanut butter cookies, I don't go for the crisp (dry) version but I like them chewy, soft and chubby.
These certainly fit the bill. The dough was easy to put together, I added chocolate chips into the batter and half the peanut butter cups then after I'd rolled the dough into balls, I stuck a few more mini peanut butter cups on the outside. These do not spread much or hardly at all, especially when you bake them from frozen dough. They won't look like they're baked at 10 minutes but don't leave them in for much longer than that or you won't get the soft, chewy texture. If you don't want the cookies to be puffy, form them as thick discs rather than mounded dough balls. I like the rounded puffy chubster look. In cookies anyway. Tastewise, these are a good version of a peanut butter chocolate chip cookie with a nice blend of both flavors.

1 egg, room temperature
1 cup dark brown sugar, packed
3/4 cup heaping cup peanut butter
1/2 cup butter, softened
1 tablespoon vanilla extract
1 3/4 cups all-purpose flour
1/2 teaspoon baking soda
1/4 teaspoon salt
1 cup semisweet chocolate chips
1 cup mini peanut butter cups
  1. In a large bowl, cream together egg, brown sugar, peanut butter, butter, and vanilla. 
  2. Add flour, baking soda, and salt; mix in until just incorporated. 
  3. Fold in chocolate chips and mini peanut butter cups. Reserve some peanut butter cups to press on the outside and tops of the cookie dough. Scoop dough into golf-ball-size balls and flatten slightly into thick discs or leave rounded. Press mini peanut butter cups into the tops of the discs. Cover with plastic wrap and chill for at least two hours. 
  4. When ready to bake, preheat oven to 350 degrees F. Line a cookie sheet with parchment paper. 
  5. Place dough discs 2 inches apart on prepared cookie sheet. Bake cookies in oven for 8-10 minutes, until edges and top of cookies are set but the centers appear slightly underbaked. Remove sheet from oven and allow cookies to cool for an additional 10 minutes.

Friday, November 14, 2014

La Honda Winery: "Iron Chef" competition

La Honda Winery - "Iron Chef" competition/team offsite on November 7, 2014
We had a team offsite earlier this month where several of our internal groups banded together to go to La Honda Winery. When I hear "winery", I think of lush vineyards bursting with ripening grapes in Napa Valley and dark, cavernous rooms filled with gigantic barrels and lined with pristine wine bottles. I didn't expect a "winery" to be a freeway exit away tucked in what looked like a warehouse district bordering residential housing nearby. But that's what La Honda Winery was and where it was.
They don't grow anything there, of course, since they're surrounded by asphalt but they cultivate small vineyard estates down the peninsula to the Santa Cruz mountains. As near as I can tell, they do small batch wine-making at La Honda and, more importantly for us, they provide a venue for corporate offsites like ours.
For our offsite, we contracted with a culinary company that provided 5 chefs to help each of the 5 teams that we were divided into for an "Iron Chef" competition. We each had a station, there were about 8-9 people on each team and our challenge ingredient was Rice Krispies. Yup, we had to use rice krispies in everything we made, whether they be main dishes, side dishes or desserts. There was a "pantry" of ingredients we could use and the proteins available were salmon, steak and tofu. What we made was up to each team and we had an hour to produce our culinary creations. There was a judge who would rate us on our food (creativity and taste), presentation, and willingness to help other teams.
There were 9 people on my team and, more importantly, several of them knew how to cook. As in real cooking of savory dishes, not just the desserts that I do. People always assume that just because I can bake, I must also know how to cook. Hahahaha! No, and if you've ever tried my cooking, you'd laugh too. But thankfully, it turns out my coworkers have some hidden talents. Given them a cooking station, a knife, some rice krispies and an hour, and look at what they came up with.
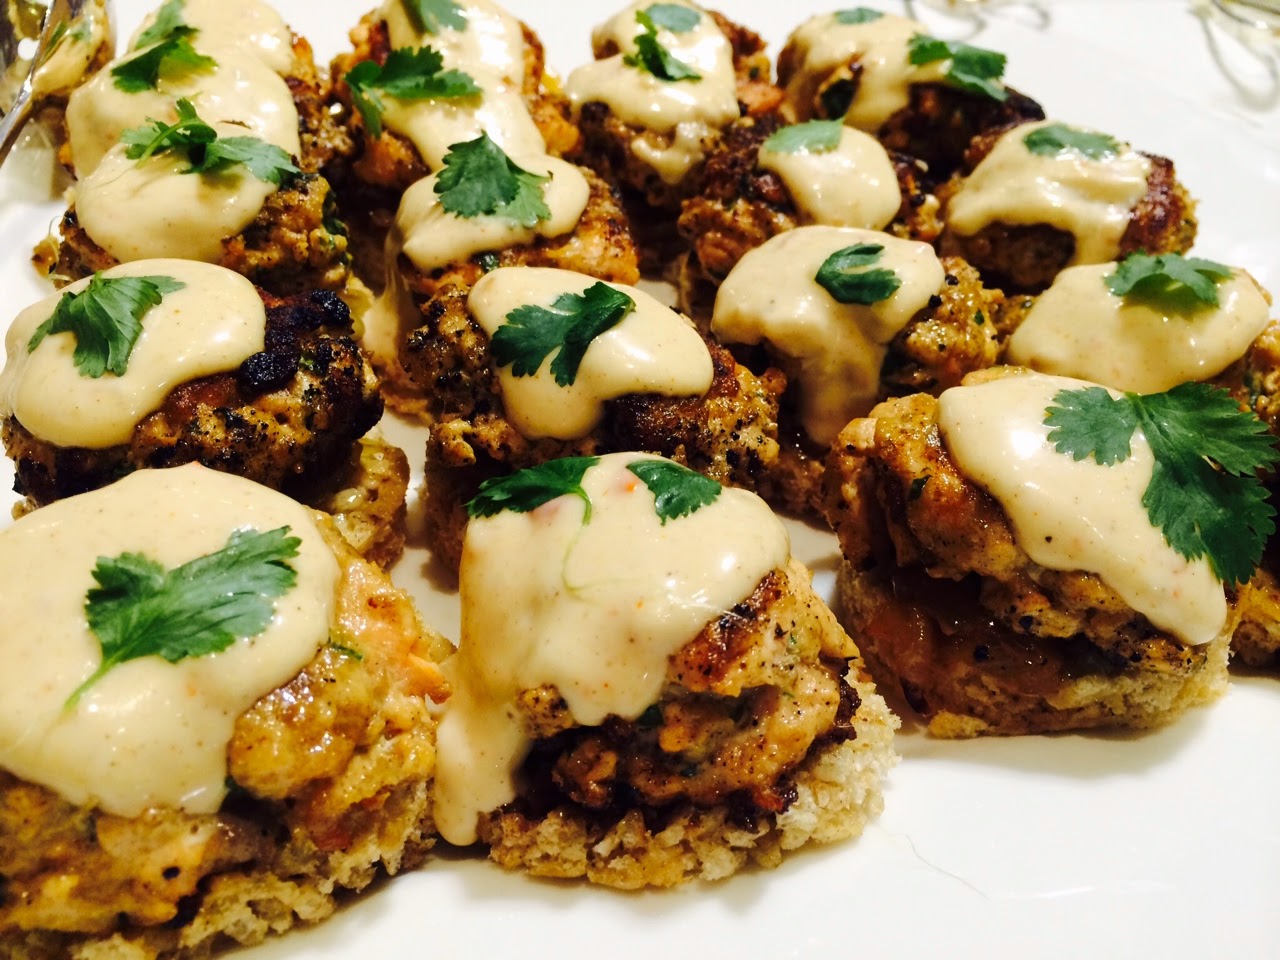
Below is my team's masterpiece creation: "panko" (meaning rice krispies) crusted soy-glazed salmon (super delicious), roasted brussel sprouts sprinkled with rice krispies and rosemary garlic (and rice krispies) mashed potatoes. Amazing, right?
Also submitted as part of our entry were "twin fries". Twin fries because both of their makers had twins themselves plus it was food their sets of twins would eat.
"Twin" fries
I had to pull my weight so I and a fellow teammate who served as my sous chef covered dessert. The dessert I thought I could easily make with the challenge ingredient were my Nutella Crunch Brownies. Totally obvi, right? Except, to my dismay, it turns out the pantry did not extend to having nutella. Or unsweetened chocolate. Or even peanut butter. Eek. I had a hard time getting over that (how could you not stock nutella???) But the minutes were ticking away so I decided to just roll with the nutella-lacking punches and make the crunch topping with just chocolate chips, butter and rice krispies. For the brownie base, because only chocolate chips were available, I went with this brownie recipe and skipped the Snickers add-ins since they didn't have the candy either.
Krispie Crunch Brownies
It was a half success - the crunch topping turned out to be more dollops of topping rather than a layer since the lack of nutella meant there was less topping and it was nowhere near as creamy or spreadable. But the crunch part held and the brownie base turned out decently. My coworkers liked it although I knew it could be better (remember I'm far harder on myself and what I make than other people are) and our chef guide asked me for the recipe afterwards :).
I have to say I was extremely impressed by the dishes from all the teams, not just my own. Although I'm not going to lie, I was partial to my team's submissions - ahem, all 5 entries submitted in the competition, thank you.

Mashed Potatoes
I wasn't taking notes when each team was presenting their dishes and giving them deliciously grandiose names and descriptions so I will just have to let the pictures speak for themselves. There was so much food I couldn't try all of the dishes and had to content myself with taking a small portion from at least half of them. And yes, there were rice krispies in one form or another in every single offering.


Stuffed Mushrooms

Salmon Cakes


Tofu

Potatoes au Gratin


Seriously, I didn't know I was working with such a talented group of people. And especially my team because when the judging was completed, we won! The judge had nice things to say about the entries from all of the teams and rightly so. Her comments about our entries included praise about its "restaurant quality presentation"; we made one team member responsible for presentation and he held up his end with aplomb. It was a really fun few hours away from work and probably one of the best offsites I've gone to. Not sure how they'll top this one at the next offsite but I'm looking forward to it already.

Thursday, November 13, 2014

Overnight Chocolate Chip Cookies

Overnight Chocolate Chip Cookies - made dough November 1, 2014 from Chocolate, Chocolate and More
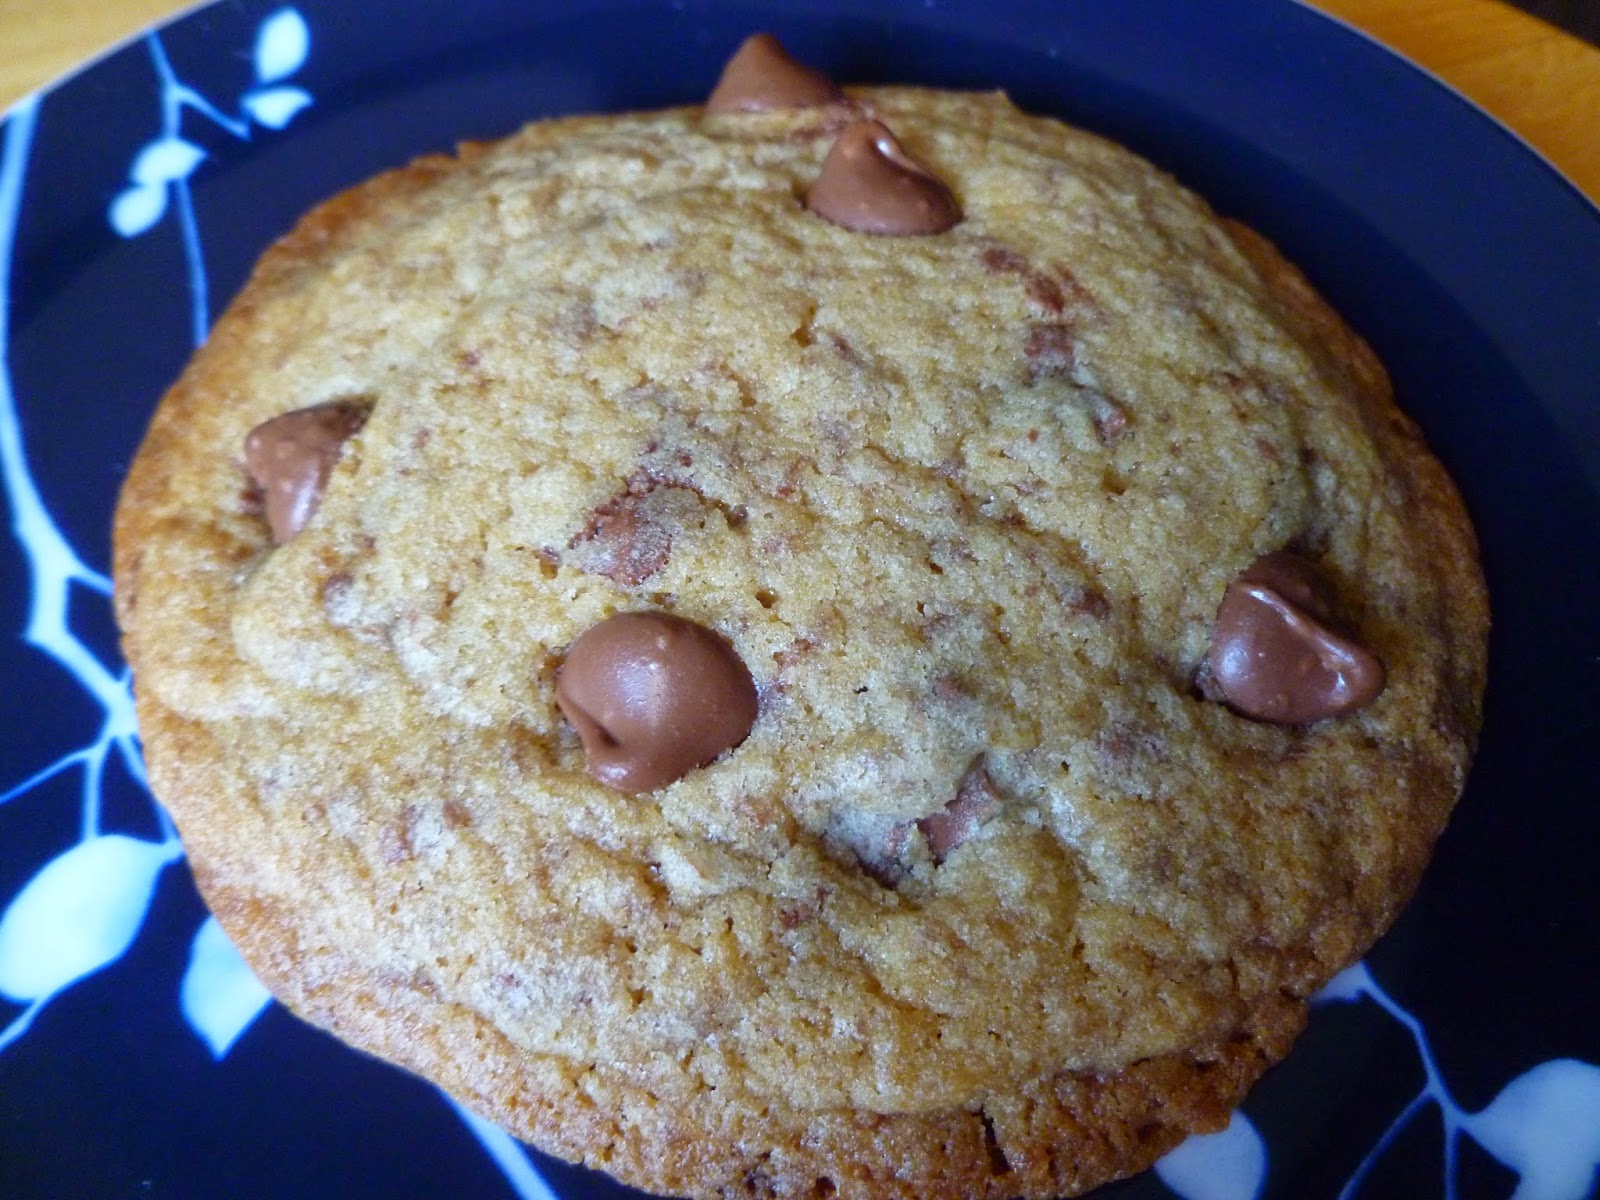
Baked until "done"
Previously, I had experimented with a chocolate chip cookie recipe and its chilling and freezing times. With that recipe, I chilled half the batter in the refrigerator overnight before baking and the other half I frozen immediately after making the dough then also baked it off the next day. With this recipe, I experimented with baking times. It does call for chilling overnight and I did that dutifully although once the 24-hour chilling period was over, I did hustle the dough balls into a freezer bag and put them in my freezer to wait for when I needed them. Like for tomorrow because I'm meeting my friend, Chocolate Chip Cookie Todd, for lunch and I had to have chocolate chip cookies for his cookie bag.
Underbaked just right
It's no secret I prefer underbaked chocolate chip cookies. They're chewy and just have a better texture to me. It's how I've always baked my cookies for years. But I thought I'd try baking until "done" to see if I was missing anything. I've captioned each cookie as to whether it was the fully baked or underbaked one. As you can tell, there's very little different between the two on the outside. That's likely due to the recipe itself - this is just how the cookies turn out on the outside.
Underbaked just right
On the inside is where the difference is the most obvious. With the properly underbaked one, you can see a more dense and moist texture. The outer edges look more fully baked and a little cakey but the middle is definitely more on the chewy side than the cakey end.
Underbaked, chewy not cakey
Underbaked just right
When baked until done, you can see the cakey texture of the inside of the cookie. This will also dry out sooner as the cookie ages and stales since it doesn't have as much moisture as the underbaked one. In terms of taste, they tasted similar since they're from the exact same dough after all. But since a cookie is about both the taste and the texture for me, the underbaked one proves I've been (under)baking chocolate chip cookies properly all this time. I simply prefer the moist, chewy texture of a good underbaked chocolate chip cookie. By the way, unlike with the other experiment where the chilled-overnight cookie tasted better than the freeze immediately cookie, I really couldn't tell a discernible difference in taste with these. They were just good chocolate chip cookies.
Baked a couple of minutes more than it should have
Baked until done - cakey rather than chewy
1 cup butter, softened
1 cup brown sugar
1/2 cup granulated sugar
2 teaspoons vanilla extract
2 eggs
2 1/2 cups all-purpose flour
1 teaspoon baking powder
1 teaspoon salt
2 cups chocolate chips
  1. Cream butter in a large mixing bowl. Add sugars and mix for 5 minutes until creamy. Add in eggs and vanilla and mix well.
  2. In a separate bowl, mix together flour, baking powder and salt. Add flour mixture to butter mixture slowly, making sure to scrape down the sides of the bowl.Fold in chocolate chips. 
  3. Portion into golf-ball-sized dough balls and store dough in an airtight container for 24 hours in the refrigerator. After the 24-hour period, you can freeze the dough or else bake the cookies.
  4. When ready to bake, preheat oven to 350 degrees. Place cookie dough balls on a parchment-paper-lined baking sheet about 2 inches apart. Bake for 8-10 minutes. 
  5. Let cookies cool on baking sheet for 1-2 minutes before removing to rack to cool completely.