Thursday, April 24, 2014

Glazed Lemon Cookies

Glazed Lemon Cookies - made April 19, 2014 from Barefeet in the Kitchen
I've been so busy at work that most of my baking has been confined to weekends. I do some stuff on weeknights but only if I have the energy or inclination. Easter decided to sneak up on me this year and although I'd done the Easter Jewel Cookies just to have an excuse to buy my annual bag of Cadbury mini eggs, it still really didn't hit me that Easter had arrived until it was Good Friday. But I was working that day so it wasn't until Saturday that I finally paid some attention to the fact that the next day was Easter Sunday.
Now that my nieces are no longer little girls running around in Easter dresses searching for Easter eggs and the Easter bunny, we don't really do a big Easter celebration anymore. At least not the non-religious kind. We go to church like we always do and go to lunch afterwards like we do every week. This year, at church, we've had new attendees, including a family with four little girls. It's been so long since we've had kids in Sunday School, that it's refreshing to see little faces at church again. And they're remarkably well behaved little girls when they join the main church for the beginning and ending hymns, always nice to see.
Since I can use any excuse to bake, I decided to make up cookie bags for the kids (with leftovers for the adults, ha). I already had cookie dough from the Cookie Butter Brown Sugar Cookies and the Triple Chocolate Chip Cookies. To provide a variety, I also made Paradise Chocolate Cookies (post coming later) and these Lemon Glazed Cookies. My lemon tree is still running amok with lemons and I also still had lemons I'd picked earlier from both my tree and my mom's tree. They would soon be in danger of drying out in my fridge so I ended up zesting and juicing all of them, saving the juice for future use and using up a good portion of zest in the cookie dough.
Mine didn't come out as nicely uniform as the ones from Barefeet in the Kitchen and they were more domed in the center. If you want them to be of more uniform shape and thickness, I suggest making even-sized dough balls (a cookie scoop helps) and flattening them into thick discs before freezing them. I kept them as dough balls so when I baked them from frozen dough, they spread at the edges but stayed round in the middle. They were still pretty tasty regardless of what they looked like. But you can go the disc route if looks matter as much as taste. The cookie itself wasn't too lemony; the tart lemon-ness comes from the glaze. I liked the pairing because the glaze kept the cookie from being too sweet and the cookie kept the glaze from being too tart. If you want a thicker glaze, more like a frosting, you have to cut back on the lemon juice. But if you don't want to sacrifice lemon flavor in the glaze, add lemon zest. Since I wanted to put the cookies in cellophane bags, I had to have a glaze that set so I used a little more powdered sugar so the glaze wouldn't be too runny. It worked pretty well and I was able to put all 4 kinds of cookies in each goodie bag without making a mess.
2 1/4 cups all-purpose flour
1/2 teaspoon baking powder
1/2 teaspoon salt
3/4 cup granulated sugar
3 tablespoons lemon zest
1 cup unsalted butter, room temperature
1 egg
1 teaspoon vanilla extract

Glaze
1 cup powdered sugar
4-5 teaspoons fresh lemon juice
  1. Whisk together flour, baking powder and salt; set aside.
  2. In a small bowl, combine granulated sugar and lemon zest. Rub the sugar and lemon zest together with your fingers until fragrant.
  3. Cream the butter and lemon-sugar mixture together until light and fluffy. Add egg and vanilla extract. Mix until smooth. Slow add in flour mixture on low speed until combined.
  4. Form into golf-ball size dough balls and chill until firm, several hours or overnight.
  5. When ready to bake, preheat the oven to 350 degrees F. Line two baking sheets with parchment paper. 
  6. Space cookie dough balls evenly on baking sheets. Bake for 10-12 minutes or until cookies are just set and barely golden brown around the edges. Cool on baking sheet for 1 minute then transfer to cooling racks to cool completely.
  7. Glaze: In a small bowl, whisk together powdered sugar and lemon juice. Dip each cookie top into the lemon glaze. Let icing set.

Tuesday, April 22, 2014

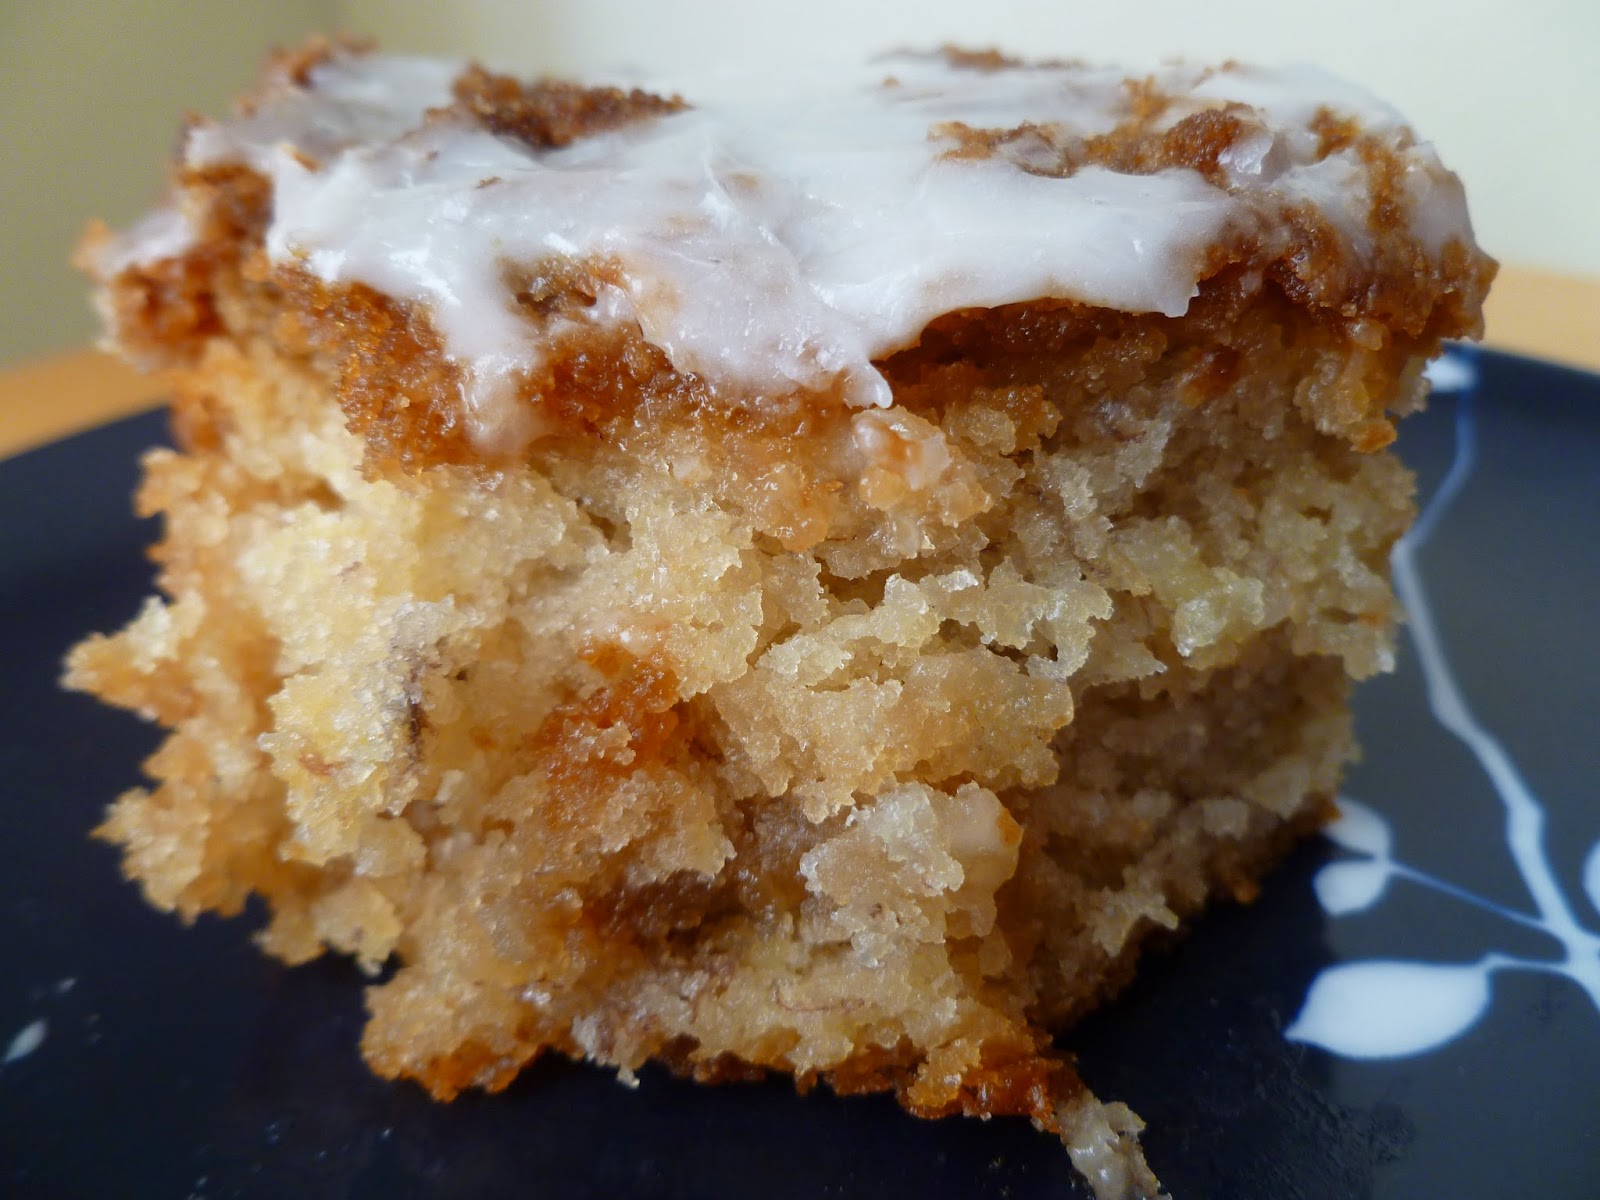
Banana Crumb Cake

Banana Crumb Cake - made April 13, 2014 from Cookies and Cups
Got overripe bananas and want to do something with them other than banana bread? Or, in my case, yet another attempt at a fluffy banana cake with cream cheese frosting? Here's a different way to use up black-skinned, mushy bananas and you'll be thanking yourself for their transformation into this yummy crumb cake.
I am inordinately fond of crumb cakes. Who doesn't love all that crusty brown sugar caramelizing on top of baked cake? I don't make it often because, well, you know, I'd eat it. Which sounds funny because I do eat everything I make. But it's just a matter of how much. I'm typically pretty good about eating a small portion of something as a taste test but then I can walk away and be fine not eating anymore. Yes, I've been told I'm weird that way. But there are certain things I'm less good about walking away from after a tiny piece and this just got added to that list.
This was delicious. Granted, I taste-tested it when it was still lukewarm and the icing had barely set so it was at its peak scrumptiousness. Normally I like to let banana cakes mellow and develop more flavor by eating them the next day but this didn't suffer from being consumed right away. The banana flavor wasn't as pronounced as it was slightly overshadowed by the brown sugar streusel crumb topping but I think that's why I liked it so much. You don't need to include the glaze over it but it doesn't hurt either. At first, when I was sprinkling the crumb topping over the top layer of batter, I was afraid it was too much topping. But I didn't want it to go to waste so I used up all of it. Which was good because it added to the deliciousness of the cake. You can't have a decent crumb cake without a decadent crumb layer so don't skimp!
Once the cake cools and settles, the texture gets a bit heavier. It was probably at its optimum texture when it was still a bit warm. But either at room temperature or warm this was pretty good. I took most of it into the office the next day and I can always gauge how good a recipe is by how long it lasts or doesn't last in the kitchen. A nearly full 9 x 13 cake cut into squares lasted a couple of hours - success. I think the record for fastest baked good to disappear was just over an hour. That recipe will be up on my blog in the next week or so.
2 cups flour
3 teaspoons baking powder
1 teaspoon salt
3 ripe bananas
1/2 cup butter, room temperature
2 cups granulated sugar
2 eggs
1 teaspoon vanilla
1 cup milk

Crumb Filling and Topping
1 cup cold butter, cubed
2 cups light brown sugar
2 cups flour

Optional Glaze
1 cup powdered sugar
1-2 tablespoons of milk, depending on desired consistency

  1. Preheat oven to 350 degrees F. Line a 9 x 13 baking pan with aluminum foil and lightly spray with nonstick cooking spray. Set aside.
  2. In a medium bowl, whisk together flour, baking powder and salt; set aside.
  3. In a large bowl, mash bananas until they become liquified.
  4. Mix in softened butter until combined then stir in sugar, eggs and vanilla; mix well.
  5. Stir in milk and flour until combined.
  6. Crumb Filling and Topping: Combine cold butter, brown sugar and flour together with a fork or pastry cutter or two knives until coarse crumbs form.
  7. Pour half of the batter into the prepared pan and top with 1/3 of the crumb mixture. Cover the filling with the remaining batter and top with remaining crumb mixture.
  8. Bake for 50-55 minutes until the center is set and a toothpick comes out clean. Cool for 10 minutes.
  9. For optional glaze: whisk powdered sugar and milk together until smooth. Drizzle on top of crumb cake.


Sunday, April 20, 2014

Sweet Anna's Fudgy Brownies

Fudgy Brownies - made April 11, 2014 from Sweet Anna's
I was doing a care package for one of my nieces and I keep various brownie recipes pinned on my pinboard for just such an occasion. I also wanted a brownie recipe that used cocoa since I was going to test out my new can of Tcho cocoa powder.
So far I'd been enjoying the Tcho chocolate products I'd bought for baking; they seemed to be good quality and I like that they're focused on sustainable chocolate sourcing. I've tried their baking chocolate, both milk and semisweet and, for this recipe, I broke open their cocoa powder. I judge cocoa powder by the darkness of the powder. The darker the powder, the more chocolate flavor I associate with it. The lighter, the more processing and less flavor. Sadly, I was disappointed that Tcho's cocoa powder was as light as Hershey's and Trader Joe's. I've been spoiled by Pernigotti cocoa which is a luscious dark cocoa powder packed with tremendous chocolate flavor. It's hard for me to bake without it.
Pernigotti and Tcho cocoa powders
You can see what I mean by the picture above. The darker cocoa is the Pernigotti and the lighter is the Tcho. There's a similar contrast between Pernigotti and almost all of the other cocoas I've tried: Hershey's, Trader Joe's, Ghirardelli, even Scharffenberger. For this brownie, I decided to "cut" the Tcho and Pernigotti cocoa powders together: 1/4 cup Tcho and 1/2 cup Pernigotti to try and make the best of both worlds. Not to mention stretch out my Williams-Sonoma-expensive Pernigotti a little further. I do find when a recipe calls for 3/4 cup of cocoa powder, using all Pernigotti makes it a little too dark chocolate for me so tempering it with a lighter cocoa helps balance it out.
This was a good brownie, nicely chocolaty. It was definitely fudgy although it has a softer texture than a more dense brownie has. I think that's due to the relatively higher proportion of liquid to dry ingredients, considering the butter is melted rather than creamed into the batter and water is also added. It was also a little more fragile than some of my sturdier brownie recipes. Not a deal breaker but you should handle with care, especially if you're sending through the mail like I was.
3/4 cup dutch-processed cocoa powder
1/2 teaspoon baking soda
2/3 cup butter, melted and divided (cut the butter first into 1/3 cup + 1/3 cup then melt separately)
1/2 cup boiling water
2 cups sugar
2 large eggs
1 teaspoon pure vanilla extract
1/2 teaspoon salt
1 1/3 cups flour
2 cups chocolate chips
  1. Preheat oven to 350 degrees F. Line a 9 x 13 baking pan with foil, spray lightly with nonstick cooking spray and set aside.
  2. In a large mixing bowl, stir together the cocoa and baking soda. Stir in 1/3 cup melted butter until smooth. Stir in the boiling water until the mixture is smooth and thick.
  3. Stir in the sugar and eggs with the remaining 1/3 cup melted butter. Stir in the vanilla and salt until just smooth.
  4. Add flour and chocolate chips and stir until just combined.
  5. Spread the batter into prepared baking pan and bake for 35-40 minutes, or until a toothpick inserted near the center comes out with moist crumbs. Do not overbake. Cool completely.

Saturday, April 19, 2014

Triple Chocolate Chip Cookies

Triple Chocolate Chip Cookies - made April 12, 2014 from Sally's Baking Addiction
This was another of those recipes that I selected because I was organizing my pantry and for some reason (ha, like I don't already know why), I had half-opened bags of every type of chocolate chip made. Half a bag of white chocolate chips, a handful of milk chocolate chips, a Costco-size bag of semisweet chocolate chip and a third of a bag of mini M&Ms.
Trying to clean out those add-ins means throwing them all in a brown sugar cookie dough, aka chocolate chip cookies. This is a standard chocolate chip cookie. Meaning it was good although mine looked like they spread a trifle more than the ones from Sally's Baking Addiction. I baked them from frozen dough in the convection setting of my oven. They weren't thin but they weren't as thick as I would've liked either. They're a good cookie but I don't know if I would remember them for very long after I ate one. Then again, I make so many cookies that only the truly stupendous would stick out. Still, if you want an easy cookie recipe to use up random add-ins, this is a very forgiving cookie.

3/4 cup unsalted butter, room temperature
3/4 cup dark brown sugar
1/4 cup granulated sugar
1 large egg
2 teaspoons vanilla extract
2 cups (250 grams) all-purpose flour
2 teaspoons cornstarch
1 teaspoon baking soda
1/2 teaspoon salt
1/2 cup semisweet chocolate chips
1/2 cup white chocolate chips
1/2 cup mini M&Ms (or other add-in of your choice)
  1. In a large bowl using a hand-held mixer or stand mixer with paddle attachment, beat the butter for 1 minute on medium speed until completely smooth and creamy. Add the brown sugar and granulated sugar and mix on medium speed until fluffy and light in color. Mix in egg and vanilla. Scrape down the sides and bottom of the bowl as needed. 
  2. In a separate bowl, combine flour, cornstarch, baking soda and salt. On low speed, slowly mix into the wet ingredients until combined. The cookie dough will be quite thick. Add the chocolate chips, white chocolate chips, and M&Ms or other add-ins and mix for about 5 seconds until evenly disbursed. Scoop dough into golf-ball-size balls. Chill or freeze for at least an hour or up to 2 days.
  3. Preheat oven to 350 degrees F. Line a large baking sheet with parchment paper or a silicone baking mat.
  4. Place dough balls evenly spaced apart on baking sheet and bake for 8-9 minutes, until barely golden brown around the edges. They will look extremely soft when you remove them from the oven. Allow to cool for 5 minutes on the cookie sheet. Transfer to cooling rack to cool completely.

Friday, April 18, 2014

Restaurant Review: Woodside Bakery

Woodside Bakery - dinner on April 5, 2014
After my 10K race last weekend, I arranged to have dinner with Lisa, one of my oldest friends from childhood. Lisa and I have known each other for decades. I once made the mistake of thinking we met in high school but she reminded me we'd actually gone to junior high together and were friends way back then. To this day I don't think I've lived down that I *cough* don't remember her from junior high and I could've sworn we only met during our freshman year in high school. Oops, my bad.
Anyway, the most important thing is we're still friends today after all these years. Our daily lives don't intersect that often but we try to get together regularly, often over food or shopping or both. This time around it was centered around food. My coworker, Queen of Cheap Eats, told me about Woodside Bakery; I'd never been there but it was somewhat halfway between me and Lisa so that's where I suggested we meet. Lisa took an evening off from her husband and kids :) and I felt like a good splurge after running my 10K earlier that morning so it met both of our needs to enjoy good food and good conversation.
The inside of Woodside Bakery is divided into a bakery area and an indoor dining area. The indoor seating was a trifle small but fortunately, they had a much larger outdoor seating area. Even more fortunately, it was a nice night when we dined so we were able to enjoy alfresco dining in comfort. They had heat lamps in case anyone got too cold but I thought the temperature was perfect. The only drawback to eating outside was the presence of a few birds who felt quite at home hopping around the tables. Easy enough to shoo them away but not normally something I'm used to doing when eating out. They did gradually disappear as more diners were seated at the outdoor tables and the birds decided being shooed away by pesky humans wasn't worth trying to pick a few crumbs off the floor.
Dinner started off with a small loaf of still-warm bread. All calorie conscious wisdom warns people away from the bread basket. I pay no mind to that foolishness. Hey, I'd just run 6.1 miles and did I mention the bread was served warm?? I liked their bread because it wasn't too crusty and the inside had a perfect dense chewiness that all good bread should have.
Linguine Frutti de Mare
Lisa got the Linguine Frutti di Mare which, according to the menu, came with prawns, calamari, PEI mussels, Little Neck clams, fish, in a light fresh tomato-wine broth for $20. It looked good and was a decent-sized portion.
I was in the mood for a burger and Woodside Bakery sources their meat locally so I went with their Grilled Niman Ranch Burger with cambozola (cheese), smoked bacon, pepper onion aïoli (I had them leave that out since I like my burgers plain) and choice of fries or organic greens for $12.75. It goes without saying I went with the fries instead of the organic greens. I was going to capitalize on my 10K run as much as I could. The burger was pretty good although hefty enough that I was more full than I needed to be since I ate almost all of it and made a respectable dent in the fries.
Of course that didn't stop me from getting dessert: apple pie a la mode. The apple pie lived up to its name in that it was mostly apples. The apples slices were a tad too firm and not that sweet. I forgot my friend Annie the Baker's recommendation to only get apple desserts in the fall when apples are in season. Still, the pie was good overall and the crust was flaky, always the hallmark of a good pie crust. Lisa got the creme brulee and for once I didn't sneak a bite since I was hitting the "stop!" mark with eating after the bread, the burger, the fries and the apple pie.
We stopped off at the bakery on our way out to peruse the selections but at that point, I was so full even looking at the displays made my stomach ache. Normally I would've gotten a slice of something to go and just eaten it later but even that seemed too much, considering I felt I probably shouldn't eat for at least a day or three.
Still, overall, it was a good experience and I definitely want to come back again and try breakfast or lunch. And leave room for one of the cake....slices.

Wednesday, April 16, 2014

Cookie Butter Brown Sugar Cookies

Cookie Butter Brown Sugar Cookies - made dough April 11, 2014 from Averie Cooks
Have you tried cookie butter yet? Do you know there's something ironic about making a spread from (biscoff) cookies then making that spread back into cookies? It's almost like dehydrating fruit for one texture then plumping them back up with water for another texture. But, if all's right with the world, the taste remains the same or perhaps better. Such is the case with Biscoff and Biscoff spread. Or more generically known as cookie butter. You can find the knockoff version at Trader Joe's, labeled Speculoos, next to the peanut butter and almond butter. I found this jar of Biscoff spread at Costco. It practically jumped into my cart, shoving aside the Nutella to cozy up next to the 10-lb bag of granulated sugar and 72-ounce package of chocolate chips. Funny how inanimate objects will do that when I need want them for baking.
I first drooled over these cookies on Averie's blog. I've raved before how her cookies make me want to lick my screen as a visceral reaction whenever I see them. So I was excited to try out this recipe. Except....mine didn't come out the way hers did. Mine wasn't as chubby and they formed a crust on top, almost like when you bake packaged brownies and they have that thin film on top after baking. I followed her directions to the letter and I think the problem was beating the dough after the eggs were added for the 4 minutes she mentions in her original directions. Usually I don't beat cookie dough that long after the eggs are in it because that's what causes that meringue-like crusty film. I also didn't add the extra two tablespoons of flour because I didn't think I needed to (the dough wasn't oily). After freezing them overnight, I baked them as long as she said to in her directions but they still seemed a little raw even after they had cooled. They didn't have the scrumptious-looking texture hers did. Click on the link to see her original post and you'll see what I mean.
However, they still tasted good. Cookie butter rules. As with nutella and peanut butter, I don't eat it straight out of the jar but I love it in baked goods. I'm going to try this recipe again, beat it for less time, add the two extra tablespoons of flour, and bake it a trifle longer to see if I can get something closer to what hers looks like. This is the first time mine didn't turn out the way hers did so now I feel the pressure to "fix" what I did. And that has almost nothing to do with wanting this cookie again.
1 large egg
1 cup creamy Cookie Butter or Biscoff Spread
3/4 cup light brown sugar, packed
1 1/2 tablespoons vanilla extract
3/4 cup plus 2 tablespoons all-purpose flour
2 teaspoons cornstarch
1 1/2 teaspoons cinnamon
1 teaspoon baking soda
pinch salt
  1. In the bowl of a stand mixer fitted with the paddle attachment, cream together the egg, cookie butter, brown sugar and vanilla on medium-high speed until light and fluffy, about 4-5 minutes. 
  2. Scrape down the sides of the bowl and add flour, cornstarch, cinnamon, baking soda and salt; mix on low speed just until incorporated, about 1 minute; don't overmix. If dough is too oily, add up to 2 tablespoons of flour.
  3. Using a medium 2-inch cookie scoop, form heaping two-tablespoon mounds. Flatten slightly, cover with plastic wrap and refrigerate for at least 3 hours and up to 5 days before baking.
  4. Preheat oven to 350 degrees F. Line a baking sheet with parchment paper. Place dough mounds on baking sheet, spaced at least 2 inches apart. Bake for 8 minutes, or until edges have set and tops are just begining t o set, even if slightly undercooked, pale and glossy in the center. Do not bake longer than 9 minutes for soft cookies; they will firm up as they cool. Cool completely on wire racks.

Tuesday, April 15, 2014

Banana Cake #13

Banana Cake - made April 6, 2014 from Evil Shenanigans
I've decided I'm going to start numbering my banana cake experiments. It's much easier to track them by number than to call them all sorts of variations of "banana cake with cream cheese frosting". Let's see how many banana cake recipes I'm going to try in my quest to get close to the fluffy texture of the banana cake from Icing on the Cake.
This is number 13 and while it was good, it's looking like I'll be making a 14th attempt because the texture of this was typical of most banana cakes: moist and cakey but not fluffy enough. I made it in a 9 x 13 pan instead of as two round cake layers, both for ease of cutting and serving at work but also because it was easier and less time consuming to bake in one large pan than two smaller ones that I would then have to fill and frost. The taste was fine but the texture still wasn't right. Back to the drawing board.
1 cup mashed ripe bananas
1 cup buttermilk
2 cups all-purpose flour
1 teaspoon baking soda
1/4 teaspoon baking powder
1/4 teaspoon salt
1 stick unsalted butter, room temperature
1 3/4 cups sugar
2 eggs
1 tablespoon vanilla

Frosting (I only made a half recipe for the 9 x 13 pan)
8 ounces cream cheese, cool but not cold
1 stick (8 tablespoons) butter, room temperature
3 cups powdered sugar (or less depending on your preferences to taste and consistency)
1 teaspoon vanilla
  1. Preheat the oven to 350 degrees F. Prepare two 8 or 9" cake pans with parchment rounds or 1 9 x 13" pan lined with foil and spray with nonstick cooking spray.
  2. Mash ripe bananas with a fork until mostly mush.
  3. Pour buttermilk into the bananas and whisk together. Set aside.
  4. Sift the flour, baking powder, baking soda, and salt in a large bowl and set aside.
  5. In the bowl of a stand mixer fitted with the paddle attachment, cream the butter and sugar until well mixed and lighter in color. Add the eggs one at a time and then the vanilla. Mix well.
  6. Add the dry ingredients and the banana mixture in three additions, starting and ending with the dry ingredients.
  7. Pour the batter evenly into the prepared pan(s). Bake for 35-40 minutes or until the cake springs back when lightly pressed and pulls away from the sides of the pan and the toothpick inserted near the center comes out clean.
  8. Allow the cake(s) to cool for 10 minutes in the pan(s) then turn out to cool completely on racks.
  9. While the cake(s) cool, prepare the frosting: cream the cream cheese with the butter then add the powdered sugar and vanilla. When frosting is desired consistency, frost the cooled cake(s).


Monday, April 14, 2014

Restaurant Review: The Pasta Market

The Pasta Market - takeout on April 4, 2014 and April 8, 2014, 3.5 stars on yelp, 170 reviews
The Pasta Market is the place my cousin Christine recommended for takeout pasta. The one I was looking for when I ended up at Bon Chon Chicken the first time around. Turns out I needed to go just a little farther to the next strip mall over. Their menu is posted outside on the glass wall so you can take your time perusing their selections before going inside and placing your order. Although they also have menus inside if you missed it outside, both mounted and as paper copies at the counter.
It was fairly empty the first time I went but I was a bit on the early side, just before 6 pm. They offer the standard selections of different pastas (spaghetti, angel hair, linguine, fettuccine, gnocchi) in various sauces (marinara, bolognese, pesto, alfredo, carbonara) as well as filled pastas like tortellini, cannelloni, ravioli and lasagna. You can also opt to add more vegetables or proteins like chicken, shrimp, etc to your pasta dishes for an extra charge. To further carbo load, there are also pizza and calzone options as well as specialty entrees like veal parmigiana, linguine vongole, and sandwiches. So basically, the Italian version of a Chinese menu.
Most, if not all, of the orders come with your choice of breadsticks or garlic bread. The first time I went, I chose the breadsticks as the guy behind the counter said that's what they were known for. They were good but ironically I preferred the garlic bread that I tried on my second visit.
Breadsticks with cheese spread for dipping
The first time I went, I ordered the spaghetti and meatballs in meat sauce - my comfort food. They give a pretty decent-sized portion for something less than $10 so I more than got my money's worth. Moreover, they give a lot of sauce proportionate to the noodles (at least to me) so I ended up boiling my own angel hair pasta and adding it to the original dish. So I got 3 meals out of the 1 order. That's one way to make my takeout dollars stretch.
I don't know that I would call it gourmet Italian cuisine. It's okay. I don't have a very high bar for pasta so it suited me just fine. Moreover, it was convenient and at the right price point for a takeout meal. You can order at the counter when you arrive and they have your order ready within 5 minutes or you can call ahead to place your order and pick it up when you're ready. A boon for busy working families or overworked non-cooks who want a different option than Lean Cuisine at the end of a work day. Ahem.
Spaghetti and Meatballs
The staff was very nice both times I've gone. They're friendly and courteous, they ask if you want plastic utensils when you pick up your order and they provide extra packets of Parmesan for sprinkling over the pasta. They also accommodated my request both times for different noodles (angel hair for the spaghetti & meatballs and spaghetti noodles instead of linguine for the carbonara). I know it's just as easy for them to boil one type of noodle than another but I appreciated the flexibility and customer service.
The only thing I would caution is they do have a tendency to overcook their pasta; at least both of the orders I tried on 2 separate visits were over done. So if you like your pasta al dente, you may want to specify that or else lower your expectations.
Chicken Carbonara
The carbonara was good too and I appreciated the generous amounts of chicken and prosciutto in it as most places tend to skimp on the protein. As with the spaghetti, there was more than enough carbonara sauce for me to add my own noodles and once again, I got three servings out of one order from this one as well. If you're like me and don't cook, having 1 takeout meal feed you for 3 days (okay, yes, that did strike me as sounding just a little bit pathetic) means 2 days you don't have to worry about "what's for dinner?" Pathetic or not, I'll take it.
Garlic Bread
On my second visit, I finally noticed that to the right of the counter where you place your order, they had a refrigerated display case of desserts. How I missed that the first time around I can't explain. I made up for the oversight by choosing a slice of chocolate cake, "just to see" what it was like.
Normally, I'm very cynical about these things and didn't have high expectations of something sold out of a display case that isn't in a bakery. Color me wrong because I thought the chocolate cake was excellent. The cake layers were moist and whatever mousse/filling they used between the layers was delicious. It was heavier than a mousse but not sickly sweet like a frosting. It had the consistency of a creamy cheesecake but not the flavor or tang of a cheesecake. So I don't know what it was other than a dense, yummy mousse. Don't forget the part where I don't usually like frosting or creamy desserts. So for me to like this when it was mostly creamy, frosting-like confection is something.
Chocolate Cake - $3.95
It was pretty rich and normally I'd have a few bites of something like this then leave the rest for the next day just to exercise portion control. This time around, I told myself to put a sock in it and enjoyed it all on the same day. Granted, I had to spread the bites out over a 2-hour period but I still ate it all. And licked my fork.

Sunday, April 13, 2014

Easter Jewel Cookies

Easter Jewel Cookies - made dough April 11, 2014, baked April 12, 2014 from Saving You Dinero
For the past few years, for Easter, I've made some kind of "nest" or basket dessert recipe. I've done Nutella Rice Krispie Easter Baskets, Chocolate Easter Baskets made out of chocolate and pretzels, and Almond Joy Brownie Easter Nests. Traditional Easter desserts can also include carrot cake or anything with lemon to capture the springtime essence. You'll notice that my Easter creations tend to center around using Cadbury mini eggs. Meaning the only reason I make something is to serve as an excuse to buy my annual bag of mini eggs and put them on top of something. This year I was out of nest/basket ideas and a search for "Easter cookies" came up with a horrifyingly beautiful assortment of iced and decorated cookies. The kind that's out of the reach of my decorating skills. But I did find this recipe from Saving You Dinero and loved it for its simplicity (links in post title).
It's essentially a little butter cookie you bake and then you push a mini egg into the center (the original recipe called for peanut M&Ms but I took liberties) as soon as you take the cookies out of the oven. The pastel colors represent springtime and you remain loyal to the Easter icon of the eggs. I also like it because if you have kids, they can easily help you with this recipe. Even if they're too young for the actual making of the dough, at least they can have the fun of pushing the mini egg into the cookie. They can "help" and it's a fun family activity - always a good way to celebrate Easter.
I really liked these cookies. Not only do they have the springtime Easter cuteness factor, but they're also quick and easy to make, you make the dough ahead of time and freeze so you can bake them on your schedule, and most importantly, they taste good. Use fresh butter (of course) to get that butter goodness taste shining through. The cookies don't spread if you bake from frozen dough, something I highly recommend. Make the dough balls small to keep them proportional to the size of the Cadbury mini eggs. These are especially good if you eat them lukewarm as the chocolate inside the candy shell, while not melt-y, will be soft. As always, do not overbake these. The cookies won't turn brown except on the bottom so time them and don't leave them in for too long or they'll easily become dry. Baked just right, they're a little bite of buttery goodness. Just like peanut butter blossoms seem to be a traditional cookie at Christmas, I think these just became my go-to Easter cookie.
1 cup unsalted butter, softened
1 cup granulated sugar
2 eggs
1 teaspoon vanilla extract
3 1/2 cups all-purpose flour
1/2 teaspoon baking powder
1/4 teaspoon salt
pastel M&Ms or Cadbury mini eggs
  1. Cream butter and sugar in a large mixing bowl. Mix in egg and vanilla until well incorporated then add flour, salt and baking powder slowly.
  2. Split dough in half and wrap in plastic. Refrigerate for 1 hour. Alternatively, you can form into dough balls and freeze 12 minutes prior to baking.
  3. Preheat oven to 350 degrees F.
  4. If you haven't already, shape dough into small balls about the size of a walnut and place 2 inches apart on baking sheets lined with parchment paper.
  5. Bake for about 10-12 minutes, until lightly browned on the bottom edges. Do not overbake.
  6. Remove from the oven and immediately press one pastel M&M or Cadbury mini egg into the center of each cookie. Remove from baking sheet and allow to cool completely.