Friday, October 25, 2013

Bacon Quiche

Bacon Quiche - made October 12, 2013, recipe modified from For the Love of Food
I love quiche.  I hardly ever make it because of how many calories are in it from the heavy cream, cheese and crust but I still love it.  I had the best quiche when I went to Paris many years ago but it's hard not to have the best anything when you're in Paris.  Come on, it's Paris.  But, back here in the USA, I decided to make one because I had a frozen pie crust in my freezer from long ago and I was tired of looking at it, mocking me for not making a pie and threatening to get freezer burn if I waited much longer.  Plus I still had most of the turkey bacon from the Cheesy Sweet Potato, Sausage and Bacon Chowder.  So I went with this recipe for Bacon Quiche from For the Love of Food.
Since the pie crust was already pre-made/store-bought (sorry, genuine pie crust makers), this was easy to put together. Cooking the bacon ahead of time was the only "complicated" thing about it which isn't complicated at all except that turkey bacon doesn't really get as crisp as real bacon since there's less fat. 
Other than that, everything else was just about mixing the rest of the ingredients together and pouring it in the unbaked pie shell.  I put the pie pan on a baking sheet and baked it that way, partly because you don't want any egg mixture or custard to bake too hot or too quickly or you won't get a creamy texture (the eggs will curdle instead) and partly to catch any spills if the filling overflowed the pie pan.

Fortunately, it didn't overflow and this baked properly to a nice, creamy texture.  I took the picture of the slice I had cut out when the quiche was still a little warm so it might look a bit runny but once it had cooled, it was the right texture.  You don't want to overbake a quiche, especially if you're not going to eat all of it right away.  When you heat the leftovers, the custard will keep cooking and it's easy for the texture to become rubbery. I really enjoyed this quiche, to the point that I had to cut it into individual slices, wrap them up and place them in the freezer so I could space out how often I was going to eat it. No point tempting myself to snarf up more than one slice at a time. When reheating quiche, I recommend wrapping it in foil and heating in a toaster oven.  The bottom crust may still be a bit soggy but at least not as much as it would get if you heated in a microwave.
1 pie crust, unbaked
8 slices of bacon, crumbled (I used turkey bacon)
2 1/2 cups of shredded Swiss Cheese
2 Tablespoons of flour
4 eggs
3/4 cup of heavy cream
3/4 cup of half and half (half cream/half milk – mix it yourself if you can’t find any)
1/2 teaspoon salt
Dash of Pepper
Tops from 2 green onions,chopped, optional
  1. Preheat oven to 350°F.
  2. Cook bacon in the microwave until crisp. Once cool, crumble and set aside.
  3. Place your pie dough in the pie dish; set aside.
  4. In a medium bowl, combine the cheese and flour; mix well. In a large bowl, beat the eggs then add cream, half and half, salt, pepper, bacon, and cheese mixture. Mix well.
  5. Pour into the pie crust-lined pie dish.
  6. Bake for 30-45 minutes or until knife inserted into center comes out clean. Let it stand for 10 minutes before serving. 

Thursday, October 24, 2013

Apple Streusel Bars

Apple Streusel Bars - made October 5, 2013 from Lovin' from the Oven
Although apples are available year round, I always associate them with autumn.  My friends in New England have an annual tradition of going apple picking and it always sounds like a lot of fun, the quintessential fall activity.  My friend Annie the Baker who used to be the head pastry chef at Mustard's in Napa Valley recommends getting apple desserts in restaurant only in the fall because that's their best season.  So fall always means apples to me.
And apple desserts like this one. It's not quite a cobbler, despite its appearance from the top.  Instead, you have a bottom layer of sweet pastry, then a layer of cinnamon-sugared apple slices, followed by a crumb topping which is just crumbles of the same pastry dough that makes up the bottom layer. Bake to golden and glaze.
While I normally don't like fruit desserts since I prefer my fruit to be whole and consumed in its natural state, apples are an easy exception, especially with desserts like these.  If you want to serve it warm, you can treat it more like a cobbler with a scoop of vanilla ice cream on top.  Leave off the glaze if you don't want it to be too sweet.
But I actually liked this better served at room temperature and, as a rare exception, served the day after I made it.  Freshly made, it's good but a bit more gooey and soft so I tended to focus more on the texture than the flavor.  The next day it was even better because the flavors just seem more developed and pronounced.  It's also easier to slice neatly since the apples have firmed up.
For sweet desserts like this one, I almost always use Granny Smith apples.  The pastry layer and topping plus the glaze and the cinnamon sugar you roll the apple slices in are sweet enough.  The tartness of Granny Smiths offers a nice contrast in flavors to the sweetness of the other ingredients. I thought this was a perfect snack dessert and is going into my fall baking repertoire.

Sweet Pastry
2 cups flour
1/2 cup sugar
1/2 teaspoon baking powder
1/2 teaspoon salt
1 cup butter, softened
1 egg, beaten
Apple Filling
1/2 cup white sugar
1/4 cup flour 
2 teaspoons cinnamon
4 cups (about 3 medium) sliced, peeled baking apples (I used 3 large Granny Smith apples)

Glaze
2 cups powdered sugar
About 3 tablespoons whole milk
1 teaspoon vanilla extract
  1. To prepare crust, mix flour, sugar, salt, and baking powder in a medium bowl. Cut in butter with a pastry blender or two knives until you have pea-sized crumbles. Gently mix in beaten egg. 
  2. Spray a 9×13 baking dish (I used a 9×9) with non-stick cooking spray. Gently pat about 2/3 of the crumb mixture onto the bottom of the dish. Preheat oven to 350 and set aside.
  3. To prepare apple filling, combine flour, sugar, and cinnamon. Toss with apples and spread apples out on prepared crust. Sprinkle reserved crust mixture over apples evenly and bake in preheated oven for 40 minutes (mine took just less than 50 minutes). When finished, allow to cool completely.
  4. To prepare glaze, whisk together powdered sugar, almond extract, and enough milk to achieve desired consistency. Place glaze in a Ziploc bag and cut off a very small portion of one of the corners. Drizzle glaze over cooled pastry and allow to harden (you can place it in the freezer to hurry things along). Cut into bars and serve.

Wednesday, October 23, 2013

Restaurant Review: Gochi Japanese Fusion Tapas

Gochi Japanese Fusion Tapas - lunch on October 4, 2013, 4-star rating on yelp
I had never heard of Gochi before but when a coworker suggested it as a place to meet for lunch, I was game, especially since it's within easy driving distance.  Not to mention it's got a 4-star rating on yelp from 1333 reviews so that made it worth checking out to see what the hype was about.
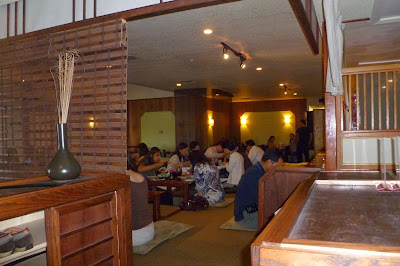
When you walk in, they ask you to remove your shoes before stepping into the seating area of the restaurant. You leave your shoes in one of their cupboards near the entrance and although you do "sit on the floor", there are sunken spaces underneath the tables with room for your legs and feet so you can sit as you would in a chair. I think it's a common misconception that at a "traditional" Japanese restaurant that the patrons sit on the floor.  Technically yes but it's an elevated floor and the floor is your chair so it's not that different than a non-Japanese restaurant.  You don't sit on the floor cross legged since there's space for your lower body in the sunken area underneath the table.
The special
My coworker ordered the special which came with a variety of dishes.  She had been here before and said "everything is good, I've never eaten anything bad here" so she didn't even care what came in the special; she knew it would be delicious.  Talk about faith. It came with miso soup, rice, some kind of chicken dish and some sort of fish.  She said it was all good so her faith was justified.
Chicken Katsu with a bowl of warm udon
I'm a bit more of a skeptic so I opted for something I did know: chicken katsu with a bowl of warm udon.  You can order a lunch entree and it comes with cold or warm udon, your choice. And I must say I made a good choice.  The katsu, breaded fried chicken atop a bowl of rice, mixed with caramelized onions, soft scrambled eggs and dried seaweed bits, was delicious.  I picked out the onions because, while I don't mind their taste, I don't like the texture.  But that was the only change I would've made to the katsu bowl.  The rice was amazing.  In general, Japanese restaurants serve some of the best rice I've ever had and Gochi held up that stereotype. It's hard to describe the difference between good rice and great rice but they had great rice. Moist but not overly wet, perfectly cooked and so good that although I'm usually indifferent to rice and don't eat it all that much (I know, it goes against my Asian roots - my cousins think I'm an alien every time I mention I don't eat rice that often), I ate every speck of rice from that bowl, even when I ran out of chicken katsu. Yup, it was that good.
The bowl of warm udon also held its own.  I liked the broth and the udon noodles.  Even more amazing, those two items combined were only $8.50.  Unheard of since most Japanese restaurants I've gone to are hardly ever that cheap.  Top it off with how good the food was and it explains that 4-star rating amongst so many reviewers.
Chicken Katsu
It might also explain why Gochi goes against traditional wisdom in terms of their hours.  They're closed on Sundays which is highly unusual for a restaurant to give up half of its weekend traffic.  According to my coworker, they also close for a couple of weeks during the holidays.  Good for them, I say, but again, unusual.  Beyond their business hours, they're also located in one of those non-destination strip malls.  If you come here, it's probably to go to Gochi and not that you're popping into the restaurant because you were already in the strip mall for something else or just wandering around. 

We came at noon and were fortunate enough to be seated right away but I've been told Gochi does get crowded and there's usually a wait, especially for dinner.  If your party isn't all there, they don't seat you until everyone is present. I liked the place but I don't know how long I'd be willing to wait for a table.  So I may just stick to lunch forays for now.

Tuesday, October 22, 2013

Sweet Potato Biscuits

Sweet Potato Biscuits - made October 12, 2013 from Martha Stewart
Goodbye, third sweet potato - you were sacrificed for this recipe because I loved how the picture of these biscuits looked on Martha's website.  Unfortunately, you might've been sacrificed in vain because my biscuits didn't come out looking like hers. Nor did they taste very sweet potato-ey.  Sorry about that but I will think of you fondly for contributing to the cause.
Okay, now that I'm done talking to the sweet potato, here's the deal with these biscuits: easy to make and only gets as complex as boiling the sweet potato I was conversing with, mashing it with a little salt and pepper and using 3/4 cup of it in the biscuits. Then you make like any other biscuits by mixing wet and dry ingredients, patting dough into a disc and cutting out round biscuits to bake closely together in a pan.
Mine didn't get the height of Martha's biscuits so they were a bit flat.  Not sure why but maybe I should've kept the dough disc thicker before cutting out the biscuits.  They were good but I didn't really get much of a sweet potato flavor from them. They tasted like normal biscuits that were slightly colored orange. Oh well, back to the store for more sweet potatoes and back to crawling pinterest for more sweet potato recipes.
1 3/4 cups all-purpose flour, plus more for kneading and shaping
2 tablespoons light-brown sugar
2 1/2 teaspoons baking powder
1 teaspoon salt
1/2 teaspoon baking soda
6 tablespoons chilled unsalted butter, cut into pieces, plus 1/2 tablespoon melted butter and more for pan
3/4 cup, chilled Sweet-Potato Puree
1/3 cup buttermilk
  1. Make the dough: In a large bowl, whisk together flour, sugar, baking powder, salt, and baking soda. With a pastry blender or two knives, cut in butter until mixture resembles coarse meal, with some pea-sized lumps of butter remaining. In a small bowl, whisk together sweet potato puree and buttermilk; stir quickly into flour mixture until combined; do not overmix.
  2. Shape the biscuits: Turn out dough onto a lightly floured surface, and knead very gently until dough comes together but is still slightly lumpy, five or six times. (If dough is too sticky, work in up to 1/4 cup additional flour.) Shape into a disk, and pat to an even 1-inch thickness. With a floured 2-inch biscuit cutter, cut out biscuits as close together as possible. Gather together scraps, and repeat to cut out more biscuits; do not reuse scraps more than once.
  3. Bake the biscuits: Preheat oven to 425 degrees, with rack on lower shelf. (I baked at 400 degrees as 425 is too hot for my oven and would burn the tops of the biscuits before they're fully baked.) Butter an 8-inch cake pan. Arrange biscuits snugly in pan (to help them stay upright). Brush with melted butter. Bake until golden, rotating once, 20 to 24 minutes.

Monday, October 21, 2013

Chocolate Chip Cookie Dough Brownies

Chocolate Chip Cookie Dough Brownies - made October 6, 2013 from The Brown-Eyed Baker
My confession for today is I don't get the love some people have for cookie dough.  I know there are a lot of cookie dough lovers out there as evidenced by the plethora of cookie dough products: cookie dough ice cream, cookie dough "bites" enrobed in chocolate, cookie dough dropped in cupcakes, cookie dough frosting, even cookie dough extract.  I even have friends who've confessed they buy those tubes of cookie dough and eat it "straight" from the tube.  Let me take a moment to wrap my mind around that.  Except I can't because my mind is busy being boggled.  Really? I'm having trouble grasping the concept (even aside from grappling with the idea of store-bought cookie dough) since I'm not even one to lick the bowl and I definitely don't snitch cookie dough before I bake it.   
I don't like cookie dough because of the grit from the unbaked sugar.  Plus it tastes sweeter than its baked counterpart.  Not to mention the whole salmonella risk from eating cookie dough made with raw eggs.  But cookie dough lovers assure me they're fearless on that score and their cookie dough passion makes them risk takers.  I'll take their word for it.
So in an effort to overcome yet another culinary prejudice, I tested out these cookie dough brownies.  You make the brownie layer just like you would any other brownie recipe, let it cool completely, then layer on an eggless cookie dough over it (I will not risk salmonella, even if others would).  Chill, cut and serve cold. While I myself couldn't see the appeal of this brownie, I figured I'd have coworkers who might.  In other words, I was trying to flush out who were the cookie dough lovers in the office.
My findings were interesting.  It turns out that cookie dough is like coconut.  People either really like it or really don't.  Not many people were in the indifferent middle.  I had a few coworkers rave about these ("I love cookie dough!") while at the other end of the spectrum, one coworker confessed she took off the cookie dough layer and just ate the brownie.  LOL, I would've done the same if I hadn't had to taste test this.  For this particular recipe, I think it would've been better if the brownie layer had been even more dark chocolaty, just to offset the sweetness of the cookie dough layer. Because you're supposed to chill it and serve it cold due to the cookie dough layer, the brownie flavor doesn't come across as well when it's cold as opposed to room temperature. But again, that's my prejudice.  If you're a cookie dough lover, you might like these.

For the Brownie:
4 ounces unsweetened chocolate, finely chopped
1 cup unsalted butter, at room temperature
2 cups light brown sugar
4 eggs
2 teaspoons vanilla extract
1 cup all-purpose flour

For the Cookie Dough:
¾ cup unsalted butter
¾ cup light brown sugar
¾ cup granulated sugar
3 tablespoons whole milk
1½ teaspoons vanilla extract
1½ cups all-purpose flour
1½ cups mini chocolate chips

  1. Prepare the Brownies: Preheat oven to 325 degrees F. Line a 9x13-inch pan with foil and spray lightly with nonstick cooking spray.
  2. In a medium glass bowl, melt the chocolate in the microwave in 30-second increments, stirring after each, until melted and smooth. Set aside to cool slightly.
  3. In a large mixing bowl, mix the butter and brown sugar with an electric mixer on medium speed until light and fluffy. Beat in the eggs and vanilla extract, scraping the bowl as needed. Mix in the melted chocolate until combined. Reduce the speed to low, add the flour and mix just until combined (don't over-mix). Spread the batter into the prepared pan. Bake 25 to 35 minutes, or until a toothpick inserted into the center comes out clean. Let cool completely.
  4. Prepare the Cookie Dough: In a medium bowl, use an electric mixer on medium speed to combine the butter and both sugars. Add the milk and vanilla and mix until combined. Reduce the speed to low and mix in the flour just until combined. Using a rubber spatula, stir in the chocolate chips.
  5. Spread the cookie dough over the cooled brownies. Refrigerate until the dough is firm, about an hour. Use a sharp knife or a pizza cutter to cut the brownies. Store the brownies in an airtight container at cool room temperature or in the refrigerator.

Sunday, October 20, 2013

Bakery Cafe Review: Specialty's

Specialty's - breakfast and lunch more times than I can count
I discovered Specialty's when I was working at my first job out of college in San Francisco.  I would sometimes walk around downtown during my lunch hour and I'd always see a line outside this shop.  I mean, always, regardless of which day it was. Back then, it was one of a handful of small Specialty's shops sprinkled in downtown San Francisco: each one typically a small storefront with a glass display lined with trays full of breads, scones and cookies.  People would point to what they wanted from the display case or put in an order for a sandwich and the cashiers would take your money and your order would be handed over instantly or, if a sandwich, within a few minutes. Further personal research led me to discover that if you just happened to walk by around 10 or 11 in the morning, you could get a small round loaf of the best potato poppyseed bread ever, hot and piping from the oven.  For a dollar.  Or potato cheese bread shaped like a cinnamon roll except it was savory and instead of the sweet cinnamon filling, it would be melted cheese.  That might've been $1.25.  To a carb lover like me, it was the cheapest and best way to gain 30 pounds.
Years later, Specialty's has expanded beyond the city and thankfully, I've contracted so those 30 pounds are gone (thank you, exercise and keeping my mouth shut more often than not).  I'm still a regular patron of Specialty's but unfortunately (or fortunately) those mini round loaves of potato poppyseed bread and the potato cheese rolls are no more.  They sell the big bread loaves of potato poppyseed but I know better than to buy one of those because I'll eat it all.  And neither my waistline nor I have seen a potato cheese roll in years.
What they do have, however, is a plethora of everything else. From a small sandwich shop also known for its big, thick cookies, it's expanded to a chain of bakery cafes in 4 states with soups, salads, sandwiches, coffee and teas and, of course, baked goods.  My new Kryptonite at Specialty's is their savory filled croissants.  They have turkey and swiss or ham and cheese.  And I don't mean they take a croissant, slice it in half and build it as a normal sandwich.  I'm talking some culinary genius who I worship unknown filled an unbaked croissant with sliced meat and cheese, let it rise then baked it to melting goodness. Love that.
There's a Specialty's on my way to work and they're now so sophisticated that I can order online before I leave my house, ask for ASAP pickup (within 15 minutes of placing my order), pay for my order online, and pick up my order already bagged as I head into the office. Which I do more often than I care to admit.  Although I do try to coincide those croissant-eating days to those running-on-the-treadmill days as well.  I'm not looking to pack those 30 pounds back on, after all, no matter how good the croissant is.
When I'm not indulging for breakfast or I'm too lazy to pack a lunch, once again, I can go online and put in an order for a sandwich. Or if I'm meeting a friend at Specialty's, I can order at their ipad ordering kiosks instead of giving my order to the humans behind the counter - gotta love high tech ordering, especially when it helps keep the lines down and there's very little wait time. All the sandwiches are listed with what they're normally comprised of and you can customize your order easily by crossing out what you don't want.  I always get the BBQ Chicken sandwich and it normally comes on toasted ciabatta bread with cole slaw, BBQ sauce, bacon and chicken.  I cross off the cole slaw and bacon and ask for untoasted bread (they toast the bread with butter and those are unwanted calories I'm not going to taste with the BBQ sauce anyway). Each menu option, for better or worse, comes with a calorie count so you can always see the caloric effect of what you're adding or subtracting, including what type of bread you use. An appetite killer, I know, but at least you know what you're signing up for and can make an informed choice.
BBQ chicken sandwich, sans cole slaw and bacon
One of my early motivators for going to Specialty's is their cookies.  I started off loyal to the milk chocolate chunk cookie, expanded to white chocolate macadamia, black and white, and their snickerdoodle.  When I'm feeling like I want to be "healthy", I get the oatmeal wheat germ chocolate chip.  Okay, I'm not really kidding myself that it's healthy but I just like it. It's not as sweet as the other cookies and has a nice chewy texture.
Oatmeal Wheat Germ Chocolate Chip Cookie
Half-eaten Oatmeal Wheat Germ Chocolate Chip Cookie
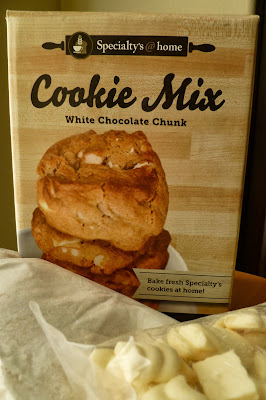
In the past few years, Specialty's has expanded their product line and now offer their cookie mixes for sale.  The mixes only come in semisweet chocolate chunk, milk chocolate chunk and white chocolate chunk.  They retail for $12 each or 3 for $33 or 4 for $40.  Which is rather pricey if you think about it, especially considering each mix only makes 12 Specialty's-sized cookies.  Yet, each individual cookie is sold at Specialty's for $2.59 so if you ever need a dozen Specialty's cookies, it's cheaper to buy the mix and make them yourself.  And yes, they do taste similar to what you can buy in their shop.
I've tried out the white chocolate chunk and the milk chocolate chunk when they first came out "just to see" what they were like. They were fine but not so stupendous that I'd be willing to keep paying that much for the box mix.  If I really needed a dozen or more cookies to give out, I'd bake them from scratch.
Probably the main drawback to be aware of when it comes to Specialty's is, like any bakery cafe, because they make their products fresh daily, if you go too late in the day, chances are there isn't much to choose from in the way of baked goods.  They bake all day but stop baking sometime in the afternoon so they can sell out as much as possible.  Anything that's day old is sold at half price the following day.  I'm not a fan of day old anything so I'd rather pay full price for the fresh stuff.
White Chocolate Chunk cookies baked from their cookie mix
Not pictured here because I haven't had it in a long time but if you ever want a good cinnamon roll, Specialty's has amazing ones.  Especially if they heat it up for you just enough to warm the roll and get the glaze a little runny.  Yowza.  You'll never eat Cinnabon again.

Spiced & Baked Sweet Potato Fries

Spiced & Baked Sweet Potato Fries - made October 8, 2013 from Baltic Maid
This was the recipe I tried with the second of my three sweet potatoes.  Sweet potato fries are my new guilty pleasure and when I go out to eat, I've taken to ordering a burger just so I could have sweet potato fries with them if they're available.  So I had to make my own with at least one of the sweet potatoes I bought.  The advantage of baking vs deep-frying is these are healthier and have less fat.  The disadvantage is they don't get crisp or as crisp if you bake them.  Despite their french fry appearance which implies crispness, these were actually soft.  I still liked them and the spices gave them a great flavor though.  I think they would've eventually gotten more crisp if I had baked them even longer but I didn't want them to burn.  I wasn't risking not having my sweet potato fries.
1-2 tbsp olive oil
1 large garlic clove, grated (I didn't have any so I left it out)
about 1 1/2 lbs / 680 g sweet potatoes
1/2 tsp sweet paprika
1/2 tsp cumin (I only used 1/4 teaspoon)
1/4 tsp freshly cracked black pepper
1/4 tsp salt
1/8 tsp cinnamon
1/8 tsp ground ginger
a few pinches cayenne
  1. Preheat the oven to 450°F/ 230°C. Combine the grated garlic and the olive oil in a bowl. Set aside. Wash and peel the sweet potatoes. Cut them into 1/3 inch (0.85 cm) thick sticks. Add the sweet potato sticks to the bowl with the oil and toss them until they’re evenly coated.
  2. Mix the spices together in a small dish. Sprinkle this spice mix over the sweet potatoes and toss them to coat them evenly.
  3. Place the fries on a baking sheet lined with parchment paper. Bake them for 20 minutes in the preheated oven. Flip them and bake for another 10 to 15 minutes or until cooked to preference.